Showing posts with label make it take it. Show all posts

Tuesday, April 18, 2017

Stepping Stones IV

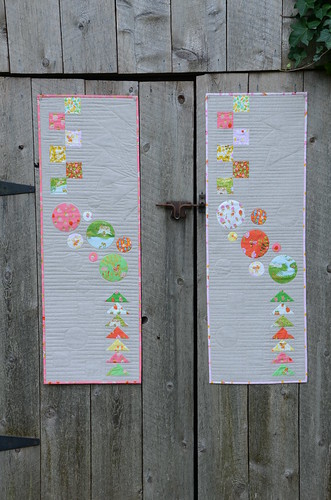
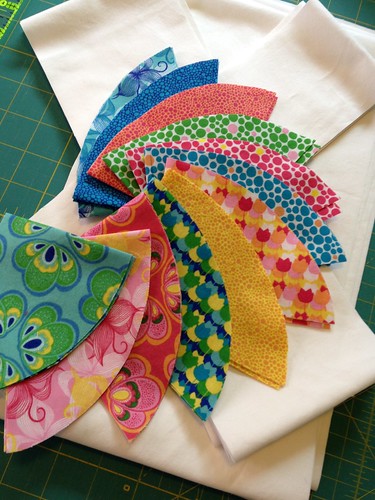
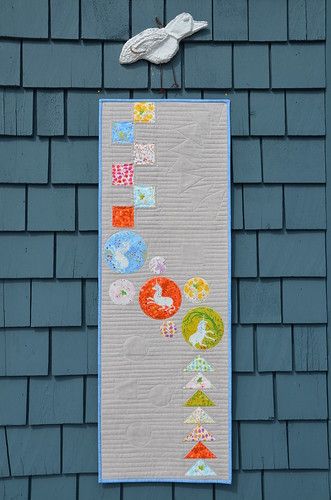
Although I've made three previous Stepping Stones Table Runners (a pattern by Krista Withers and me) in my book Make It, Take It, they've all been gifted. It is a project that people always respond to very positively at my trunk shows, so I thought it a good idea to make another one for my upcoming teaching trip to the Maritimes.

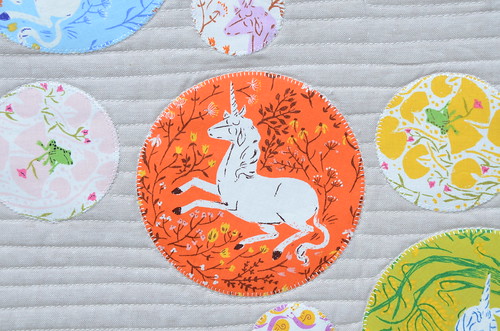
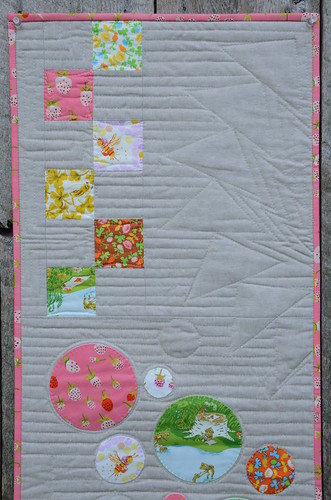
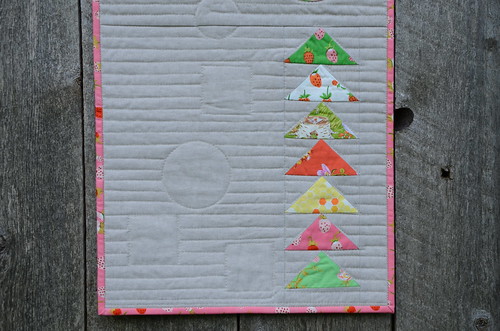
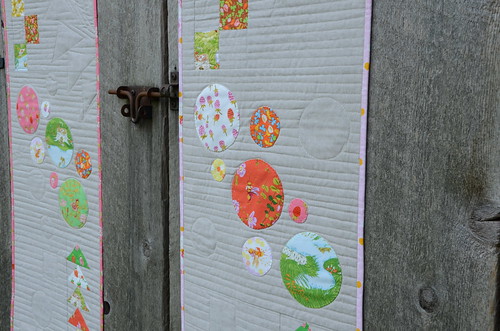
The other ones were also made with Heather Ross prints; they are so cute, visually interesting and fun to fussy cut!  I've traded the froggies for unicorns on this one, using the Far, Far Away line.  As with the other runners, this one has Essex linen in natural for the background.

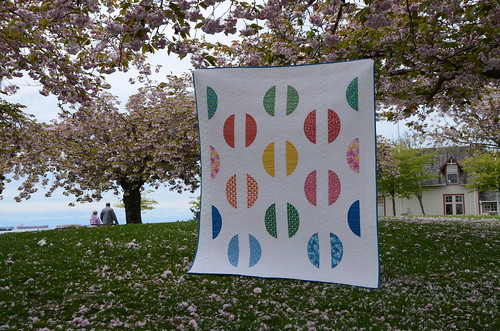
Stepping Stones Table Runner by Poppyprint


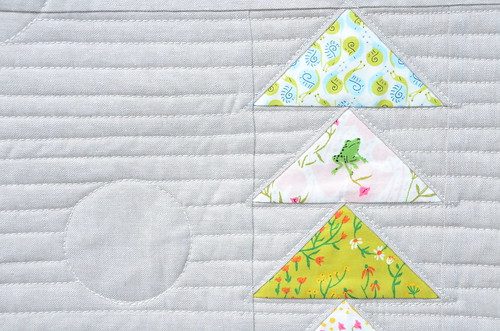
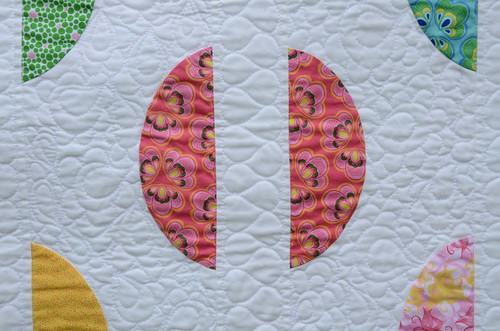
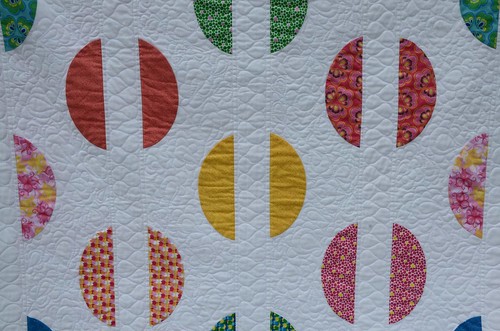
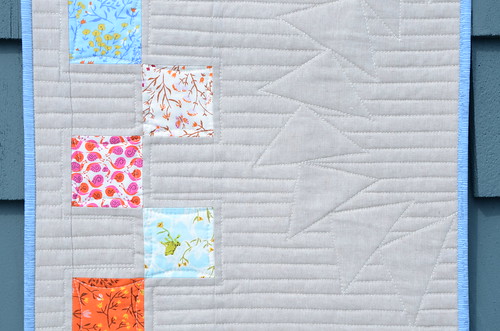
I've quilted it just like Krista's accompanying instructions in the book for Ghost Shape quilting using a walking foot. I marked the ghost shapes and a few of the long, straight lines with a Clover disappearing pen (that evaporates in about an hour, depending on the level of humidity in the air).

DSC_1883

DSC_1884

DSC_1886

I don't often buy fat quarter sets of fabric lines, so when I do splurge it is usually because I have an idea and want to use the prints together in a project. What I always forget to do is also buy a 1/2 yard of one of the prints to use as a binding for that project. Luckily, I had this two-tone Carolyn Friedlander print that works perfectly with the blues in Far, Far, Away. Hopefully, next time I won't forget the binding!

Tuesday, February 21, 2017

The Penultimate Lonestar

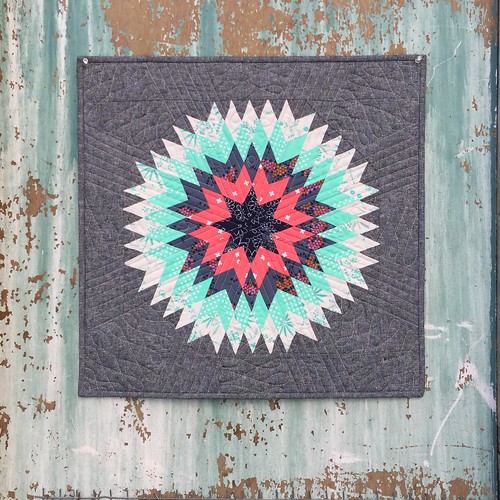
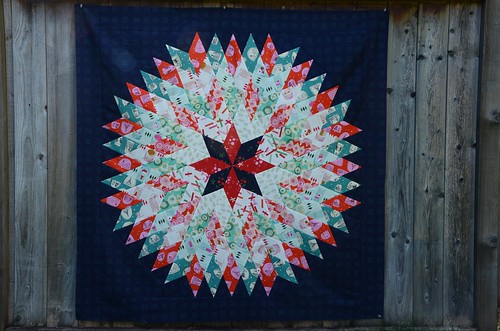
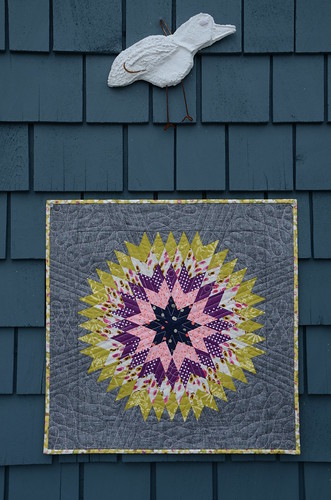
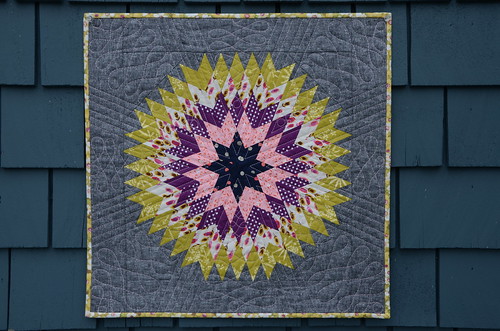
Just a quick share of this mini-Lonestar Circle quilt I recently finished up on a retreat. You've seen a few of these here before. This particular one has been lying around in my sewing room in pieces since the Alaska Cruise almost 2 years ago. It was time to get this UFO pieced, quilted and bound!  A friend once indicated that she wanted to make one, but she's a busy gal and I know she's got plenty of her own ideas brewing, so I gifted her this one for her sewing room wall.

You can find the pattern in my book Make It, Take It. The original quilt was designed by Lynne Goldsworthy and I've shared cutting instructions to make this mini version here.

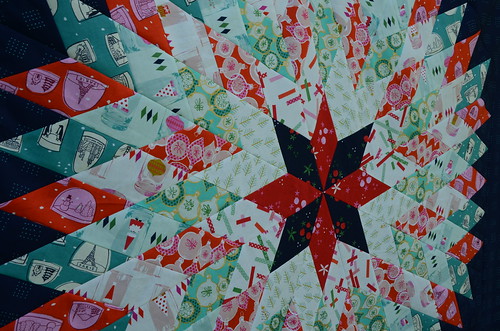
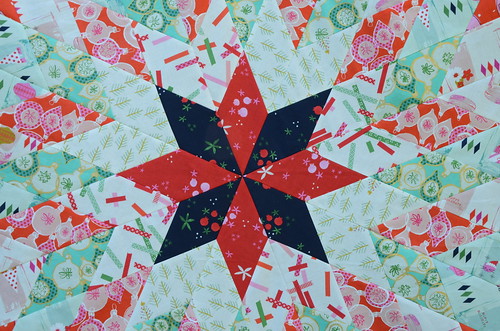
Lonestar Circle mini by Poppyprint
made with Cotton & Steel, Essex Linen and quilted with Aurifil 40 wt thread

It just so happened that the chicken coop on the retreat property was painted a perfect colour as a backdrop for this quilt.  Lucky me!

This is the penultimate because there is still one more full sized version awaiting quilting in my sewing room. It's a Christmas one, so I have time....

Wednesday, October 28, 2015

Lonestar Circle Variations

I'll be teaching Lynne's lovely pattern to two local guilds in the coming months and I offered workshop participants the choice of making a mini, or the full sized version that appears in Make It, Take It.  I thought some of you with the book might be interested in trying a mini version yourselves, or a full-sized two-colour variation like my Tinsel version (see below). This blog post is really meant as a reference for folks who have the book and are looking for options. It is not directions on how to make the quilt.

Read on for fabric and cutting guidelines for these two fun variations!

Mini Lonestar Circle 20" square

Lonestar Circle mini by Poppyprint

If you'd like to make a 20" mini version where the colours radiate out from the centre as in my sample above (in other words, each 'round' of the star is made up of the same fabric), then you only need F8's of the first 3 fabrics starting from the centre, a FQ of the 2 outermost fabrics and a 2/3 metre of background/border. Cut the number of 1 1/2" strips from the longest side of your fabric as indicated in the chart below. Make all eight of your star wedge segments identical.


 FABRIC #
1 ½” STRIPS
1 (star centre)
2
2
4
3
5
4
6
5
7
Background
3 (WOF long)

In addition, from the background fabric, cut 2 strips 3" for borders and 2 strips 2 1/4" for binding. You'll also need two 6" squares cut in half on the diagonal for your corners.

Two Colour-way star

Tinsel Lonestar Circle

The full-sized version I made above has alternating red/green lights and darks. Similar to the quilt in the book, I alternated light and dark fabrics in radiating rings of the star, but I limited my colours to red and green. To do this, I made 4 strip sets of all red fabrics starting with dark red as fabric #1, then light, dark, light, dark, background.  I made 4 similar sets using all greens (well, in the photo you can see I used navy for fabric #1), so navy, light green, dark green, light green, dark green, background.  Then when I pieced the 8 star wedges, I alternated red and green strip sets.

Tinsel Lonestar Circle
Okay, so some of my "light reds" and "light greens" are actually cream prints, but you get my drift.

For this two-colourway version you need 3 dark prints and 2 light prints of each colourway for the star and the same amount of background/border fabric called for in the book. I had 1/2 yards of these Tinsel prints, but there was a ton of fabric leftover.  Here's an idea of what you actually need if you are buying yardage at your local shop:

FABRIC # (#1 is centre star)
  3 ½” STRIPS x WOF
YARDAGE* REQUIRED
1 (dark red) & (dark green)
1 each
0.20 m or 1/5 yard each
2 (light red) & (light green)
1 each
0.20 m or 1/5 yard each
3 (dark red) & (dark green)
2 each
0.30 m or 1/3 yard each
4 (light red)& (light green)
2.5 each
0.4 m or 1/2 yard each
5 (dark red) & (dark green)
3 each
0.4 m or 1/2 yard each
Background
7
       See Make It, Take It
*these are generous amounts that allow for an extra strip in case of cutting error.

All of this will likely read as a foreign language if you haven't got a copy of Make It, Take It and read the pattern!  

Wednesday, September 23, 2015

Tinsel Time

I held off until after school started, but this Christmas project could wait no longer. As soon as I saw Cotton & Steel's fun Tinsel* line at Spring Market, I knew it would be perfect for making Lynne's Lonestar Circle quilt from my book. I'll be teaching this quilt for two local guilds in the coming months and I needed a full-sized sample. Students will have the choice of making a mini like the three I've made, or this 55" square version.  I'll also provide info on fabric requirements for creating a radiating design with only 5 fabrics plus background, or using two alternating colour ways like I did in this Tinsel version and this mini version.  Fact: the full size is more forgiving and actually an easier make than those mini versions!

>Tinsel Lonestar Circle

I've got a folkart-inspired appliqued tree skirt that I've loved for years but after seeing the Tinsel fabric in all it's amazing cuteness, I thought I'd try and make this project and transform it into a new tree skirt.  Then this incredible stroke of luck happened....

Tinsel Lonestar Circle

The centre points turned out perfectly. This is part careful planning, measuring, pinning and sewing, but also part quilting voodoo. How can I cut that gorgeous centre star right outta there? Not happening. 

Tinsel Lonestar Circle

Hello, new holiday table cloth.

Monday, September 14, 2015

Stepping Stones Table Runner Samples & Teaching

This fall is very busy with trunk shows!  I'm having a great time visiting many local guilds sharing the projects from Make It, Take It with traditional and modern quilters alike.  The table runner that I pieced for the book was quilted by Krista Withers, so after Quilt Market and my spring trunk shows I sent her that one because I knew she loved it and well, she's awesome so she should have it!  I needed to make another and why make one when you can make two?!

Stepping Stones Table Runners by Poppyprint

The combination of Essex linen and Briar Rose used in the original runner was just too sweet to pass up, so I kept everything pretty much the same when I made these two new ones. The runner sews up quickly - it is so fun to make!  I was anxious to try straight line quilting using Krista's Ghost Shape Quilting instructions in the book. PLUS, I treated myself to a new Juki TL2010Q over the summer and I figured this would be the perfect small project to give it a go.

Stepping Stones Table Runners by Poppyprint

Stepping Stones Table Runners by Poppyprint

Unfortunately, the walking foot that came with my machine was a dud and I was unable to use it. After some online research and an S.O.S. call on Instagram, I was advised by several other Juki users to just go for it and quilt using the regular sewing foot with the presser foot pressure turned right down to the lowest setting (in other words, almost no pressure on the foot). Walking foot be damned!  (Note: my dealer arranged for an immediate replacement walking foot to be sent directly from Juki and I have received it, but not yet tried it).

Stepping Stones Table Runners by Poppyprint
The circles are machine appliqued using my "Fabric Stickers" method described in my Crop Circles Table Runner tutorial on the left sidebar. I used a shortened & narrowed blind hem stitch to secure them to the quilt top.

The results were pretty darn good considering I didn't use a walking foot. Some of the straight seams show signs of drag, but I can live with that. On the second one, I stabilized those longer seams between blocks and beside the pieced sections with stitch in the ditch.  Ultimately, I'm just picky and would prefer longarm results with a home machine, which just isn't going to happen. I'm trying to lighten up and find satisfaction in a job done the best that I can do with the equipment that I have.

Machine binding on my Juki

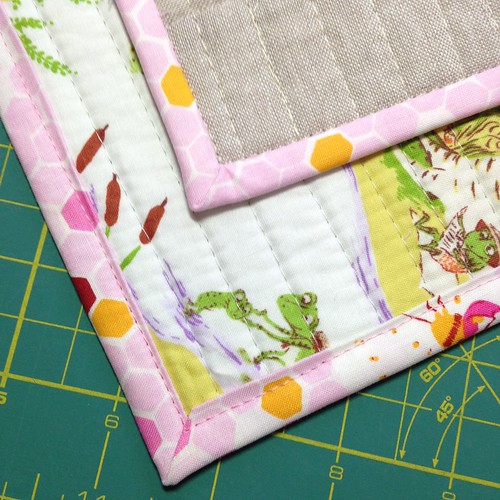
Where the Juki totally rocked was the binding. I applied my regular 2 1/4" double fold binding to the front of the runners, then pressed it to the back, mitering the corners. Using Roxanne's Glue-Baste-It and a dry iron, I basted the binding to the back.  Then, still using the regular sewing foot I slowly and carefully stitched in the ditch from the front. The machine performed beautifully, even with the uneven thickness of fabrics under the foot (6 layers of binding fabric plus quilt sandwich under the right side of the foot and only the quilt sandwich under the left side of the foot).  With my Pfaff, the snap-on "stitch in the ditch foot" regular popped off when I tried to do this.

I'll be keeping one of these runners for my trunk shows (two more this week!) and gifting the other one soon. If you are a quilting teacher, I highly recommend this project as a complete beginner quilting class that includes: rotary cutting techniques, accurate piecing, flying geese construction, machine applique, quilt basting, marking & straight line quilting and binding.  Check out the copyright statement in Make It, Take It - as long as your students each have a copy of the book, you're welcome to teach any of the projects. Please do!

Friday, September 11, 2015

Good Neighbors Pin Cushion Party plus a mini tutorial & giveaway!

It is a party! A pin cushion party! We're celebrating the release of Amanda Jean's sweet new fabric line from Connecting Threads called Good Neighbors. We've all made pin cushions to showcase the prints and there will be blogposts all month long.  You'll see at the end of this post an extensive list of bloggers supporting Amanda Jean - everyone is so excited for her and her first fabric line.  Although it was a really busy time, Amanda Jean and I did manage to meet each other at Spring Market and exchange a couple of hugs. I hope we will get to meet again one day and have more time to hang out and talk quilting!  I think that her contemplative, sincere style (and devotion to scraps) really come through in her fabric design.  Just look at these great colours and uncomplicated patterns:


Good Neighbors Charms

I especially love Leaves Array (bottom left) and cross stitch (fourth row, the red/blue/grey lattice prints on the right side).  The stripes on the bottom row are ideal binding fabrics!


Big mouthed thread catcher from Make It, Take It with extra pinwheel piecing!

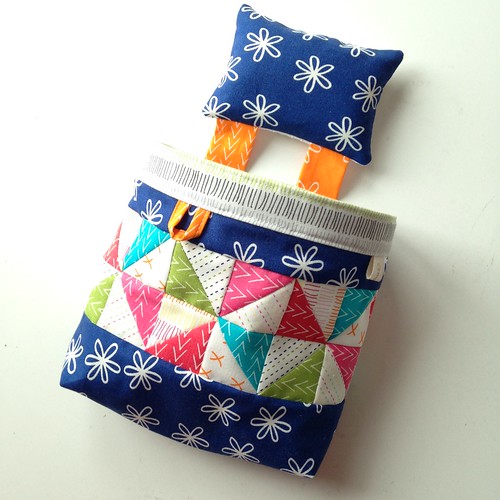
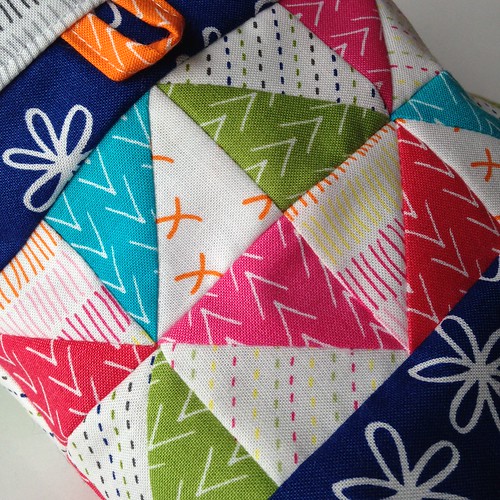
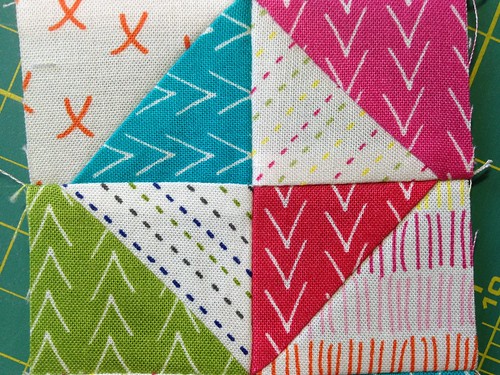
Good Neighbors is the perfect line of blending fabrics with all of the great colours and sweet little prints. I wanted to use as many of them as possible, so I added some tiny pinwheels to the Big Mouthed Threadcatcher pattern out of my book. I've been making these threadcatchers for so many years, in fact I know I've made well over 200. It's fun to change things up by adding some special piecing the thread bag.


Big mouthed thread catcher from Make It, Take It with extra pinwheel piecing!

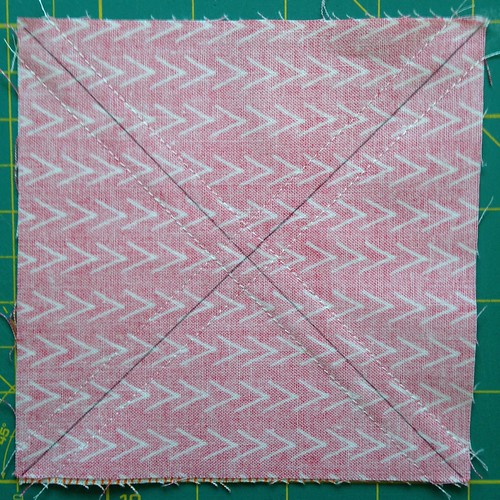
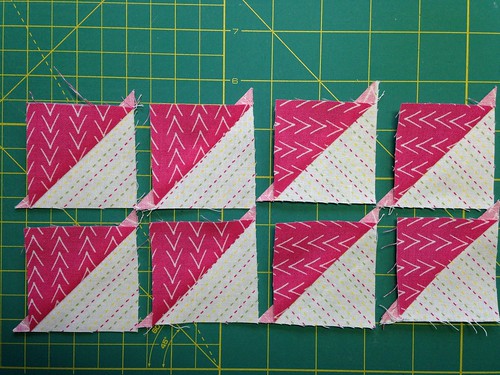
I remembered to use quick piecing and cutting technique that I'd learned somewhere along the way of my quilting career...I just can't remember where! Perhaps a magazine, or a long-ago workshop?  Here's how it works:  you start with two squares and end up with eight 1/2 square triangles! For my thread bag,  start with two 5" charm squares RST, draw both diagonal lines, corner to corner. Sew 1/4" on either side of the lines. Make 4 cuts: cut on the drawn lines and the horizontal and vertical middle. Presto: eight 1/2 squares!!  I trimmed mine to 2" before piecing them into pinwheels/broken dishes blocks.


8 half squares from two 5" charms. 

8 half squares from two 5" charms.

8 half squares from two 5" charms.

8 half squares from two 5" charms.

Connecting Threads would like to send a Canadian or US resident a charm pack of the Good Neighbors collection.  Just leave one comment here (your email must be linked OR written into your comment in order to win) and I will choose a random winner in a week's time. Good luck! {ETA: Comments are now closed, thank you for stopping by!}

9/1/2015 Amanda Jean – Crazy Mom Quilts
9/2/2015 Anna – Noodlehead 
9/3/2015 Mary – Mary on Lake Pulaski
9/4/2015 Svetlana – Sotak Handmade
9/5/2015 Debbie – Esch House Quilts
9/6/2015 Holly – Bijou Lovely
9/7/2015 Carla – Grace and Favour
9/8/2015 Faith – Fresh Lemons Quilts
9/9/2015 Vanessa –  V and Co.
9/10/2015 Anna –  Thimbleanna
9/11/2015 Krista –  Poppy Print Creates (you're here!)
9/12/2015 Erin –  Why Not Sew
9/13/2015 Lee –  May Chappell
9/14/2015 Alex –  Tea Ginny Designs
9/15/2015 Cheryl –  Nap Time Quilter
9/16/2015 Penny –  Sew Take a Hike
9/17/2015 Amy –  During Quilt Time
9/18/2015 Debbie –  A Quilter’s Table
9/19/2015 Anne –  Spring Leaf Studios
9/20/2015 Melissa Corry –  Happy Quilting
9/21/2015 Amber –  One Shabby Chick
9/22/2015 Nettie –  A Quilt is Nice
9/23/2015 Adrianne – Little Bluebell
9/24/2015 Cindy –  Live a Colorful Life
9/25/2015 Amy –  Diary of a Quilter
9/26/2015 Chase –  Quarter Inch Mark
9/27/2015 Rene –  Rene Creates
9/28/2015 Erin –  House on Hill Road
9/29/2015 Nicole –  Modern Handcraft
9/30/2015 Teri –  Connecting Threads

Tuesday, August 11, 2015

Local Book Signing!

I'm super excited to participate in my first public book signing (I've visited several local guilds, but this is my first time in a shop!).  This Sunday, August 16th, I'll be in the sweet village of Ladner, B.C. parked at The Quilted Bear quilt shop. I've brought along a trunk show of book projects so you can see first hand, the beautiful designs of all of the talented contributors to Make It, Take It.  Everyone who purchases a book will also receive one of my "Retreats Rule!" buttons.

There's something for everyone on Sunday. It is the annual Classic Car Show and Quilt Walk. On from 10:00 a.m. to 4:00 p.m., the main drag is closed and transformed into a parking lot of gleaming vintage cars, trucks and motorcycles.


This stunning quilt was made by my friend Matthew Wheeler, Vancouver Modern Quilt Guild member and former owner of the Quilted Bear.

All photos by Chung Chow, 2014, the Delta Optimist newspaper

 The shop windows, railings and yoga studio space are all decorated with quilts from local quilters.  Every summer I say I'll make it out to Ladner for this show but I've never been in town. I'm excited to finally participate; as well as the book signing, I've got two quilts hanging in the show (Selvage Colourblock and Light Of May). I haven't been to an outdoor quilt show since Sisters about 6 years ago.

Hope to see you there!

Thursday, July 9, 2015

Calendar Girls!

I'm so excited to share that two projects from my book were chosen by the editors at Martingale for inclusion in their 2016 That Patchwork Place Calendar. It's a gorgeous calendar and it includes a full pull-out booklet of patterns, so you could make each of the featured projects!

All photographs by Brent Kane, copyright Martingale Inc.


My Orange Grove quilt was chosen for August. This quilt it such a favourite of mine. I really enjoyed all of the precise piecing (which I have not tackled again since, mind you!). But the very best part is the incredible quilting that Krista Withers put into this quilt. I'm awed by her work and super proud to have this quilt in my collection.


I've got a collection of rainbow pine tree blocks made by the Stash Trad Bee on Flickr a few years ago.  One of these days they need to be pieced together into a colourful version of this quilt.   Here's the calendar spread:


Also included is a gorgeous photo of Ayumi's sweet Big and Little Totes - definitely one of the most popular projects from Make It, Take It that I know many shops are featuring as a sample on their book display. Congratulations Ayumi (Ms. April)!


Ask for the calendar at your LQS, or order directly from Martingale! They're available now (and make the perfect gift for your quilty friends, or a great door prize for your December guild meetings).  Better yet, leave a comment below for your chance to win one from me. Your email address must be linked to, or included in, your comment in order to win.  I'll randomly pick a winner on July 20th.  Good Luck!

ETA: Comments are now closed. Congratulations comment #13. Jen, you've won the calendar! 


Thursday, June 4, 2015

Soon We'll Be Stitching at Sea!

In 3 more short sleeps (short being the operative word...I have SO much to do!), there will be 19 excited quilters boarding the Celebrity Infinity in Vancouver. We're bound for a week of sewing and so much fun in Alaska!  Personally, I am getting ridiculously excited about my first ever ZipTrek adventure in Ketchikan. One of the platforms is a 30' tower out in the water that we'll zip to and from!

On the cruise, I'll be teaching two workshops over the course of our "at sea" days.  Altogether we'll have about 18 hours of classroom time, so everyone should be able to get their two wall hanging quilt tops together.  However, if people choose to visit the spa, take a dip in the amazing top deck pool, scan the horizon for whales or play bingo all afternoon, those are all options too.

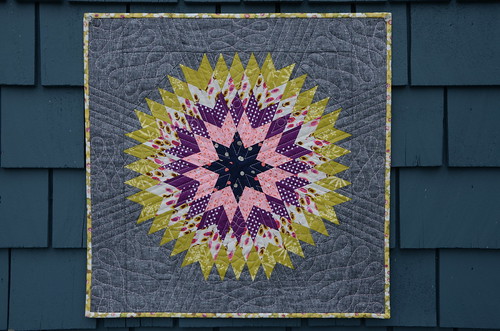
Here's the sample I just finished for our Lonestar Circle Mini class. It's the third one I've made, adapting Lynne's lapsized pattern from Make It, Take It.

Lonestar Circle mini by Poppyprint

Lonestar Circle mini by Poppyprint

Again, I used Cotton & Steel (some brand new prints I scored at Quilt Market sample spree, plus two older ones). The background is Essex yard dyed linen and the backing and binding are a classic (as in, it's really old, please don't ask me where I got it!) Amy Butler floral from Ginger Bliss that is such a perfect match, I think I might have to mash up all of these prints again in another project!  

Lonestar Circle mini by Poppyprint

It's quilted with a sweet, soft pink Aurifil thread in 28 wt. 

This project is fun to make and I've got a few tricks to share with my students about matching those pesky points on bias seams. Our other project, my Temperature Check improv quilt will be a welcome break from the precision work. There's something for every quilter on this cruise!

I'll try to share along the way with Instagram, but there is no free wifi on the ship and quite frankly, I'm looking forward to a week focussed on my surroundings. If we find wifi in a port along the way, I'll show you some of the shenanigans we are bound to get up to!  Otherwise, stay tuned for some photo essays later in June.
Wednesday, May 27, 2015

My First Trip to Market!
I've hardly been home since International Spring Quilt Market a couple of weeks ago. The entire trip - the experience of sample spree, meeting up with friends old & new, cycling around Minneapolis, checking out upcoming fabric lines, admiring gorgeous quilts, helping Lee set up her booth, signing books, delivering my schoolhouse to a packed room (they actually sat on the FLOOR!) - ALL of it was simply fantastic. I didn't take my camera, so I only have cell phone images, most of which I shared on Instagram.

pat sloan and krista
Finally, we meet!! Pat Sloan!! I love this picture. Pat was at market promoting her 31st book - we were at the beautiful Martingale booth for her signing of Teach Me To Applique.  

What a thrill to meet industry lovelies like Pat Sloan, Pam (Kitty Morning) Vieira-McGinnis and Alex Anderson. These women are professional, successful, kind and supportive. I could not believe their enthusiasm for supporting a relative newbie like me. So nice.  I find myself smack in the demographic middle of the modern quilt bloggers in their 30's and the industry mavens with years of experience ahead of me. I must say that the example set by the likes of these three women is something to strive for. There is definitely room in the industry for all of our creativity to co-exist and it was exciting to share my work with positive, successful role models like them.

Spring Quilt Market 2015
A tiny portion of the Sample Spree line up a full 2 hours before the doors were set to open!

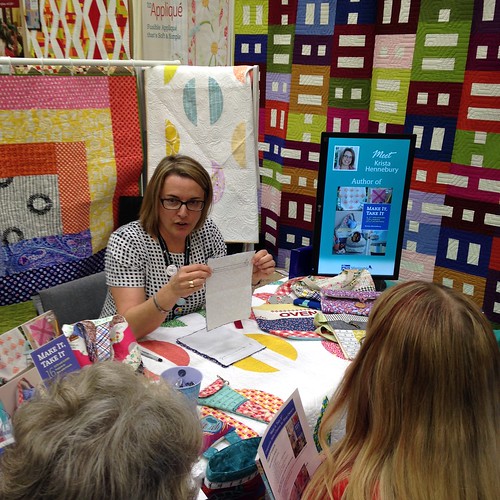
If you aren't familiar with the twice yearly International Quilt Market, it is a "trade only" event. It is an opportunity for buyers to see all of the new products and place orders with suppliers. The entire day before the show floor opens, schoolhouse presentations take place in conference rooms.  They cover everything from industry trends, new fabric lines and new publications, to point of sale systems.  Since this is my first book and my presentation was at the end of a very long day, I was worried about talking to an empty room. I begged all of my blogging buddies to come and fill seats....I needn't have worried as most of them ended up sitting on the floor!  My heart rate went up when I saw how many people were cramming into the room and I ended up talking a mile a minute about the book projects and finishing up way early!  Feedback from shop owners was excellent, though - they love the projects and appreciated the companion sales sheet with workshop suggestions that I had prepared for them (if you are a shop owner and would like me to email you a copy, please let me know in a comment below!).

Spring Quilt Market 2015
Sharing my windowed zipper demo

Having the opportunity to meet more of the wonderful staff members of Martingale was really great. So many people there have helped me, and continue to do so, with Make It, Take It. Their experience and preparation for Market was very evident in the smooth running (and massive attendance) at all of their schoolhouse presentations and book signings.  They had shop owners sign up in advance for the book signings at the Martingale booth. This gave authors the opportunity to share a quick little demo to about 5 people at a time, sign their books, then greet the next folks. I showed step by step how to create a windowed zipper since that is a pocket feature in both the Ultimate Equipment Tote and the Knitting Needle Clutch projects in the book. One friendly shop owner from Newfoundland made my day when he said "If I get nothing else out of Market, the trip was worth it just to learn how to do this!" Awww, smiley face.

Spring Quilt Market 2015
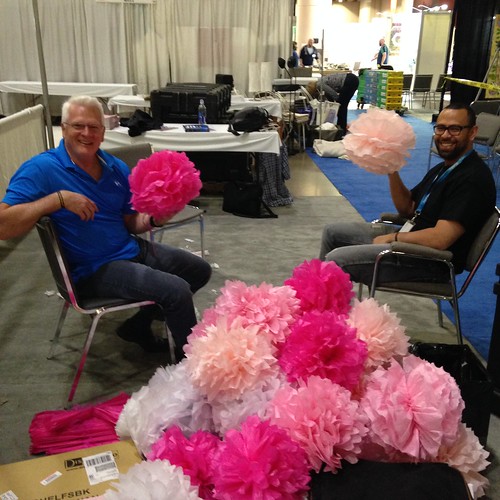
Speaking of smiley faces, these guys made tissue carnations ALL DAY during set up of their point of sale software booth.

There were many, many first time meetings of people I've been friendly with on line which was so much fun. I knew that Amanda was going to be at Market on Saturday, so I brought my version of Christina's Macaron Delight pattern made with Amanda's Spring Bloom fabrics. She's an absolute delight and I cannot wait to see what she'll design next for Windham. 

Spring Quilt Market 2015

I'm going to call it quits there for now. I've got a day retreat to run on Saturday and it is only 11 sleeps until we depart on our Stitch at Sea Alaska cruise. My to do list is a mile long! I hope you enjoyed this little glimpse into a first-timer's trip to Market.

Thursday, May 7, 2015

Sample Spree Big Tote

With the release of Make It, Take It, I decided to make the trip to Spring Quilt Market in Minneapolis to help promote the book. I've never been to a Market before, but I've seen enough photos and video of Sample Spree to know it is mayhem. If you haven't heard, it is a giant ballroom filled with FQ packs of all of the soon-to-be-released fabric at wholesale prices or less. You have to buy a ticket in advance for $15 to get in and some people wait in line all afternoon for a chance to be the first at the fabric manufacturer's tables.

There are a couple of new lines that I'm interested in and truth be told I am not planning to go crazy (because really, do I need more fabric?), but I do want to be prepared. Just in case. Since you are not allowed shopping carts or rolling luggage at spree (haha!!!!), I thought a large tote would be a good idea (and experienced friends advised this, too).

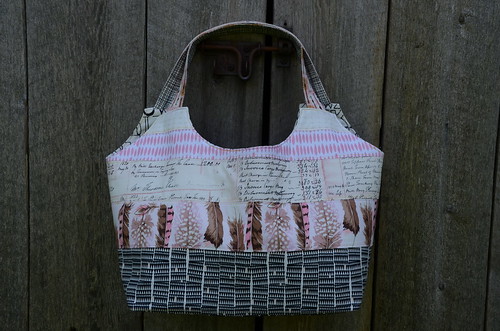
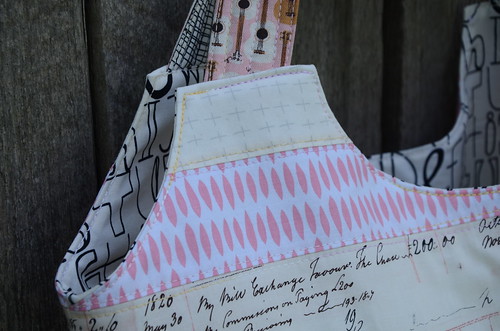
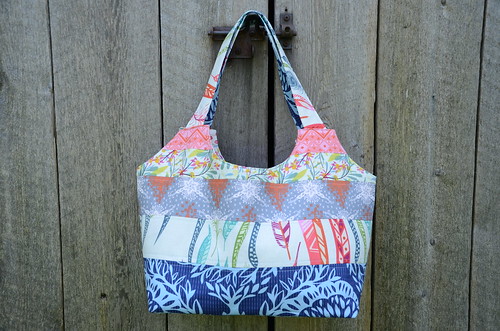
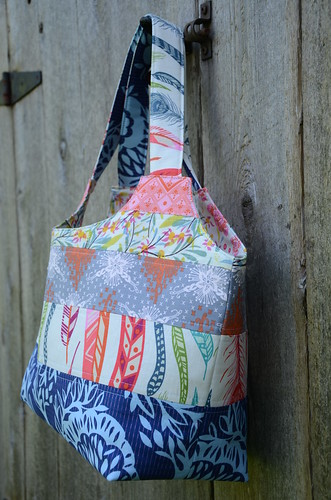
So I give you my Sample Spree Big Tote.  This is a project in the "Take It" section of my book, designed by the very clever Ayumi Takahashi. The construction is so quick and painless! It makes a great gift and there's a companion Little Tote that is perfect as a lunch bag, loot bag or small project bag.

Big Tote made by Poppyprint

It is made with some of my favourite prints (that Martha Negley Farmington feather is just so incredible!) and I quilted the outer panels to some fusible fleece. There is a fitted sheet of heavy weight interfacing quilted to the flat base panel as well. There are no pockets, zippers or closure. Just maximum fabric-buying cargo space!

Big Tote made by Poppyprint

The opening is topstitched with my go to triple-stitch in a variegated pink/yellow 28 wt Aurifil thread. The bag and handles are lined with two excellent Lu Summers prints, Alphabetty and Weave. I purchased multiple yards of both and only have bits left...so sad!

I've made a second one to gift a friend with of some of her favourite fabrics, too. All Anna Maria Horner prints.

Big Tote made by Poppyprint

Big Tote made by Poppyprint

I hope I get lucky at Spree. If so, you'll be the first to know!

Just in case there are store owners reading who may be at Market, my schoolhouse presentation is in room 210B from 4:55 - 5:25 p.m. on Thursday.  I'll be signing books and doing a little demo for folks pre-registered with Martingale at their booth #325 from 1:30 - 2:30 p.m. Friday. A second signing takes place at the Brewer booth #2019 from 10:00 - 11:00 a.m. Saturday.  I hope to see you there!

People of Minneapolis (or those who have visited before) - What should I do/see/check out downtown if I have some time? I've never been! 

Monday, April 27, 2015

Macarons in Spring Bloom

Hello and welcome to the Spring Bloom Blog Hop!! I've only just met Amanda Caronia, the talented designer behind Spring Bloom, but already I know she's going to make a splash in fabric design. Her bright, colourful and fresh palette are a welcome sight for spring.  Read on to find out how you could win a FQ stack of Spring Bloom to play with!

Spring Bloom Macarons by Poppyprint

In my quest to make every contributor's project in my book, I decided to sew up a delicious Macaron Quilt with Amanda's fabric. Christina's quilt design is really interesting; there are no blocks in this quilt. The macaron shapes are pieced right into a long strip of background fabric that has been cut like a hunk of swiss cheese. Once all the cutting prep was complete, I could not believe how fast this generous lap-sized quilt sewed up!  I didn't pin any of the curves. I don't do tons of curved piecing, but when I do, I follow this awesome video tutorial by my friend Leanne. It works like a charm for 1/4 circles and these 1/2 oval macaron shapes.

Spring Bloom fabrics by Amanda Coronia for Windham

As my deadline for today was approaching, I needed to figure out quilting designs. I considered vertical wavy lines right across the quilt using my machine's triple zig zag stitch set wide and long. I considered an art-deco pattern that was a combination of straight lines up the middle of the macarons and curved back down around them, echoing the shapes in thread colours that matched the fabrics. Finally, I considered FMQ my recent standard of all-over looping meanders.  Then I had a little chat with myself that turned into a pep talk ( I'd been convincing myself I wasn't able to do all that negative space justice with my out-of-practice FMQ skills).

I had another look at Amanda's fabric to see if there were some shapes I could adopt for quilting. I grabbed some old practice quilt sandwiches from a previous class (and said, hey, you did a great job on these practice designs, just get busy and go for it!). Seriously, I did have to pull on my big girl panties and just GO!

Spring Bloom Macarons by Poppyprint
The flowers in this print inspired my petalled paisley quilting.

The first thing I did was define the vertical columns between the macarons with a stitch in the ditch of the seam and then a line 1/4" away. Between these lines, I did a loopy back and forth thingy that I've always liked - I think it looks great in a long narrow space and on this quilt, sort of like the delicious cream filling for the macarons!  Everywhere else in the negative space I quilted a sort of petalled paisley shape.  In spots where I needed to fill to the edges, I went around with a second row of petals here and there. For now the macarons are not quilted. I'm contemplating a handstitch with coordinating perle cotton about 1/2" inside each macaron (what do you think about that?).

Spring Bloom Macarons by Poppyprint

All of the quilting was done in one long day at Quilt By the Bay on Saturday. I think my Pfaff was running for about 8 hours!  I'm so glad I went for it. It's just been ages since I filled so much negative space with FMQ and to be honest, I've seen so much incredible work from talented long-armers, that I had psyched myself out.  I'm happy to say that this finish has renewed my confidence, so yay!

Spring Bloom Macarons by Poppyprint

Amanda's fabric makes the prettiest macaron's don't you think? Strawberry, lemon, blueberry, pistachio and raspberry flavours come to mind.  There have been so many pretty makes with this line already. Check out the other stops on the tour to see some adorable little dresses, colourful quilts, pillows and bags. I'm excited to see Felicity's quilt tomorrow and was super impressed by Cindy's cool idea from yesterday!

If you'd like a chance to win a FQ stack of Spring Bloom, leave ONE comment here (your comment must contain your email address, or link to your email to win). I'll choose a random winner  on Thursday at 10:00 p.m. PST. Good luck!!  ETA: Comments are now closed. Congratulations Janet of WhatComesNext, you've won a FQ set of Spring Bloom!

Thank you so much for sharing your lovely fabric, Amanda and Windham!


SPRING BLOOM MAKERS BLOG HOP SCHEDULE


April 23 Jessica Darling


May 2 Bella Caronia Blog That’s a Wrap

Saturday, April 11, 2015

Three More Exciting Stops!

Thanks for everyone following along the Make It, Take It blog tour this week. There have already been a few lucky winners and there are still a few chances for more free copies of the book.

I had the good fortune of an invitation to speak to the Whistler Quilt Guild last Tuesday night. I shared a presentation on Modern Quilting, showed several of my quilts as examples and then shared all of the projects from the book. I had a lovely evening with the friendly women of the guild and was thrilled that they gave me a bonus free lift ticket for the next day!  It was my first day on the slopes in two seasons and it felt great to feel the quads burn again.  Thank you to my friend (and retreat regular) Ellen and her boys for a lovely day and delicious lunch.

Spring skiing under Bluebird skies, Whistler, BC

With all those mountain views on my mind and fresh air in my lungs, I forgot to post about the tour stops that day!! Tuesday featured projects from two of the loveliest friends I have through quilting, Leanne and Felicity. All of us have had the pleasure of hanging out together in Vancouver last time Leanne came to town on business. In fact, Leanne's trip happily coincided with both of my guild meetings that week so she came along twice!  Leanne was also witness to my first real-life encounter with Liberty of London fabrics IN LONDON (luckily she didn't have to catch me while I *almost* fainted). Read all about Leanne's unique project in the book, Half Moon Needlecase, here. It combines two of her favourite things: improv and matchstick quilting. While I was in Whistler, Ellen was excited to show me a 1/4 page ad in the latest Fons & Porter magazine featuring this project!!


Felicity is a super fun local quilting pal and the co-president of the Vancouver Modern Quilt Guild. She's an excellent public speaker and very entertaining meeting host!  A couple of years ago, while sitting with Felicity at our  meeting, I noticed she was busy tacking down a binding on some interesting placemats. I offered to help out and while I was sewing a lightbulb went off. These would be a wonderful retreat project for my book! Her woven strip technique is so great; you could adapt this process to make a quilted base for so many things, like a table runner, tote bag or low-volume background for an applique quilt.  It's hard to find a great placemat pattern for a round table, so I'm stoked there is one in Make It, Take It!! I was loving the styling of this picture at the photoshoot (Yes, I devoured those raspberries and, uhm, I may have brought that candy with me for the long drive home from Seattle).

Martingale - Make It, Take It (Print version + eBook bundle)
Photo: Brent Kane, Martingale Inc, all rights reserved.

Felicity also spent a fun afternoon at my dining table testing the Rainbow 'Round the Cabin group-quilting activity in the book.

Also joining in today is the sweet Ayumi of Pink Penguin.  I can't remember our initial online meeting but I know it was early on in my blog-following life. I was lucky to discover Ayumi's blog and all of her incredible free tutorials, many of which I've made over the years. She's an extremely generous designer who's aesthetic I admire greatly (check out HER amazing book) .  I have hopeful plans to visit her in Japan one day so that she can be my personal guide at the Tokyo Festival of Quilts. It was no surprise that her projects made the cover of the book (and the cover of Martingale's trade magazine released last November) as they were an instant hit with the staff at Martingale. I think the Big and Little Totes will be made and enjoyed by everyone who has the book. I used Ayumi's very own recently-released Lighthearted fabric (for Kokka) to make my version of the Little Tote.  Check out Ayumi's post and enter to win a digital copy of the book here.


Almost there, folks. The tour wraps up tomorrow with Christina and Kristie. Soon it will be your turn to show us all the great projects you've made from the book!