Showing posts with label table runner. Show all posts

Friday, December 4, 2020

Medina Dots Table Runner & Matching Placemats

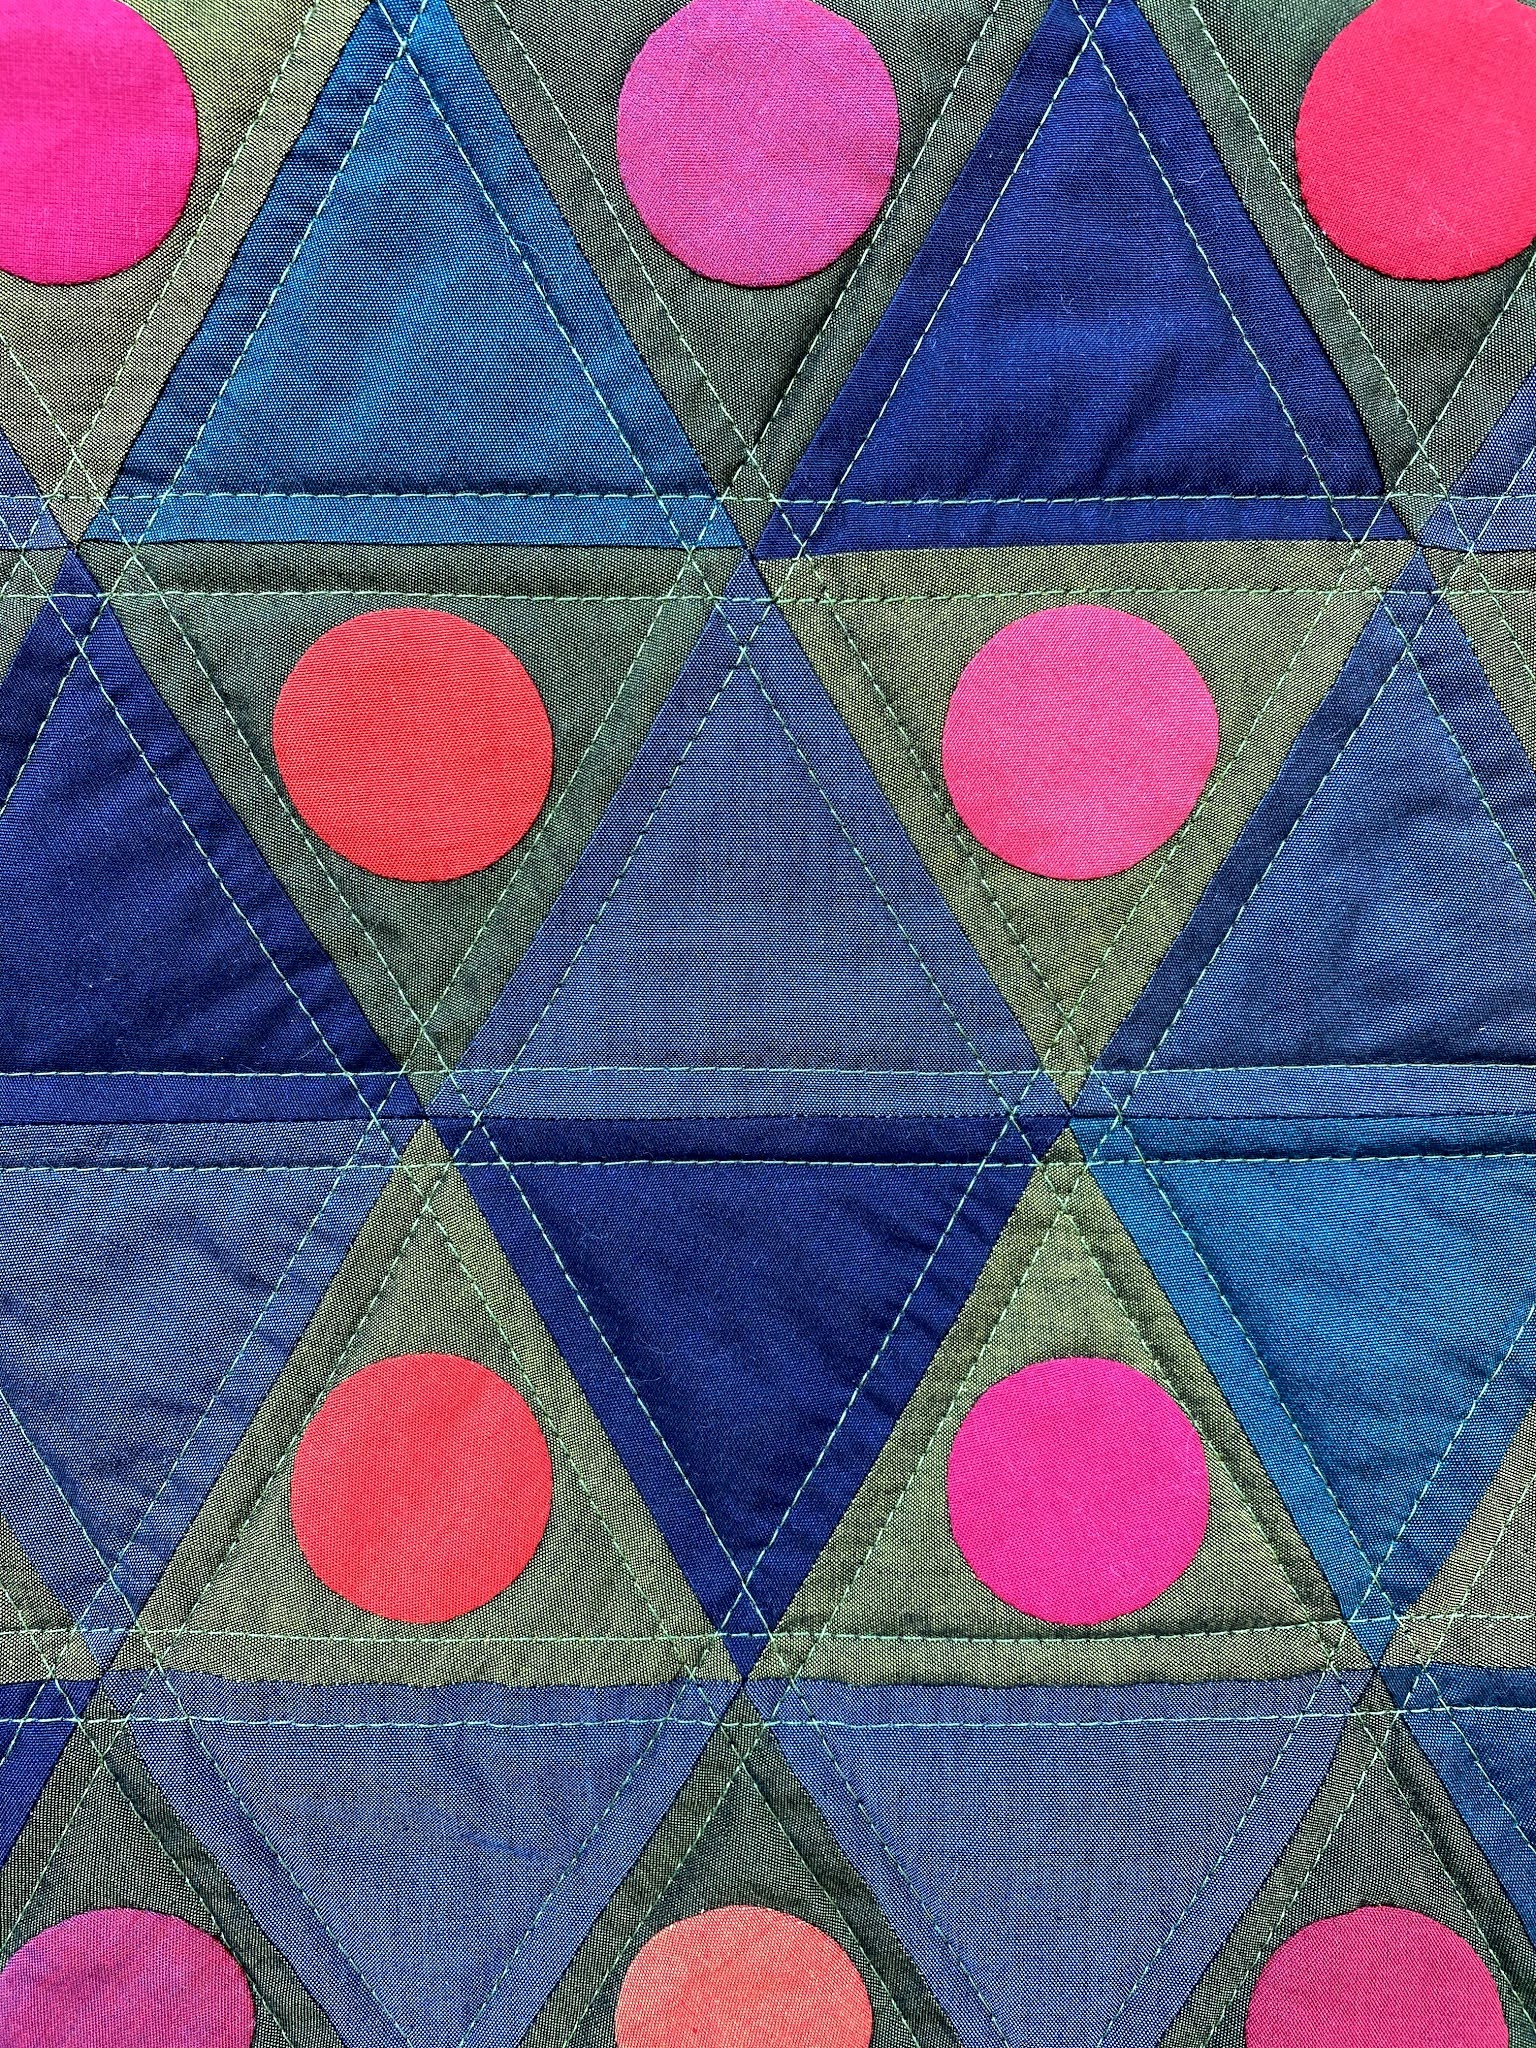
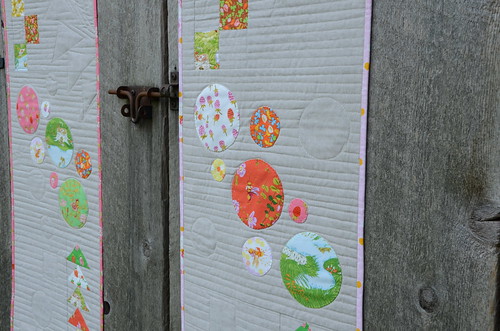
 I'm excited to share my latest project for Oakshott Fabrics! Everything you see here was made from one F8 stack of the Lipari and one F8 stack of the Ruby Reds collections (a total of 16 super-sized Oakshott F8's which measure 10" x 27"). I set myself the challenge of creating a pattern that would not only let the fabrics shine, but let you feel good about your purchase by using up all of the precious cloth in the two F8 stacks. The result is a super luxurious set of table linens with playful shapes and vibrant colours reminiscent of Moroccan market stands.

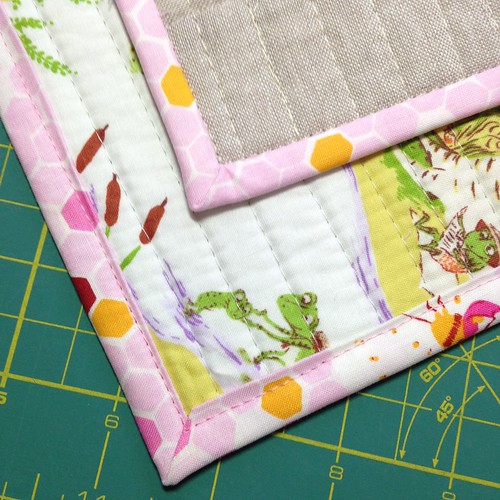
The table runner features 60 degree triangles of the blue and green Liparis, appliquéd Ruby Reds circles (by hand, or machine) and a unique diamond-shape that is sure to fancy-up your table! The 6 coordinating placemats make use of the remaining F8's from the Lipari stack with leftover triangles pieced as a border accent. Everything is beautifully bound in a scrappy Ruby Reds binding using up almost every inch!  And because I have a feeling someone will ask...the binding went these angles in the exact same way it works on right angled quilt corners. It just takes a little finesse when turning to the wrong side to create the mitre.


I used a regular cotton blend batting in the table runner, but for the placemats I wanted a bit more structure that would stand up to more regular washing (by hand). I chose heavyweight fusible fleece by Pellon and am very pleased with the crisp finish. 

Everything is pieced with Aurifil 50wt and quilted with a luscious green Aurifil 40 wt thread. I give all of the recommended thread weight and colour info in the pattern. I didn't want to compress those pretty circles with quilting, so I chose to simply quilt 1/4" from all of the piecing lines with my walking foot and repeated the same angles and double lines on the placemats. A Hera marker works a treat for chemical and chalk-free marking on Oakshott shot cottons.

If you're looking for some luxe and would like to make your own set, the .pdf pattern is available in my Etsy shop here and you can purchase the full fabric pack directly from Oakshott here. I've also got a limited number of full kits for sale myself that include all fabric for front and binding of the runner and 6 placemats, the full colour printed pattern + die-cut cardstock circle templates for a great price of $125 Can shipping to North American addresses for $20 Cdn (or available for local pick from my front porch). Please contact me via my email address (upper left corner under my headshot) to claim one! ONLY FOUR AVAILABLE AS OF DECEMBER 4.

Tuesday, April 18, 2017

Stepping Stones IV

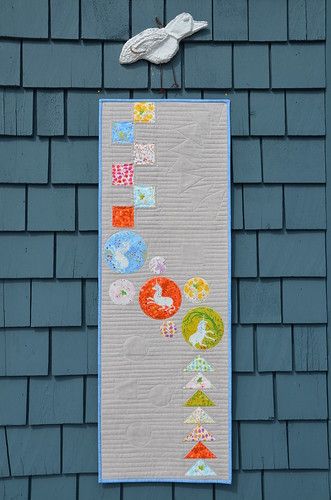
Although I've made three previous Stepping Stones Table Runners (a pattern by Krista Withers and me) in my book Make It, Take It, they've all been gifted. It is a project that people always respond to very positively at my trunk shows, so I thought it a good idea to make another one for my upcoming teaching trip to the Maritimes.

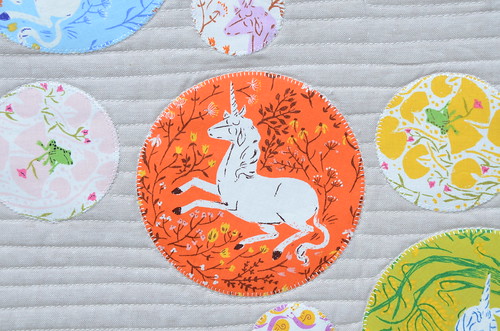
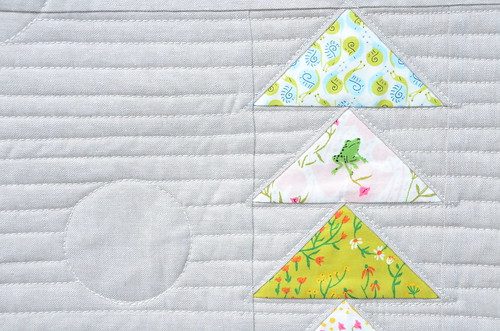
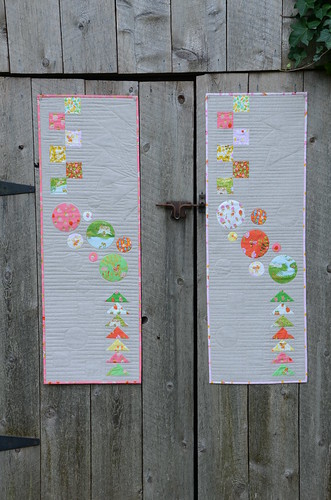
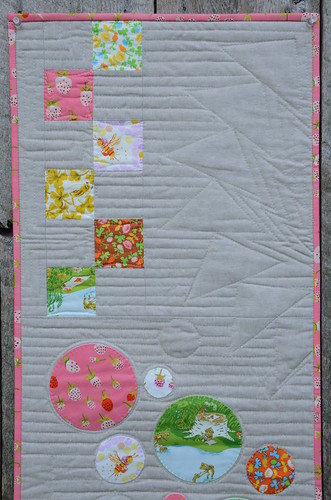
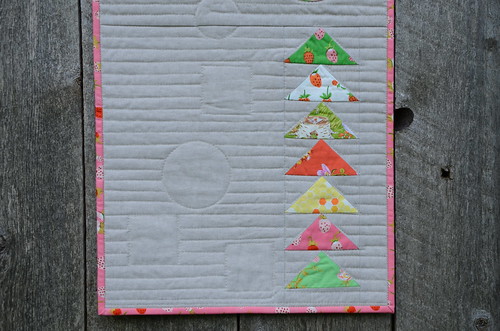
The other ones were also made with Heather Ross prints; they are so cute, visually interesting and fun to fussy cut!  I've traded the froggies for unicorns on this one, using the Far, Far Away line.  As with the other runners, this one has Essex linen in natural for the background.

Stepping Stones Table Runner by Poppyprint


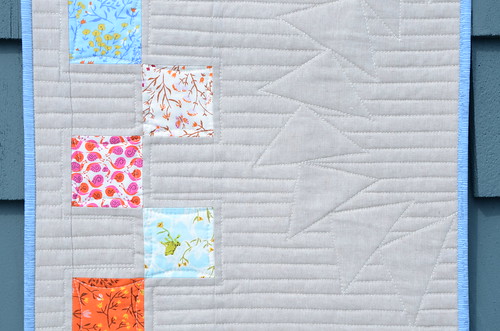
I've quilted it just like Krista's accompanying instructions in the book for Ghost Shape quilting using a walking foot. I marked the ghost shapes and a few of the long, straight lines with a Clover disappearing pen (that evaporates in about an hour, depending on the level of humidity in the air).

DSC_1883

DSC_1884

DSC_1886

I don't often buy fat quarter sets of fabric lines, so when I do splurge it is usually because I have an idea and want to use the prints together in a project. What I always forget to do is also buy a 1/2 yard of one of the prints to use as a binding for that project. Luckily, I had this two-tone Carolyn Friedlander print that works perfectly with the blues in Far, Far, Away. Hopefully, next time I won't forget the binding!

Monday, September 14, 2015

Stepping Stones Table Runner Samples & Teaching

This fall is very busy with trunk shows!  I'm having a great time visiting many local guilds sharing the projects from Make It, Take It with traditional and modern quilters alike.  The table runner that I pieced for the book was quilted by Krista Withers, so after Quilt Market and my spring trunk shows I sent her that one because I knew she loved it and well, she's awesome so she should have it!  I needed to make another and why make one when you can make two?!

Stepping Stones Table Runners by Poppyprint

The combination of Essex linen and Briar Rose used in the original runner was just too sweet to pass up, so I kept everything pretty much the same when I made these two new ones. The runner sews up quickly - it is so fun to make!  I was anxious to try straight line quilting using Krista's Ghost Shape Quilting instructions in the book. PLUS, I treated myself to a new Juki TL2010Q over the summer and I figured this would be the perfect small project to give it a go.

Stepping Stones Table Runners by Poppyprint

Stepping Stones Table Runners by Poppyprint

Unfortunately, the walking foot that came with my machine was a dud and I was unable to use it. After some online research and an S.O.S. call on Instagram, I was advised by several other Juki users to just go for it and quilt using the regular sewing foot with the presser foot pressure turned right down to the lowest setting (in other words, almost no pressure on the foot). Walking foot be damned!  (Note: my dealer arranged for an immediate replacement walking foot to be sent directly from Juki and I have received it, but not yet tried it).

Stepping Stones Table Runners by Poppyprint
The circles are machine appliqued using my "Fabric Stickers" method described in my Crop Circles Table Runner tutorial on the left sidebar. I used a shortened & narrowed blind hem stitch to secure them to the quilt top.

The results were pretty darn good considering I didn't use a walking foot. Some of the straight seams show signs of drag, but I can live with that. On the second one, I stabilized those longer seams between blocks and beside the pieced sections with stitch in the ditch.  Ultimately, I'm just picky and would prefer longarm results with a home machine, which just isn't going to happen. I'm trying to lighten up and find satisfaction in a job done the best that I can do with the equipment that I have.

Machine binding on my Juki

Where the Juki totally rocked was the binding. I applied my regular 2 1/4" double fold binding to the front of the runners, then pressed it to the back, mitering the corners. Using Roxanne's Glue-Baste-It and a dry iron, I basted the binding to the back.  Then, still using the regular sewing foot I slowly and carefully stitched in the ditch from the front. The machine performed beautifully, even with the uneven thickness of fabrics under the foot (6 layers of binding fabric plus quilt sandwich under the right side of the foot and only the quilt sandwich under the left side of the foot).  With my Pfaff, the snap-on "stitch in the ditch foot" regular popped off when I tried to do this.

I'll be keeping one of these runners for my trunk shows (two more this week!) and gifting the other one soon. If you are a quilting teacher, I highly recommend this project as a complete beginner quilting class that includes: rotary cutting techniques, accurate piecing, flying geese construction, machine applique, quilt basting, marking & straight line quilting and binding.  Check out the copyright statement in Make It, Take It - as long as your students each have a copy of the book, you're welcome to teach any of the projects. Please do!


Monday, September 22, 2014

Little Quilts Cocktail Shakers and a giveaway

Hello there, fans of Amy, Sarah, sweet little quilts, cocktails, and Liberty!  Welcome to my stop on the Little Quilts blog tour, where I will happily gush on and on about how much I am enjoying this addition to my quilting library.


I met Amy during my first foray into swapping back in the Flickr Doll Quilt Swap. I was then introduced to Sarah and her beautiful work shortly after when these two talented ladies teamed up for their Dollies on Line pattern company.  Amy's Mrs. Schmenkman Quilts was one of the first blogs I followed years ago and she thrilled me one day with a sweet unexpected gift prompted by a mini quilt I'd made. I knew right then, that she was my kind of people.  Something tells me that I will get to meet both of these amazing quilters next year in person.....

So, if you've been following along this blog tour you already know that the tour is a swap!  Each of us has a secret partner for which we are making a quilt from Little Quilts. Prior to receiving my copy, I had already decided (based on the Amazon "take a look inside" photos) which pattern I'd use. Then my book arrived: cue indecision.  I wanted to make ALL THE QUILTS! Really! That rarely happens with me and books. Every pattern appeals to me. I know this will be my go-to guide whenever a swap comes around because there is definitely something for everyone and plenty of room for customization with fabric choices, fussy cutting and expanding to larger-sized quilts.

Shaken, Not Stirred by Poppyprint
planning, planning, planning

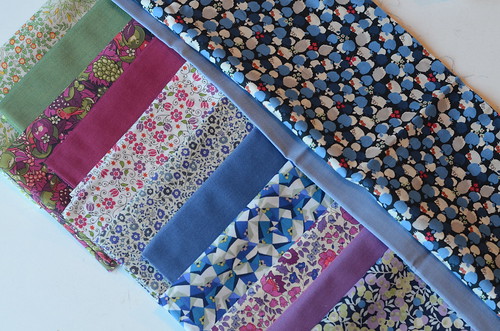
Having recently acquired a bumper crop of Liberty tana lawn F8's, I was anxious to use some of them in this special quilt. I paired them with that other British fabric I love, Oakshott Colourshotts. After marking several pages in the book, eventually I returned to my original idea because my little brain just loved the idea of an all-British cocktail shaker quilt: A James-Bond-ish Shaken, Not Stirred table runner.

Shaken, Not Stirred by Poppyprint

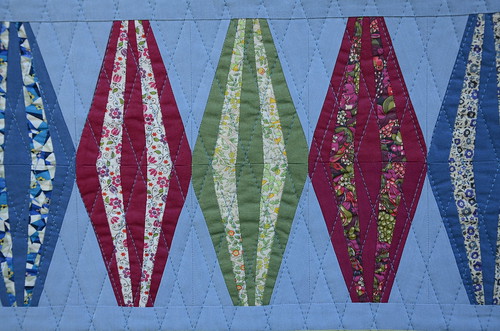
I think these two kinds of fabric really enjoy each other's company. The foundation piecing for the cocktail shaker shapes is very straightforward and not at all fiddly as far as paper piecing goes. It's actually a great project for a first go at this technique.  Can you spot the teeny Hello Kitties in the border print?

Shaken, Not Stirred by Poppyprint
"Shaken, Not Stirred"

The runner finished up at 16" x 31".  Hopefully my partner has a suitably sized coffee table or side board, or even a bar!  Of course, there is always the awkward skinny wall option for hanging a table runner. 

Shaken, Not Stirred by Poppyprint

I quilted the runner with a gorgeous blue Aurifil 28 wt thread in a straight line diagonal grid pattern that parallels the piecing. And I used this perfectly-suited Laurie Wisbrun print from my stash on the back!

Shaken, Not Stirred by Poppyprint

Shaken, Not Stirred by Poppyprint

To see what everyone else is making for their secret partners in our blog tour swap, have a look at the other stops listed below!  If you don't have it already, ask your local quilt shop to stock this wonderful book for you...then organize a swap with your guild or quilting friends!

If you'd like to win a copy of Little Quilts courtesy of Sara and Amy's publisher, leave a comment and let us know if you've ever made a doll or mini quilt before!  I'll close the giveaway October 4th and chose a random winner.  To win, you MUST leave your email address in your comment if it is not linked. If I can't contact you with one click, I'm afraid I have to chose another winner.  Good luck!

September 1: Amy and Sarah
September 8: Pam Vieira-McGinnis
September 15: Nedra Sorenson
September 22: Lynne Goldsworthy and Krista Hennebury
September 29: John Adams
October 6: Katy Jones

EDITED TO ADD: comments are now closed, and congratulations to commenter #63, Kathy, who has won herself a copy of Little Quilts!

Friday, February 14, 2014

Sharing the Love (runner)

Hello my lovelies and Happy Valentine's Day.

Just a quick visit to let you know I am still here, working very hard and trying to stay focused. It is really hard to walk past my sewing room a zillion times a day without sitting down to sew!  I did manage to finish off my Love runner in time for today, though.


This was an unexpected project that resulted from a new piecing technique I'm working on for upcoming workshops. I tried it out using a really old charm pack of Valentines fabric I found in my stash. The pieced units looked pretty good, and I have never made any home-dec items for Valentine's Day, so I decided to go for it.


The alternate rows are Kona PFD (prepared for dying) white that I had on hand. I used fusible Pellon fleece for a thin batting and stitched in the ditch of every seam.  The hearts were marked, then using a pearl cotton, I quilted them in with a running stitch.


And finally, a little Love chain stitched along one end.   It's all bound up with Lizzy House's fabulous pearl bracelets, which makes a fabulous binding!

I hope you get, and give, a nice lovin' squeeze from someone special today. And if that doesn't work out, treat yo' self to some delicious chocolates. Happy heart day.

Monday, October 7, 2013

Portholes

A lovely class with Lucie Summers at the Fat Quarterly retreat in July yielded these three "Porthole" blocks which I love. Spending a couple of hours learning from Lu was a real treat. She is so much fun, completely unpretentious and hilarious and most importantly for a teacher, really instills a "you can do this" feeling in her students.

Porthole Table Runner by Poppyprint

I wanted to complete a small project with the blocks and keep them together as a technique sample. I love the finished edge and texture that this technique provides. It's not difficult, you just have to be extra careful while trimming away seam allowances from the back!

Porthole Table Runner by Poppyprint

Lu also taught a wonderful improv piecing class (which I wasn't in), then the next day demonstrated the kantha-style running stitch in a hand-quilting session.  I love kantha stitching and felt it was a great way to show off these blocks and provide lots of texture to the table runner. It's a great feeling to create running stitches freehand, just rocking your needle up and down across fabric without trying to follow lines or worrying about keeping your stitches consistent.  Katha stitching also marries well with the block-printed linens I used from Maiwa Handprints. Some of them may even be from Bengal, where Kantha embroidery originated!

Porthole Table Runner by Poppyprint
A triple porthole!

At retreat, Alex Veronelli of Aurifil shared some wooden spools of his linen thread for people to try. The natural colour and texture (it's a bit nubbly and the thickness varies) is just perfect here. I loved it.  I think initially Alex was hoping people could put this thread through their machines. I haven't tried, but having stitched with it by hand, I am pretty sure my machine's tension discs, and machine needles, wouldn't appreciate the varying thickness and natural imperfections in the thread.  For hand-sewing an organic running stitch however, it's ideal.  I'm sorry but I don't know if this thread is available commercially.

Porthole Table Runner by Poppyprint

The runner is only 10" by 33" so it's a bit teeny for our big dining room table. I may end up hanging it on a narrow wall area. I will definitely display it somewhere because I'm super pleased with this project.

Saturday, September 7, 2013

St. Louis Leftovers

During a short house-sitting gig in Victoria last month, I wanted to have a quickie project for the evenings.  I grabbed my gorgeous fat 1/8th stack of Shelburne Falls purchased from Westwood Acres, some coordinating Kona solids, a Sketch and Pearl Bracelet or two. I also threw in a couple of Chicopee prints since they go perfectly with Shelburne Falls.  Pre-cutting 4" strips before we left home meant I could just set up Lise-Lotte's sweet Featherweight and piece to my heart's content as soon as we arrived!

The plan was a St. Louis 16-Patch using Steffani's great tutorial.  The 16-patch blocks are huge, so the quilt top goes together very quickly. Depending on your choice of big print, small print or solid, the blocks can look quite different. It was a perfect holiday project that didn't require much thought.

Shelburne Falls Table Runner

Because I had long F8's instead of Fat Quarter's that the tute calls for (my strips were about 21" long), there were leftover pieced sections after cross-cutting the initial strip sets. They were so pretty I couldn't chuck them, so this table runner was born (thanks to Leanne's encouragement on IG). Like so many modern things I make, this runner doesn't really go with my house - at least until we update the living/dining room, so I think I will gift it to a friend turning 50. Her home is much more modern and I know she likes these colours.

Shelburne Falls Table Runner

Shelburne Falls Table Runner

The quilting is simple organic lines, all in Aurifil of various weights. I just chose the colours that coordinated. I'm not fussed about thread weights for quilting, but usually aim for the 28 or 30 wt.  The binding is Kona Grass Green and the backing is 3 different shades of Kona aquas from a FQ stack I have.

Shelburne Falls Table Runner
Front: 28 wt #5006, Back L-R: 28 wt variegated #4653 2ED, 40wt #2730, 28wt #5003 and 50 wt #4668. The two grey spools are from the V & Co. Simply Color collection and the orange spool is from the Tula Pink box set, both generously sent to me by Aurifil for the Patchwork Please Zakka 2.0-along.

As soon as the 16-patch quilt is actually quilted, I'll share that too. If you've got a bunch of fat quarters to use up, I highly recommend this fun patchwork quilt. You can go crazy with colour, or keep it subdued with a constant solid colour paired with large prints. It would be a great charity quilt pattern for guild sew-ins, or a fun block to swap at retreats.

Wednesday, March 30, 2011

Dragon.Fly

Are you sitting down? Big news. I finished something larger than a bag, mug rug or mini quilt...don't get too excited, it won't cover a bed. But it is looking mighty fine on my dining room table right now.

If you've been visiting for a while, you may remember that I pieced this table runner last spring (but who's counting the months it's been curing in my closet, right?). I got inspired to complete it by the dangling carrot of EQ7 and 'generous fabric packs' offered up by the crew at Fat Quarterly and their "Win It to Be In It" contest. They are looking for completed projects from any issue of FQ mag and I believe this was in the very first issue!

Dragon.Fly Table Runner by Poppyprint

The pattern is called Flying Fish Table runner and it was designed by the incomparable John, of Quilt Dad. He's been ever so sweet to comment on my Flickr photos, too!

The fabrics are mostly from Japan. B went there on business about 10 years ago and I arranged for the wife of his Japanese colleague to purchase $50 of 'authentic Japanese' fabric for me. There has never been a project that inspired me to use them - they are just so special and I knew that I had to make something for myself with them. The minute I saw John's table runner, I knew it would be perfect. I paired the prints with Kona Ash.

IMG_4712

Quilting was tough to decide. I ripped out a lot of attempts. Finally I came to the conclusion that simple would be best. Many of the fabrics (including the border) featured dragonflies, so I took advantage of the larger pieced areas to embroider (Sashiko-style) some dragonflies. The rest of the geese are stitched in the ditch and a simple running stitch fills the borders. The hand work is done with Perle 8 (Valdani and Prescencia) cotton. I have to thank my pal Dianne for donating the 'Fusiboo' batting for this project while we were on retreat. [Side note: the batting initially fused really well by following manufacturers directions, but did not stay fused at all after manipulating the quilt around my machine for quilting]

Dragon.Fly Table Runner detail1 by Poppyprint

Even if this goes no where in the Fat Quarterly contest, I feel like a winner just to have completed it! Does anyone else get stuck after finishing a quilt top? I am just so impatient to move on to the next thing - I am terrible at finishing the bigger stuff!

I've linked this post to my pal Lynne's blog, Lily's Quilts. She's got a fun new monthly feature where you link to your fav project of the past month. I chose this one (but I do love this one too) just because it's been languishing for so long and now it's DONE! yahoo.


Fresh Sewing Day @ Lily's Quilts

Click on the button to see what everyone else loved working on in March!

Thursday, December 16, 2010

On my Christmas table

If you're cruising give aways, you can read two posts down or get there faster by clicking here.

For several years I have put fabric aside in my stash for a Christmas table runner. This particular Martha Negley print (that I think is GORGEOUS) has been patiently curing on my shelf for at least 4 years. Gasp. Finally, I decided to just make something simple and get it on the table already!

Holiday Table Runner by Poppyprint

I took two lengths of the cotton print and sewed a hunk of natural linen/cotton blend in between them with 3/8" seam allowance. Not really wanting a quilt on the table, I chose to sew the whole works right sides together with a brushed cotton (sort of like a one-sided flannel). I turned it right sides out, topstitched the edges and each seam and then got busy tracing 3 different sized lids onto the linen. I embroidered a running stitch with 3 strands of burgundy, ivory and green DMC floss.

My new holiday table runner

Sorta like a quickie version of my Crop Circles Table runner tutorial over there on
in my sidebar.

New holiday table runner '10 by Poppyprint

Seriously, you can whip one of these up in an afternoon.

I'm excited to head over town to the Vancouver Modern Quilt Guild meeting tonight. We'll be having a handmade ornament exchange and goodies, plus members can sign up for the day retreat I'm running in February. It's going to be a great evening!

Wednesday, May 19, 2010

Flying Fish

This project is the first one I tackled on retreat. I wanted to make something first just for me, out of fabric I love (and have been coveting on my shelf for several years...just waiting...patiently for the right pattern to come along). Presto! The talented John (QuiltDad) published his "Flying Fish Table Runner" pattern in the premier issue of Fat Quarterly (a most inspiring e-zine bursting with inspiration and patterns!). As soon as I saw the photos I knew it would be perfect for my Japanese linen/indigo collection.

Flying Fish Table Runner

I used a soft grey Kona solid for the background. White was a little too harsh and made the dragonfly wings in the border look dirty (and we can't have dirty little dragonfly wings!). The linens are a coarse weave and much thicker than the Kona cotton, so pressing was a challenge, to say the least.

Flying Fish table runner

I'm not that happy about all of the little wrinklies, but I think that's what happens when you use fabrics of two different weights. It's hard to avoid. Check out my points, though! (little pat on my own back).

I LOVE this table runner and would love some feedback on quilting ideas. The seams are very thick at the points, so those will have to be avoided. Sandi had a nice idea of doing circles, which might looks really great in a sashiko-style running stitch with light grey perle cotton. I am considering backing the runner with a homespun fabric and just quilting thru the two layers (no batting, no binding), so that it is more table-toppish and less quilt. What do you think?

Several of the linens with block printing came straight from Tokyo. B went there for business about 8 years ago, just when I had started quilting. I sent him with a 50 US dollar bill and asked him to very politely request that the wife of his Japanese colleague use it to purchase some fabric of her choice for me. She had lived in the States for a few years, so I'm sure she was used to the North American style of asking for favours....anyway, she happily spent my money and spent it well!

To see what I made with the linen scraps, stop by tomorrow!

Oh, and if you're here from Sew Mama Sew for Giveaway Day, that's two posts down...keep scrolling (there are some nice pix to look at on the way)!

Sunday, October 18, 2009

Tutorial - Crop Circle Table Runner

Hello! Welcome to my first tutorial! I'm so excited to share this fun table runner idea with you....


20091018_0155


Sew,Mama,Sew! is having a scrap tutorial contest and I thought I'd try my hand at making one for you using a fun technique for turning scraps in to "FABRIC STICKERS". You read that right - it's a simple case of scrap, cut, sew, flip and stick! This is a fantastic technique I've been using for quilt labels for a few years and it's super versatile...you'll be appliqueing circles onto bags, onesies, quilts, t-shirts, jean jackets, curtains, pillows and who knows what else!?!?.


Here's what you need:
- fabric scraps at least 3" square
- background fabric (I used a piece of organic linen 18"w X 55" long)
-backing fabric the same size as your runner
-lightweight, fusible woven interfacing the same size as your runner (I used this to stabilize my linen by fusing it to the wrong side of the linen before starting any applique)
-scraps of lightweight, fusible non-woven interfacing like "Sewer's Dream" large enough to cover your largest circle template. This is the stuff many people like to back their embroidery work with: it has a very light hand (i.e. has no real weight).
-coordinating piecing (50 wt) and top-stitching thread (30 or 40 wt)
-contrasting DMC floss

Here's how you do it:

1) Pick a crop of scraps that look nice together. Press.
2) Raid your kitchen for circle templates.

20091013_0077 20091014_0079


3) Trace a variety of circle sizes onto the wrong side of your scrap fabric pieces. I used a fine permanent Micron pen.


20091014_0082


4) Roughly cut out the circle of fabric leaving at least an inch all around. Pin right-sides-together (RST) to the gluey side of the non-woven interfacing.


20091014_0083


5) With a short stitch length (I used 2), stitch around the drawn circle ON THE LINE. No need to back stitch, just overlap a few stitches when you come around to the start of your stitches. Go slowly, take about 4-5 stitches at a time, stopping with your needle down to pivot around the circle. Careful not to 'steer' and distort your fabric as you sew. I used an open toe embroidery foot so I could really see the drawn line.


20091014_0094


6) Trim your seam allowance to a skinny 1/4". Snip some triangles out of the seam allowance. The more you snip, the smoother your circle's curves will be when it's turned out. Carefully insert the tip of your scissors into the interfacing and make a long slit. Turn your circle out through the slit!


20091014_0090


20091014_0091


7) Using a Purple Thang (one of my favourite tools!) or a chopstick, gently push the seam allowance out. Gently roll the interfacing under and finger press the edges between your thumb and finger. Make sure the interfacing is all the way under the edge of the fabric and not showing peeking out the edges of your circle.


20091014_0092


8) You've just made circle FABRIC STICKERS that you can now fuse to anything you want! You could even stack them on top of each other. The beauty is, unlike with Wonder Under, Heat 'n Bond or Steam a Seam, your top fabric is pliable and 'puffed', not glued-on-looking.


20091016_0118


9) For the Crop Circle Table Runner, arrange your fabric stickers in a pleasing way. I always think that an odd number of things in a group looks best so I used 9. Once you're happy, fuse them on with a steamy iron (careful not to shimmy the iron around, just lift up and press down).


20091017_0123


10) Now it's back to the sewing machine to stitch down the circles. I used the blind hem stitch which looks like this: ----^-----^-----^. I shorten the straight stitches and narrow the ^ stitch. Keep the straight stitches in the background fabric right next to your circle (photo on left) so that just the ^ stitch is actually through the circle (photo on right). An open toe embroidery foot is helpful to see what you're doing. Same as before, pivot around the circle when your needle is down in the fabric. I like these stitches to be hidden, so I use Sulky 100% polyester invisible thread. You could use a contrasting thread to blanket stitch, or zigzag. It's tricky to do a nice, smooth satin stitch on curves, so I don't.


20091017_012720091017_0129


11) Once all of your circles are attached, pin your table runner RST with your backing fabric. Stitch all around using a 3/8" seam allowance, back-stitch at corners for reinforcement and leave about 6" open along one side for turning. Clip corners. Turn project to right sides through the opening in the seam.


20091017_0136


12) Press seam allowance, making sure your backing fabric is all the way tucked under your table runner top. Topstitch with a coordinating thread (30 or 40 wt). I like to use my Pfaff stitch-in-the-ditch-foot for this; it has a fence to line up the edge of the project against. I set my needle to the far left position to get a nice straight topstitching line parallel to the edge of the table runner.


20091017_0137


13) Now you can embellish if you wish. I chose to do a hand running stitch with 2 strands of DMC floss about a 1/4" outside each circle. Then, using a circle template cut out of freezer paper and fused with a dry iron onto the middle of my table runner, I stitched around that to define a spot for a bowl or vase. This stitching also serves to attach the top and backing of the table runner together.


20091017_0131


IMG_1906


14) OPTIONAL: have your assistant whip up a coordinating chocolate cake for maximum table runner appreciation and to ramp up the ooohhh, aaaahhhh factor for the kids in the family.


IMG_1897


Voila! The Crop Circle Table Runner!

IMG_1905


Wow, that was a super long post. Congratulations for making it all the way down here. Have fun with your fabric stickers and let me know if you use them for a project!


Edited to add: If you live in a quilting desert and you can't find fusible light weight interfacing, don't fret. This method also works with a used, unscented dryer sheet! It's not fusible, but it turns the fabric edges under just the same (without adding bulk or stiffness) and you can pin your fabric circle to the background and stitch it down by hand or machine just the same!