Sew,Mama,Sew! is having a scrap tutorial contest and I thought I'd try my hand at making one for you using a fun technique for turning scraps in to "FABRIC STICKERS". You read that right - it's a simple case of scrap, cut, sew, flip and stick! This is a fantastic technique I've been using for quilt labels for a few years and it's super versatile...you'll be appliqueing circles onto bags, onesies, quilts, t-shirts, jean jackets, curtains, pillows and who knows what else!?!?.
Here's what you need:
- fabric scraps at least 3" square
- background fabric (I used a piece of organic linen 18"w X 55" long)
-backing fabric the same size as your runner
-lightweight, fusible woven interfacing the same size as your runner (I used this to stabilize my linen by fusing it to the wrong side of the linen before starting any applique)
-scraps of lightweight, fusible non-woven interfacing like "Sewer's Dream" large enough to cover your largest circle template. This is the stuff many people like to back their embroidery work with: it has a very light hand (i.e. has no real weight).
-coordinating piecing (50 wt) and top-stitching thread (30 or 40 wt)
-contrasting DMC floss
Here's how you do it:
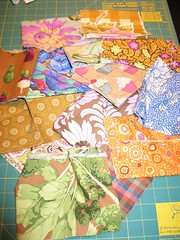
1) Pick a crop of scraps that look nice together. Press.
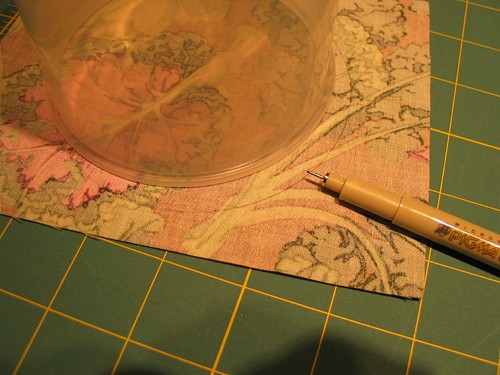
2) Raid your kitchen for circle templates.
3) Trace a variety of circle sizes onto the wrong side of your scrap fabric pieces. I used a fine permanent Micron pen.
4) Roughly cut out the circle of fabric leaving at least an inch all around. Pin right-sides-together (RST) to the gluey side of the non-woven interfacing.
5) With a short stitch length (I used 2), stitch around the drawn circle ON THE LINE. No need to back stitch, just overlap a few stitches when you come around to the start of your stitches. Go slowly, take about 4-5 stitches at a time, stopping with your needle down to pivot around the circle. Careful not to 'steer' and distort your fabric as you sew. I used an open toe embroidery foot so I could really see the drawn line.
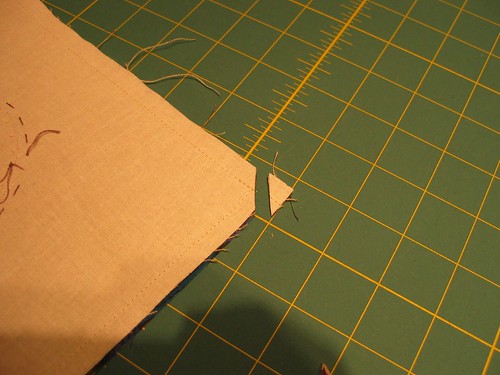
6) Trim your seam allowance to a skinny 1/4". Snip some triangles out of the seam allowance. The more you snip, the smoother your circle's curves will be when it's turned out. Carefully insert the tip of your scissors into the interfacing and make a long slit. Turn your circle out through the slit!
7) Using a Purple Thang (one of my favourite tools!) or a chopstick, gently push the seam allowance out. Gently roll the interfacing under and finger press the edges between your thumb and finger. Make sure the interfacing is all the way under the edge of the fabric and not showing peeking out the edges of your circle.
8) You've just made circle FABRIC STICKERS that you can now fuse to anything you want! You could even stack them on top of each other. The beauty is, unlike with Wonder Under, Heat 'n Bond or Steam a Seam, your top fabric is pliable and 'puffed', not glued-on-looking.
9) For the Crop Circle Table Runner, arrange your fabric stickers in a pleasing way. I always think that an odd number of things in a group looks best so I used 9. Once you're happy, fuse them on with a steamy iron (careful not to shimmy the iron around, just lift up and press down).
10) Now it's back to the sewing machine to stitch down the circles. I used the blind hem stitch which looks like this: ----^-----^-----^. I shorten the straight stitches and narrow the ^ stitch. Keep the straight stitches in the background fabric right next to your circle (photo on left) so that just the ^ stitch is actually through the circle (photo on right). An open toe embroidery foot is helpful to see what you're doing. Same as before, pivot around the circle when your needle is down in the fabric. I like these stitches to be hidden, so I use Sulky 100% polyester invisible thread. You could use a contrasting thread to blanket stitch, or zigzag. It's tricky to do a nice, smooth satin stitch on curves, so I don't.
11) Once all of your circles are attached, pin your table runner RST with your backing fabric. Stitch all around using a 3/8" seam allowance, back-stitch at corners for reinforcement and leave about 6" open along one side for turning. Clip corners. Turn project to right sides through the opening in the seam.
12) Press seam allowance, making sure your backing fabric is all the way tucked under your table runner top. Topstitch with a coordinating thread (30 or 40 wt). I like to use my Pfaff stitch-in-the-ditch-foot for this; it has a fence to line up the edge of the project against. I set my needle to the far left position to get a nice straight topstitching line parallel to the edge of the table runner.
13) Now you can embellish if you wish. I chose to do a hand running stitch with 2 strands of DMC floss about a 1/4" outside each circle. Then, using a circle template cut out of freezer paper and fused with a dry iron onto the middle of my table runner, I stitched around that to define a spot for a bowl or vase. This stitching also serves to attach the top and backing of the table runner together.
14) OPTIONAL: have your assistant whip up a coordinating chocolate cake for maximum table runner appreciation and to ramp up the ooohhh, aaaahhhh factor for the kids in the family.
Voila! The Crop Circle Table Runner!
Wow, that was a super long post. Congratulations for making it all the way down here. Have fun with your fabric stickers and let me know if you use them for a project!
Edited to add: If you live in a quilting desert and you can't find fusible light weight interfacing, don't fret. This method also works with a used, unscented dryer sheet! It's not fusible, but it turns the fabric edges under just the same (without adding bulk or stiffness) and you can pin your fabric circle to the background and stitch it down by hand or machine just the same!


49 comments:
What a clever idea. Thank you for the wonderful tutorial. If I make a table runner, would you mind sending your assistant over. That cake looks delicious!
Great idea, well written! I'm going to have to try it, and that cake looks yummy, too!
Nicely done Krista - you make great tutorials. I think D needs to stay home from school one Friday and make us cake and tea for stitch! Yummy table runner - yummy cake!
Nicely done tutorial - thanks!
Very cool! This is actually how I was taught with one thing. I didn't know about cutting the triangles out to make it smoother. Very very awesome. Thanks. You ROCK! Well, actually your assistant really set the whole thing off. Just wouldn't have been the same come to think of it! hee. *karendianne. www.leehaven.com
Excellent! This might actually be a form of applique I learn to like.
Typically applique tutorials involve precise cutting, gluing, and ironing that's so tedious that I can't last past the 3rd block!
I'll definitely give this one a go and see if it works for me!
Cheers,
Leah Day
Great tutorial! I'm definately going to try this! Thanks.
Arabella
This is really great - thank you for your time and for sharing this method for circles. Love it!
what a wonderfully clear tutorial, and a great way to do circles. just read all of your posts and I love your quilts, and the idea of the mystery quilt xox
Applique has been giving me the heebie jeebies for months, but I'm so anxious to try it. I am totally heading for my scrap box now. Awesome tutorial. Thank you!!!
Nicely done....I do the fabric dryer sheets for labels but never thought to try it for circles.....now I will :0).
Leah Day sent me over to have a look....I'm so happy to see both of you young ladies loving quilting so much and doing such lovely work!
Happy sewing
Very nice!! I love it. Thanks for sharing this wonderful tutorial.
Great job! I love the table runner.
Thank you for creating and sharing this tutorial! It looks great, and I will definitely give this technique a try!
Fantastic! What a great tutorial - thanks! :)
I've added this to my things to make list. Thanks so much for taking the time to write it all down for us. I love it!
Wow, this is a great tutorial! Very well written and photographed. And what a great idea. I'm going to try it.
Terific tutorial, terific idea, I'm so very impressed! Thank you.
Oh, wow! 1 - great runner. 2- a dryer sheet? Really? GENIUS. 3 - Are you going to eat all that cake? :-)
That's a great idea to do such a design and looks great!
Awesome idea, Krista!! I never would've thought of that!
Congratulations Krista! You made on to Sew Mama Sew! Good job and great tutorial! - Paula
Great tutorial. I love circles.
I honestly love this tutorial! What fantastic results and you make it look so easy too!
I love circles too!
Your explanation was clear and complete, you would answer my question just as it was forming in my head. Love the circles. I want to try this for my quilting label right away! How about some small circles at the bottom of my jeans - ya!
I love your table runner, Krista. Great tutorial. Well done!
Cool idea - I've been wondering how people get those perfect circles!
Great tutorial! I'm definately going to try this! Thanks.
I made two of these and matching dish towels as Christmas gifts! Thank you!
Wow, this seems so much easier than using tin foil and iroing it around a cricle template. I dont know why I thought fusible applique circleswere gonig to be hard, at least it doesnt seems so after your tute! I am going to ick up some kona solids and fusible tomarrow!!
Love your blog! (I found it by way of Leah Day's quilting blog.) You have great ideas and write well. I'll be back!
A wonderful tutorial and a great idea for my leftover Fassett fabrics. Thank you!
really awesome.!!.beautiful!! i can't wait any longer to make one like this!!
Great idea. Which project is the fastest to complete? The runner or the cake? I think I can guess which one has the least calories. Thanks for the great tutorial.
I love circles, and the addition of the hand quilting is charming. Thanks for sharing a fun project. :)
THAT is my top stitching/edge stitching foot??? Who knew? You called it a stitch in the ditch foot. Do you use it for that, too?
Love your tutorial.
Thank you...awesome tutorial. Love the use of linen. Did you pre-wash it? Keep on creating!
Awesome tutorial... love the use of linen. Did you pre-wash it before applying the circles? Keep on creating!
Thank you sooooooooo much for this clear and clever tutorial! You deserve congrats for your 500 posts and we all are very lucky for reading them!
hugs from Brazil!!
Sil
Hahahahaha! I live in a quilty desert! The MIDDLE EAST!! We do have strange stuff with strange names that do this same thing, I'm sure?? Anyway, I'll check it out! Lovely tutorial. Thanks!
What a great job! I would LOVE to make this because of your directions! AND desert too! Well done.... ENJLY! cheers su '-}
What a great tutorial and such a clever idea.
This is fantastic. I love reverse applique circles, but this is the bees knees. LOL. Thanks
Awesome, I love the purple cake. That should be mandatory to any table runner! Quick question, I always get little pointy parts on my circles. Any suggestion on how to avoid those?
Great way to make appliqué circles! I’ve made 4 blocks so far for the VMQG block lottery. After the first one, it occurred to me to try trimming the seam allowance of the circle with my pinking shears – no need to cut the notches and I got a smoother edge.
Love this idea. So glad to finally see someone else recommend used sheets. Been recommending them for years - even before I wanted to quilt - just for sewing. Keep going on the tutorials. You did a really great job!
Very cute - love the runner!
I just used this for a quilt label. Thanks so much!
I'll be using this trick in the future, for sure!
Post a Comment