Showing posts with label cotton & steel. Show all posts

Wednesday, April 19, 2017

Peekaboo Bears - a Mini-Mini Quilt

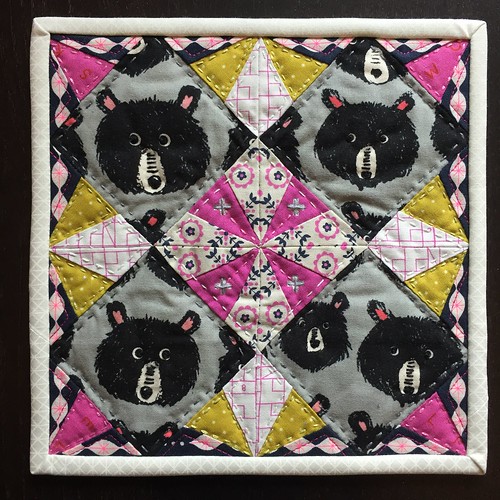
I thought you'd like to see the completed mini-mini quilt that I started while on my trip to Australia. I posted some in-progress photos and more info about the pattern here.

It is mostly hand quilted with perle cotton, although I did do one outlining machine stitched line using 30 wt Aurifil in hot pink in that navy border. The binding was sewn on by machine and hand tacked to the back. Sadly, my hand-piecing accuracy is not the best (it's been ages since I did much hand-piecing) so most of those pretty points were lost around the outside, but I think overall it's still adorable. I hope my partner in the Ottawa MQG likes her little bears.  All I know about her is that she shares my aversion to brown and she likes Cotton & Steel fabric...this is 8" x 8" of 100% C&S!

Peekaboo Bears by Poppyprint

I embellished all of the bear eyes with a french knot - so cute!

I really enjoy participating in the swaps we do at VMQG because they tend to be small, manageable projects with a generous time frame to complete them. I'm thankful for the volunteers that take on the organisation and planning; in this case Amy. Our guild ships everything in one go (or sometimes we get lucky with a traveller who can personally deliver the goods). The rules for this one were "make a mini-mini quilt that has an outside perimeter of less than 48 inches". Perfect!!

If you've read Poppyprint for a while, then you know I used to swap like a fiend back in the Flickr days, starting with the famous Doll Quilt Swap.  I think one year I did over 10 swaps and learned many new things every time. Making stuff especially for another person according to their wishlist can be a really fun challenge.  Although I love participating, sharing and receiving beautiful handmade things from around the world, I try to limit myself to one or two a year now and that seems to be the perfect amount. Guild ones are great fun and it's especially fun to connect with other Canadian groups.

How about you...swapping anything these days?

Monday, March 6, 2017

Culcita (Kul-see-tah)

This is a product-sponsored post; written opinions and observations are my own.

There's a brand new monthly subscription box for quilters and it's called Culcita (which apparently comes from the Latin origin for the word 'quilt'). This new, dynamic company is a family venture born out of a desire to get the latest modern fabric designs into the hands of quilters by delivering it right to their door monthly, bi-monthly or quarterly. I love that they have several different options so that you can tailor the service just for you (for example, every box will contain 12 prints but you get to choose a FQ or 1/2 yard option). It isn't just fabric, currently they offer a straight fabric box, modern quilt project kit , a skillz-builder box or a bag/accessory kit  like this one which includes everything you need to make Anna's awesome Compass Bag!

Bag Project Kits

Jessica and Jamie contacted me to see if I'd like to give their February box a try and see how it all works. I am a big supporter of women-lead small business and make an effort to only partner with those able to serve Canadian quilters.  Although Culcita ships from the US (domestic shipping included in the monthly subscription) they also offer Canadians a reasonable flat rate shipping option and the company is co-owned by family members living in the U.S. and Canada (meet them here). I love that! Having investigated a few other subscription box services since the trend began, I've been disappointed a few times by those who are unable to ship to Canada.

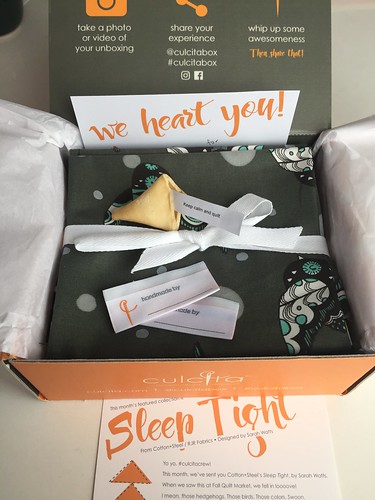
Here's what I received in their super-efficiently packed and custom designed  re-usable box:

Culcita box feb 2017

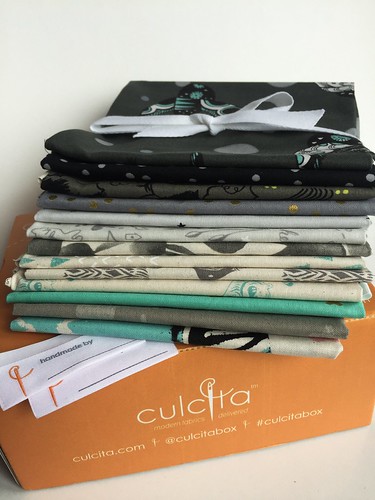
A handwritten thank you note, a card describing the fabric collection and why it was chosen for subscribers, two super cute woven labels, a quilting fortune and 12 FQ of Sleep Tight in the Stargazing palette. 

Culcita box feb2017

I like this format! I'm a notion junkie, so I already have everything I need in that department and I stick to fairly mainstream/neutral thread colours, so I like the fact that I wouldn't be paying for stuff every month that I wouldn't use or need. I can always use the fabric, or share, gift or trade it. On that note, Cucita offers a "trade" hashtag for subscribers to get in touch with each other if they're wishing for the alternate colourway and want to connect with others hoping for a swap. Cool! 

I'm hoping to use some of this collection to make a mini-mini quilt for an upcoming swap between the Vancouver MQG and the Ottawa MQG....something tells me my secret partner would like this fabric.  

Thank you for sharing, Culcita!

Tuesday, February 21, 2017

The Penultimate Lonestar

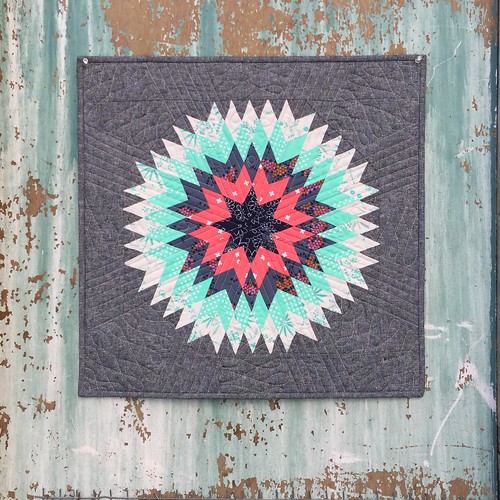
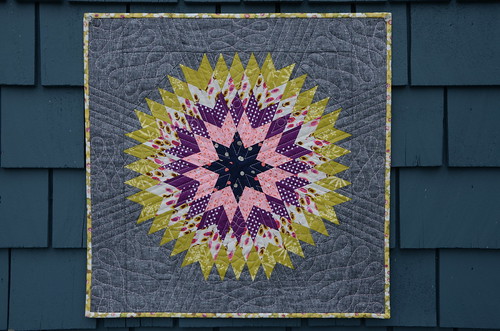
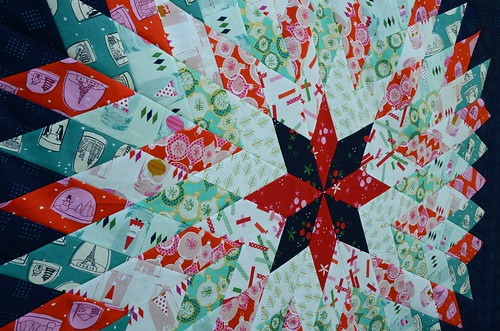
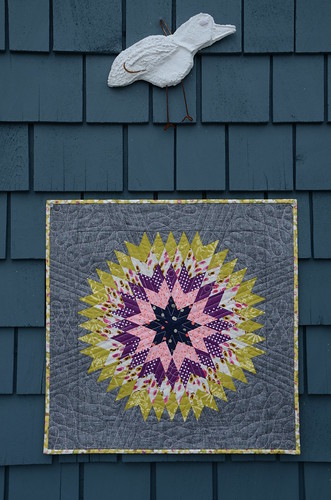
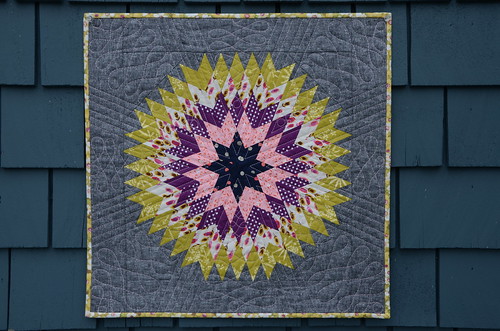
Just a quick share of this mini-Lonestar Circle quilt I recently finished up on a retreat. You've seen a few of these here before. This particular one has been lying around in my sewing room in pieces since the Alaska Cruise almost 2 years ago. It was time to get this UFO pieced, quilted and bound!  A friend once indicated that she wanted to make one, but she's a busy gal and I know she's got plenty of her own ideas brewing, so I gifted her this one for her sewing room wall.

You can find the pattern in my book Make It, Take It. The original quilt was designed by Lynne Goldsworthy and I've shared cutting instructions to make this mini version here.

Lonestar Circle mini by Poppyprint
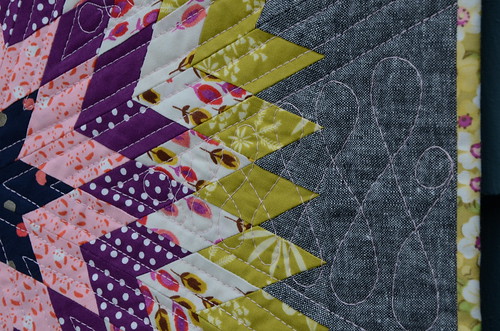
made with Cotton & Steel, Essex Linen and quilted with Aurifil 40 wt thread

It just so happened that the chicken coop on the retreat property was painted a perfect colour as a backdrop for this quilt.  Lucky me!

This is the penultimate because there is still one more full sized version awaiting quilting in my sewing room. It's a Christmas one, so I have time....

Wednesday, October 28, 2015

Lonestar Circle Variations

I'll be teaching Lynne's lovely pattern to two local guilds in the coming months and I offered workshop participants the choice of making a mini, or the full sized version that appears in Make It, Take It.  I thought some of you with the book might be interested in trying a mini version yourselves, or a full-sized two-colour variation like my Tinsel version (see below). This blog post is really meant as a reference for folks who have the book and are looking for options. It is not directions on how to make the quilt.

Read on for fabric and cutting guidelines for these two fun variations!

Mini Lonestar Circle 20" square

Lonestar Circle mini by Poppyprint

If you'd like to make a 20" mini version where the colours radiate out from the centre as in my sample above (in other words, each 'round' of the star is made up of the same fabric), then you only need F8's of the first 3 fabrics starting from the centre, a FQ of the 2 outermost fabrics and a 2/3 metre of background/border. Cut the number of 1 1/2" strips from the longest side of your fabric as indicated in the chart below. Make all eight of your star wedge segments identical.


 FABRIC #
1 ½” STRIPS
1 (star centre)
2
2
4
3
5
4
6
5
7
Background
3 (WOF long)

In addition, from the background fabric, cut 2 strips 3" for borders and 2 strips 2 1/4" for binding. You'll also need two 6" squares cut in half on the diagonal for your corners.

Two Colour-way star

Tinsel Lonestar Circle

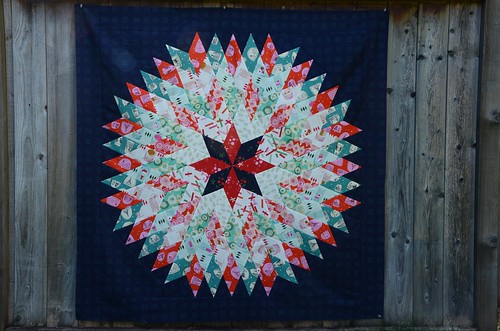
The full-sized version I made above has alternating red/green lights and darks. Similar to the quilt in the book, I alternated light and dark fabrics in radiating rings of the star, but I limited my colours to red and green. To do this, I made 4 strip sets of all red fabrics starting with dark red as fabric #1, then light, dark, light, dark, background.  I made 4 similar sets using all greens (well, in the photo you can see I used navy for fabric #1), so navy, light green, dark green, light green, dark green, background.  Then when I pieced the 8 star wedges, I alternated red and green strip sets.

Tinsel Lonestar Circle
Okay, so some of my "light reds" and "light greens" are actually cream prints, but you get my drift.

For this two-colourway version you need 3 dark prints and 2 light prints of each colourway for the star and the same amount of background/border fabric called for in the book. I had 1/2 yards of these Tinsel prints, but there was a ton of fabric leftover.  Here's an idea of what you actually need if you are buying yardage at your local shop:

FABRIC # (#1 is centre star)
  3 ½” STRIPS x WOF
YARDAGE* REQUIRED
1 (dark red) & (dark green)
1 each
0.20 m or 1/5 yard each
2 (light red) & (light green)
1 each
0.20 m or 1/5 yard each
3 (dark red) & (dark green)
2 each
0.30 m or 1/3 yard each
4 (light red)& (light green)
2.5 each
0.4 m or 1/2 yard each
5 (dark red) & (dark green)
3 each
0.4 m or 1/2 yard each
Background
7
       See Make It, Take It
*these are generous amounts that allow for an extra strip in case of cutting error.

All of this will likely read as a foreign language if you haven't got a copy of Make It, Take It and read the pattern!  

Wednesday, September 23, 2015

Tinsel Time

I held off until after school started, but this Christmas project could wait no longer. As soon as I saw Cotton & Steel's fun Tinsel* line at Spring Market, I knew it would be perfect for making Lynne's Lonestar Circle quilt from my book. I'll be teaching this quilt for two local guilds in the coming months and I needed a full-sized sample. Students will have the choice of making a mini like the three I've made, or this 55" square version.  I'll also provide info on fabric requirements for creating a radiating design with only 5 fabrics plus background, or using two alternating colour ways like I did in this Tinsel version and this mini version.  Fact: the full size is more forgiving and actually an easier make than those mini versions!

>Tinsel Lonestar Circle

I've got a folkart-inspired appliqued tree skirt that I've loved for years but after seeing the Tinsel fabric in all it's amazing cuteness, I thought I'd try and make this project and transform it into a new tree skirt.  Then this incredible stroke of luck happened....

Tinsel Lonestar Circle

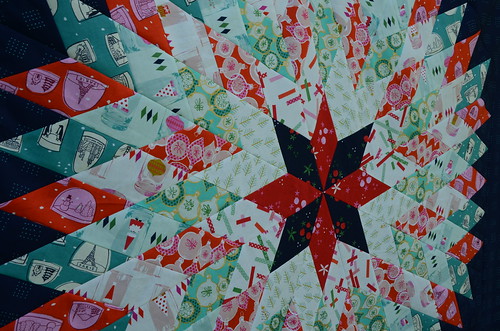
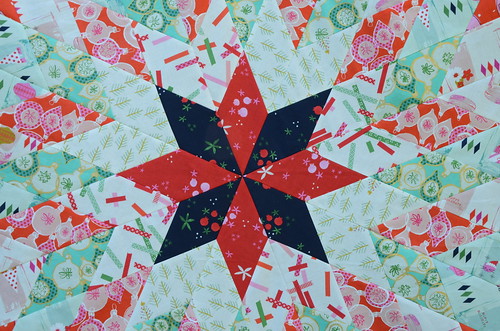
The centre points turned out perfectly. This is part careful planning, measuring, pinning and sewing, but also part quilting voodoo. How can I cut that gorgeous centre star right outta there? Not happening. 

Tinsel Lonestar Circle

Hello, new holiday table cloth.

Thursday, June 4, 2015

Soon We'll Be Stitching at Sea!

In 3 more short sleeps (short being the operative word...I have SO much to do!), there will be 19 excited quilters boarding the Celebrity Infinity in Vancouver. We're bound for a week of sewing and so much fun in Alaska!  Personally, I am getting ridiculously excited about my first ever ZipTrek adventure in Ketchikan. One of the platforms is a 30' tower out in the water that we'll zip to and from!

On the cruise, I'll be teaching two workshops over the course of our "at sea" days.  Altogether we'll have about 18 hours of classroom time, so everyone should be able to get their two wall hanging quilt tops together.  However, if people choose to visit the spa, take a dip in the amazing top deck pool, scan the horizon for whales or play bingo all afternoon, those are all options too.

Here's the sample I just finished for our Lonestar Circle Mini class. It's the third one I've made, adapting Lynne's lapsized pattern from Make It, Take It.

Lonestar Circle mini by Poppyprint

Lonestar Circle mini by Poppyprint

Again, I used Cotton & Steel (some brand new prints I scored at Quilt Market sample spree, plus two older ones). The background is Essex yard dyed linen and the backing and binding are a classic (as in, it's really old, please don't ask me where I got it!) Amy Butler floral from Ginger Bliss that is such a perfect match, I think I might have to mash up all of these prints again in another project!  

Lonestar Circle mini by Poppyprint

It's quilted with a sweet, soft pink Aurifil thread in 28 wt. 

This project is fun to make and I've got a few tricks to share with my students about matching those pesky points on bias seams. Our other project, my Temperature Check improv quilt will be a welcome break from the precision work. There's something for every quilter on this cruise!

I'll try to share along the way with Instagram, but there is no free wifi on the ship and quite frankly, I'm looking forward to a week focussed on my surroundings. If we find wifi in a port along the way, I'll show you some of the shenanigans we are bound to get up to!  Otherwise, stay tuned for some photo essays later in June.

Tuesday, February 17, 2015

Chilcotin Wild - a mini quilt

A last minute finish before departing for QuiltCon tomorrow, this mini quilt is a gift for my friend Kristie's new sewing room.  Seriously, I can't get enough of this mini Lonestar Circle (full-size lap quilt pattern by Lynne appears in my book).  The ombre effect with the Cotton and Steel basics is striking as long as you don't stare at it too long. I found that the skinny border helped to reduce the pulsating effect a bit by reining in the points.

Chilcotin Wild by Poppyprint

The centre seams of this one didn't turn out quite as accurate as my first effort, I think in part due to the fact that I had to fussy cut the horses individually instead of strip piecing them in to the sets (this would make more sense if you had the pattern in front of you).  I think there is enough going on with the horse motifs and quilting to divert any critical examination of seams though, haha.  I'm contemplating making 9 or 16 of these sized blocks for a queen size quilt. Call me crazy but I love making them - it's a bit of a shock considering how intense the piecing and seam matching is after all of the improvisational work I've been doing lately. At this point, it is only a "plan". You are quilters....you know what that means. At any rate, I need to make at least one of these minis to keep as this is one of the projects I'll be teaching on the Alaskan cruise in June!

Chilcotin Wild by Poppyprint

I quilted with straight lines to define wedge shapes on each side and in each corner.  I then filled the wedge-shaped areas with a free-motion ribbon design that I'm super happy with. All of the thread is 40 wt Auriful in hot pink and aqua.  I just love how the quilting looks on that Essex yarn-dyed linen.

Chilcotin Wild by Poppyprint

For my 40th birthday (cough,  many years ago), B surprised me with a long weekend trip to British Columbia's Chilcotin region for three days of trail riding at a small dude ranch. We didn't see the famous wild horses of the Nemaiah Valley, but I would love to, one day. This quilt is named for them.

Chilcotin Wild by Poppyprint
Chilcotin Wild, 22 1/2" x 22 1/2"

Saturday, January 31, 2015

A Saturday Quickie

Last weekend my traditional guild held our big annual workshop day. It is different from most workshops in that there is no instructor. Instead, a committee organizes a theme (like placemats, floral quilts, scrappy quilts) or a mystery pattern and everyone works together in a huge gymnasium.  This year the theme was Layer Cake and you could make a mystery quilt or just work on your own layer cake pattern. Typically over 40 guild members participate and it is a really fun day. Lunch is a potluck, so you know what that means...more cake, cookies and loaves than we know what to do with and barely enough cheese, crackers, sandwiches and sausage rolls! 

I had a lovely day working on my Featherweight Agatha, sewing with a Cotton & Steel Maple Layer Cake. These are special layer cakes made for the Canadian market by the wholesale company Trend-Tex.  I finished up my quilt top yesterday.

Cotton & Steel Quickie

However, when I returned to my sewing room after taking this shot, I discovered there was still a row of blocks stuck to my design wall!! So imagine this with one more row along the bottom, hehe.  I'm trying not to fuss about all of the decapitated horses.

The pattern I used is called Double Slice and is a free video tutorial offered by the Missouri Star Quilt Co.  Super fast and fun!  For now, I've hung it neatly over a hanger to go in the closet with all of the other Quilt Tops With No Purpose...my speciality!

Tuesday, January 13, 2015

Lonestar Circle Mini

When I first started blogging and participating in the quilting and sewing community on Flickr, I signed up for so many swaps. I spent almost two years sewing up mini quilts, pouches, pot holders, mug rugs and hoops for other people. Some of my very best and most creative work went out the front door and into the homes of other sewists. Swapping was super fun and I met some of my closest online friends that way, but I started feeling a little sad about some of the great work I sent away that I'd never see again.  I decided to take a break and only do occasional swaps with friends.

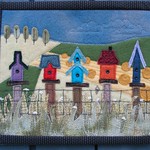
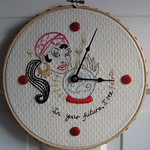
Mini QT March swap made for lmdesigns Potholder Pass 3 'cooking' 452 Poppyprint - mugrug pears 3 birdhouse fence wool mini by Poppyprint Time For Fabric Hoop by Poppyprint
Just a few of the swap items that I sent off to partners over the past 5 years.

Then Instagram took off like crazy and, similar to Flickr, communities started up through swapping again. I felt ready to jump back in and signed up for Kristi's Schnitzel and Boo Miniquilt Swap (search the hashtags #schnitzelandboominiquiltswap OR #makeaquiltmakeafriend if you want to check out the quilts on IG). Round Two is just shipping now and there are 1000 participants!  It is exciting to be a part of something so huge - I even signed up to be a swap mama to help ensure that this massive swap was a success.  Each mama has about 40 swappers to monitor and I'm super lucky because all 38 of my swappers are 100% committed to seeing the swap through. Phew!

So, what would I make for my secret partner? With my book, Make It, Take It coming out in a month's time, I wanted to try a mini-version of one of the patterns.  Lynne designed this incredible Lone Star Circle quilt for the book and used Oakshott shot cottons to make it.

Martingale - Make It, Take It
Photo from Make It, Take It by Brent Kane, Martingale 2014

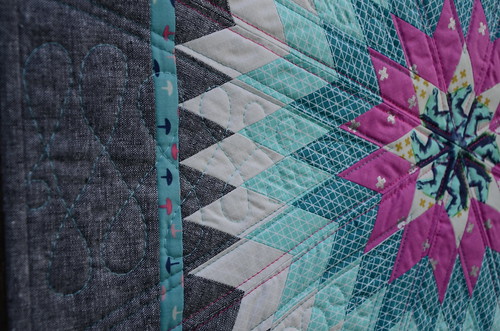
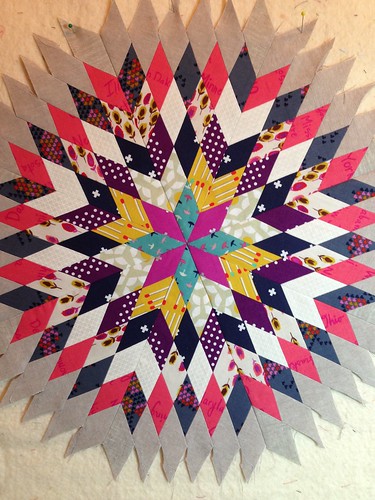
A lonestar quilt has long been on my "to try" list and this complete circle version is so eye-catching I knew it was a must.  In Lynne's pattern, the strips are cut 3 1/2".  I made a 1/3-sized version by cutting 1 1/2" strips from fat quarters (the finished mini is just under 18" square).  There is something about radiating designs; they seem to be universally loved by quilters.  Is it the symmetry? The eye-catching points?  I can't quite put my finger on it, but this little honey got more likes on IG than anything else I've ever posted!

Lonestar Circle Mini by Poppyprint
All seams are pressed open on this mini, except for the two vertical seams that meet in the middle for the final horizontal joining seam (between the two half circles). I pressed those in opposite directions so I could lock the allowances and achieve a perfect pointy centre star!

The background is Essex yarn-dyed linen in flax, and the finished quilt measures 18" square.  My swap partner seems to like radiating designs (based on her inspiration mosaic) and although this fabric wasn't mentioned in her favourite designers list, I hope the universal appeal of Cotton & Steel will make this okay for her.  I don't have any fabrics by one designer she listed and I'm going to send her the 2 fat quarters I have from her other favourite designer as extras.

Lonestar Circle Mini by Poppyprint

Lonestar Circle Mini by Poppyprint

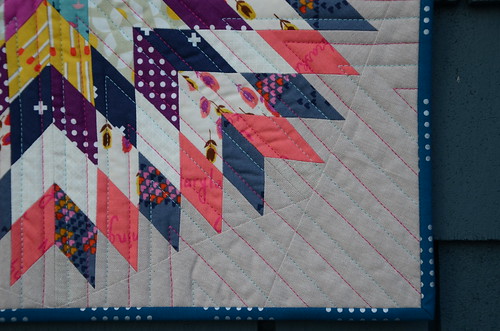
I simply quilted with straight lines and a longer stitch length (3.5 stitches/inch) using Aurifil 30 wt cotton thread in hot pink and teal to match the centre star prints.  I will freely admit that after doing so much improvisational sewing last fall, pin-matching all of those points nearly drove me bananas, but the effort is well worth the results!  In the book, I explain how to correctly pin-match angled seams so that you end up with perfectly pointy-points.
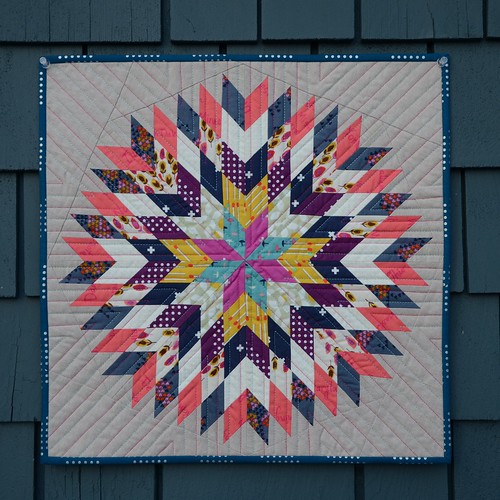
Lonestar Circle Mini by Poppyprint

Throughout the year I'll be making up my own versions of the contributor projects from Make It, Take It. I can't wait to share more of this book with you!  Of course there will be a blog tour (watch for that in April).  For now, set your calendar alarms for February 10th: that's the day you'll be able to order the book from  Martingale's  online shop. The bonus is that when you buy a hard copy direct from the publisher, you automatically receive a FREE digital copy, so you can take the book along on retreat or to your sew-ins on your tablet or laptop! Yay!