Showing posts with label "lonestar circle". Show all posts

Tuesday, February 21, 2017

The Penultimate Lonestar

Just a quick share of this mini-Lonestar Circle quilt I recently finished up on a retreat. You've seen a few of these here before. This particular one has been lying around in my sewing room in pieces since the Alaska Cruise almost 2 years ago. It was time to get this UFO pieced, quilted and bound!  A friend once indicated that she wanted to make one, but she's a busy gal and I know she's got plenty of her own ideas brewing, so I gifted her this one for her sewing room wall.

You can find the pattern in my book Make It, Take It. The original quilt was designed by Lynne Goldsworthy and I've shared cutting instructions to make this mini version here.

Lonestar Circle mini by Poppyprint
made with Cotton & Steel, Essex Linen and quilted with Aurifil 40 wt thread

It just so happened that the chicken coop on the retreat property was painted a perfect colour as a backdrop for this quilt.  Lucky me!

This is the penultimate because there is still one more full sized version awaiting quilting in my sewing room. It's a Christmas one, so I have time....

Wednesday, October 28, 2015

Lonestar Circle Variations

I'll be teaching Lynne's lovely pattern to two local guilds in the coming months and I offered workshop participants the choice of making a mini, or the full sized version that appears in Make It, Take It.  I thought some of you with the book might be interested in trying a mini version yourselves, or a full-sized two-colour variation like my Tinsel version (see below). This blog post is really meant as a reference for folks who have the book and are looking for options. It is not directions on how to make the quilt.

Read on for fabric and cutting guidelines for these two fun variations!

Mini Lonestar Circle 20" square

Lonestar Circle mini by Poppyprint

If you'd like to make a 20" mini version where the colours radiate out from the centre as in my sample above (in other words, each 'round' of the star is made up of the same fabric), then you only need F8's of the first 3 fabrics starting from the centre, a FQ of the 2 outermost fabrics and a 2/3 metre of background/border. Cut the number of 1 1/2" strips from the longest side of your fabric as indicated in the chart below. Make all eight of your star wedge segments identical.


 FABRIC #
1 ½” STRIPS
1 (star centre)
2
2
4
3
5
4
6
5
7
Background
3 (WOF long)

In addition, from the background fabric, cut 2 strips 3" for borders and 2 strips 2 1/4" for binding. You'll also need two 6" squares cut in half on the diagonal for your corners.

Two Colour-way star

Tinsel Lonestar Circle

The full-sized version I made above has alternating red/green lights and darks. Similar to the quilt in the book, I alternated light and dark fabrics in radiating rings of the star, but I limited my colours to red and green. To do this, I made 4 strip sets of all red fabrics starting with dark red as fabric #1, then light, dark, light, dark, background.  I made 4 similar sets using all greens (well, in the photo you can see I used navy for fabric #1), so navy, light green, dark green, light green, dark green, background.  Then when I pieced the 8 star wedges, I alternated red and green strip sets.

Tinsel Lonestar Circle
Okay, so some of my "light reds" and "light greens" are actually cream prints, but you get my drift.

For this two-colourway version you need 3 dark prints and 2 light prints of each colourway for the star and the same amount of background/border fabric called for in the book. I had 1/2 yards of these Tinsel prints, but there was a ton of fabric leftover.  Here's an idea of what you actually need if you are buying yardage at your local shop:

FABRIC # (#1 is centre star)
  3 ½” STRIPS x WOF
YARDAGE* REQUIRED
1 (dark red) & (dark green)
1 each
0.20 m or 1/5 yard each
2 (light red) & (light green)
1 each
0.20 m or 1/5 yard each
3 (dark red) & (dark green)
2 each
0.30 m or 1/3 yard each
4 (light red)& (light green)
2.5 each
0.4 m or 1/2 yard each
5 (dark red) & (dark green)
3 each
0.4 m or 1/2 yard each
Background
7
       See Make It, Take It
*these are generous amounts that allow for an extra strip in case of cutting error.

All of this will likely read as a foreign language if you haven't got a copy of Make It, Take It and read the pattern!  

Wednesday, September 23, 2015

Tinsel Time

I held off until after school started, but this Christmas project could wait no longer. As soon as I saw Cotton & Steel's fun Tinsel* line at Spring Market, I knew it would be perfect for making Lynne's Lonestar Circle quilt from my book. I'll be teaching this quilt for two local guilds in the coming months and I needed a full-sized sample. Students will have the choice of making a mini like the three I've made, or this 55" square version.  I'll also provide info on fabric requirements for creating a radiating design with only 5 fabrics plus background, or using two alternating colour ways like I did in this Tinsel version and this mini version.  Fact: the full size is more forgiving and actually an easier make than those mini versions!

>Tinsel Lonestar Circle

I've got a folkart-inspired appliqued tree skirt that I've loved for years but after seeing the Tinsel fabric in all it's amazing cuteness, I thought I'd try and make this project and transform it into a new tree skirt.  Then this incredible stroke of luck happened....

Tinsel Lonestar Circle

The centre points turned out perfectly. This is part careful planning, measuring, pinning and sewing, but also part quilting voodoo. How can I cut that gorgeous centre star right outta there? Not happening. 

Tinsel Lonestar Circle

Hello, new holiday table cloth.

Thursday, June 4, 2015

Soon We'll Be Stitching at Sea!

In 3 more short sleeps (short being the operative word...I have SO much to do!), there will be 19 excited quilters boarding the Celebrity Infinity in Vancouver. We're bound for a week of sewing and so much fun in Alaska!  Personally, I am getting ridiculously excited about my first ever ZipTrek adventure in Ketchikan. One of the platforms is a 30' tower out in the water that we'll zip to and from!

On the cruise, I'll be teaching two workshops over the course of our "at sea" days.  Altogether we'll have about 18 hours of classroom time, so everyone should be able to get their two wall hanging quilt tops together.  However, if people choose to visit the spa, take a dip in the amazing top deck pool, scan the horizon for whales or play bingo all afternoon, those are all options too.

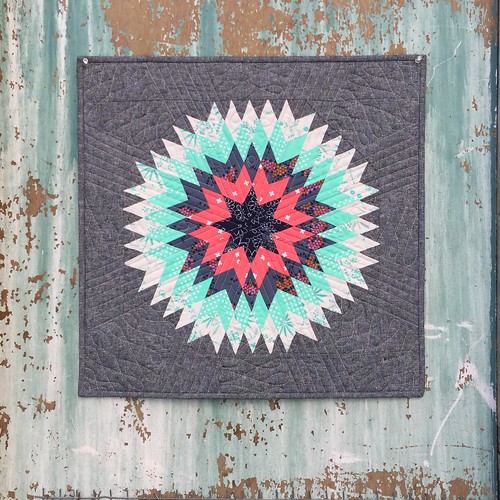
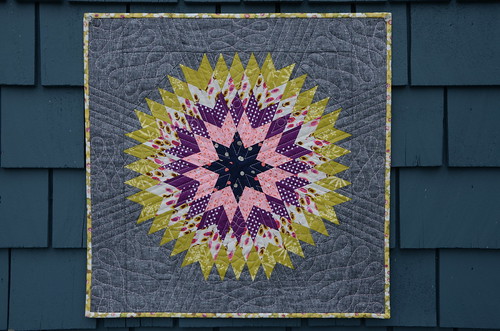
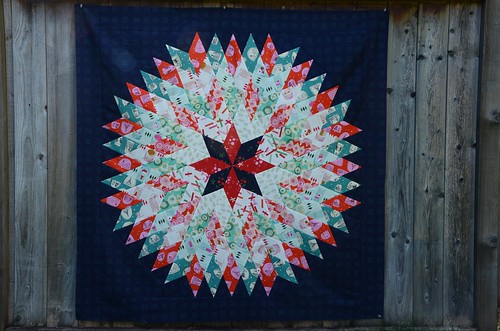
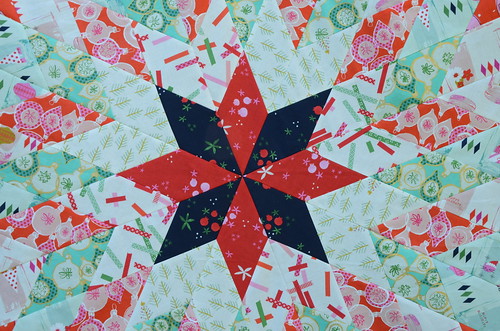
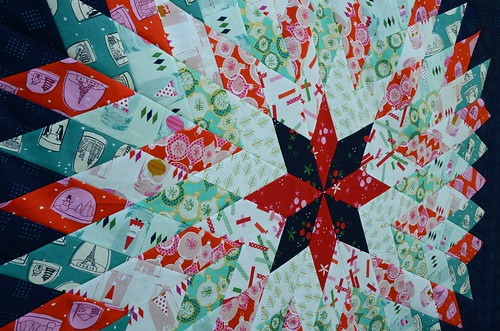
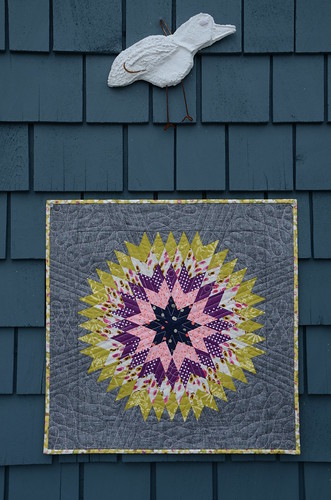
Here's the sample I just finished for our Lonestar Circle Mini class. It's the third one I've made, adapting Lynne's lapsized pattern from Make It, Take It.

Lonestar Circle mini by Poppyprint

Lonestar Circle mini by Poppyprint

Again, I used Cotton & Steel (some brand new prints I scored at Quilt Market sample spree, plus two older ones). The background is Essex yard dyed linen and the backing and binding are a classic (as in, it's really old, please don't ask me where I got it!) Amy Butler floral from Ginger Bliss that is such a perfect match, I think I might have to mash up all of these prints again in another project!  

Lonestar Circle mini by Poppyprint

It's quilted with a sweet, soft pink Aurifil thread in 28 wt. 

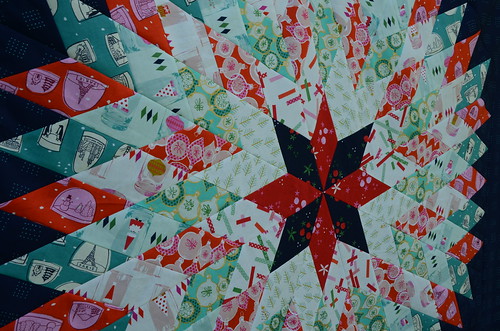
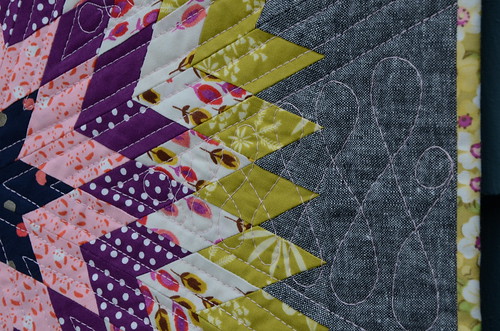
This project is fun to make and I've got a few tricks to share with my students about matching those pesky points on bias seams. Our other project, my Temperature Check improv quilt will be a welcome break from the precision work. There's something for every quilter on this cruise!

I'll try to share along the way with Instagram, but there is no free wifi on the ship and quite frankly, I'm looking forward to a week focussed on my surroundings. If we find wifi in a port along the way, I'll show you some of the shenanigans we are bound to get up to!  Otherwise, stay tuned for some photo essays later in June.