Showing posts with label linen. Show all posts

Monday, October 16, 2017

Level Two Tote - A Pattern Release!

Hi all! Exciting news today. I've finished up an new pattern and it is now live in my Craftsy shop right here.  I've always been a bag lady and have made umpteen bags from many fabulous patterns available out there, but I put my favourite simple requirements together and came up with my own design.

You've seen a few of these totes I've made over the last 18 months. Initially, I designed one for myself as a simple last-minute bag to take with me on a trip. Since then, I've made a few others as gifts for friends, each time refining the design.  Finally, an Instagram follower commented "Please tell me you are making a pattern for this! I want to make one!"

Well, my friends. Ask and you shall receive. That IG follower even offered to pattern test for me and she made a beautiful tote! Here's my latest version that appears on the pattern cover. I made it with the gorgeous Rifle Paper for Cotton and Steel Alice in Wonderland linen blend and the most perfect shade of fuschia cork fabric that I was able to purchase at my LQS. In the pattern, I list various sources for materials you'll need to make this tote.

Finished size: 16" wide across the top x 13" high x 5.5" deep at base

There are fully illustrated and thoughtfully explained instructions for creating a zipper window like you see here. You'll also learn how to install a magnetic snap if you haven't tried that yet! This LEVEL TWO TOTE is so named because there are a few potentially new skills to learn, but also for that bottom level fabric that is chosen for durability and wash-ability. I've suggested waxed canvas, cork, vinyl or lightweight hide. My next one will be made with leather!


I've been using my original tote as my everyday purse and it is perfect for me. I wanted an uncomplicated bag that didn't have too much structure or fancy hardware detailing. This tote has plenty of room to accommodate a few extra things picked up during the day (like, for instance a yard of fabric, 5 FQ's or a couple of skeins of yarn.....ahem).


There is no central bottom seam and the leather handles are securely riveted on; both details that really increase the strength and durability of this bag. I regularly carry a full water bottle, heavy wallet, sunglasses, chequebook, iphone, car keys and a few pens around in mine. There's an internal slip pocket with two pen slots and the external zip pocket is large enough for your cell phone.

I hope you'll try one for yourself (and then make lots more as gifts!). It's an afternoon or evening project that only requires 6 rectangles of fabric! For real! 

Special thanks to Jackie and Eileen for testing this pattern so thoroughly for me!

Tuesday, February 21, 2017

The Penultimate Lonestar

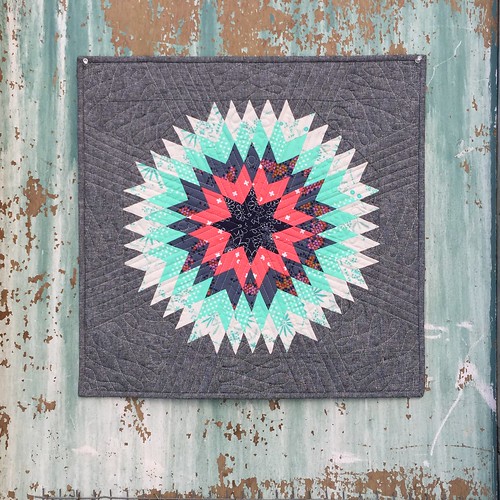
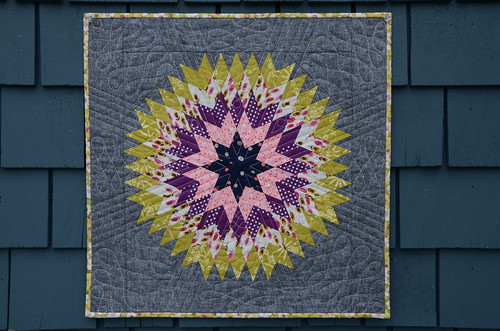
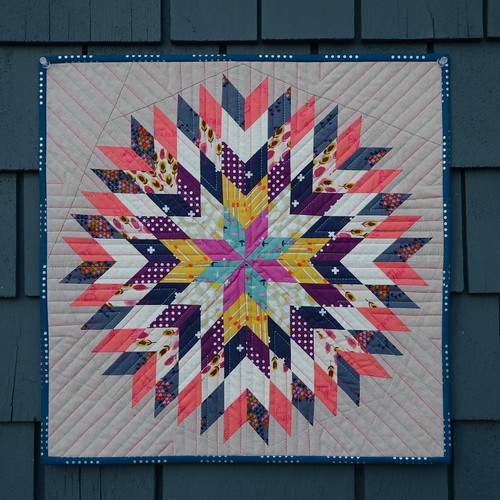
Just a quick share of this mini-Lonestar Circle quilt I recently finished up on a retreat. You've seen a few of these here before. This particular one has been lying around in my sewing room in pieces since the Alaska Cruise almost 2 years ago. It was time to get this UFO pieced, quilted and bound!  A friend once indicated that she wanted to make one, but she's a busy gal and I know she's got plenty of her own ideas brewing, so I gifted her this one for her sewing room wall.

You can find the pattern in my book Make It, Take It. The original quilt was designed by Lynne Goldsworthy and I've shared cutting instructions to make this mini version here.

Lonestar Circle mini by Poppyprint
made with Cotton & Steel, Essex Linen and quilted with Aurifil 40 wt thread

It just so happened that the chicken coop on the retreat property was painted a perfect colour as a backdrop for this quilt.  Lucky me!

This is the penultimate because there is still one more full sized version awaiting quilting in my sewing room. It's a Christmas one, so I have time....

Tuesday, December 13, 2016

Improv Christmas Pillows

First things first: WE HAVE SNOW!!!! Happy dance.

Ok.

Over the past two + years I've been making these little improv trees with samples of Improv Under the Influence piecing from my workshops. After demonstrating the technique to students using these beautiful Oakshott fabrics (leftover from my Chess on the Steps quilt), I would then piece sections into little trees with an Essex linen background. It was a great way to show people alternate ideas for the piecing.  I'd been contemplating a modern table runner, but settled on pillows instead. I finally pieced the tops together at one of my recent day retreats.

improv Christmas pillows by Poppyprint

The compositions needed a little something, so I added the tiny wonky stars, which are so much fun to make. Both pillows are totally reversible, each with a strip of improv piecing on the back. I tackled invisible zips for the first time after finally finding my special invisible zipper foot (if any of you have a newer Pfaff, you'll know that this clear plexiglass foot is itself pretty invisible in whatever container you store it in!). I typically bind my pillows, but I think I'm a convert now. It was super easy! There are plenty of tutorials online, but I like Katie's succinct one here.

improv Christmas pillows by Poppyprint

The pillow tops and backs were squared to 20" and backed with fusible fleece (no fabric backing or lining in these pillows). I quilted the fronts with straight vertical lines about 1/4" inch apart using coordinating 40 wt. Aurifil thread in green and red. The backings are quilted with lines 1" apart in the Essex and 1/4" apart in the improv strips.

improv Christmas pillows by Poppyprint
(I've just gotta say, taking photos in winter here is so hard. It's either light-sucking grey overcast or brilliant sunshine and shadows!)

Most of my handmade Christmas decorations in the living room are 12 or more years old and tend towards folksy designs that were popular in the shop I was working in at that time. I'm loving this modern update, although the pillows are bit incongruous with our 100 year old cottage!

I hope you are enjoying your holiday gift-making, decorating and baking. I've seriously cut back on baking the last couple of years and I must say, it is incredibly liberating. I'd much rather sew gifts. I think I have the only family that left cookie exchange bounty untouched on the kitchen counter for weeks! My mom kindly sends our Christmas dessert of plum pudding, so I'm even off the hook for that.
If I don't make it back here before the 25th, Merry Christmas and happy  holidays to all of you! Thanks for another year of hanging out with me here at Poppyprint. xoxoxox

Thursday, May 12, 2016

Sew Together Bag for #MayisforMakers

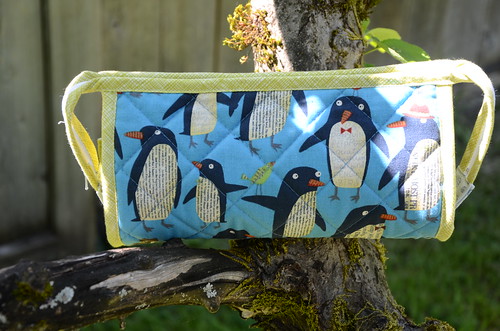
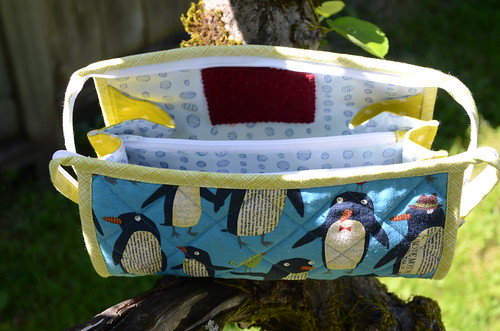
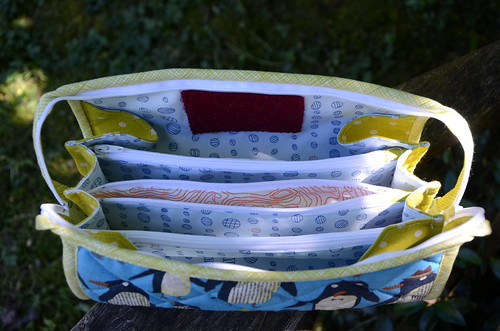
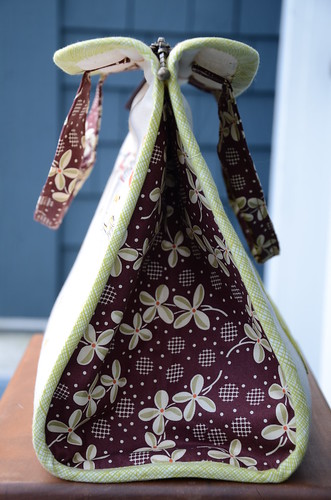
What a satisfying project!! I can't believe it has taken me so long to jump on the bandwagon and make this super cool and useful Sew Together bag.  I'm sure one day I will make more, but for now this one is for me and I just love the clever design of it.

DSC_1174

The penguin linen blend was a long ago purchase from SewMeASong that's been curing in my stash awaiting the perfect project. Seriously, these guys are so cute!  I used linen mochi dots in lime for the side panels and two Carolyn Friedlander prints on the inside and pocket linings. The binding is a favourite of mine: Heath in green from Alexander Henry. I quilted the outside panel to byAnnie's Soft and Stable to give the bag body and prevent it from collapsing when it was loaded with stuff and unzipped.

DSC_1175

DSC_1177

When I posted a progress shot on retreat, a friend shared her brilliant tip of hammering the side seams of the linen prior to attaching the binding (really! With a hammer!). This was a lifesaver to achieve a relatively even binding application, because all of those linen layers are really thick! I sewed this project on my Juki (if you have one, then you know how small the stitchplate hole is) and in the final inch of stitching the zipper ends to the bottom edge, I bent one topstitch gold-eye needle and broke a second. Yikes.  Not bad, though, considering all of those layers that easily divert a lesser quality needle on it's way through.  Ironically, the "thick fabric" stitch plate that I've had on back order since last November was in the mail pile awaiting my return home from retreat.

I found the photos in the posts from this sewalong very helpful when putting the pockets together.

I'm still searching for my week 2 indie pattern purchase for #mayisformakers...what are your favourite indie patterns?

Saturday, January 23, 2016

Your Maker's Tote

Yes, this could be YOURS!

Noodlehead Maker's Tote by Poppyprint

I've just completed this adorable Maker's Tote, designed by Anna Graham of Noodlehead. It is a wonderful pattern that is really pretty straight forward and easy. There's no turning, no squashing of batting/interfacing/outer bag and long handles through tiny lining openings. The trickiest part is sewing the bias binding on the bottom corners, but slow and steady (and Clover Wonder Clips) win the race!

Noodlehead Maker's Tote by Poppyprint

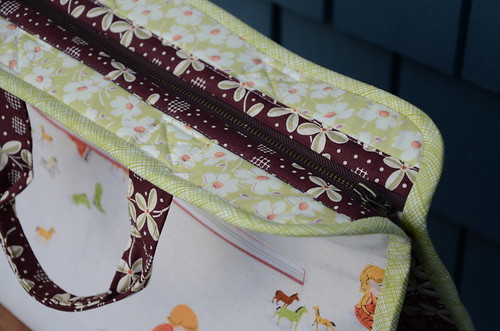
There's a slick zipper installation (optional magnetic snap instructions for those folks nervous of sewing straight lines that will show on the outside of the tote).  You use an opening zipper for a true wide-mouth bag that you could probably stuff a baby quilt into. It's size large for sure!

Noodlehead Maker's Tote by Poppyprint
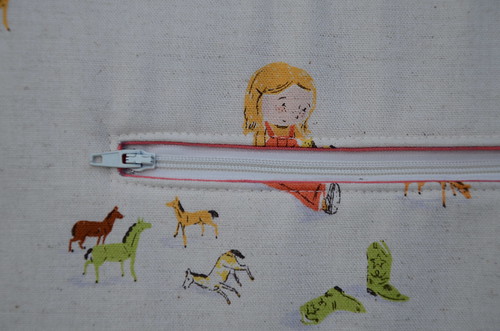
There's another zip pocket on the back side of the tote!

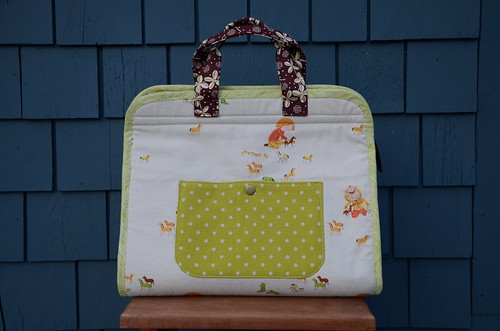
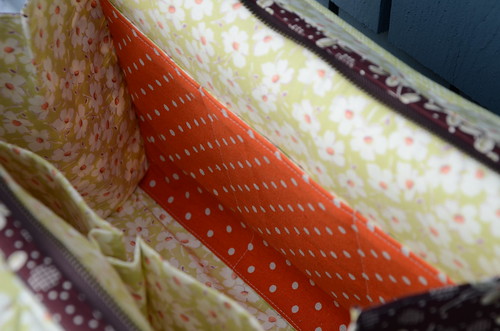
I used the adorable Heather Ross print in linen for the outside. After all, what crafty maker can't relate to the creativity of little girls playing with their horses? A Denyse Schmidt  print for the side panels and handles, a Mochi linen dot for the inside slip pocket and an older, sweet Amy Butler print for the lining. The body of the bag is supported ByAnnie Soft and Stable. I chose special fabrics that I love because I'm sharing this bag with one Lucky Maker!

Noodlehead Maker's Tote by Poppyprint

Noodlehead Maker's Tote by Poppyprint

I hope to get around to making another for myself, but first I'm going to stuff this one with about $200 worth of gorgeous modern fabrics from my generous blog partners and a bunch of gifts from me. This will be the prize for my epic 5K follower giveaway on Instagram! If you're not on IG, I'm sorry that you won't be able to win, however there will be another fun giveaway right here around Valentines Day just for blog followers. Everybody gets a chance, just as soon as the prizes arrive and I can photograph everything in it's epicness. 


Wednesday, October 28, 2015

Lonestar Circle Variations

I'll be teaching Lynne's lovely pattern to two local guilds in the coming months and I offered workshop participants the choice of making a mini, or the full sized version that appears in Make It, Take It.  I thought some of you with the book might be interested in trying a mini version yourselves, or a full-sized two-colour variation like my Tinsel version (see below). This blog post is really meant as a reference for folks who have the book and are looking for options. It is not directions on how to make the quilt.

Read on for fabric and cutting guidelines for these two fun variations!

Mini Lonestar Circle 20" square

Lonestar Circle mini by Poppyprint

If you'd like to make a 20" mini version where the colours radiate out from the centre as in my sample above (in other words, each 'round' of the star is made up of the same fabric), then you only need F8's of the first 3 fabrics starting from the centre, a FQ of the 2 outermost fabrics and a 2/3 metre of background/border. Cut the number of 1 1/2" strips from the longest side of your fabric as indicated in the chart below. Make all eight of your star wedge segments identical.


 FABRIC #
1 ½” STRIPS
1 (star centre)
2
2
4
3
5
4
6
5
7
Background
3 (WOF long)

In addition, from the background fabric, cut 2 strips 3" for borders and 2 strips 2 1/4" for binding. You'll also need two 6" squares cut in half on the diagonal for your corners.

Two Colour-way star

Tinsel Lonestar Circle

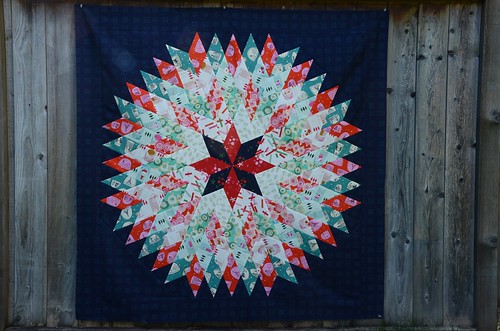
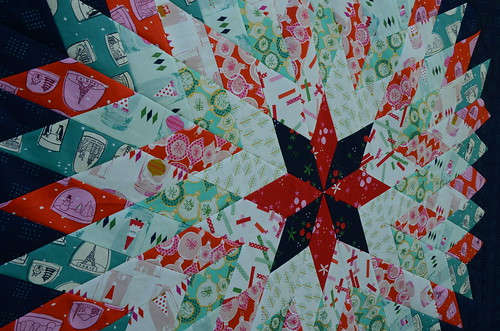
The full-sized version I made above has alternating red/green lights and darks. Similar to the quilt in the book, I alternated light and dark fabrics in radiating rings of the star, but I limited my colours to red and green. To do this, I made 4 strip sets of all red fabrics starting with dark red as fabric #1, then light, dark, light, dark, background.  I made 4 similar sets using all greens (well, in the photo you can see I used navy for fabric #1), so navy, light green, dark green, light green, dark green, background.  Then when I pieced the 8 star wedges, I alternated red and green strip sets.

Tinsel Lonestar Circle
Okay, so some of my "light reds" and "light greens" are actually cream prints, but you get my drift.

For this two-colourway version you need 3 dark prints and 2 light prints of each colourway for the star and the same amount of background/border fabric called for in the book. I had 1/2 yards of these Tinsel prints, but there was a ton of fabric leftover.  Here's an idea of what you actually need if you are buying yardage at your local shop:

FABRIC # (#1 is centre star)
  3 ½” STRIPS x WOF
YARDAGE* REQUIRED
1 (dark red) & (dark green)
1 each
0.20 m or 1/5 yard each
2 (light red) & (light green)
1 each
0.20 m or 1/5 yard each
3 (dark red) & (dark green)
2 each
0.30 m or 1/3 yard each
4 (light red)& (light green)
2.5 each
0.4 m or 1/2 yard each
5 (dark red) & (dark green)
3 each
0.4 m or 1/2 yard each
Background
7
       See Make It, Take It
*these are generous amounts that allow for an extra strip in case of cutting error.

All of this will likely read as a foreign language if you haven't got a copy of Make It, Take It and read the pattern!  

Thursday, October 22, 2015

They're Golden!

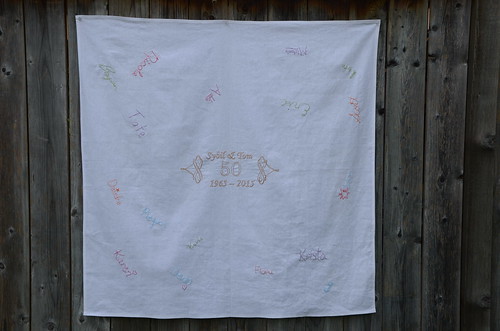
You may recall that in July my family attended a special reunion in Nova Scotia. My three siblings and I, our spouses and children all joined my parents to celebrate their 50th wedding anniversary.  The four families chipped in and gifted my folks a weekend in Niagara-on-the-Lake complete with tickets to a musical.  I wanted to do something a little longer lasting, though.

>50th anniversary table cloth

I made them a fun quilt for their 40th anniversary featuring hand drawn and crayon-coloured blocks by most family members. That quilt hangs proudly in our family cottage.  This time I opted for an embroidery project.  I hemmed a yard of white Essex linen and took it along to Nova Scotia with me for everyone to sign using a Frixion pen.

50th anniversary table cloth
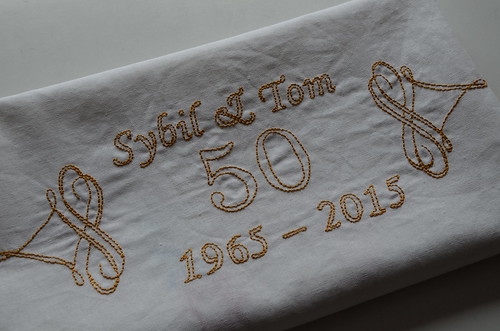
My parents are the original Sybil and Tom...I'm sure Downton Abbey fans will ask ; )

The middle dedication was prepared in Word, printed and then simply traced onto the linen. The flourishy thingies I found in free clip art online.  I first tried to stitch it with metallic embroidery floss, but that was a disaster. It looked awful, I couldn't knot it without huge lumps and the metallic threads frayed off the rayon core thread like crazy.  Luckily a friend provided this gold coloured rayon floss that worked beautifully.

50th anniversary table cloth

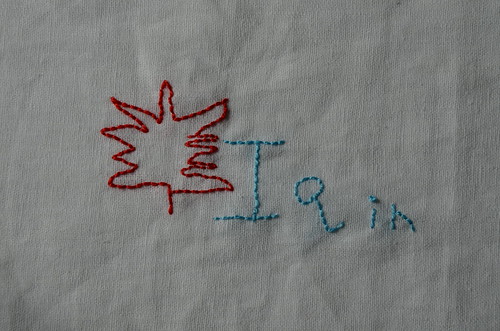
My favourite 'signature' on the table cloth is by the youngest member of our family, my four year old nephew. After writing his name, he looked up at me and said "I'm thinking about a maple leaf". I asked him if he'd like to draw one and look what he drew, from his memory! He never took the pen off the linen and looked up at me after he drew each line. Adorable.

It is a difficult thing to photograph well, but you get the idea of this gift. There is a round table in my parent's front hall that I thought this would suit perfectly, and that's where my mom has put it. They are currently cruising in luxury around Italy, Croatia and France. That sounds like the perfect way to celebrate 50 amazing years!

Monday, September 14, 2015

Stepping Stones Table Runner Samples & Teaching

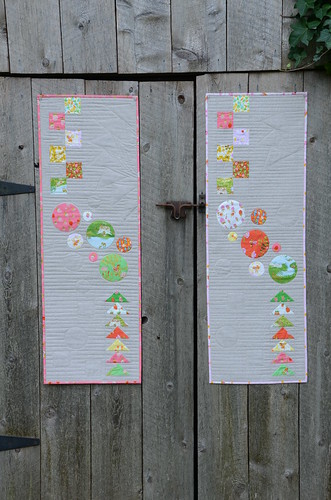
This fall is very busy with trunk shows!  I'm having a great time visiting many local guilds sharing the projects from Make It, Take It with traditional and modern quilters alike.  The table runner that I pieced for the book was quilted by Krista Withers, so after Quilt Market and my spring trunk shows I sent her that one because I knew she loved it and well, she's awesome so she should have it!  I needed to make another and why make one when you can make two?!

Stepping Stones Table Runners by Poppyprint

The combination of Essex linen and Briar Rose used in the original runner was just too sweet to pass up, so I kept everything pretty much the same when I made these two new ones. The runner sews up quickly - it is so fun to make!  I was anxious to try straight line quilting using Krista's Ghost Shape Quilting instructions in the book. PLUS, I treated myself to a new Juki TL2010Q over the summer and I figured this would be the perfect small project to give it a go.

Stepping Stones Table Runners by Poppyprint

Stepping Stones Table Runners by Poppyprint

Unfortunately, the walking foot that came with my machine was a dud and I was unable to use it. After some online research and an S.O.S. call on Instagram, I was advised by several other Juki users to just go for it and quilt using the regular sewing foot with the presser foot pressure turned right down to the lowest setting (in other words, almost no pressure on the foot). Walking foot be damned!  (Note: my dealer arranged for an immediate replacement walking foot to be sent directly from Juki and I have received it, but not yet tried it).

Stepping Stones Table Runners by Poppyprint
The circles are machine appliqued using my "Fabric Stickers" method described in my Crop Circles Table Runner tutorial on the left sidebar. I used a shortened & narrowed blind hem stitch to secure them to the quilt top.

The results were pretty darn good considering I didn't use a walking foot. Some of the straight seams show signs of drag, but I can live with that. On the second one, I stabilized those longer seams between blocks and beside the pieced sections with stitch in the ditch.  Ultimately, I'm just picky and would prefer longarm results with a home machine, which just isn't going to happen. I'm trying to lighten up and find satisfaction in a job done the best that I can do with the equipment that I have.

Machine binding on my Juki

Where the Juki totally rocked was the binding. I applied my regular 2 1/4" double fold binding to the front of the runners, then pressed it to the back, mitering the corners. Using Roxanne's Glue-Baste-It and a dry iron, I basted the binding to the back.  Then, still using the regular sewing foot I slowly and carefully stitched in the ditch from the front. The machine performed beautifully, even with the uneven thickness of fabrics under the foot (6 layers of binding fabric plus quilt sandwich under the right side of the foot and only the quilt sandwich under the left side of the foot).  With my Pfaff, the snap-on "stitch in the ditch foot" regular popped off when I tried to do this.

I'll be keeping one of these runners for my trunk shows (two more this week!) and gifting the other one soon. If you are a quilting teacher, I highly recommend this project as a complete beginner quilting class that includes: rotary cutting techniques, accurate piecing, flying geese construction, machine applique, quilt basting, marking & straight line quilting and binding.  Check out the copyright statement in Make It, Take It - as long as your students each have a copy of the book, you're welcome to teach any of the projects. Please do!


Monday, April 13, 2015

A Supertote for Superknitter

Ever have that feeling that you're being watched? Ever since my Mom figured out how Instagram works, I've had to clean up my act, haha. When B and I travelled to Italy last fall and my parents stayed here to keep the kids alive, my mom was all like "hey, how can you see pictures of the trip?" to our kids.  A few days into our travels, I got a notification on my iphone home screen: SUPERKNITTER is now following you. I instantly knew it was my mom (after all, she is Superknitter) and I laughed. She loves that she can keep an eye on her kids and grandchildren now. It's super cute because she leaves very sweet comments on all of our photos.

MG Supertote by Poppyprint

I made her a Supertote a few years ago, but because she carries everything and a kitchen sink with her everywhere she goes, a new one was required. She and my dad cruise around in a classic white MG convertible (that she gave him for their 25 wedding anniversary, and in which he drove me down the driveway to my front yard wedding ceremony).  They are part of a fun MG club that has organized drives a few times per year to various small towns and car shows. For ages she's been searching for MG-themed fabric and finally someone designed one on Spoonflower!

MG Supertote by Poppyprint

Now Superknitter can knit in style at the show 'n shines. Did you know at the big rallies they not only give trophies for cars, but last year she won a crafting award for a gorgeous cross stitch she did of their car (I'll try and get a photo to share)?  I used fusible fleece for interfacing this time to give the tote extra body. I also top-stitched and stay-stitched the handles like crazy so they wouldn't rip away from the bag. Those kitchen sinks are heavy!

MG Supertote by Poppyprint

I thought I might as well have fun and included the measuring tape fabric so that the tote didn't become too car-ish. After all, it will contain everything from hand quilting to knitting to cross stitch at some point. I used darker linen this time to help keep the bottom of the bag from showing too much dirt as I know it has to travel on the floor of the car at Mom's feet.

MG Supertote by Poppyprint
I just put elasticized pockets on one side and regular pockets on the other.

This is truly a Super Tote and I've been lugging mine everywhere, including to QuiltCon, London and Inuvik! It holds a ton of stuff and is really comfortable to carry. If you'd like to make one, get the pattern from the lovely Anna Graham of Noodlehead here.

Tuesday, January 13, 2015

Lonestar Circle Mini

When I first started blogging and participating in the quilting and sewing community on Flickr, I signed up for so many swaps. I spent almost two years sewing up mini quilts, pouches, pot holders, mug rugs and hoops for other people. Some of my very best and most creative work went out the front door and into the homes of other sewists. Swapping was super fun and I met some of my closest online friends that way, but I started feeling a little sad about some of the great work I sent away that I'd never see again.  I decided to take a break and only do occasional swaps with friends.

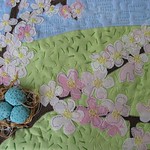
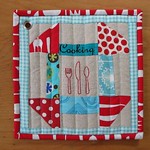
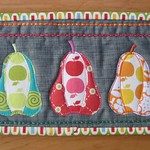
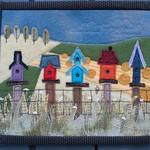
Mini QT March swap made for lmdesigns Potholder Pass 3 'cooking' 452 Poppyprint - mugrug pears 3 birdhouse fence wool mini by Poppyprint Time For Fabric Hoop by Poppyprint
Just a few of the swap items that I sent off to partners over the past 5 years.

Then Instagram took off like crazy and, similar to Flickr, communities started up through swapping again. I felt ready to jump back in and signed up for Kristi's Schnitzel and Boo Miniquilt Swap (search the hashtags #schnitzelandboominiquiltswap OR #makeaquiltmakeafriend if you want to check out the quilts on IG). Round Two is just shipping now and there are 1000 participants!  It is exciting to be a part of something so huge - I even signed up to be a swap mama to help ensure that this massive swap was a success.  Each mama has about 40 swappers to monitor and I'm super lucky because all 38 of my swappers are 100% committed to seeing the swap through. Phew!

So, what would I make for my secret partner? With my book, Make It, Take It coming out in a month's time, I wanted to try a mini-version of one of the patterns.  Lynne designed this incredible Lone Star Circle quilt for the book and used Oakshott shot cottons to make it.

Martingale - Make It, Take It
Photo from Make It, Take It by Brent Kane, Martingale 2014

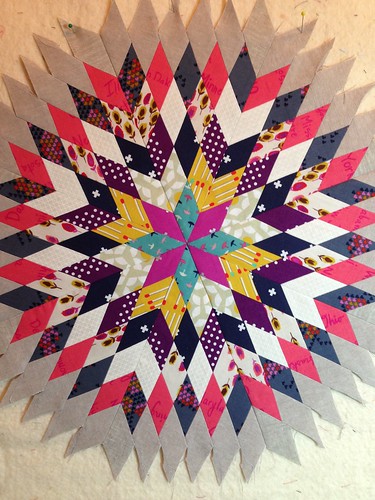
A lonestar quilt has long been on my "to try" list and this complete circle version is so eye-catching I knew it was a must.  In Lynne's pattern, the strips are cut 3 1/2".  I made a 1/3-sized version by cutting 1 1/2" strips from fat quarters (the finished mini is just under 18" square).  There is something about radiating designs; they seem to be universally loved by quilters.  Is it the symmetry? The eye-catching points?  I can't quite put my finger on it, but this little honey got more likes on IG than anything else I've ever posted!

Lonestar Circle Mini by Poppyprint
All seams are pressed open on this mini, except for the two vertical seams that meet in the middle for the final horizontal joining seam (between the two half circles). I pressed those in opposite directions so I could lock the allowances and achieve a perfect pointy centre star!

The background is Essex yarn-dyed linen in flax, and the finished quilt measures 18" square.  My swap partner seems to like radiating designs (based on her inspiration mosaic) and although this fabric wasn't mentioned in her favourite designers list, I hope the universal appeal of Cotton & Steel will make this okay for her.  I don't have any fabrics by one designer she listed and I'm going to send her the 2 fat quarters I have from her other favourite designer as extras.

Lonestar Circle Mini by Poppyprint

Lonestar Circle Mini by Poppyprint

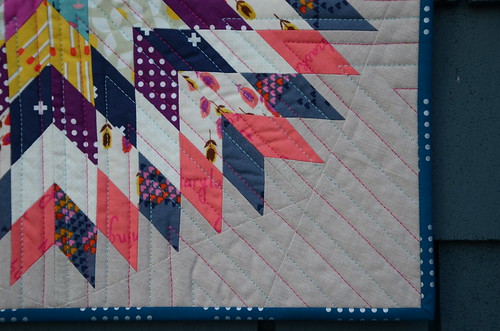
I simply quilted with straight lines and a longer stitch length (3.5 stitches/inch) using Aurifil 30 wt cotton thread in hot pink and teal to match the centre star prints.  I will freely admit that after doing so much improvisational sewing last fall, pin-matching all of those points nearly drove me bananas, but the effort is well worth the results!  In the book, I explain how to correctly pin-match angled seams so that you end up with perfectly pointy-points.

Lonestar Circle Mini by Poppyprint

Throughout the year I'll be making up my own versions of the contributor projects from Make It, Take It. I can't wait to share more of this book with you!  Of course there will be a blog tour (watch for that in April).  For now, set your calendar alarms for February 10th: that's the day you'll be able to order the book from  Martingale's  online shop. The bonus is that when you buy a hard copy direct from the publisher, you automatically receive a FREE digital copy, so you can take the book along on retreat or to your sew-ins on your tablet or laptop! Yay!


Monday, June 2, 2014

An Island Class

On Mother's Day weekend our son T participated in a rowing regatta on Vancouver Island. The weather was perfect and the kids had a great time at Shawnigan Lake. On the Saturday, I had a great time teaching a workshop for the Modern Quilt Guild of Victoria! I didn't realize that it was the guild's first formal workshop.  I gave them a couple of class options to choose from and they chose the 241 Bag, which is always a fun one to teach.

241 Bag Sample

People love to customize Anna's pattern and I've made so many of these bags that I'm able to work with students individually to support whatever combinations of pockets and zippers they choose.  I love seeing all of the different fabric combinations that people come up with!  For one of my class samples I paired one of my all-time favourite prints, Martha Negley Farmington feathers, with Essex yarn-dyed linen in steel.  The two look gorgeous together.

241 Bag Sample

I always like to include a fun surprise inside zipper pockets. These ones have a pop of Lizzy House pearl bracelets and I used Joel Dewberry Deer Valley rustic dots for the inside slip pocket on a lining of shirting stripes.

Summer 241 Bag Sample

The topstitching on the handle was done with a variegated Aurifil 28 wt thread that runs grey to light blue.

Summer 241 Bag Sample

I love this bag, but I think I'll include it in the items I'll be selling at the quilt show boutique later this month.  My other sample has side pockets in lieu of the slash zips, but it's not quite complete yet!

It was really fun to meet an entire classroom of enthusiastic tote-makers; for some this was their first ever tote or purse construction.  The guild president Nicole coordinated the workshop, participated AND brought a delicious lemon cake to celebrate her birthday the following day (Mother's Day!!).   

DSC_8289
Here are some of the bags at the end of class.

Thank you so much MQG Victoria - I love my super cool guild button (with killer logo designed by Berene!).  Thanks also to my lovely friend Lise-Lotte who not only hosted B and I, but joined the guild and came to the workshop, too.  It really was the best weekend. I love Victoria and can't wait to go back!

image


Saturday, December 7, 2013

A Birthday Box

After watching the Canucks win in overtime last night (on TV), I started a much-delayed birthday gift for a friend. I mean, how much time can a box pouch take anyway? It was only 10:30 on a Friday night....

I've never made one before, so I scoured the internets for available tutorials and decided to use this one by Libby. Even the lining is completely turned, so there are no exposed seams on the inside of the pouch. Just to ramp up the challenge, I decided to cut into my stash of never-used coated cottons and chose an Amy Butler print for the lining (I got mine at a shop that has since closed, but I found some for you here).  Even though I make a lot of bags, visualizing how stuff is going to turn from inside out to right side out is not my strength, so I went slowly.

Lined Box Pouch by Poppyprint

The tutorial was easy to follow with excellent photographs. The only issue I had was trying to sew over top of the zipper ends "in the same place" on both the lining and outer fabric (a luscious AMH linen interfaced with Pellon ShapeFlex, by the way).  I found this impossible due to the bulk of the pull tabs, but it's no biggie, it just means you can see stitches at the end of the zipper on the inside of the pouch.  This, of course, will make absolutely no sense to you unless you've tried to make one of these before!

Lined Box Pouch by Poppyprint

The other issue that kept me up until 1:30 a.m. was finding the right needle for the job. My stitches were lovely on the top, but when trying to sew through any seam allowances that included the coated cotton, the bottom of the work was a bit of a tangled mess. The vinyl side of the fabric was not touching the plate or foot, but just sewing through that stuff proved disastrous to my tension. I think the thread must have been sticking to the vinyl within the layers.  Finally, a topstitch 80 needle coupled with increased top tension did the trick.  See Amy Butler's tips for sewing with her vinyl coated cottons here.

Lined Box Pouch by Poppyprint 

In the rare seams where I had to sew over the right (sticky) side of the coated lining, I used a teflon foot which easily glides over the vinyl.  Apparently a piece of tape on the bottom of  your presser foot can do the trick just as well - if only I'd known before springing $25 for the Pfaff foot! I've heard of putting tissue paper on top of the vinyl can help, but then you have to pick paper out of the stitches. No thanks.  I wish I could have given the pouch a final pressing (all boxes/bags/pouches look best with a good pressing) but I didn't want to risk melting the vinyl!

Lined Box Pouch by Poppyprint

Rumour has it my friend's husband forgot her birthday today. Ouch. I'm so glad I stayed up late to make this for her!