Showing posts with label mini quilt. Show all posts

Thursday, August 16, 2018

Vancouver Special

On Saturday and Sunday August 25/26, the Vancouver Modern Quilt Guild will proudly present our second Modern Quilt Showcase. Once again, I'm coordinating the show alongside a few other dedicated guild members who've been working super hard to pull it all together. It takes an enormous effort to plan a multi-day public quilt show in a large, industrial setting. We love the Pipe Shop venue in North Vancouver because it is flooded with natural light; the wide open space featuring huge timber posts is the most perfect backdrop for our colourful, modern quilts.

Unlike most contemporary quilt shows taking place these days, we've once again decided to forego the usual "drape" approach to hanging. Our quilts will hang directly from cross bars and dowels suspended from overhead wire. Many of the quilts will have backs visible, which is also rather unusual for a quilt show. It'll be a stunning show of about 140 quilts. I really hope to see you there!

We issued a challenge to our members this time: create a modern mini quilt for the theme "West Coast Modern". The quilt must be made of solid coloured fabric and not exceed 80" total perimeter.  I'm enjoying challenges more and more these days as my confidence in designing original work increases year after year.  I've also learned that it's possible to make just about anything you like and figure out a way to make it fit the theme.
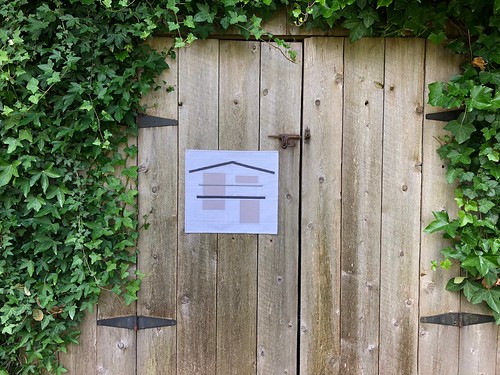
“Special” a miniquilt by Poppyprint

I considered lots of modern landscape interpretations because, well, Vancouver is a coastal city on the edge of B.C., with ocean on one side and mountains on the other. Then out of the blue, I decided to take the "modern" more literally and create a little quilted version of a well-known (somewhat controversial) house design built throughout Vancouver's east and south sides. These homes are known as Vancouver Specials: they feature two full above-ground floors built on grade, maximum square footage, shallow sloping roof, typically a kitchen on each floor, front balcony with sliding glass door, brick bottom with stucco top and an off-centre entranceway.  They often fill their city lot, leaving a small front and back yard.  The homes were built relatively quickly (some came in kits) and provided multi-generational housing that suited the influx of new Canadians to this city who were used to living this way in their home countries and cultures.  While not the most attractive homes, they served an important purpose: to welcome new families to Vancouver and provide affordable housing in a rapidly growing urban area.

Image result for vancouver special images

As families have aged out of these neighbourhoods, many of these 70's built homes have been purchased by younger professionals and renovated into expansive, spare modern spaces for family living. There is even an annual home tour featuring such houses.

Related image
image source: weloveeastvan.com

I created my little version entirely with Oakshott shot cottons and quilted it with the new Aurifil longarm 40/3 cotton thread on a cone. I love the weight of this thread for quilting!  I'm thinking more and more about minimalist design and trying it out. This may be my first step...making this quilt a true challenge for me. It's definitely one aspect of modern quilt design that I find the most difficult to wrap my brain around.
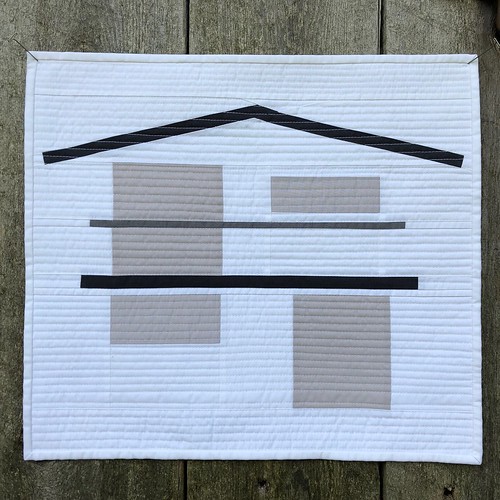
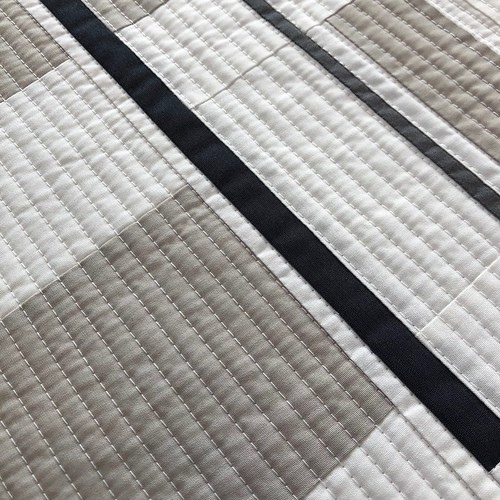
“Special” a miniquilt by Poppyprint

“Special” a miniquilt by Poppyprint

I sewed a little sleeve and label on the back yesterday. My mini is all ready for the showcase. To make the mini challenge even more fun, we'll be asking visitors to vote on their favourite. The quilt with the most votes will receive the most beautiful miniature ribbon, handmade by a guild member.  All other quilts in the showcase are also up for Viewer's Choice ribbons, so please come by, enjoy some incredible modern quilts, buy a lucky raffle ticket on our charity quilt and vote for your favourites.

VMQG Modern Quilt Showcase
August 25, noon  - 8:00 p.m.
August 26, 10:00 a.m. - 5:00 p.m.
Admission: $5, children <12 free="" p="">

The Pipe Shop, 115 Victory Ship Way, North Vancouver, BC
 (just one block east of the Lonsdale Quay Seabus Terminal)
Accessible with washrooms onsite
Free parking nearby in the ICBC parkade, pay parkade at the Pinnacle Hotel & Lonsdale Quay.
1 hr and 2 hr free street parking in the neighbourhood


Wednesday, April 19, 2017

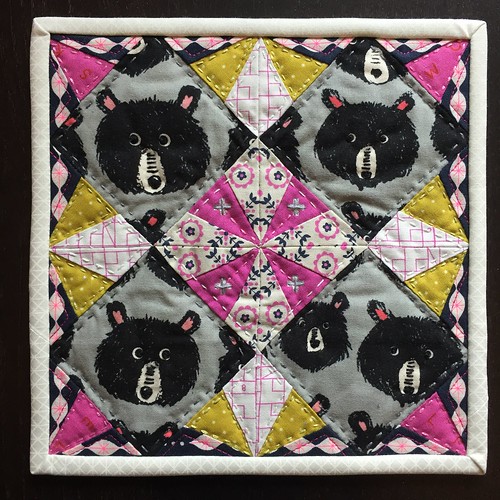
Peekaboo Bears - a Mini-Mini Quilt

I thought you'd like to see the completed mini-mini quilt that I started while on my trip to Australia. I posted some in-progress photos and more info about the pattern here.

It is mostly hand quilted with perle cotton, although I did do one outlining machine stitched line using 30 wt Aurifil in hot pink in that navy border. The binding was sewn on by machine and hand tacked to the back. Sadly, my hand-piecing accuracy is not the best (it's been ages since I did much hand-piecing) so most of those pretty points were lost around the outside, but I think overall it's still adorable. I hope my partner in the Ottawa MQG likes her little bears.  All I know about her is that she shares my aversion to brown and she likes Cotton & Steel fabric...this is 8" x 8" of 100% C&S!

Peekaboo Bears by Poppyprint

I embellished all of the bear eyes with a french knot - so cute!

I really enjoy participating in the swaps we do at VMQG because they tend to be small, manageable projects with a generous time frame to complete them. I'm thankful for the volunteers that take on the organisation and planning; in this case Amy. Our guild ships everything in one go (or sometimes we get lucky with a traveller who can personally deliver the goods). The rules for this one were "make a mini-mini quilt that has an outside perimeter of less than 48 inches". Perfect!!

If you've read Poppyprint for a while, then you know I used to swap like a fiend back in the Flickr days, starting with the famous Doll Quilt Swap.  I think one year I did over 10 swaps and learned many new things every time. Making stuff especially for another person according to their wishlist can be a really fun challenge.  Although I love participating, sharing and receiving beautiful handmade things from around the world, I try to limit myself to one or two a year now and that seems to be the perfect amount. Guild ones are great fun and it's especially fun to connect with other Canadian groups.

How about you...swapping anything these days?

Saturday, May 14, 2016

Geode - a Mini Quilt

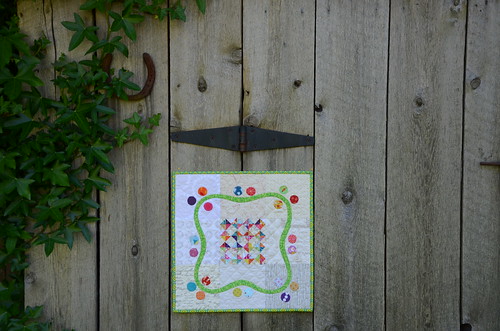
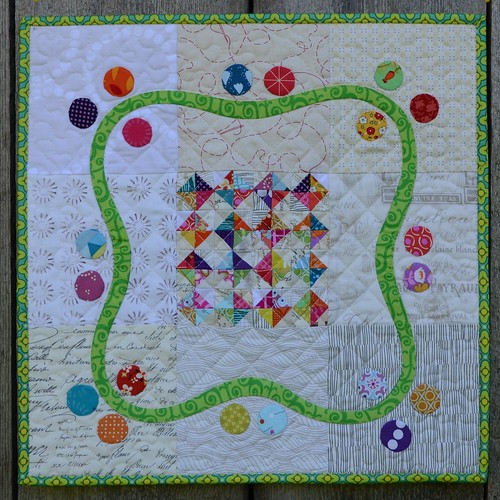
This sweet little expression of colour reminds me of the crystals you find inside a geode.  On the outside, a geode is typically a non-descript round-ish grey rock. However on the inside, if you are lucky when you smash it open with a hammer, you discover a tiny magical world of perfect crystals. Typically quartz (often purple amethyst), calcite or dolomite crystals form over hundreds or even thousands of years as water trickling through a cavity in the ground leaves behind the mineral components as crystalline deposits.

DSC_1162

I was starting to feel like this little project was taking a geologic amount of time to complete. After all, it is only 15" square and it has been two years in the making!  Why do we do this to ourselves? Delay finishing a project when really, there is only another hour or so required to get it done? If you've got a better answer than good old fashioned procrastination, please share so that I can learn and stop doing this!
DSC_1159

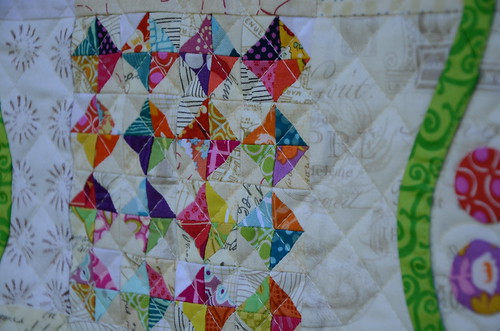
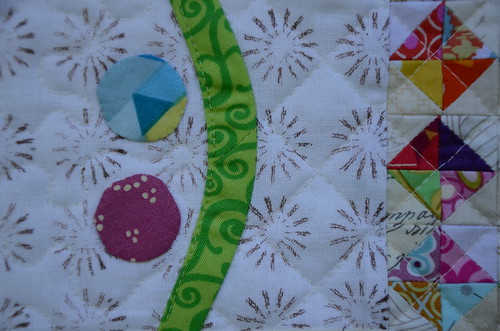
The center block of 'crystals' are teensy little two-fer triangles cut off the corners of this project. Each half square triangle measures 1/2" finished.  I pieced them together to form colourful little square in squares without an overall quilt design in mind.  Next, I created a 9-patch by adding low volume squares around the crystal block. I even used a precious piece of poppyprinted white linen I found in my scrap drawer. Gradually, more ideas came to me and I settled on the green bias tape (appliqued using this method) to frame the little block. I used a flexible curve ruler to draw the wiggly shape on the low volume background fabrics with a pencil (the line is covered by the tape when it is folded over).

DSC_1160

Realizing the quilt wasn't yet finished, the tiny circles were hand-appliqued on. Then this poor little quilt top sat for over a year. Sometimes on my design wall. Sometimes thrown over a pile of other fabric on top of a cabinet. Many times folded up and brought to retreat, only to remain folded up until I got home.  FINALLY, last week Geode made it to the basting, quilting and binding stage. Phew.

Geode by Poppyprint

This little gem (couldn't resist) is going in the mail as a reciprocal thank you gift for a special friend who surprised me with her generosity once. 

Tuesday, November 17, 2015

The Nut House

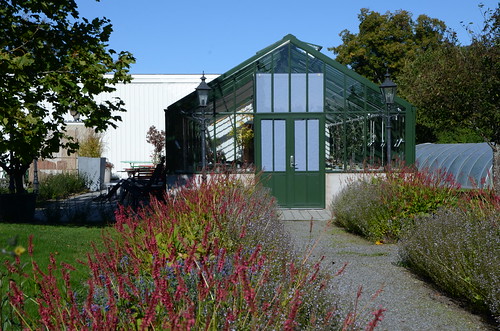
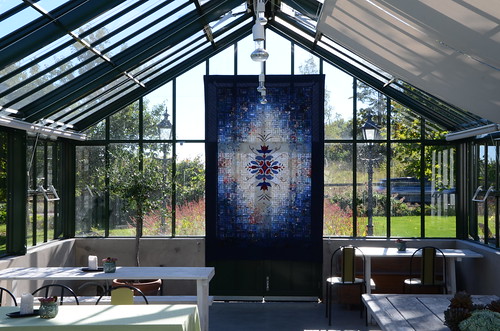
Another first from my visit to Sweden: a quilt exhibit in a greenhouse!  As a special side-trip the day before the Rikstäcket annual meeting began, one of the guild members exhibited some of her work at a greenhouse/tea room called The Nut House close to Upplands Vasby (the town where we stayed for the meeting).

DSC_0881

It was a lovely sunny afternoon and a few of the Board members took me to see the exhibit before the large bus tour of guild members descended on the place. Anna-Greta Lindstrom displayed several of her art quilt wall hangings and had this gorgeous watercolour quilt hung at the end of the greenhouse. This quilt was on display at the Festival of Quilts in Birmingham (perhaps last year?) and with the sun shining behind it, the quilt took on the appearance of a stained glass window.

DSC_0887

To celebrate a milestone birthday, Anna-Greta was selling lottery tickets for a chance to win one of 5 wallhangings she's made over the years. All of the money raised would go to Medicines Sans Frontiers - I thought this was a brilliant idea, so I bought a ticket. She promised to post a quilt to Canada if I won. Well, guess what?! I won! I don't have a photo of the quilt yet, but I'll share it when we get some light here and I can take a decent photograph. Here are two of her other creations that were on display:

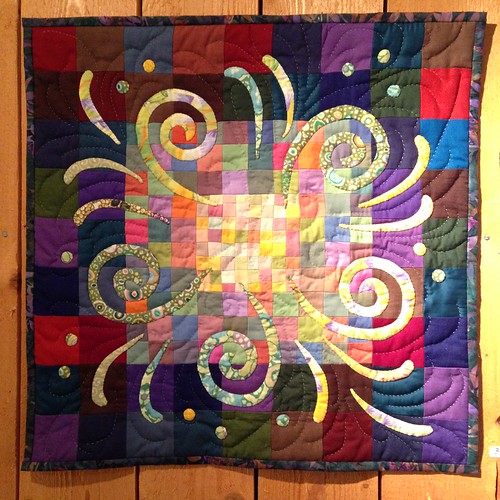
Anna-Greta Lindstrom Quilts
"Energin Kommer Inifrån" I love the fun Kaffe Fassett swirls overlaid on the solid grid background 

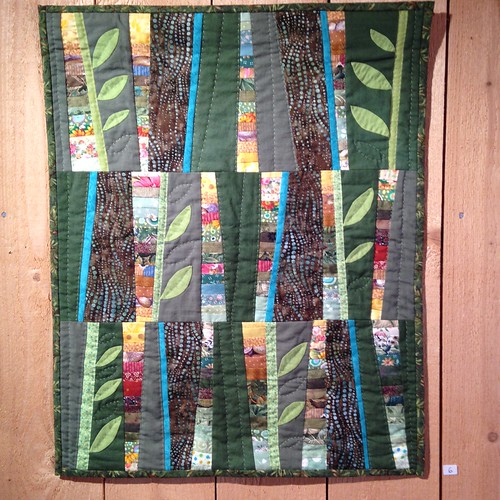
Anna-Greta Lindstrom Quilts
Here is a great example of batik playing nicely with printed cottons in a beautiful forest abstraction.

Anna-Greta Lindstrom Quilts
Sweet stitched details and applique from the quilt above.

I took an opportunity to walk the property, look in the garden shop and take some photos from the working greenhouse, which was by now winding down for autumn.

DSC_0873

DSC_0863

DSC_0868

DSC_0861

DSC_0859

DSC_0876

DSC_0860

DSC_0852

DSC_0856

DSC_0880
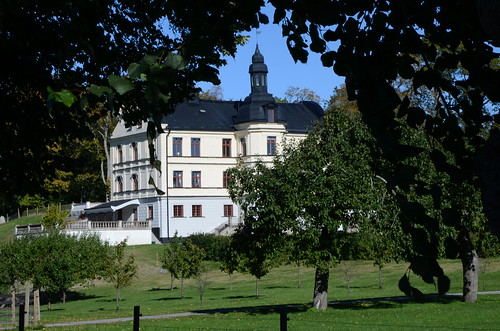
This country estate was next door to the Nut House, but I couldn't find out any information - I was curious how old the home was, but the two properties are not linked according to the woman working in the greenhouse that day.

I've almost caught up and completed my Sweden posts, but the stories of my trip to the north, as well as photos from my workshops, are still to come. Plus, you still have to see the beautiful quilt my new friends gifted me!!

Wednesday, October 28, 2015

Lonestar Circle Variations

I'll be teaching Lynne's lovely pattern to two local guilds in the coming months and I offered workshop participants the choice of making a mini, or the full sized version that appears in Make It, Take It.  I thought some of you with the book might be interested in trying a mini version yourselves, or a full-sized two-colour variation like my Tinsel version (see below). This blog post is really meant as a reference for folks who have the book and are looking for options. It is not directions on how to make the quilt.

Read on for fabric and cutting guidelines for these two fun variations!

Mini Lonestar Circle 20" square

Lonestar Circle mini by Poppyprint

If you'd like to make a 20" mini version where the colours radiate out from the centre as in my sample above (in other words, each 'round' of the star is made up of the same fabric), then you only need F8's of the first 3 fabrics starting from the centre, a FQ of the 2 outermost fabrics and a 2/3 metre of background/border. Cut the number of 1 1/2" strips from the longest side of your fabric as indicated in the chart below. Make all eight of your star wedge segments identical.


 FABRIC #
1 ½” STRIPS
1 (star centre)
2
2
4
3
5
4
6
5
7
Background
3 (WOF long)

In addition, from the background fabric, cut 2 strips 3" for borders and 2 strips 2 1/4" for binding. You'll also need two 6" squares cut in half on the diagonal for your corners.

Two Colour-way star

Tinsel Lonestar Circle

The full-sized version I made above has alternating red/green lights and darks. Similar to the quilt in the book, I alternated light and dark fabrics in radiating rings of the star, but I limited my colours to red and green. To do this, I made 4 strip sets of all red fabrics starting with dark red as fabric #1, then light, dark, light, dark, background.  I made 4 similar sets using all greens (well, in the photo you can see I used navy for fabric #1), so navy, light green, dark green, light green, dark green, background.  Then when I pieced the 8 star wedges, I alternated red and green strip sets.

Tinsel Lonestar Circle
Okay, so some of my "light reds" and "light greens" are actually cream prints, but you get my drift.

For this two-colourway version you need 3 dark prints and 2 light prints of each colourway for the star and the same amount of background/border fabric called for in the book. I had 1/2 yards of these Tinsel prints, but there was a ton of fabric leftover.  Here's an idea of what you actually need if you are buying yardage at your local shop:

FABRIC # (#1 is centre star)
  3 ½” STRIPS x WOF
YARDAGE* REQUIRED
1 (dark red) & (dark green)
1 each
0.20 m or 1/5 yard each
2 (light red) & (light green)
1 each
0.20 m or 1/5 yard each
3 (dark red) & (dark green)
2 each
0.30 m or 1/3 yard each
4 (light red)& (light green)
2.5 each
0.4 m or 1/2 yard each
5 (dark red) & (dark green)
3 each
0.4 m or 1/2 yard each
Background
7
       See Make It, Take It
*these are generous amounts that allow for an extra strip in case of cutting error.

All of this will likely read as a foreign language if you haven't got a copy of Make It, Take It and read the pattern!  

Tuesday, October 20, 2015

Tiny Quilts and Inspiration

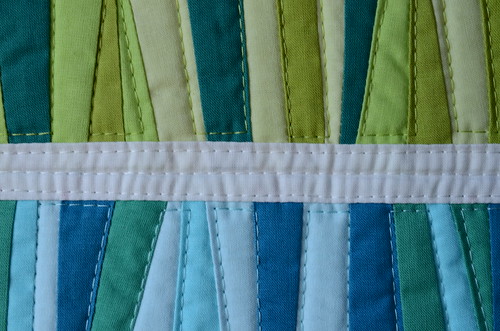
August was my "me" month. I didn't have any deadlines or commitments, so I kept sewing plans loose. My thought was to spend some time reading, researching and re-grouping.  I decided to work on two small projects for the American Made Brand Solids Tiny Quilt Challenge.  I really like the concept of the AMB company (read all about their "farm to fabric" process on their website).  Two small (less than 15" sides) and original compositions sounded like a fun exercise.

In order to qualify for the challenge, quilts had to be made of 100% AMB solids. I had some pastel and grey fat quarters purchased at Island Quilter a couple of years ago and two rainbow mini-charm packs (2 1/2" squares) from QuiltCon 2015 at my disposal.

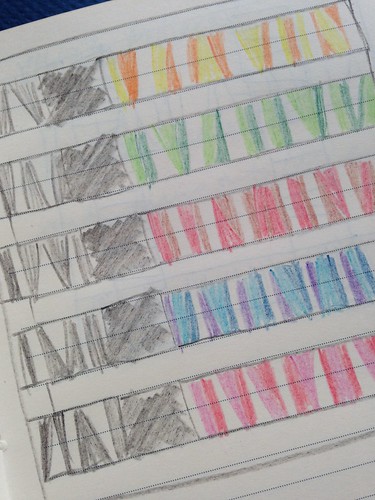
Still working on exploring ideas with my Improv Under the Influence piecing technique, I thought I'd give it a try with the 2 1/2" squares. I didn't have a a concrete idea of what I would do with improv-pieced border units in rainbow colours, until one day inspiration struck in the form of a photo on Instagram. Heather Jones posted a detail shot of a log cabin, showing the horizontal logs separated by white chinking. On the left side of the image, you saw the rounded square ends of the logs forming the adjacent wall.  I grabbed my sketchbook and drew this:

"The Five" sketch by Poppyprint

Looking at those rainbow stripes reminded me of some a quilt block I'd seen on Instagram. It was made by Susanne Woods (craftyeditor) for the #lovewinsquilt project, commemorating the landmark U.S. Supreme Court decision in June that effectively legalized same sex marriage.

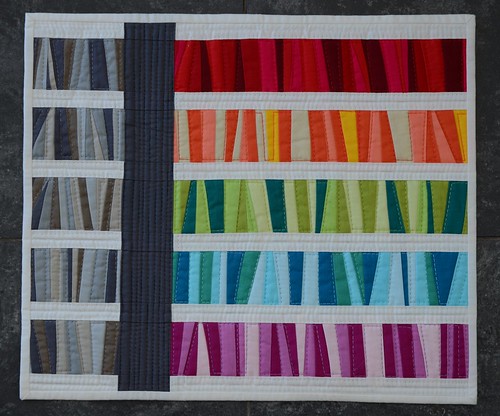
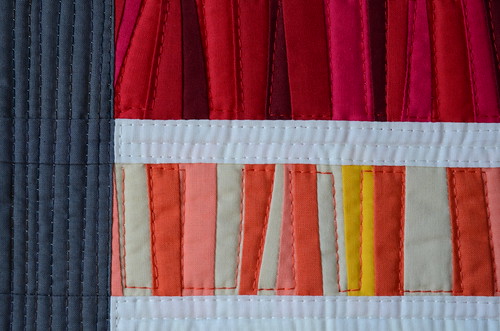
After having a lot of fun piecing skinny strips with tiny 1/8" seam allowances, I came up with this final composition, which I call The Five, measuring 12 1/2" x 14 1/2". It represents the five Supreme Court Justices in their sombre robes, their weighted decision, and ultimately their landmark ruling for equality. Not everyone is happy about this decision, in fact I lost about 20 followers on IG after posting the story of this quilt. Quilters have been using their art to honour their values and commemorate important milestones in history for over 100 years and I'm excited to make my own tiny contribution to this tradition.

The Five by Poppyprint

The Five by Poppyprint

The Five by Poppyprint

With coordinating Aurifil thread in 30 wt, I quilted straight lines with a 3.5 stitch length, simply following alternate seams in the pieced strips as my guide. 

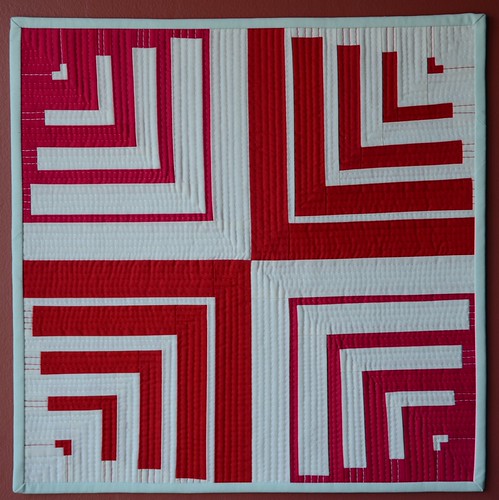
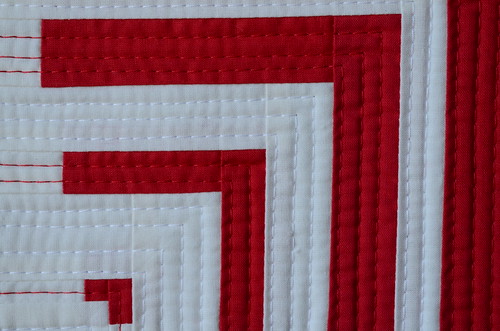
Somewhere along the way, I got to thinking about rounded squares and sketched a few ideas for achieving the look with a log cabin construction. It took quite a bit of math! In order to make The Five, I had to drive across the border to buy reds as there weren't any in the mini charm packs I had. With left over hunks of tomato red and fuschia, I made this Long Cabin Study 1 quilt, which is 15" square.

Log Cabin Study 1 by Poppyprint

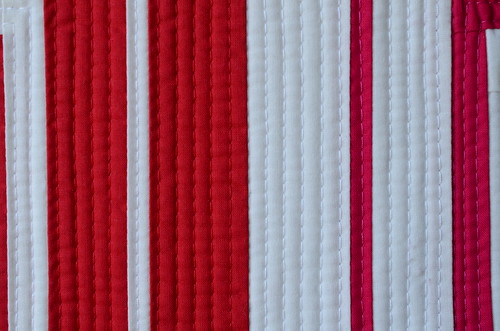
The binding had to be AMB also, so my options were limited and ultimately I chose this pale mint colour over dark grey. Again, I quilted with coordinating Aurifil 30 wt thread and a long stitch length on my new Juki  TL2010-Q (using the regular sewing foot with minimal pressure, since the walking foot that came with my machine was faulty).

Log Cabin Study 1 by Poppyprint

Log Cabin Study 1 by Poppyprint

You can see that I carried the thread right through to the edges of the quilt over the alternate coloured fabric.

This quilt wasn't selected, either. I've since made another one in a slightly larger size where the proportions work even better for the secondary pattern of the rounded square. I'll share that with you next and I think I'll create a pattern for a bed-sized version because I just love the bold colour study and resulting graphic design. I find it reminiscent of those illusion text fonts with 'unfinished' letters that your eye automatically completes so that you can read the words, like this one by German designer Alexander Tibus where letters are defined by their shadows.


I've just returned from a wonderful long weekend of teaching in Juneau, Alaska and have lots to catch up. I'll work on my Sweden photos this week and share those with you soon!


Monday, September 21, 2015

Flickrfaves

Ahhhh, the good old days. The days when we all hung out on Flickr, sharing our photos, participating in conversations and sending our happy little mini quilts, pouches and mugrugs to far away friends in swaps.  Angela started a new hashtag on Instagram for showing our old #flickrfaves photographs to new friends who may not have been on the quilting scene back then.  I know not all of you use Instagram, so I thought I'd repost some of my older work that you may not have seen before (also, most of what I'm making these days I can't share quite yet because they are for challenges or gifts or publication in the future).

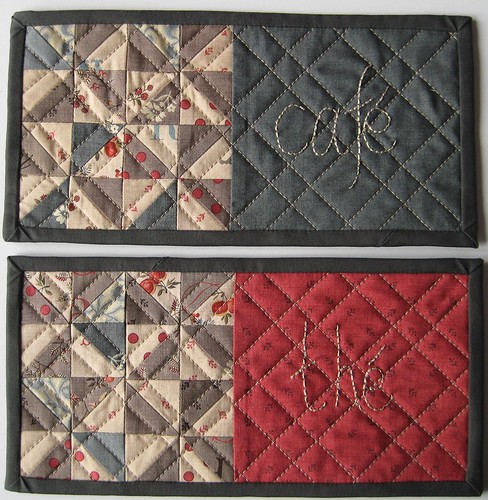
Les Petites Mugrugs2 by Poppyprint

Remember when we all started making Mug Rugs? These were two I put together with some leftover "twofer" corners cut off from some flying geese for another projects. All French General fabric. January 2011

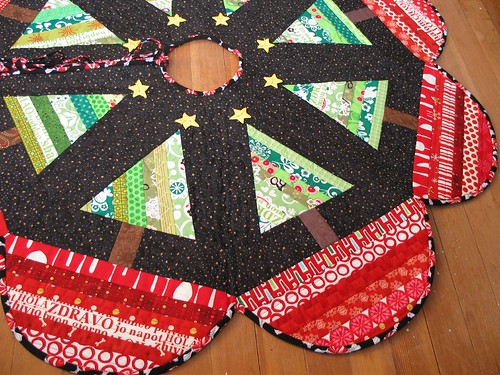
300511 black - starry night treeskirt complete- by Poppyprint

This was one of two tree skirts I made using a pattern by Carol Turznik (mamacjt on Flickr). Carol kindly granted me permission to teach this as a class and it was a lot of fun! December 2010


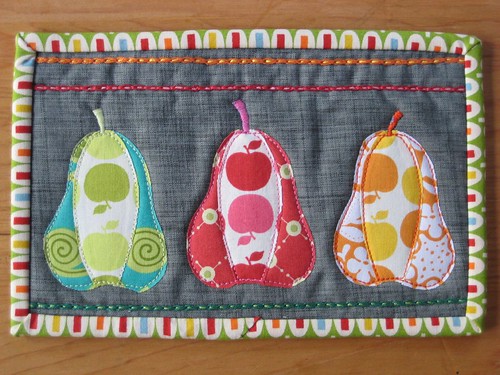
Poppyprint - mugrug pears 3

Here's another mug rug made for a Flickr swap, September, 2010. This pear design went on to become a  bolster pillow pattern published in Stitch magazine.

Spring Fling mini QT for lmdesigns (March '10)

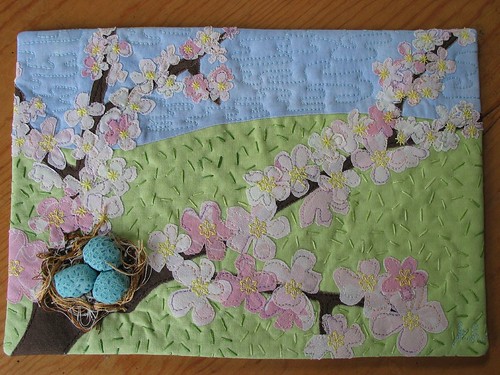
Another sweet little art quilt given away in a swap. The theme was Spring Fling and completely unbeknownst to my partner and I, we both made a tiny quilt featuring a nest with 3 robin's eggs for each other! Sometimes swaps can have the most surprising results. 
March, 2010

MuuMuu-Bijoux by Poppyprint

This wallhanging was made in 2004 after a workshop with local teacher Barb Mortell, who taught the free-pieced paper dolls. It was my first 'original design' quilt and the first time I'd tried free-cutting and piecing curves with a rotary cutter and making improv-pieced flying geese. The quilt is called Mu-Mu Bijoux and is a remembrance of my late mother-in-law and her Maui muumuus.

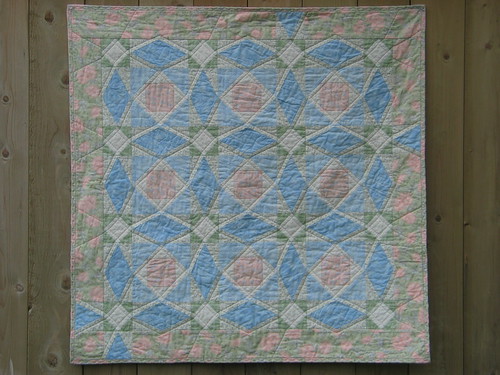
Baby storm at sea

This baby Storm at Sea was made for our former babysitter when she had her first child. I made it 10 years ago from all the soft Moda florals that were so in style back then at our local shops.

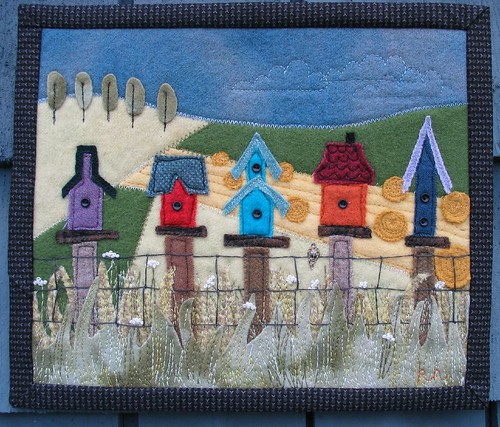
birdhouse fence wool mini by Poppyprint

Here's a favourite of both my husband and mine. It was sent away in a mini swap with a 'house' theme. It's all wool applique and an original design inspired by a photograph I took near my parent's cottage in rural Ontario. A local resident has placed unique birdhouses on top of a row of fence posts by a hay field. 

Allium mug rug by Poppyprint

And finally, I think this is my most-viewed Flickr photo, with over 6500 views. I'm not sure how that happened, but I think it was featured on the Explore page and then used in a bunch of inspiration mosaics for mugrug swaps. I actually kept this one because I was so pleased with how it turned out. It was my first ever project using Essex Linen, which started quite a love affair for me - it's my background of choice for special projects!

September has been so busy for me already. I presented 5 trunk shows/lectures in the space of 8 days to local traditional guilds, taught an Improv Under the Influence workshop, hosted a day retreat, delivered our son to university, made 3 mini quilts and a lap sized quilt top, completed a special gift, made two Stepping Stones table runners from Make It, Take It, and provided many, many Mom Taxi rides for our daughter (who has started supervised driving, thank goodness). In another week, I'm off on a very exciting adventure to Sweden, where I'll be teaching 3 workshops. I'm also helping organize a showcase of Modern Mini Quilts for the VMQG; we are showcasing our quilts at the Vancouver Quilter's Guild show on October 23 & 24.

2015 is a crazy, exciting, amazing year so far and the fun will continue right through to December. Somewhere in the next two months I need to make the QuiltCon entry that I'm dreaming about and get a start on some Christmas gifts. 

Phew. 

Tuesday, February 17, 2015

Chilcotin Wild - a mini quilt

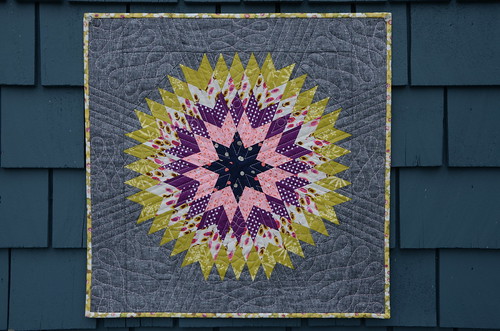
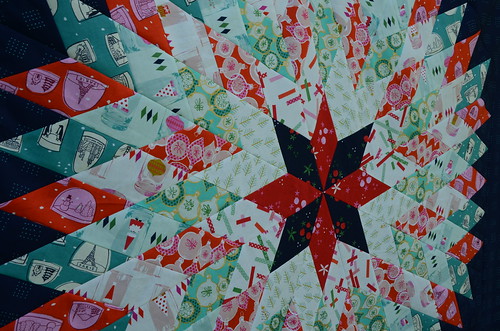
A last minute finish before departing for QuiltCon tomorrow, this mini quilt is a gift for my friend Kristie's new sewing room.  Seriously, I can't get enough of this mini Lonestar Circle (full-size lap quilt pattern by Lynne appears in my book).  The ombre effect with the Cotton and Steel basics is striking as long as you don't stare at it too long. I found that the skinny border helped to reduce the pulsating effect a bit by reining in the points.

Chilcotin Wild by Poppyprint

The centre seams of this one didn't turn out quite as accurate as my first effort, I think in part due to the fact that I had to fussy cut the horses individually instead of strip piecing them in to the sets (this would make more sense if you had the pattern in front of you).  I think there is enough going on with the horse motifs and quilting to divert any critical examination of seams though, haha.  I'm contemplating making 9 or 16 of these sized blocks for a queen size quilt. Call me crazy but I love making them - it's a bit of a shock considering how intense the piecing and seam matching is after all of the improvisational work I've been doing lately. At this point, it is only a "plan". You are quilters....you know what that means. At any rate, I need to make at least one of these minis to keep as this is one of the projects I'll be teaching on the Alaskan cruise in June!

Chilcotin Wild by Poppyprint

I quilted with straight lines to define wedge shapes on each side and in each corner.  I then filled the wedge-shaped areas with a free-motion ribbon design that I'm super happy with. All of the thread is 40 wt Auriful in hot pink and aqua.  I just love how the quilting looks on that Essex yarn-dyed linen.

Chilcotin Wild by Poppyprint

For my 40th birthday (cough,  many years ago), B surprised me with a long weekend trip to British Columbia's Chilcotin region for three days of trail riding at a small dude ranch. We didn't see the famous wild horses of the Nemaiah Valley, but I would love to, one day. This quilt is named for them.

Chilcotin Wild by Poppyprint
Chilcotin Wild, 22 1/2" x 22 1/2"

Tuesday, January 13, 2015

Lonestar Circle Mini

When I first started blogging and participating in the quilting and sewing community on Flickr, I signed up for so many swaps. I spent almost two years sewing up mini quilts, pouches, pot holders, mug rugs and hoops for other people. Some of my very best and most creative work went out the front door and into the homes of other sewists. Swapping was super fun and I met some of my closest online friends that way, but I started feeling a little sad about some of the great work I sent away that I'd never see again.  I decided to take a break and only do occasional swaps with friends.

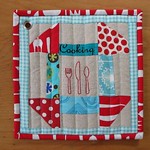
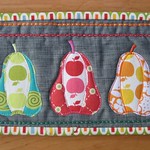
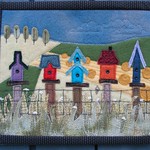
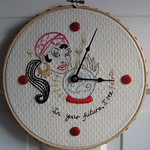
Mini QT March swap made for lmdesigns Potholder Pass 3 'cooking' 452 Poppyprint - mugrug pears 3 birdhouse fence wool mini by Poppyprint Time For Fabric Hoop by Poppyprint
Just a few of the swap items that I sent off to partners over the past 5 years.

Then Instagram took off like crazy and, similar to Flickr, communities started up through swapping again. I felt ready to jump back in and signed up for Kristi's Schnitzel and Boo Miniquilt Swap (search the hashtags #schnitzelandboominiquiltswap OR #makeaquiltmakeafriend if you want to check out the quilts on IG). Round Two is just shipping now and there are 1000 participants!  It is exciting to be a part of something so huge - I even signed up to be a swap mama to help ensure that this massive swap was a success.  Each mama has about 40 swappers to monitor and I'm super lucky because all 38 of my swappers are 100% committed to seeing the swap through. Phew!

So, what would I make for my secret partner? With my book, Make It, Take It coming out in a month's time, I wanted to try a mini-version of one of the patterns.  Lynne designed this incredible Lone Star Circle quilt for the book and used Oakshott shot cottons to make it.

Martingale - Make It, Take It
Photo from Make It, Take It by Brent Kane, Martingale 2014

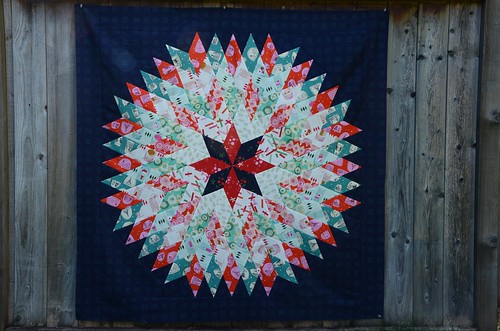
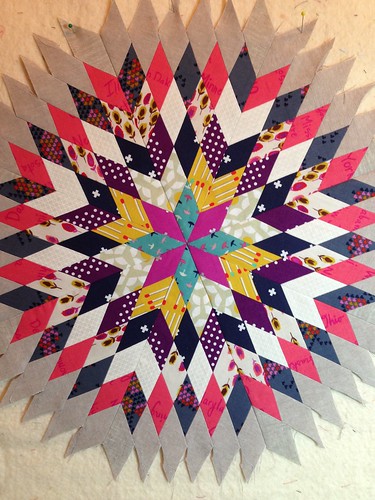
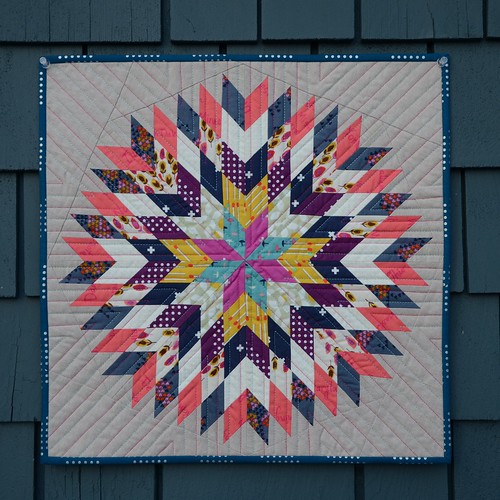
A lonestar quilt has long been on my "to try" list and this complete circle version is so eye-catching I knew it was a must.  In Lynne's pattern, the strips are cut 3 1/2".  I made a 1/3-sized version by cutting 1 1/2" strips from fat quarters (the finished mini is just under 18" square).  There is something about radiating designs; they seem to be universally loved by quilters.  Is it the symmetry? The eye-catching points?  I can't quite put my finger on it, but this little honey got more likes on IG than anything else I've ever posted!

Lonestar Circle Mini by Poppyprint
All seams are pressed open on this mini, except for the two vertical seams that meet in the middle for the final horizontal joining seam (between the two half circles). I pressed those in opposite directions so I could lock the allowances and achieve a perfect pointy centre star!

The background is Essex yarn-dyed linen in flax, and the finished quilt measures 18" square.  My swap partner seems to like radiating designs (based on her inspiration mosaic) and although this fabric wasn't mentioned in her favourite designers list, I hope the universal appeal of Cotton & Steel will make this okay for her.  I don't have any fabrics by one designer she listed and I'm going to send her the 2 fat quarters I have from her other favourite designer as extras.

Lonestar Circle Mini by Poppyprint

Lonestar Circle Mini by Poppyprint

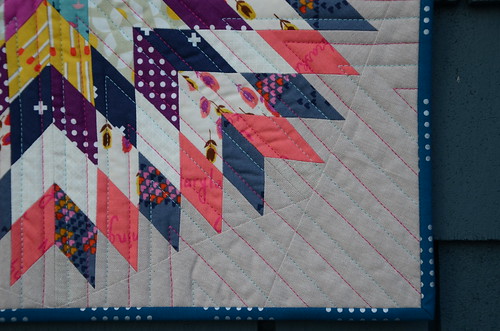
I simply quilted with straight lines and a longer stitch length (3.5 stitches/inch) using Aurifil 30 wt cotton thread in hot pink and teal to match the centre star prints.  I will freely admit that after doing so much improvisational sewing last fall, pin-matching all of those points nearly drove me bananas, but the effort is well worth the results!  In the book, I explain how to correctly pin-match angled seams so that you end up with perfectly pointy-points.

Lonestar Circle Mini by Poppyprint

Throughout the year I'll be making up my own versions of the contributor projects from Make It, Take It. I can't wait to share more of this book with you!  Of course there will be a blog tour (watch for that in April).  For now, set your calendar alarms for February 10th: that's the day you'll be able to order the book from  Martingale's  online shop. The bonus is that when you buy a hard copy direct from the publisher, you automatically receive a FREE digital copy, so you can take the book along on retreat or to your sew-ins on your tablet or laptop! Yay!