Showing posts with label walking foot. Show all posts

Friday, December 4, 2020

Medina Dots Table Runner & Matching Placemats

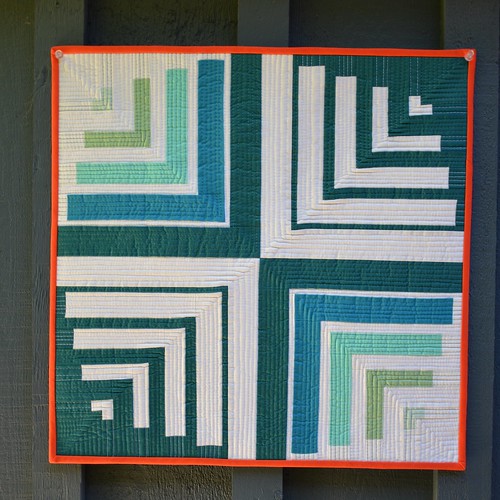
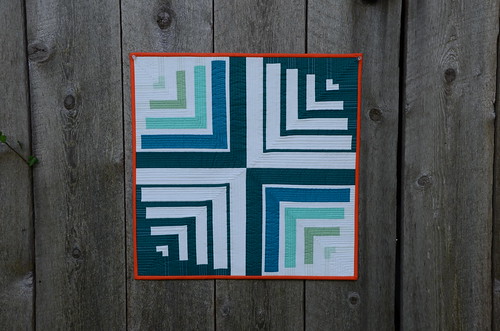
 I'm excited to share my latest project for Oakshott Fabrics! Everything you see here was made from one F8 stack of the Lipari and one F8 stack of the Ruby Reds collections (a total of 16 super-sized Oakshott F8's which measure 10" x 27"). I set myself the challenge of creating a pattern that would not only let the fabrics shine, but let you feel good about your purchase by using up all of the precious cloth in the two F8 stacks. The result is a super luxurious set of table linens with playful shapes and vibrant colours reminiscent of Moroccan market stands.

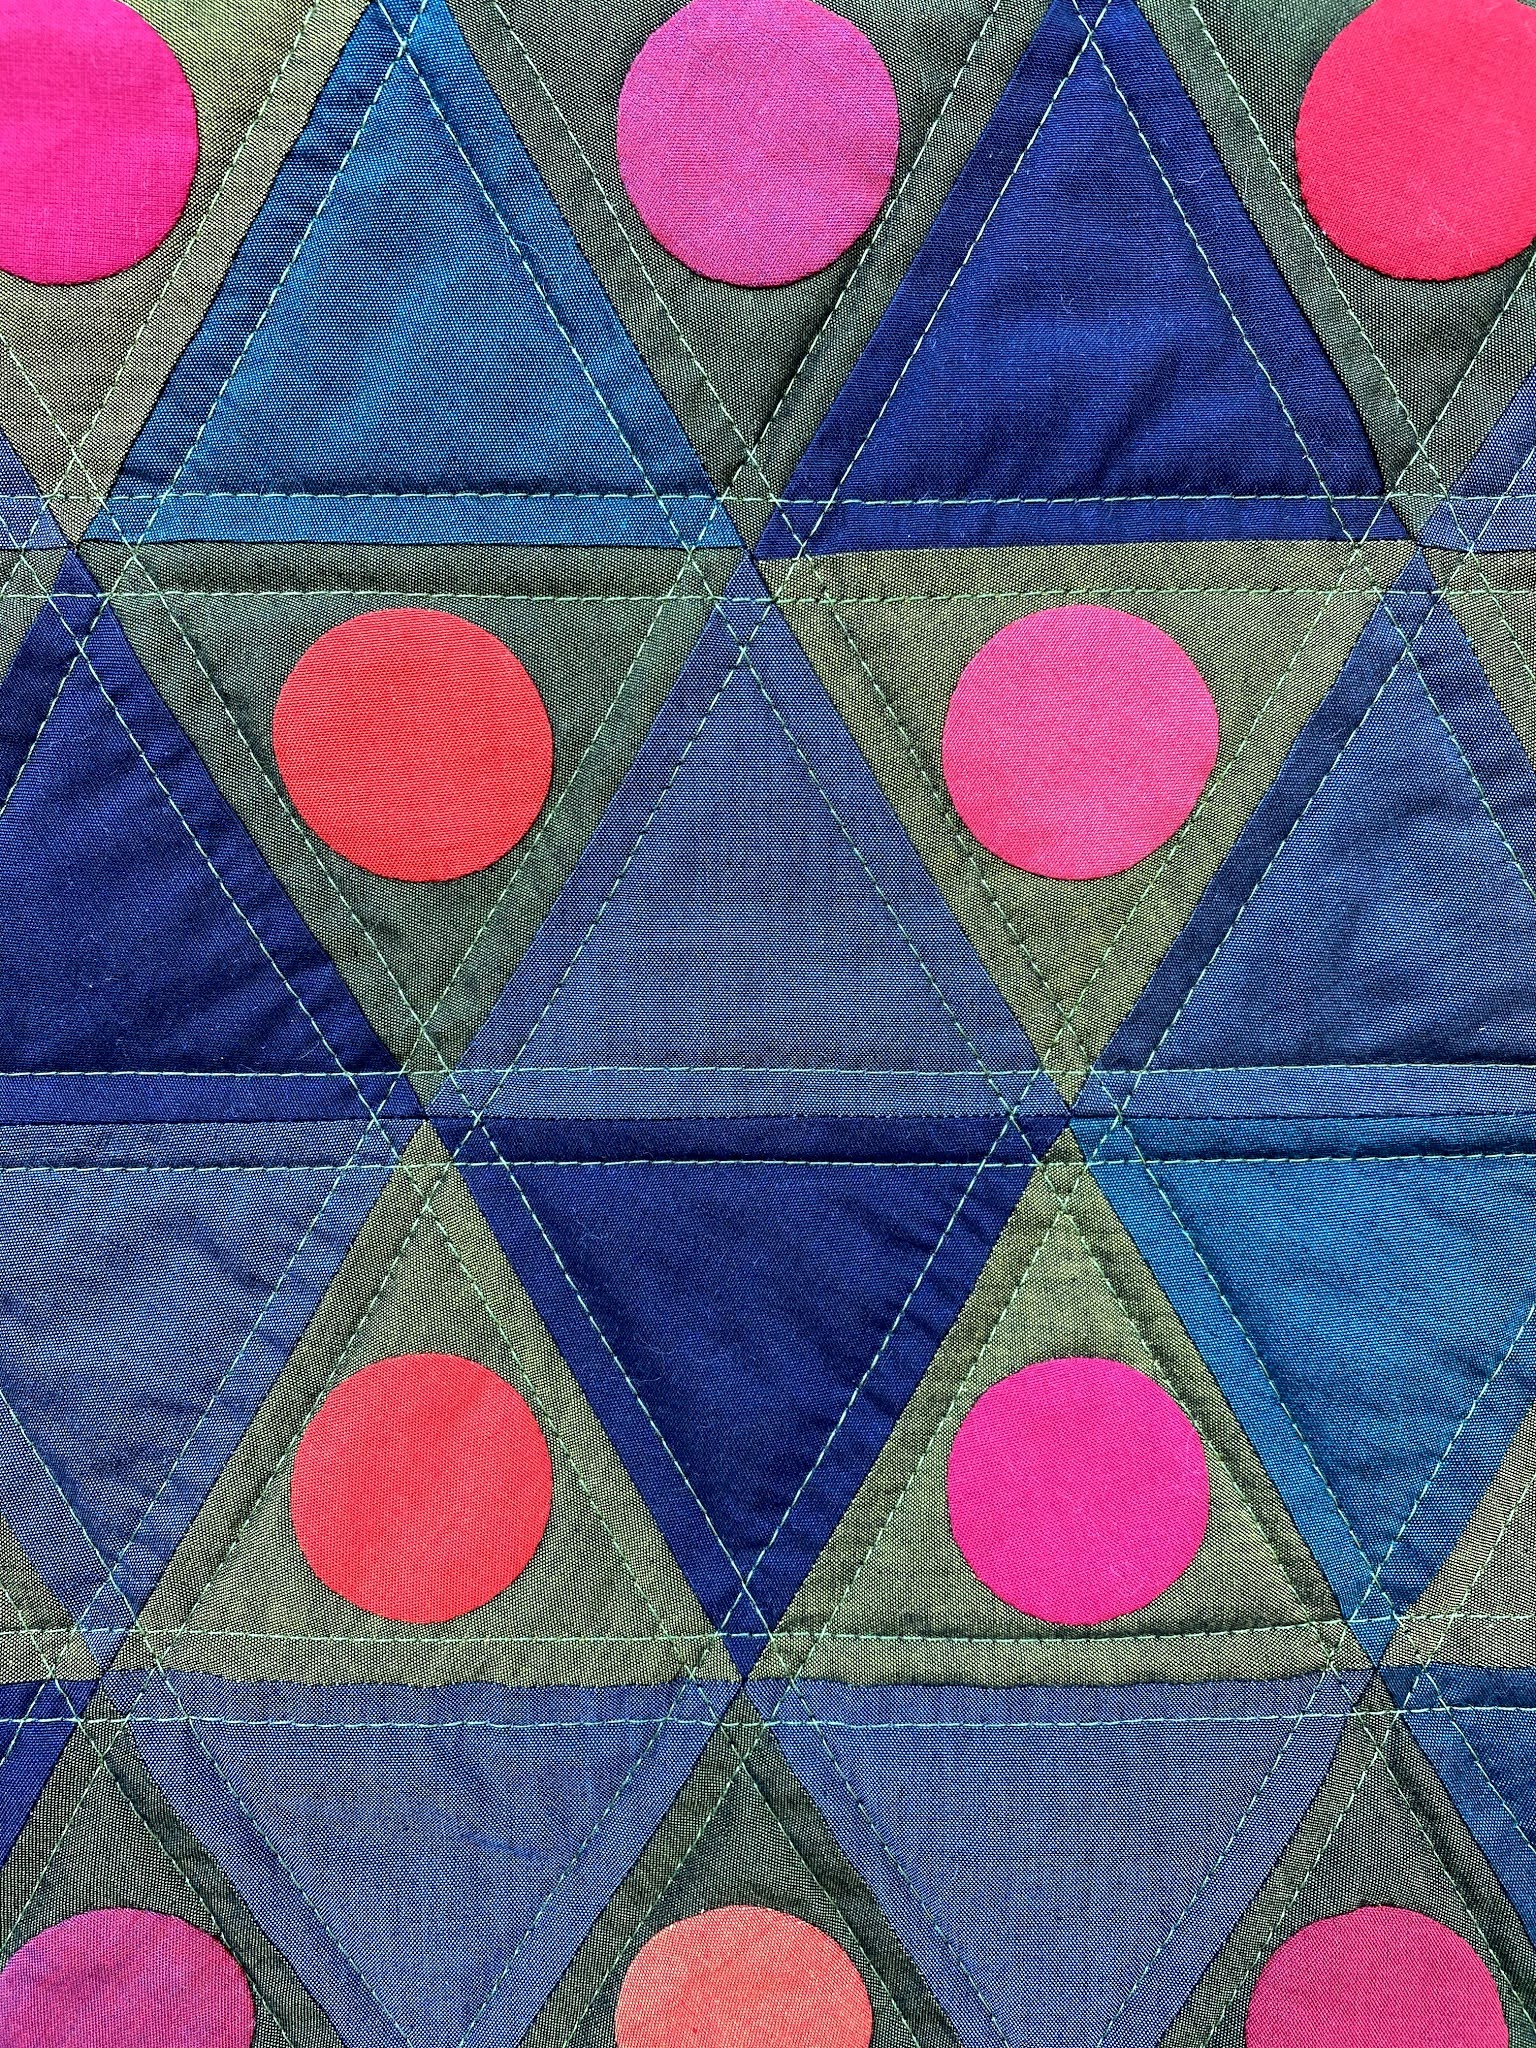
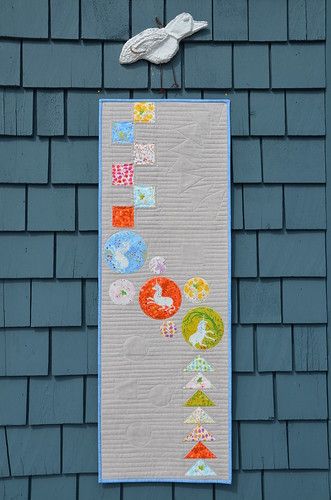
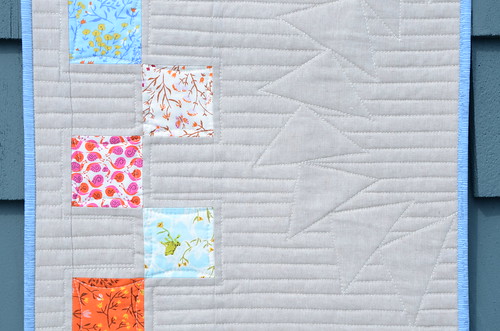
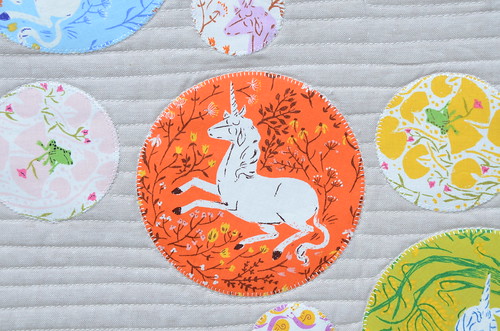
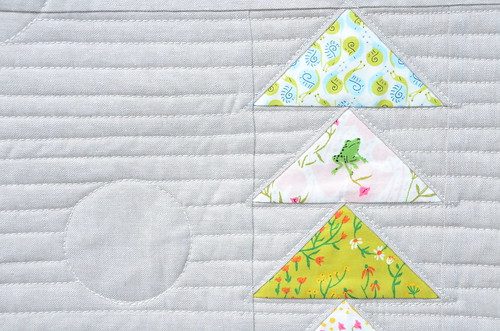
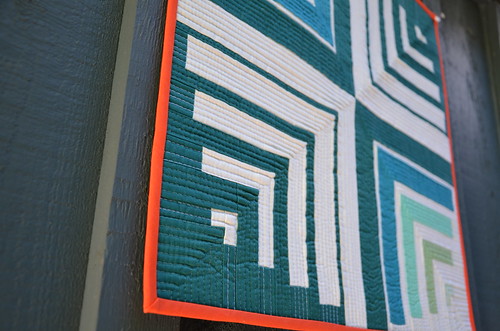
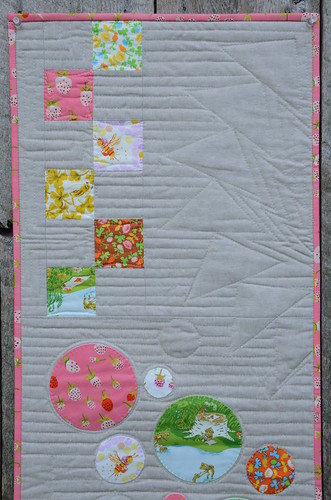
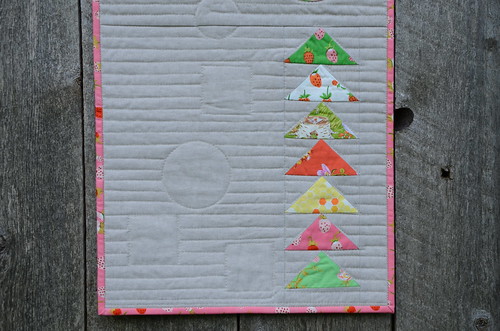
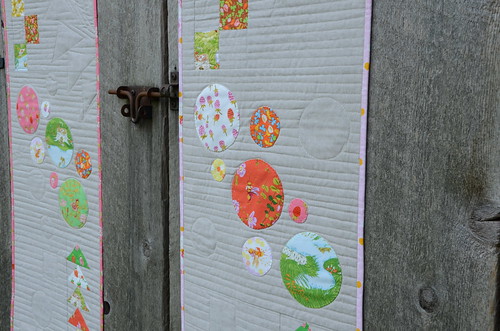
The table runner features 60 degree triangles of the blue and green Liparis, appliquéd Ruby Reds circles (by hand, or machine) and a unique diamond-shape that is sure to fancy-up your table! The 6 coordinating placemats make use of the remaining F8's from the Lipari stack with leftover triangles pieced as a border accent. Everything is beautifully bound in a scrappy Ruby Reds binding using up almost every inch!  And because I have a feeling someone will ask...the binding went these angles in the exact same way it works on right angled quilt corners. It just takes a little finesse when turning to the wrong side to create the mitre.


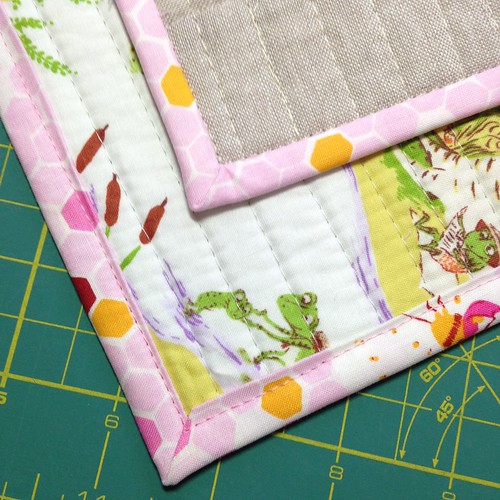
I used a regular cotton blend batting in the table runner, but for the placemats I wanted a bit more structure that would stand up to more regular washing (by hand). I chose heavyweight fusible fleece by Pellon and am very pleased with the crisp finish. 

Everything is pieced with Aurifil 50wt and quilted with a luscious green Aurifil 40 wt thread. I give all of the recommended thread weight and colour info in the pattern. I didn't want to compress those pretty circles with quilting, so I chose to simply quilt 1/4" from all of the piecing lines with my walking foot and repeated the same angles and double lines on the placemats. A Hera marker works a treat for chemical and chalk-free marking on Oakshott shot cottons.

If you're looking for some luxe and would like to make your own set, the .pdf pattern is available in my Etsy shop here and you can purchase the full fabric pack directly from Oakshott here. I've also got a limited number of full kits for sale myself that include all fabric for front and binding of the runner and 6 placemats, the full colour printed pattern + die-cut cardstock circle templates for a great price of $125 Can shipping to North American addresses for $20 Cdn (or available for local pick from my front porch). Please contact me via my email address (upper left corner under my headshot) to claim one! ONLY FOUR AVAILABLE AS OF DECEMBER 4.

Sunday, December 3, 2017

What Apple?

Here's my latest Speed Date with Improv class sample. When I teach the workshop (which as been very popular with traditional and modern guilds alike, yay!), I demo each technique for students. When I travel, I use student fabric (no one minds because it gives them a little head start on each "date"), but at local classes I use my own machine and fabrics.  The result is lots of improv units on my home design wall.

I was recently interviewed by CBC radio for a local weekend program called North by Northwest. A producer came to interview me working in my studio, so I decide to piece this together because it was a fairly small, manageable project.  I'll write more about that fun afternoon once I get the word on the day the interview will air (it might be mid-December).

So, here is What Apple?  A fun mini-quilt improv sampler that finished up at 24" x 28".


There are a few more units making up this quilt than in my previous Speed Date samples because I used the same mustard fabric for demos in two workshops, so I had extras to play with. I also had some more chunks of mustard leftover, so decided to insert that strip on the right side and balance it with black on the bottom and white on the top to extend the piece. These chunkier strips coupled with the 1/4 circle curves at each corner give the piece boundaries, but jaggedy, imperfect boundaries where like colours meet. I prefer this on an improv quilt as opposed to a straight and defined traditional border.


I chose to quilt in the "wonky waffle" with my walking foot again. This is random straight-ish vertical and horizontal lines that I really like on top of this busy quilt. I score a few lines with a long ruler and Hera marker, then fill in by eye at random intervals in between.

Like the two that came before, Mojito and Night and Day, this one has faced edges.

This workshop continues to take me places...in the new year, I'll be teaching on Vancouver Island, in Scotland, England, Alberta and for a couple of outlying modern guilds in BC as well. I can't tell you how happy that makes me!!  I've had several students create completely new improv work informed by what they learned in this class; that's incredibly exciting for me because that is the exact intent of teaching these techniques as a sampler. Bring on 2018! 

Wednesday, June 28, 2017

Notes from the NJS Judges - Part 2

In this post (a continuation from my previous post) I share the comments from three CQA-certified judges on my Improv Untitled quilt. This wallhanging recently hung in the Canadian National Juried Show in Toronto in the Abstract Art category. I could have easily entered it into the Modern category along with Round Peg, Square Hole, but I thought my chances with the jury might improve if I tried two different categories.

Improv Untitled by Poppyprint

I am happy to share these comments/critiques with you as a point of interest. I find them thoughtful, constructive and useful!

Judge 1
The variety and scale of the shapes add visual interest. The shapes shift between being positive shapes to being negative shapes. This is visually unsettling (oh dear). Was this the mood you were intending to portray? Grid quilting pattern is effective.

Judge 2
This well-constructed quilt works with the viewer's mind (thank you, exactly!) as the eye moves around searching for familiar and identifiable images. The bold border plays a secondary role - perhaps it could be slightly integrated into the central area. Take care when piecing dark against light and watch out for shadowing (curses, I tried my best).

Judge 3
Negative space might be emphasized with more or different quilting (hmmm, this is a good suggestion worth considering for the next one). The design draws me in to follow pathways like a game (mission accomplished!). The light-coloured motif floats off the black and is anchored by the black grid quilting lines.

I'd really like to thank the judges (in no particular order, because the comments are not directly attributed to any judge), Margie Davidson, Hilary Rice and Judy Villett. I am actually rather delighted with all of your thoughtful words and will take them into consideration for future work. For the first time (in 6 juried show experiences) I actually feel like I got some great value out of my entry fee with this feedback.  

Would you like to learn 7 improv piecing techniques and make your own quilt similar to this one in a fast-paced, fun and supportive environment? I teach this unique Speed Date with Improv workshop (as a 1- or 2-day class) and would be happy to visit your guild or shop. Email address at the top left sidebar for enquiries. I have some availability in late fall and am now booking into 2018.  Sadly, due to working visa restrictions, I cannot teach in the US, but all other international and Canadian travel is welcome.

Tuesday, April 18, 2017

Stepping Stones IV

Although I've made three previous Stepping Stones Table Runners (a pattern by Krista Withers and me) in my book Make It, Take It, they've all been gifted. It is a project that people always respond to very positively at my trunk shows, so I thought it a good idea to make another one for my upcoming teaching trip to the Maritimes.

The other ones were also made with Heather Ross prints; they are so cute, visually interesting and fun to fussy cut!  I've traded the froggies for unicorns on this one, using the Far, Far Away line.  As with the other runners, this one has Essex linen in natural for the background.

Stepping Stones Table Runner by Poppyprint


I've quilted it just like Krista's accompanying instructions in the book for Ghost Shape quilting using a walking foot. I marked the ghost shapes and a few of the long, straight lines with a Clover disappearing pen (that evaporates in about an hour, depending on the level of humidity in the air).

DSC_1883

DSC_1884

DSC_1886

I don't often buy fat quarter sets of fabric lines, so when I do splurge it is usually because I have an idea and want to use the prints together in a project. What I always forget to do is also buy a 1/2 yard of one of the prints to use as a binding for that project. Luckily, I had this two-tone Carolyn Friedlander print that works perfectly with the blues in Far, Far, Away. Hopefully, next time I won't forget the binding!

Thursday, October 6, 2016

Quarter Round Ombre

While creating this quilt for the RJR Fabrics What Shade RU blog tour, I did a little test on the ombre idea and made this Quarter Round version.

Quarter Round Ombre by Poppyprint

Like this one, I consulted my colour wheel for binding suggestions and since blue-green loves red-orange, I went for it! It's pretty zingy. I like it.

Quarter Round Ombre by Poppyprint

It is quilted with Aurifil 40 wt white and 50 wt teal thread. I'm still trying to decide if the rumours are true and a walking foot isn't necessary when quilting straight lines on the Juki. I tried this one without walking foot and there was some drag, even with the presser foot pressure on the lightest setting. This was spray basted and I stitched the ditch of the horizontal and vertical centre seams to stabilize before I started the closely spaced lines (which I did every third or fourth line, then went back and filled in the spaces between). I think I'm going to stick with using the walking foot in future.

Quarter Round Ombre by Poppyprint

Instructions for both Quarter Round and the larger 16-block Round Peg, Square Hole quilt are included in my pattern available on Craftsy (link up there in the upper right side bar). You'll also find a colouring page in the pattern that you can use to try out  your own colour blocking for secondary patterning.  If you're looking for some patterns to kick off your fall sewing, Craftsy has a promo on at the moment to save $5 on a $25 purchase using code FRESHLOOK25.

If you're celebrating Thanksgiving this weekend, have a wonderful time with family and friends! Pumpkin pie....mmmmmmm.

Monday, September 14, 2015

Stepping Stones Table Runner Samples & Teaching

This fall is very busy with trunk shows!  I'm having a great time visiting many local guilds sharing the projects from Make It, Take It with traditional and modern quilters alike.  The table runner that I pieced for the book was quilted by Krista Withers, so after Quilt Market and my spring trunk shows I sent her that one because I knew she loved it and well, she's awesome so she should have it!  I needed to make another and why make one when you can make two?!

Stepping Stones Table Runners by Poppyprint

The combination of Essex linen and Briar Rose used in the original runner was just too sweet to pass up, so I kept everything pretty much the same when I made these two new ones. The runner sews up quickly - it is so fun to make!  I was anxious to try straight line quilting using Krista's Ghost Shape Quilting instructions in the book. PLUS, I treated myself to a new Juki TL2010Q over the summer and I figured this would be the perfect small project to give it a go.

Stepping Stones Table Runners by Poppyprint

Stepping Stones Table Runners by Poppyprint

Unfortunately, the walking foot that came with my machine was a dud and I was unable to use it. After some online research and an S.O.S. call on Instagram, I was advised by several other Juki users to just go for it and quilt using the regular sewing foot with the presser foot pressure turned right down to the lowest setting (in other words, almost no pressure on the foot). Walking foot be damned!  (Note: my dealer arranged for an immediate replacement walking foot to be sent directly from Juki and I have received it, but not yet tried it).

Stepping Stones Table Runners by Poppyprint
The circles are machine appliqued using my "Fabric Stickers" method described in my Crop Circles Table Runner tutorial on the left sidebar. I used a shortened & narrowed blind hem stitch to secure them to the quilt top.

The results were pretty darn good considering I didn't use a walking foot. Some of the straight seams show signs of drag, but I can live with that. On the second one, I stabilized those longer seams between blocks and beside the pieced sections with stitch in the ditch.  Ultimately, I'm just picky and would prefer longarm results with a home machine, which just isn't going to happen. I'm trying to lighten up and find satisfaction in a job done the best that I can do with the equipment that I have.

Machine binding on my Juki

Where the Juki totally rocked was the binding. I applied my regular 2 1/4" double fold binding to the front of the runners, then pressed it to the back, mitering the corners. Using Roxanne's Glue-Baste-It and a dry iron, I basted the binding to the back.  Then, still using the regular sewing foot I slowly and carefully stitched in the ditch from the front. The machine performed beautifully, even with the uneven thickness of fabrics under the foot (6 layers of binding fabric plus quilt sandwich under the right side of the foot and only the quilt sandwich under the left side of the foot).  With my Pfaff, the snap-on "stitch in the ditch foot" regular popped off when I tried to do this.

I'll be keeping one of these runners for my trunk shows (two more this week!) and gifting the other one soon. If you are a quilting teacher, I highly recommend this project as a complete beginner quilting class that includes: rotary cutting techniques, accurate piecing, flying geese construction, machine applique, quilt basting, marking & straight line quilting and binding.  Check out the copyright statement in Make It, Take It - as long as your students each have a copy of the book, you're welcome to teach any of the projects. Please do!