Showing posts with label quilting. Show all posts

Tuesday, April 18, 2017

Stepping Stones IV

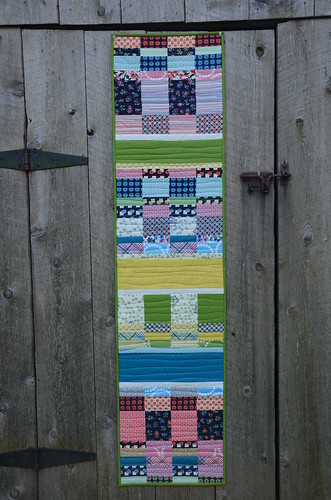
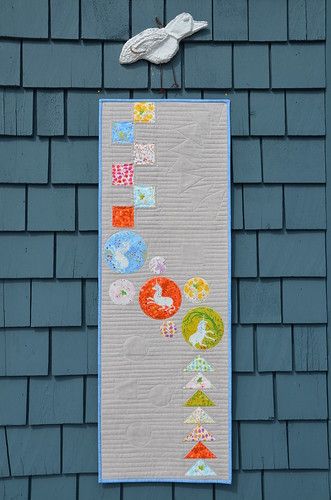
Although I've made three previous Stepping Stones Table Runners (a pattern by Krista Withers and me) in my book Make It, Take It, they've all been gifted. It is a project that people always respond to very positively at my trunk shows, so I thought it a good idea to make another one for my upcoming teaching trip to the Maritimes.

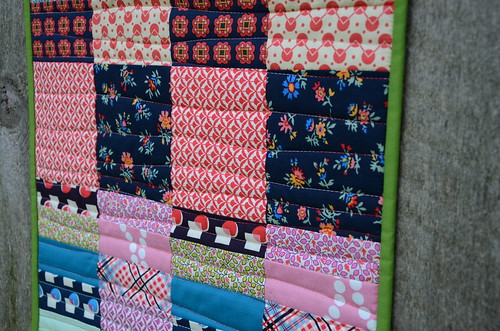
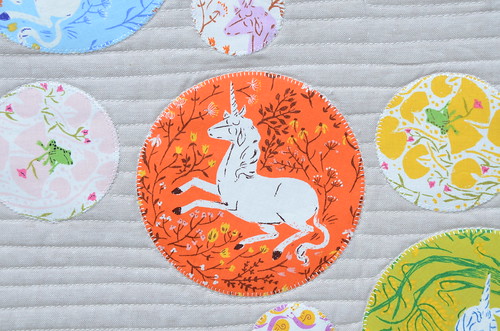
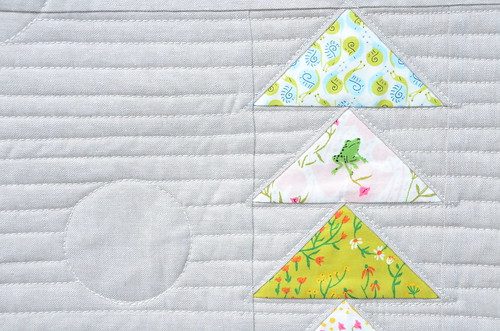
The other ones were also made with Heather Ross prints; they are so cute, visually interesting and fun to fussy cut!  I've traded the froggies for unicorns on this one, using the Far, Far Away line.  As with the other runners, this one has Essex linen in natural for the background.

Stepping Stones Table Runner by Poppyprint


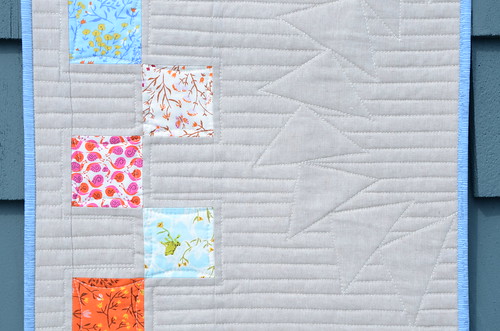
I've quilted it just like Krista's accompanying instructions in the book for Ghost Shape quilting using a walking foot. I marked the ghost shapes and a few of the long, straight lines with a Clover disappearing pen (that evaporates in about an hour, depending on the level of humidity in the air).

DSC_1883

DSC_1884

DSC_1886

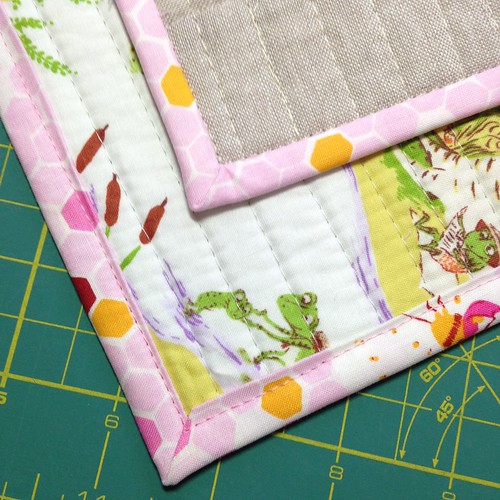
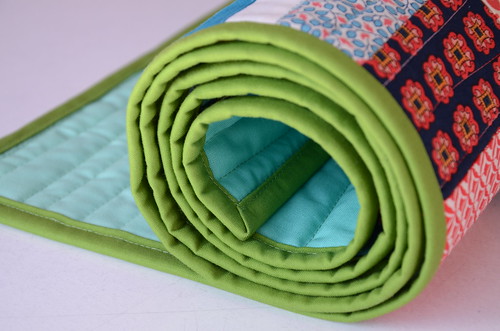
I don't often buy fat quarter sets of fabric lines, so when I do splurge it is usually because I have an idea and want to use the prints together in a project. What I always forget to do is also buy a 1/2 yard of one of the prints to use as a binding for that project. Luckily, I had this two-tone Carolyn Friedlander print that works perfectly with the blues in Far, Far, Away. Hopefully, next time I won't forget the binding!

Tuesday, February 28, 2017

1/4" Tune Up Test

The VMQG guild executive recently asked me to give a presentation on accuracy. Whether you tend to make measured, traditional style blocks or you prefer improv quilting, maintaining a scant 1/4" seam allowance will lead to neater work, more resilient seams, less bulk to quilt through, blocks that fit together and the satisfaction of pointy points where you want them. 

Both beginners and experienced quilters alike can benefit from a seam allowance tune-up. You'd be surprised how many people have struggled for ages, wondering why their measured blocks don't end up the planned size.  The test doesn't take long and once your seam allowance is established, you'll enjoy the satisfaction of blocks that fit together as your patterns intend, without distortion from stretching short edges or puckers from gathering generous ones. Refresh your accuracy by performing the simple test below and remember that you'll need to repeat this on ALL of your machines (because, ahem, a few of us sew on more than one machine).  If you are sewing a project using bulkier fabric such as Essex linen, or fine fabric such as lawn, it would be a good idea to repeat this test with the actual fabric being used for the project!


BUT WHY "SCANT"? Quilt blocks are measured to the 1/4" based on side-pressing of seams within the block. A scant 1/4" seam is necessary because we need to allow room in the pressed-over fold for the piecing thread as well as the one or two threads of fabric on the edge of the fold.  A fine, 50 wt piecing thread takes up very little room in seams, which is one of the reasons the Aurifil brand is so popular with quilters. 


5 STEPS TO A PERFECT
SCANT ¼” SEAM ALLOWANCE

1. Accurately cut five 2 1/2" squares of pressed, quilting weight cotton. Measure with your quilting rulers, not the cutting mat. Remember that accurate piecing begins with accurate cutting. Know your rulers!

2. Using your normal piecing thread, sew the squares together along side seams, creating one long strip unit.

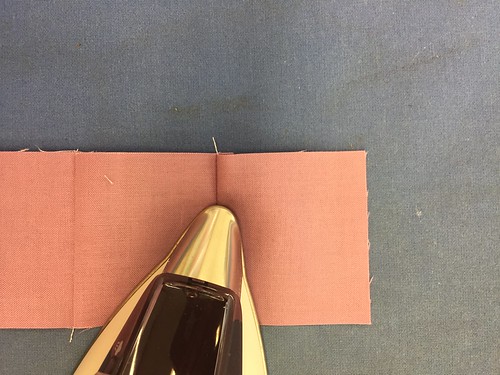
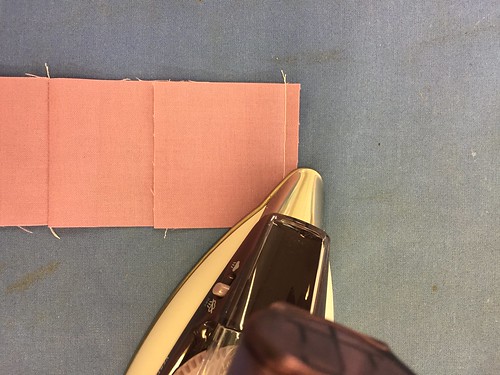
3. Press seams flat to set stitches, then press seams all to one side in the same direction.
1/4" test

1/4" test


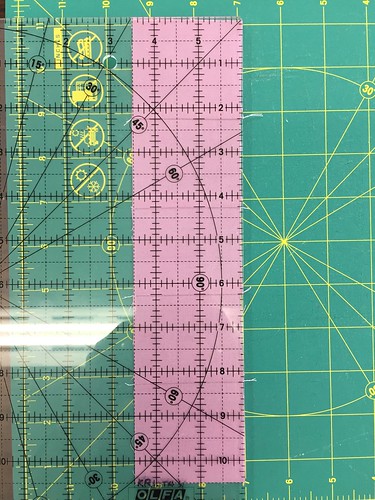
4. Measure the unit by placing your quilting ruler on top of the strip. It should measure 10 1/2".


Untitled


5. If your strip is less than 10 1/2" long, then your seam allowance is larger than a scant 1/4". If your strip is greater than 10 1/2" long, then your 1/4" is too scant. 


TROUBLE-SHOOTING

My strip is larger than 10 1/2" long
  • confirm pieces accurately measure 2 1/2" square
  • confirm seams are all pressed to one side in the same direction (NOT OPEN). 
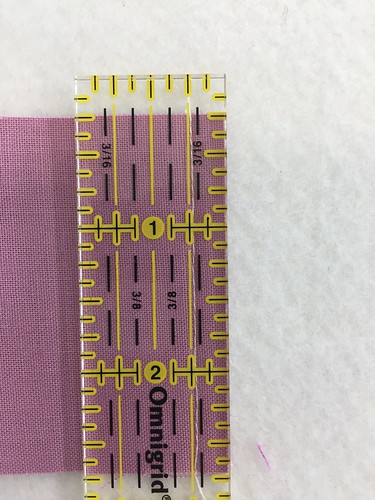
  • fold over the last square and re-press the seam flat. Place your ruler on top of the right edge, aligning the edge of the ruler with the edge of the fabric. Your stitches should be visible just to the right (or inside) of the 1/4" ruler line. If you can see fabric between the 1/4" line and your line of stitches, then your seam is too scant.
Untitled
This seam is just a hair too scant because you can see fabric between the 1/4" line on the ruler and the line of stitches.

My strip is smaller than 10 1/2" long
  • confirm pieces  accurately measure 2 1/2" square
  • confirm from the right side that the fabric of each square is fully pressed out over the seam
  • fold over the last square and re-press the seam flat. Place your ruler on top of the right edge, aligning the edge of the ruler with the edge of the fabric. Your stitches should be visible just to the right (or inside) of the 1/4" ruler line.If your stitches are under the 1/4" line, then you've sewn an exact 1/4" seam, not a scant one; you need to decrease your seam allowance by about 2 thread widths.  If your stitches are fully to the outside, or left of the 1/4" line, then your seam allowance is too generous (big) and adjustments to decrease it need to be made (move needle one notch to the right or adjust your seam guide closer to the presser foot).
In general, as I've had students perform this test in workshops, it appears that many manufacturer's 1/4" patchwork feet with fence guide attached on the right side of the foot are actually a bit generous. If you have one of these feet, hold it up to the light. Can you see daylight between the edge of the foot and the fence? If so, chances are that the edge of the foot is actually the scant 1/4" and the fence it a true 1/4".

Good luck! Let me know how you make out in the comments and leave any questions you may have there as well. I'll try to answer questions in subsequent comments, so check back.


Friday, May 20, 2016

All the Acronyms

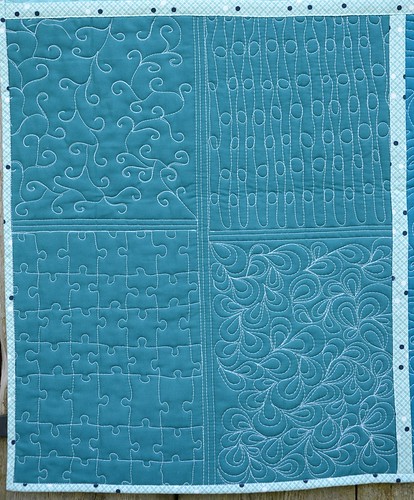
So, recently I took an advanced FMQ class with the VMQG and made a QAYG baby playmat with the results.

I like to take Free Motion Quilting classes every couple of years just to work up my mojo and build confidence while trying new designs. There are so many great books, classes and teachers out there to learn from.  This class was taught by fellow Vancouver Modern Quilt Guild member Stacey Murton (hushrules on IG). She recently learned from some of the best modern quilters at QuiltCon and brought back some of her new found knowledge to share.

FMQ practice by Poppyprint

Ideas for free motion designs are endless, but it is always a good idea to start at the beginning and get into the flow with some simple swirly, loopy, meandering lines. While I regularly revert to my safe swirly stipple for a quick finish, one day I'd like to take more time with a special quilt and custom FMQ elements of it with individual motifs. It is wonderful that authors Christa Watson and Christina Cameli are supporting those of us working on domestic machines!

FMQ practice by Poppyprint

FMQ practice by Poppyprint

FMQ practice by Poppyprint

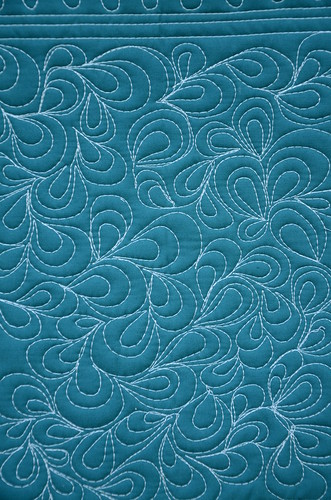
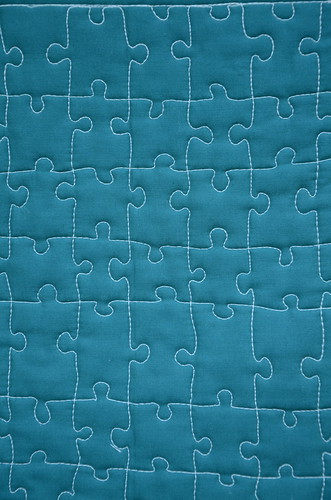
Some of these designs came from Stacey's class handouts (overlapping whorls, swirls + hooks, water and pebbles seen above), while the ones you see below came from Christina Camelli's book First Steps to Free Motion Quilting (puzzle pieces, interlocking circles & lines, tendrils and mussel shell thingies seen below).  I didn't mark anything on these practice sandwiches, I just started quilting. I think that with something like the puzzle pieces and interlocking circles & lines on a real quilting job, I would use a hera marker and ruler to lay out a grid of lines to follow in order to keep things fairly uniform and parallel.

FMQ practice by Poppyprint

FMQ practice by Poppyprint

FMQ practice by Poppyprint

I like medium sized motifs, like the swirls and mussel shell and paisley flower shapes. I find it more difficult to work smaller, as with tiny pebbles. Stacey suggested drawing pebbles like figure 8's but when I tried that it was tough to stay circular - mine ended up looking like tear drops. More practice required!  I thought the tendril/vine one would be super hard since backtracking with a darning foot is rather daunting for me, but turns out it wasn't too bad after all. 

Having the new Juki TL-2010Q has been a major help for me.  The machine purrs along beautifully and I do not have any difficulty with tension or thread breakage. The fairly low extension table is a bonus as well. I keep my speed in the middle range of the machine's tortoise to hare scale and actually move my quilt fairly slowly. I learned to do this from Christina's Craftsy class  "Free Motion Quilting Essentials" which is on sale for $24.60 Cdn* until Saturday.  I must say, slowing everything down helps to keep my shoulders more relaxed and I have more control over motif shapes and stitch length (no more 1/4" long stitches on curves!).

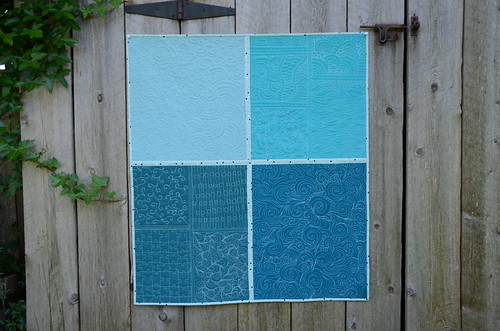
I didn't do all of this work in the class - these are fairly big FQ sized sandwiches. I completed two of the four while on retreat the week after class. After trimming them up, I joined them together using Marianne's tutorial here.  I've sent this off with some VMQG members to display and possibly be our raffle prize at Vancouver's Mini Maker Faire, June 11-12.

*I'm a Craftsy affiliate, which means if you click on the link and end up purchasing a class, I will receive a small commission. I promise to think of you when I buy my next latte.

Thursday, February 11, 2016

Processing my Ice Road Quilt

After 10 months of thinking about it, my Ice Road quilt finally happened. There was a show deadline looming, so I decided to get a move on and finally create a quilt to commemorate my amazing teaching trip to Canada's arctic town of Inuvik last March.  If you check that post, you'll see the pillow top that I created over that weekend to illustrate another design option for my Improv Under the Influence piecing technique.  That pillow top was the spark for this quilt.

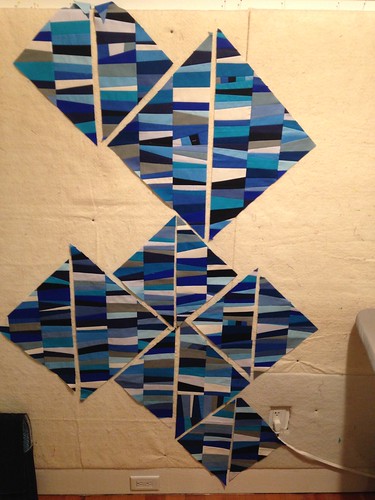
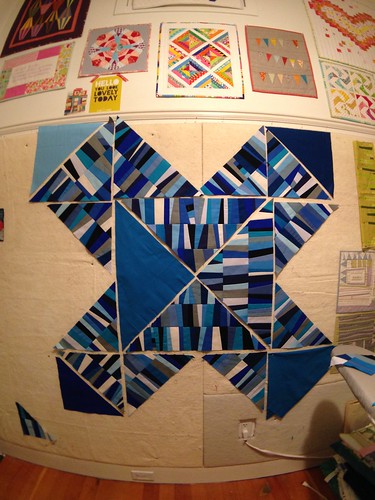
Last year I purchased a FQ box of DS Modern Solids. I've been savouring that box on my shelf but decided to go ahead and create my quilt entirely from those gorgeous fabrics.  I initially thought that I would make 9 blocks similar to that X pillow top, sew them together with skinny white sashing and border the whole works with a 10" or 12" border of white.

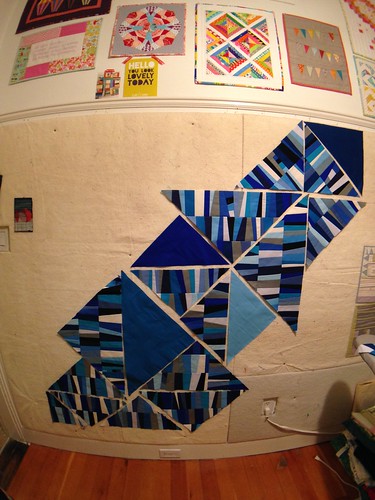
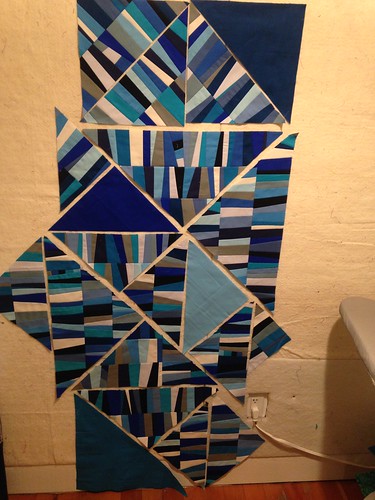
As I created the triangle units other ideas popped into my head, so I held off on piecing them together until I could play on my design wall a bit. These are average night time cell phone photos, but you get the idea.

Untitled

Working the the idea of "road", I tried a linear layout.  This wasn't dynamic enough. All of the joining seams are vertical so there's a lack of movement and interest. I wasn't happy with the lack of oomph (highly technical quilting term, aka "visual dynamics").

Untitled
What about diagonal? I like the fun angles created at the mitred (45 degree) corners of these improv-pieced units. I played with this in my Light of May quilt.  Unfortunately B and I agreed this had a rocket-ship appearance that wasn't what I was going for.

Untitled
I returned to the vertical layout, but starting filling in space with solid coloured triangles. Now we're getting somewhere, but for my eye, things were still a little haphazard.

I spent quite some time over a few days daydreaming about what I like and where my work tends to go. I think I can safely say that I enjoy the improv construction a great deal. I also seem to enjoy taming the wonkiness of improv and fitting pieces into structural layouts. Perhaps this comes from my scientific background, or my traditional quilting beginning? I don't really know, but I can say that I'm very pleased with the final outcome. Not to mention, happy that all of those triangles fit together without any math works! They were all cut from chunks of pieced border units using my giant 20 1/2" square ruler on point.

Untitled
Getting closer!


I know some people thrive on the haphazard (and I thoroughly enjoy so many of those quilts!). Perhaps I am slowly working my way there, but in the mean time, this is my process and this is my quilt.

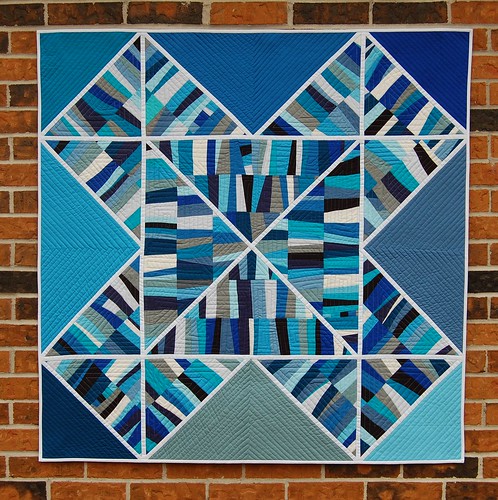
Ice Road Quilt
Ice Road, 2016

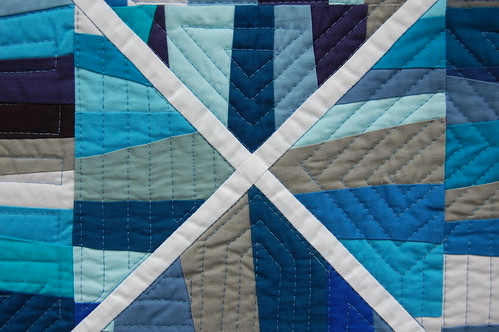
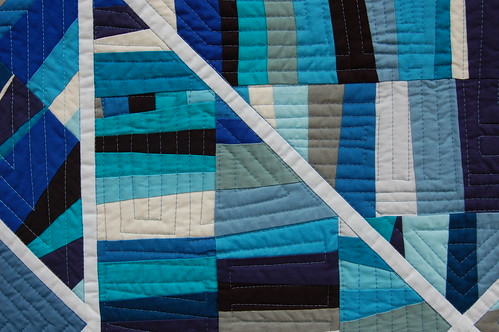
I quilted it on my new Juki 2010. Some of it was done with the walking foot, but when the noise got to be too much, I took it off and went with the regular sewing foot. I cannot really tell the difference in quilting quality - there was some pulling and puckering with both feet (spray and pin basted!). I stabilized the straight white sashings first with stitch in the ditch and I purposely did not cross the sashing with any quilting in order to maintain as straight lines as possible and avoid any pulling.  All of the quilting is unmarked, improv straight lines. I follow seams and make turns where I feel like it!

Ice Road Quilt

Ice Road Quilt
There are more close ups of the quilting, if you click on any of the photos you'll end up on my Flickr stream where you can see more.

I'll let you know if it makes it into the show!


Sunday, November 15, 2015

Textillia - a Hang Out for Sewists!

Have you sewists always wondered what the knitting site Ravelry is all about and why knitters congregate there? It is a community - a place to share, catalogue and keep track of your work, see what other makers are making, where people are buying their patterns, reviews and hacks to patterns, what's happening on the design scene, ask questions and get advice/feedback, post photos and links....etc, etc.

Now there's a new hang-out with a similar feel, designed specifically for sewists. Textillia launched in the beta phase last week and the Vancouver-based developers invite YOU to login, sign up, create profiles and populate the site in order to fine-tune the specific needs of the sewing community.  They've created a comprehensive site, but are seeking quilters specifically because they want feedback, suggestions and bug-alerts so that they can perfect the site to best suit the users needs.


Participation is free during the beta phase, and the first month will always be free for new members. After that, a small monthly fee will apply.  Read this post for new member info and follow along on Instagram (Textillia) for updates and announcements.

I've got a designer page up now and I plan to build on it as an online catalogue of my work and patterns.  I found the site very easy to navigate, plus it was very easy to upload photos and information.


I think as the community grows, this could be a really powerful online resource for garment sewists, quilters and crafters, plus shops, designers and fabric companies. I can't help but feel like much of the work I put into this blog is going unnoticed and unread these days. Perhaps we'll move to a central location like Textillia for sharing our projects and conversation, instead of a multitude of individual blogs?  I know I'm hardly reading blogs anymore and readership here has fallen way off, not to mention comments which are few and far between unless there's a chance to win something.  I miss the conversation & interaction that I used to have with blog readers.  All of that action seems to be on IG these days. 

Have a look around Textillia and let me know what you think. Get started here!

Tuesday, October 20, 2015

Tiny Quilts and Inspiration

August was my "me" month. I didn't have any deadlines or commitments, so I kept sewing plans loose. My thought was to spend some time reading, researching and re-grouping.  I decided to work on two small projects for the American Made Brand Solids Tiny Quilt Challenge.  I really like the concept of the AMB company (read all about their "farm to fabric" process on their website).  Two small (less than 15" sides) and original compositions sounded like a fun exercise.

In order to qualify for the challenge, quilts had to be made of 100% AMB solids. I had some pastel and grey fat quarters purchased at Island Quilter a couple of years ago and two rainbow mini-charm packs (2 1/2" squares) from QuiltCon 2015 at my disposal.

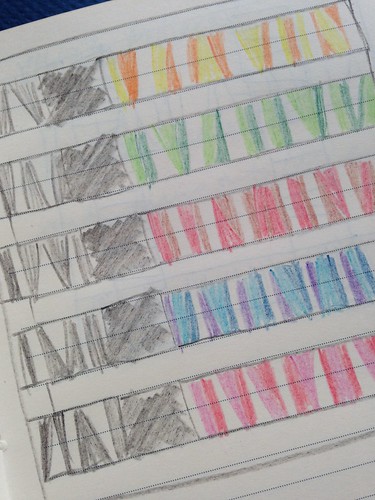
Still working on exploring ideas with my Improv Under the Influence piecing technique, I thought I'd give it a try with the 2 1/2" squares. I didn't have a a concrete idea of what I would do with improv-pieced border units in rainbow colours, until one day inspiration struck in the form of a photo on Instagram. Heather Jones posted a detail shot of a log cabin, showing the horizontal logs separated by white chinking. On the left side of the image, you saw the rounded square ends of the logs forming the adjacent wall.  I grabbed my sketchbook and drew this:

"The Five" sketch by Poppyprint

Looking at those rainbow stripes reminded me of some a quilt block I'd seen on Instagram. It was made by Susanne Woods (craftyeditor) for the #lovewinsquilt project, commemorating the landmark U.S. Supreme Court decision in June that effectively legalized same sex marriage.

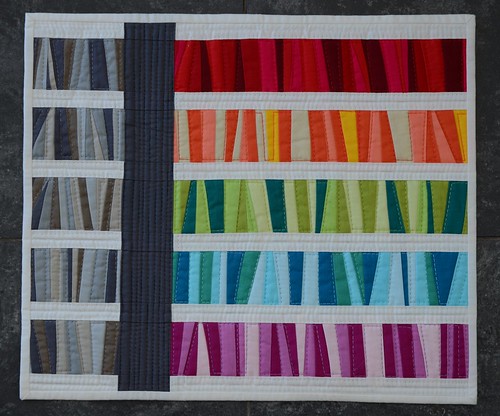
After having a lot of fun piecing skinny strips with tiny 1/8" seam allowances, I came up with this final composition, which I call The Five, measuring 12 1/2" x 14 1/2". It represents the five Supreme Court Justices in their sombre robes, their weighted decision, and ultimately their landmark ruling for equality. Not everyone is happy about this decision, in fact I lost about 20 followers on IG after posting the story of this quilt. Quilters have been using their art to honour their values and commemorate important milestones in history for over 100 years and I'm excited to make my own tiny contribution to this tradition.

The Five by Poppyprint

The Five by Poppyprint

The Five by Poppyprint

With coordinating Aurifil thread in 30 wt, I quilted straight lines with a 3.5 stitch length, simply following alternate seams in the pieced strips as my guide. 

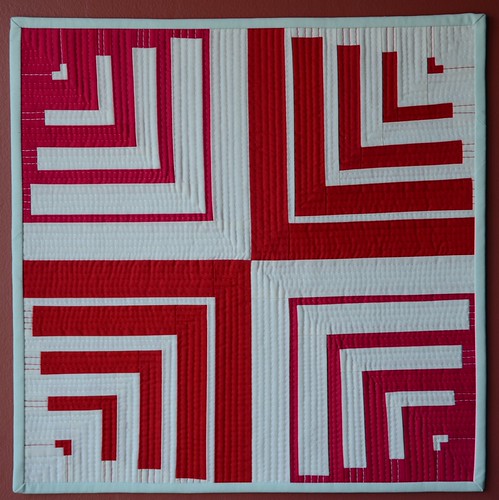
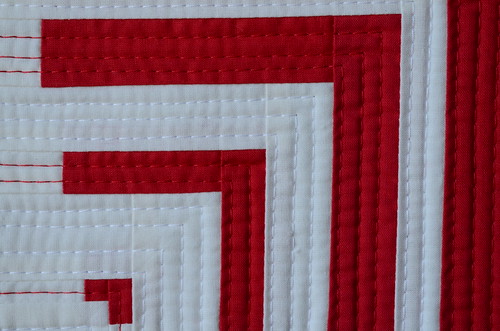
Somewhere along the way, I got to thinking about rounded squares and sketched a few ideas for achieving the look with a log cabin construction. It took quite a bit of math! In order to make The Five, I had to drive across the border to buy reds as there weren't any in the mini charm packs I had. With left over hunks of tomato red and fuschia, I made this Long Cabin Study 1 quilt, which is 15" square.

Log Cabin Study 1 by Poppyprint

The binding had to be AMB also, so my options were limited and ultimately I chose this pale mint colour over dark grey. Again, I quilted with coordinating Aurifil 30 wt thread and a long stitch length on my new Juki  TL2010-Q (using the regular sewing foot with minimal pressure, since the walking foot that came with my machine was faulty).

Log Cabin Study 1 by Poppyprint

Log Cabin Study 1 by Poppyprint

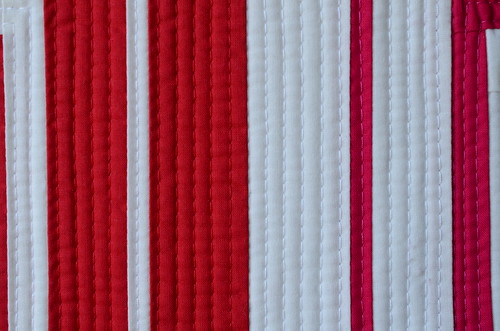
You can see that I carried the thread right through to the edges of the quilt over the alternate coloured fabric.

This quilt wasn't selected, either. I've since made another one in a slightly larger size where the proportions work even better for the secondary pattern of the rounded square. I'll share that with you next and I think I'll create a pattern for a bed-sized version because I just love the bold colour study and resulting graphic design. I find it reminiscent of those illusion text fonts with 'unfinished' letters that your eye automatically completes so that you can read the words, like this one by German designer Alexander Tibus where letters are defined by their shadows.


I've just returned from a wonderful long weekend of teaching in Juneau, Alaska and have lots to catch up. I'll work on my Sweden photos this week and share those with you soon!



Monday, September 14, 2015

Stepping Stones Table Runner Samples & Teaching

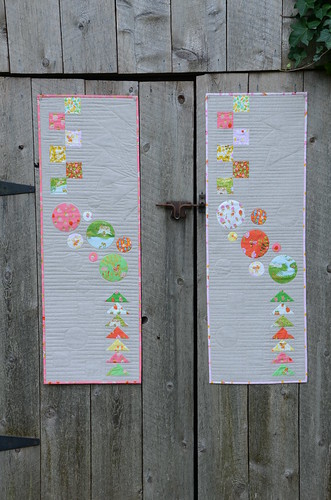
This fall is very busy with trunk shows!  I'm having a great time visiting many local guilds sharing the projects from Make It, Take It with traditional and modern quilters alike.  The table runner that I pieced for the book was quilted by Krista Withers, so after Quilt Market and my spring trunk shows I sent her that one because I knew she loved it and well, she's awesome so she should have it!  I needed to make another and why make one when you can make two?!
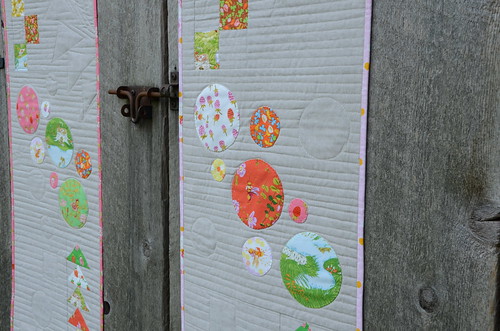
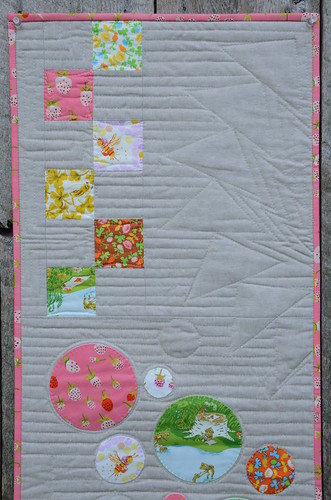
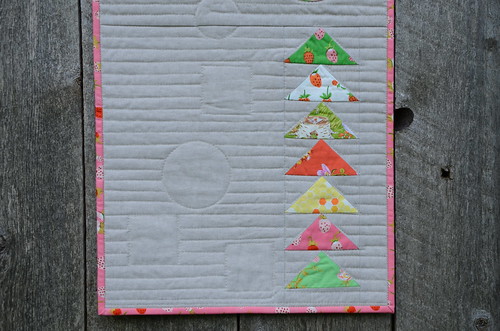
Stepping Stones Table Runners by Poppyprint

The combination of Essex linen and Briar Rose used in the original runner was just too sweet to pass up, so I kept everything pretty much the same when I made these two new ones. The runner sews up quickly - it is so fun to make!  I was anxious to try straight line quilting using Krista's Ghost Shape Quilting instructions in the book. PLUS, I treated myself to a new Juki TL2010Q over the summer and I figured this would be the perfect small project to give it a go.

Stepping Stones Table Runners by Poppyprint

Stepping Stones Table Runners by Poppyprint

Unfortunately, the walking foot that came with my machine was a dud and I was unable to use it. After some online research and an S.O.S. call on Instagram, I was advised by several other Juki users to just go for it and quilt using the regular sewing foot with the presser foot pressure turned right down to the lowest setting (in other words, almost no pressure on the foot). Walking foot be damned!  (Note: my dealer arranged for an immediate replacement walking foot to be sent directly from Juki and I have received it, but not yet tried it).

Stepping Stones Table Runners by Poppyprint
The circles are machine appliqued using my "Fabric Stickers" method described in my Crop Circles Table Runner tutorial on the left sidebar. I used a shortened & narrowed blind hem stitch to secure them to the quilt top.

The results were pretty darn good considering I didn't use a walking foot. Some of the straight seams show signs of drag, but I can live with that. On the second one, I stabilized those longer seams between blocks and beside the pieced sections with stitch in the ditch.  Ultimately, I'm just picky and would prefer longarm results with a home machine, which just isn't going to happen. I'm trying to lighten up and find satisfaction in a job done the best that I can do with the equipment that I have.

Machine binding on my Juki

Where the Juki totally rocked was the binding. I applied my regular 2 1/4" double fold binding to the front of the runners, then pressed it to the back, mitering the corners. Using Roxanne's Glue-Baste-It and a dry iron, I basted the binding to the back.  Then, still using the regular sewing foot I slowly and carefully stitched in the ditch from the front. The machine performed beautifully, even with the uneven thickness of fabrics under the foot (6 layers of binding fabric plus quilt sandwich under the right side of the foot and only the quilt sandwich under the left side of the foot).  With my Pfaff, the snap-on "stitch in the ditch foot" regular popped off when I tried to do this.

I'll be keeping one of these runners for my trunk shows (two more this week!) and gifting the other one soon. If you are a quilting teacher, I highly recommend this project as a complete beginner quilting class that includes: rotary cutting techniques, accurate piecing, flying geese construction, machine applique, quilt basting, marking & straight line quilting and binding.  Check out the copyright statement in Make It, Take It - as long as your students each have a copy of the book, you're welcome to teach any of the projects. Please do!


Friday, May 16, 2014

A Very Special Delivery - Blogger's Quilt Festival

Welcome to my Bloggers Quilt Festival post!  Some of you may recognize this quilt I've chosen to share in the ROYGBIV category because a very similar one made by Tracey and her friends was featured in the festival last year! I sent Tracey a block for her quilt and it became my inspiration - not only the design, but also the sentiment - for this quilt.

I had the great pleasure of delivering this beautiful quilt to a very special person earlier this week.

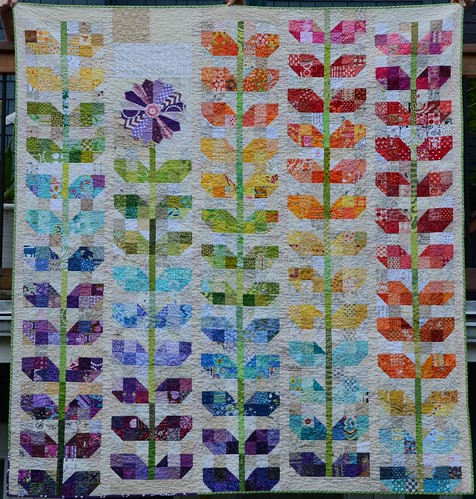
Scrappy Sprouts for Deanna

This is what I've been busy with over the past 5 weeks, with regular updates on Instagram. A mom in our school community received the worst possible news while on vacation with her family in March. She has a long road ahead to regain her health and she needs to know that we are with her all the way.  There was a sense of urgency to get a quilt around her brave shoulders, so I put out a call to my retreat customers and fellow members of the VMQG to help.  They responded as quilters do: with generosity and grace.

I also organized several sewing days around my dining table for mothers and friends in our community so that they could learn how to piece a scrappy sprouts block and put their love and strength into this gift as well. Several women had never sewn before and others hadn't touched a machine in years, but they patiently laid out their blocks and carefully sewed the patches together for their dear friend.  I had pre-cut squares and pre-pieced half square triangles from my stash ready for them to select.

Scrappy Sprouts for Deanna

In the end I was overwhelmed with the number of sprouts blocks that came in. I couldn't bear not to use every single one, so there's a lovely stalk of them holding up the back. Piecing 74 blocks made by over 30 different people has it's challenges but I was determined to let this project come together peacefully. This isn't perfection of technique, but it is absolutely perfect.  In the final layout, a vertical sashing between the columns and a slight offset of each stalk of sprouts keeps things interesting and hides the subtle size differences in the blocks.

image
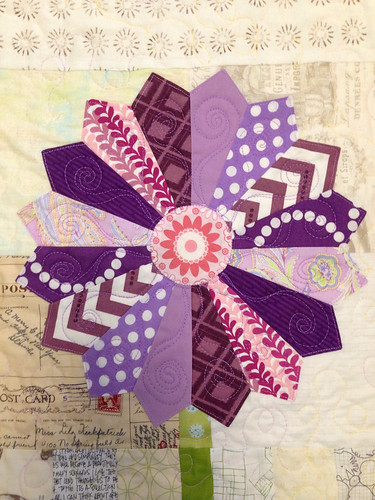
A sweet purple Dresden just for Deanna - the four full stalks of sprouts represent her incredibly supportive husband and their three amazing boys.

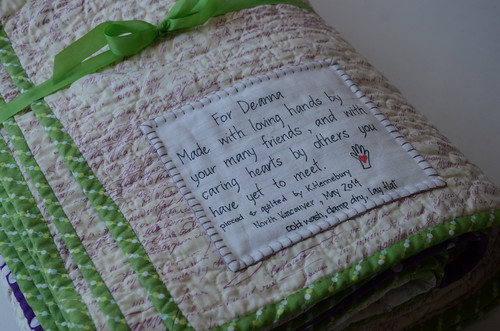
The VMQG retreat over the first weekend in May was my opportunity to assemble the top and backing, sandwich this 78" x 82" quilt and complete the quilting.  It's quilted with an all-over swirly and looping meander using a gorgeous variegated Aurifil 28 wt in pale yellow/cream/lilac. The backing fabric is a Michael Miller print called Old Script with lilac-coloured cursive text.  It's bound with a V & Co. Color Me Happy green bead stripe cut on the bias, plus a little strip of purple Lizzy House pearl bracelets around the lower left corner. I used 3 strands of coordinating lilac embroidery floss to blanket-stitch the label on.

DSC_8310

There's just something extra-special about this sweet sprout block that makes it the perfect choice for a group-effort comfort quilt.  I send a heartfelt hug and thanks to Tracey for allowing me to share her mini-tute for the sprouts block, and the same to every woman who had a hand in the making of this quilt. 

This quilt is so cheerful and full of hope; it is made with love and just plain feel-good vibes.    I know it's already working wonders.

Visit the festival at Amy's Creative Side and have a look through the festival links to see hundreds of amazing quilts made all over the world! Amy does an incredible amount of work organizing sponsors, categories and voting twice a year - it truly is the biggest quilt show online! Thank you Amy!

Spring '14 Blogger's Quilt Festival - AmysCreativeSide.com

Friday, December 20, 2013

Winner, winner, Christmas dinner!

I felt so lucky (and for a moment, a little guilty) for winning the block lotto at my annual November retreat last month. I've been running this retreat for 8 years and never won, so I guess it was bound to happen. Can I just say how happy I am that it was this year? Happy, happy, happy!  Katy's Christmas scrappy trip inspired me to set the Scrappy Trip Around the World block as this year's lotto - it's a super quick make and everyone's got holiday fabric to use up!


Although I'd been sewing with my pals for 4 days non-stop, I returned home Monday night and put the blocks right up on my design wall. There were 30 blocks, so a 5 x 6 layout made the most sense. The odd number across the quilt meant I couldn't use the 'normal' diamond setting. As much as I love this block, I didn't really feel like making 6 more - I just wanted to get this thing together in time for Christmas! Using the strong diagonal reds, I opted for zigzags.


I busted out the wiggly stitch on my Pfaff for diagonal quilting lines through every second square. The wiggly stitch is excellent for diagnonal lines on a quilt with 2" squares because you don't have to mark the quilting lines!  Just aim for the corners of each square and you're all set. The wiggly line doesn't have to hit the corners dead on like you'd want to do with straight-line stitching.


I considered a flannel backing, but also had yardage of this super soft Kaffe Fasset shot cotton in green that's been lying around for years. Using up stash won over buying new flannel and I framed in this extra block with some Kona red so that there's a sweet little present on the back. The binding is a sweet candy cane stripe that was printed on the bias that I've been saving for just this kind of quilt (JOY by Kate Spain for Moda).


All washed and cuddly and keeping us warm on the couch!

Saturday, September 7, 2013

St. Louis Leftovers

During a short house-sitting gig in Victoria last month, I wanted to have a quickie project for the evenings.  I grabbed my gorgeous fat 1/8th stack of Shelburne Falls purchased from Westwood Acres, some coordinating Kona solids, a Sketch and Pearl Bracelet or two. I also threw in a couple of Chicopee prints since they go perfectly with Shelburne Falls.  Pre-cutting 4" strips before we left home meant I could just set up Lise-Lotte's sweet Featherweight and piece to my heart's content as soon as we arrived!

The plan was a St. Louis 16-Patch using Steffani's great tutorial.  The 16-patch blocks are huge, so the quilt top goes together very quickly. Depending on your choice of big print, small print or solid, the blocks can look quite different. It was a perfect holiday project that didn't require much thought.

Shelburne Falls Table Runner

Because I had long F8's instead of Fat Quarter's that the tute calls for (my strips were about 21" long), there were leftover pieced sections after cross-cutting the initial strip sets. They were so pretty I couldn't chuck them, so this table runner was born (thanks to Leanne's encouragement on IG). Like so many modern things I make, this runner doesn't really go with my house - at least until we update the living/dining room, so I think I will gift it to a friend turning 50. Her home is much more modern and I know she likes these colours.

Shelburne Falls Table Runner

Shelburne Falls Table Runner

The quilting is simple organic lines, all in Aurifil of various weights. I just chose the colours that coordinated. I'm not fussed about thread weights for quilting, but usually aim for the 28 or 30 wt.  The binding is Kona Grass Green and the backing is 3 different shades of Kona aquas from a FQ stack I have.

Shelburne Falls Table Runner
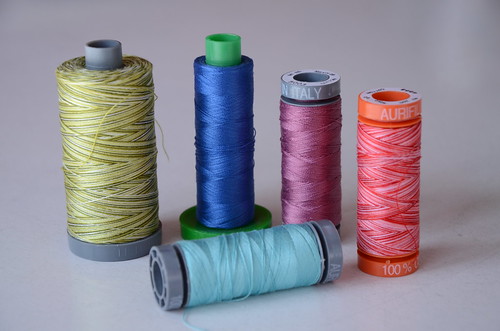
Front: 28 wt #5006, Back L-R: 28 wt variegated #4653 2ED, 40wt #2730, 28wt #5003 and 50 wt #4668. The two grey spools are from the V & Co. Simply Color collection and the orange spool is from the Tula Pink box set, both generously sent to me by Aurifil for the Patchwork Please Zakka 2.0-along.

As soon as the 16-patch quilt is actually quilted, I'll share that too. If you've got a bunch of fat quarters to use up, I highly recommend this fun patchwork quilt. You can go crazy with colour, or keep it subdued with a constant solid colour paired with large prints. It would be a great charity quilt pattern for guild sew-ins, or a fun block to swap at retreats.

Tuesday, July 9, 2013

Just in time for London

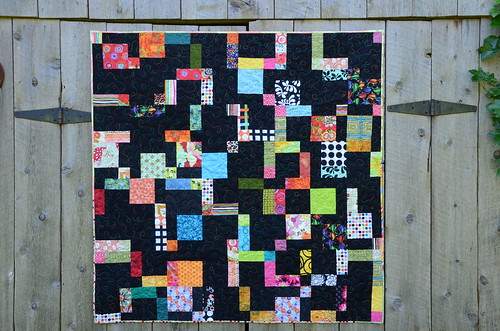
The last VMQG meeting proved very lucky for me. I won half of the block lottery and came home with enough Modern Disappearing 9-Patch blocks to make a 52" square quilt. We often have monthly challenges that result in everyone making one or more blocks in order to practice something new. I always participate, but have never won the lotto since Felicity is busy winning them all (wink).

DSC_6859

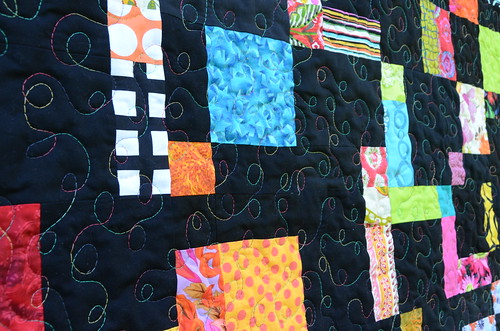
For the modern version, you make the 9-patches with more solids than prints, based on Kristy Daum's tutorial here. We chose black as our solid, to provide background or negative space. I must say, it was hard to sew all that black and I wasn't really in love with the quilt top after piecing it all together.  I wondered if I could lighten things up a bit with some fun thread and chose to do a loopy meander using a variegated Aurifil 40 wt cotton in bright colours of yellow, green, fuschia and blue.

DSC_6860

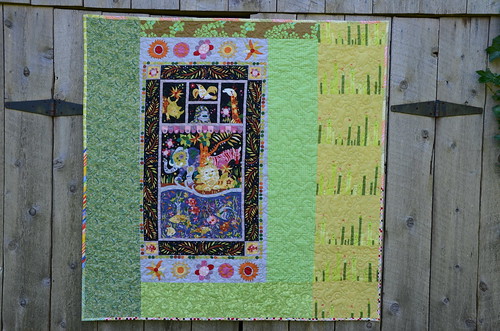
I like it much more now! I'm much happier about donating this quilt to a child now that all that black has been jazzed up.  For the back, I built a log cabin around a colourful panel I've had stashed for several years. The panel was printed off kilter and it always bothered me as I wasn't sure how I'd deal with that in a baby quilt. I don't notice it as much now that the field of green is all around it.

DSC_6862

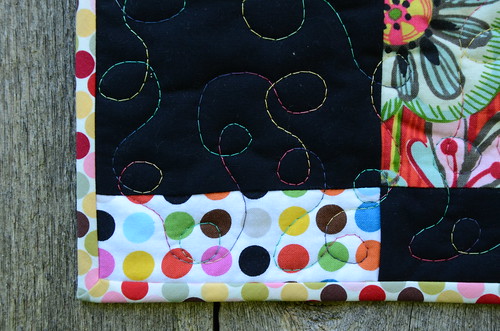
The binding is pieced from several colourful leftovers. I like this dotty corner that happened quite by accident!

DSC_6861

This quilt will accompany me to London next week and I'll happily hand it over to Lynne for her Siblings Together quilt drive.  Siblings Together is a wonderful British charity that brings siblings separated by the foster care system back together at a summer camp. It appears that there will be many other comfort quilts coming into the Fat Quarterly Retreat; the goal is to send every child home with a quilt to cuddle and remember their special time with brothers and sisters. I hope they give comfort to a lot of children living in less than ideal and complicated circumstances.

I have quite a bit of sewing to do before I depart in a week. Hopefully I'll get to show it all to you before I go!  Yesterday I spent a lovely few hours with even lovelier company at Berene's house. Mai was visiting from the OahuMQG so we were all invited to meet her and stitch together. She came bearing surprise gifts from my sweet friend Amber, look:

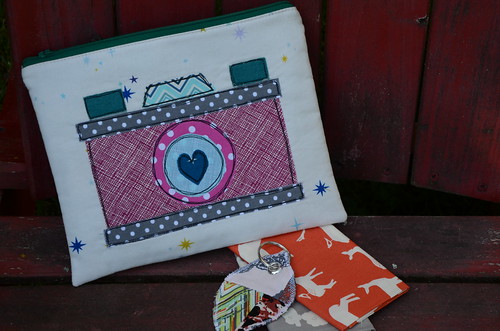
wonderful surprise gift from Amber 1shabbychick!!
Gah! Cutest camera pouch and gorgeous FQs! This is totally coming on vacation with me. Thank you so much for your thoughtfulness Amber, and Mai for the personal delivery.

Finally, for those of you who just can't get enough of me, the VMQG did a lovely "member spotlight" of me and my work that you can see here. Thanks friends!