Showing posts with label Liberty. Show all posts

Tuesday, June 7, 2016

"Will I Remember Colour?" - a Quilt Show Challenge

It is time once again for my traditional guild's bi-annual show this weekend! I'm always very excited about our show for many reasons: we have a very active guild of talented quilters who go all-out to make beautiful quilts for the show, we encourage & celebrate all kinds of quilting styles, the venue is amazing with lots of space & natural light, there's a fabulous member's boutique (that I coordinate), a tea room and a big merchant mall!

This year I am pleased to say that I managed to complete a challenge quilt.  The theme was "Quilt Me a Story" and the idea was to create a small quilt no more than 60" in perimeter inspired by a favourite story or book.  Of all the books I've read recently, I was most affected by reading the Still Alice by Lisa Genova.  I resisted this book, thinking it would be horribly depressing, but I'm very glad that I read it, because while it is indeed incredibly sad, the story left me with a peace that is hard for me to explain.

While considering the quilt challenge, I thought about my creative life, my loves and how memory loss might affect me (my paternal Grandmother lived to a very old age, but suffered severe dementia in her last 10 years). What would happen to my work if I could not remember the names of colours? Would working with colour be the same, just without the words? Would colour still bring me joy? How would I put colours together?
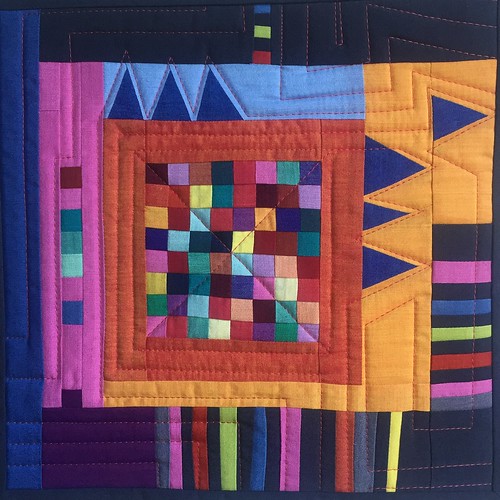
"Will I Remember Colour?" A quilted response to the book Still Alice. 11 2/2" square. Piecing techniques à la Gwen Marston.
Will I Remember Colour?
 11 1/2" square

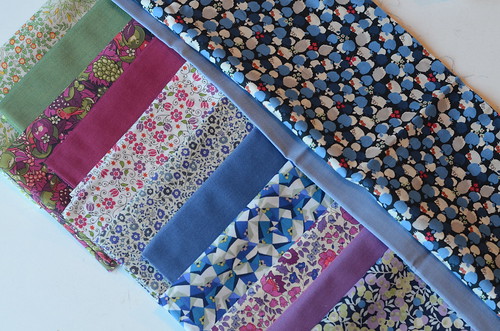
This quilt was made using the Small Studies techniques I learned from Gwen Marston last spring. I used Oakshott scraps that I had on hand and tried to work fairly quickly without giving much thought to colour theory or what I normally like together.

In addition to finishing up this challenge, I've been busy making items to sell in the boutique. I really enjoy doing this for every show. It is a great way to support the guild, enhance our show and also bring in a bit of cash for summer fun! (sorry, only iphone photos, no time for proper photography this week!).
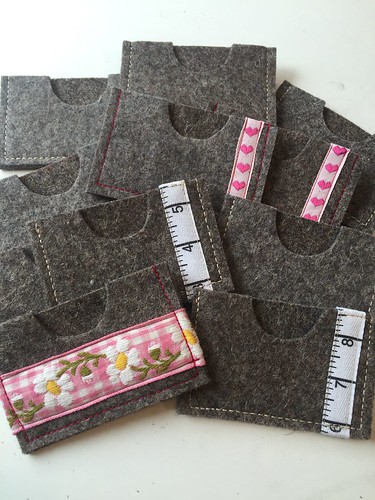
Wool card wallets by Poppyprint. Used off its of expensive industrial wool to make these.
Industrial woolfelt off-cuts were turned into card wallets
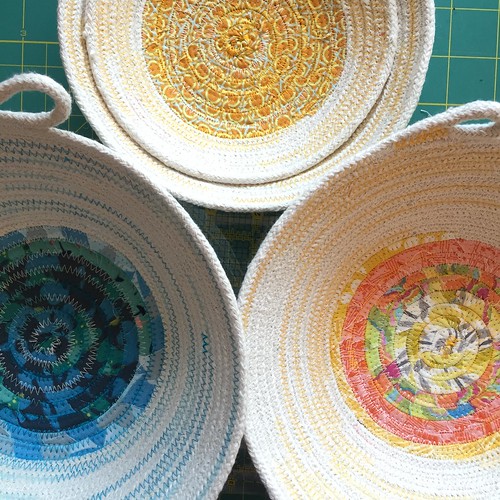
Rope bowls by Poppyprint
I love making these rope bowls!

Untitled
Tiny scraps of Liberty tana lawn on their way to becoming earrings!

And finally, here's my show ribbon. We started a fun tradition a few shows ago, inspired by the Parksville Quilter's Guild, to award home made ribbons to fellow guild members in fun categories. Each member of the show-organizing committee gets to choose their own category and award the ribbon to the quilt of their choice. Member's love it and it gives an opportunity for everyone to have a chance at a ribbon!  For this show, I chose "1/2 Square Triangles" (last show, I did Best Use of Solids and the show before that I did Travel Inspired Quilt). 
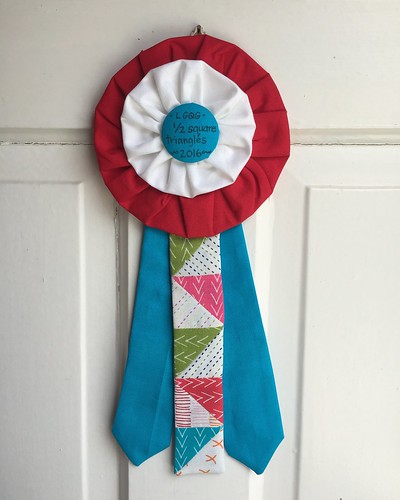
The ribbon I made to be awarded to a quilt with impressive 1/2 square triangles at my traditional guild show this weekend.

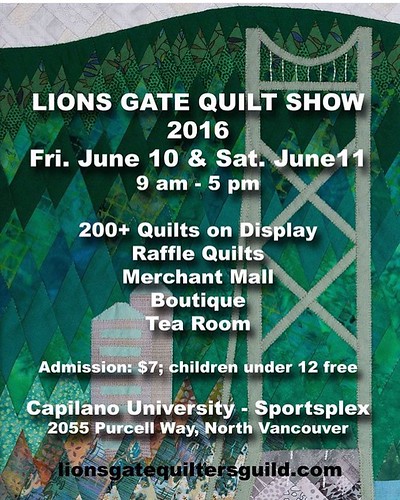
If you are local, I hope you'll visit us this Friday or Saturday at Capilano University. Come find me in the boutique!
Untitled


Saturday, August 22, 2015

Around Town Take II

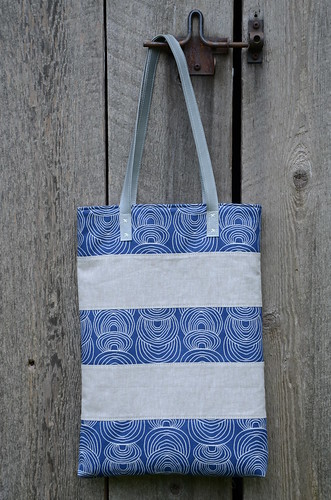
I whipped up this tote for a friend's birthday the other day. It's very straight-forward pattern and a satisfying make. There's something so familiar about rugby stripes - I just love the design of this Around Town Tote Bag.

Around Town Tote Bag by Poppyprint

The pattern can be found in the Liberty Love book by Alexia Marcelle Abegg, one of the uber creative and talented Cotton & Steel designers. The book is out of print now, but you may find one hidden online, or second hand. It's a book on my sewing room shelf that I return to often.  The pattern calls for Liberty tana lawn for the accent strips, but I substituted Anna Graham's gorgeous Ripple canvas from her new Rain Walk line printed by Cloud 9 fabrics (purchased from Fabric Spark). The offset stripes are Essex Linen.

Around Town Tote Bag by Poppyprint

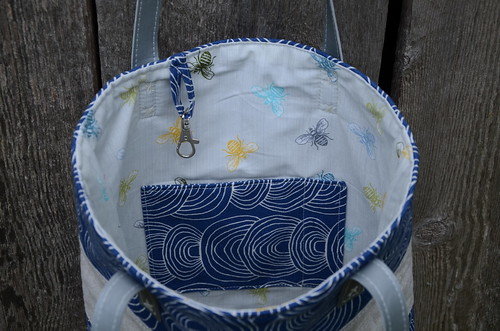
I added an interior pocket and key clip. It's a deep bag and it's a long way down for keys! I also modified the pattern a little bit by adding 1" of depth to the bottom print strip and sewing a 1" gusset into the corners of the tote for some added capacity.  The lining is a sweet Moda print called Be My Honey by MaryJane (I've had it for a couple of years in my stash).

Around Town Tote Bag by Poppyprint

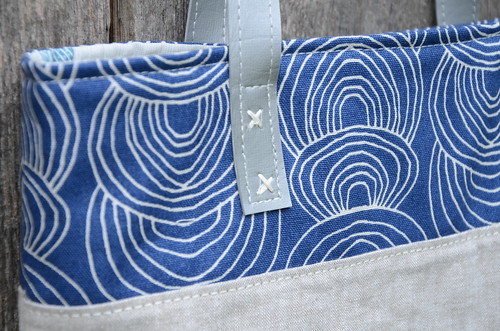
The patterns calls for using an upcycled leather belt for handles, but I have some vinyl on hand so I cut 4 strips and sewed them WST in pairs (for extra strength).  I used my 9mm wide zig zag set to 0 length to make the X stitches, then sewed extra security straight stitches in a box around the X's.  Last time I made this bag, I used gorgeous deer hide for the handles but sadly I don't have enough left to cut more long handles.

I'm slowly making my way through a very long list of fun sewing to do for myself and others. It's always slow-going in summer...especially this exceptionally HOT and dry one here in Vancouver. We're in a rare drought with strict water restrictions. Our lawn is crispy and our garden limp and sad. I've been sewing downstairs where it's cooler as my south facing sewing room is quite a cooker, even with the UV coating on the window.  

I've got a new toy to share with you just as soon as I make enough space to take it out of the BOX!!! So excited.

Monday, September 22, 2014

Little Quilts Cocktail Shakers and a giveaway

Hello there, fans of Amy, Sarah, sweet little quilts, cocktails, and Liberty!  Welcome to my stop on the Little Quilts blog tour, where I will happily gush on and on about how much I am enjoying this addition to my quilting library.


I met Amy during my first foray into swapping back in the Flickr Doll Quilt Swap. I was then introduced to Sarah and her beautiful work shortly after when these two talented ladies teamed up for their Dollies on Line pattern company.  Amy's Mrs. Schmenkman Quilts was one of the first blogs I followed years ago and she thrilled me one day with a sweet unexpected gift prompted by a mini quilt I'd made. I knew right then, that she was my kind of people.  Something tells me that I will get to meet both of these amazing quilters next year in person.....

So, if you've been following along this blog tour you already know that the tour is a swap!  Each of us has a secret partner for which we are making a quilt from Little Quilts. Prior to receiving my copy, I had already decided (based on the Amazon "take a look inside" photos) which pattern I'd use. Then my book arrived: cue indecision.  I wanted to make ALL THE QUILTS! Really! That rarely happens with me and books. Every pattern appeals to me. I know this will be my go-to guide whenever a swap comes around because there is definitely something for everyone and plenty of room for customization with fabric choices, fussy cutting and expanding to larger-sized quilts.

Shaken, Not Stirred by Poppyprint
planning, planning, planning

Having recently acquired a bumper crop of Liberty tana lawn F8's, I was anxious to use some of them in this special quilt. I paired them with that other British fabric I love, Oakshott Colourshotts. After marking several pages in the book, eventually I returned to my original idea because my little brain just loved the idea of an all-British cocktail shaker quilt: A James-Bond-ish Shaken, Not Stirred table runner.

Shaken, Not Stirred by Poppyprint

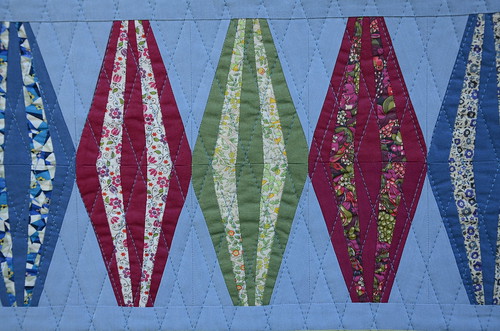
I think these two kinds of fabric really enjoy each other's company. The foundation piecing for the cocktail shaker shapes is very straightforward and not at all fiddly as far as paper piecing goes. It's actually a great project for a first go at this technique.  Can you spot the teeny Hello Kitties in the border print?

Shaken, Not Stirred by Poppyprint
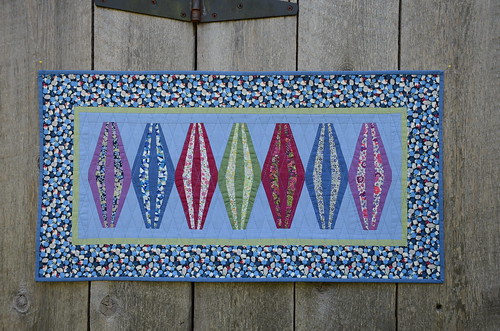
"Shaken, Not Stirred"

The runner finished up at 16" x 31".  Hopefully my partner has a suitably sized coffee table or side board, or even a bar!  Of course, there is always the awkward skinny wall option for hanging a table runner. 

Shaken, Not Stirred by Poppyprint

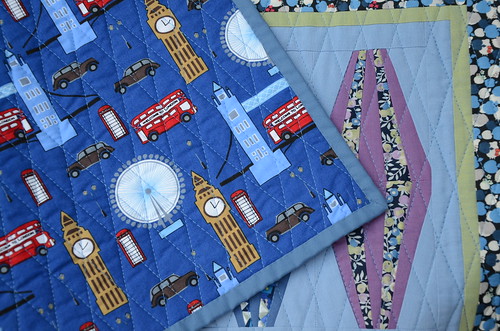
I quilted the runner with a gorgeous blue Aurifil 28 wt thread in a straight line diagonal grid pattern that parallels the piecing. And I used this perfectly-suited Laurie Wisbrun print from my stash on the back!

Shaken, Not Stirred by Poppyprint

Shaken, Not Stirred by Poppyprint

To see what everyone else is making for their secret partners in our blog tour swap, have a look at the other stops listed below!  If you don't have it already, ask your local quilt shop to stock this wonderful book for you...then organize a swap with your guild or quilting friends!

If you'd like to win a copy of Little Quilts courtesy of Sara and Amy's publisher, leave a comment and let us know if you've ever made a doll or mini quilt before!  I'll close the giveaway October 4th and chose a random winner.  To win, you MUST leave your email address in your comment if it is not linked. If I can't contact you with one click, I'm afraid I have to chose another winner.  Good luck!

September 1: Amy and Sarah
September 8: Pam Vieira-McGinnis
September 15: Nedra Sorenson
September 22: Lynne Goldsworthy and Krista Hennebury
September 29: John Adams
October 6: Katy Jones

EDITED TO ADD: comments are now closed, and congratulations to commenter #63, Kathy, who has won herself a copy of Little Quilts!

Monday, December 16, 2013

A Christmas Greenhouse

Making special gifts for family and dear friends is what Christmas is all about for me, and I know many of you, too.  The minute I saw Amy's Victorian Greenhouse pattern for foundation paper piecing, I knew that I would make it for my lovely friend. She recently inherited her mother's sweet greenhouse and after dismantling, transporting and setting it up in her own backyard, she spent last summer filling it with various seedlings, tomatoes, strawberries and a sweet garden chair.  I know it is very special to her, and that it will enrich her garden fully, not only with warm memories, but also vibrant, healthy plants.

Victorian Greenhouse by Poppyprint

We share a love of Liberty prints, so I had a look through the stack of tana lawn that I brought back from London last July to find just the right print to fill the greenhouse. I used my own poppy-printed fabric for the ground and Joel Dewberry's new woodgrain in grey for the border.  The foundation print is one of rocks that I've had for years and had never found a use for. It is perfect here.

Victorian Greenhouse by Poppyprint

The pattern, although featuring some super skinny strips, was very easy to sew on the foundation. I used a product called "Fundation" printable sheets  to print the pattern directly from my printer.

Victorian Greenhouse by Poppyprint

I sewed ties into the top and bottom seams (between the pillow front and back) to keep the back overlap from gaping. 

My friend visited with her family yesterday and we exchanged our heartfelt gifts. I was absolutely thrilled to receive the most beautiful hand-woven tea towel from the first cloth she has created on her table-top loom. You can see the blogpost about her newest obsession, and my treasured gift, here.  While Christmas is definitely a time of giving, I will freely admit to being a most appreciative receiver as well!

Victorian Greenhouse by Poppyprint

I hope you are enjoying spending some time sewing for special people in your life, too!


Thursday, October 3, 2013

URHere Swap

Swapping has fallen by the wayside for me in the last year. That's not such a bad thing, I really needed to take a step back from too many commitments. I sure miss them when I see some of the gorgeous makes winging their way around the world in some of the great Flickr swap groups.  Amy started up a fun swap in Instagram for Starbucks You Are Here Mugs.  The last thing I need is another mug (my kitchen is so small and we literally have no room in the cupboard for even one more!), but it is so easy to buy a mug, pop it in a box and ship it!

It wasn't long before super cute little makes were popping up in the flickr group and being sent as "extras". There was no way I could just send my partner a lonely mug!  I've got a fairly substantial collection of basted  Liberty 1/2" hexies so I ladder stitched a flower together and appliqued it onto some chambray for this sweet needle book, complete with Liberty fabric-covered button.

a wee Liberty needlebook for my URHere-swap partner

There's a gorgeous Liberty blue poppy print on the inside, along with some hand-dyed wool in a beautiful shade of purple.

photo

I'm not even sure my partner likes Liberty tana lawn, but don't think there are many warm-blooded quilters who can resist it!  This swap package will go in the mail tomorrow. I'm looking forward to seeing which location my mug will come from - I'll let you know when it arrives.  There will be two extras soon as well. Cindy and Katie both wanted Vancouver mugs, so I'll have an Orange County and Seattle ones coming my way, too!

Sunday, September 8, 2013

Craft Book Month

Craft Book Month

Lindsey and Mary over at Craft Buds are hosting their 3rd annual Craft Book Month through September. They've got a blog tour all month featuring book projects as well as a link up for people to share projects made in 2013 from craft books (including great prizes!). This is interesting for me. I have a LOT of sewing/stitching/quilting books. I love reading through them, checking out different construction techniques, fabric combinations, inspiring photography and stories. Do I make stuff out of my craft books? Rarely. I can't really say why. Perhaps it is because I often have my own ideas that need sewing, or I use specific one-off patterns that I purchase from blogging friends.


One book that has inspired me in the past several months is Alexia Abegg's Liberty Love. In this case, it is entirely due to the gorgeous Liberty tana lawn fabrics and  Alexia's designs that show them off to their full potential. Of course, any favourite fabric could be used for projects in the book - one need not fork out the big bucks for Liberty - but if you've got a treasured stash, this is likely the book that will get you cutting into it.

Around Town Tote by Poppyprint

I originally blogged about this gorgeous Around Town Tote here.  I want to make one for myself soon because I just love the aesthetic of this uncomplicated bag. I still have enough of the leaf print, but I might be tempted to choose one of the more colourful florals that I brought home from London instead.

My next project from Liberty Love will be the Spool Quilt. I fear it will have to wait until November retreat, but that's okay. It is the perfect project to easily piece while laughing with friends and I know everyone will be excited to see all of the tana lawn prints. Liberty is rare here. 

Once I make the Spool Quilt, that will be two projects out of one book. A definite record for me. What crafting book have you made the most projects from? 


Wednesday, July 31, 2013

London 2013 - Give Me Liberty

I've been getting requests to share my fabric purchases from London. Not one to keep anyone in suspense, here you have it!

Within four hours or so of my arrival in London and before I'd even eaten a proper meal, Leanne took me off to Shaukat for some Liberty love. Tana lawn before dinner: my kind of London experience!

Liberty tana lawns at Shaukat, London
rolls and rolls of tana lawn

Prior to the trip, I was warned that this shop can be overwhelming but I was pleasantly surprised. Not only were we the only two customers in the store, it was beautifully air conditioned (man, London was an oven while I was there - I haven't sweat that much since Bangkok in '91), spotlessly clean and very well organized. My mission was to come home with some small pieces of fabric that I could use to make the Liberty Spool Quilt from Alexia Abegg's Liberty Love book.

Liberty Tana Lawn

Shaukat's minimum cut is a 1/2 meter, but lucky for collectors like me they also sell remnant pieces for 1, 3 and 5 pounds sterling, depending on the size. Leanne and I quickly took to the remnant piles and dug for our favourites. 

Liberty Tana Lawn
Most of these pink prints are from a strip roll up I purchased at Liberty.

Liberty Tana Lawn
Darker prints that I will use for spool ends in the quilt. Some were traded at the Saturday night marketplace held at retreat.

Liberty Tana Lawn
eep! It's Hello Kitty!

The next day we were part of a lucky group from retreat that was selected to participate in a designer talk at the Liberty of London store. After some initial confusion and traipsing up and down stairs and elevators between the store and the office building behind it, we settled into a lovely cool conference room.

 Liberty of London

First a young designer with the company talked about collaborations with artists in some recent collections. Then Liberty's passionate archivist gave us a history of the company and it's flagship store, followed by a slide show. She shared comparative photos of the archival designs that inspired modern counterparts for the Stile (which they pronounce "steel") collection of quilting cottons. The excitement didn't end there for me.  After the talk, I went down a staircase and exited the office building through a set of doors into an alley behind the main store. Wrong move. I set off the Liberty Secret Service. All at once I had 4 Italian men dressed in black with ear pieces running down the alleyway from both buildings! Hehe, my bad. Luckily, I could play the innocent foreigner and no harm was done.

Some photos from inside the store:

Liberty of London
Origami cranes hang above a display table

Liberty of London
foxy door stops!

Liberty of London
Sarah Fielke's book for sale on the fabric floor

Liberty of London
Awards display in the office building lobby

Liberty of London
walk this way to beautiful fabric

There you have it: Poppyprint's Liberty rampage of London! 

Next up, all of the beautiful handmades that came home with me from Fat Quarterly Retreat.

Monday, April 29, 2013

Peace: Liberty edition

Prior to making my Peace, Boston flag, I had basted my teeny 1/2" Liberty hexies together into a peace sign for my new spring jacket. After buying the jacket on impulse from a shop window display, I was surprised to see that every second woman in Vancouver is wearing a similar one - jeez.

Now mine is a little different.

photo

These tiny hexies are the last of my Liberty scraps from last year's challenge by The Organic Stitch Co when I made this and these. Jo's got a 20% off sale on her ENTIRE shop, so I've re-stocked charm squares in the hopes of making the sweet spool quilt from Alexia's book Liberty Love.  Yardage purchases will have to wait until I hit Old Blighty in person in July. I want to have a proper fondle before I plunk down big coin on that tana lawn! Jo's got a new mini charm package - fifty different 2 1/2" squares for under $12. It's the perfect snack pack for someone looking to dabble in Liberty and her shipping to Canada is super reasonable.

 To Boston with Love UPDATE: An exciting event/venue opportunity in Boston means our flags have to be there earlier:  if you want your flag(s) to hang in the opening, they need to be in Boston by May 21st.  Flags arriving after that date can still be added. See VMQG site for details. Take an hour this evening and make a flag to be a part of this super exciting modern quilt guild movement!

Wednesday, March 13, 2013

Loving Liberty

Last month I visited the sewing wholesaler to gather prizes and giveaway goodies for my retreat when I spied a copy of Liberty Love by Alexia Abegg on the manager's desk. Playing the innocent, I said "oh, I didn't realize that book was for sale yet!". Of course it wasn't for sale yet, but a businessman isn't going to pass up a sales opportunity, is he? Out I walked with a smile on my face and an advance copy of Liberty Love in my lovely Happysewlucky-made fabric shopping bag!

Having read the book cover to cover, I can hardly think of anything else beyond my trip to London in July and fondling Liberty Tana Lawn in person, IN THE LIBERTY FLAGSHIP STORE!  I've previously declared my love of sweet spool quilts and even made a few selvage ones, so it's a no-brainer to put this one on my Future Quilts list. Liberty charm square acquisition is in full swing!

photo

Instagram is loaded with amazing photos of people making the Marcelle Medallion quilt. It is exciting to see how different the central medallion looks in different colours and prints (check the flickr group for pix). I love medallion quilts, so I'm sure there will be one of these in my future, although I don't think I am keen to piece flying geese with tana lawn, so I will probably use my cotton scraps.

To kick off my own personal Liberty Love fest here, I went with a quick but satisfying project: the Around Town Tote. Alexia taught a class at Keli's amazing Drygoods Make.Do.Mend workshop last weekend and after seeing photos of the bag that K2 made there, I realized this would be the perfect gift for a friend's 50th birthday. 

Around Town Tote by Poppyprint

I know my friend is an over-the-shoulder bag carrier, so I made the straps longer. The pattern calls for upcycling a leather belt, but I've got a buttery soft deer hide that's been waiting over 20 years for the perfect project, so I cut strips from that. Due to it's stretchy nature, I decided to stitch two strips together, rough side in, for stability. A 100/16 topstitch needle did the trick...I just went slowly with presser foot pressure turned right down and a teflon foot. I don't have an awl, so I used the same needle without thread to pre-pierce marked holes for the hand-stitched X's (sewn with doubled polyester thread, a leather needle and thimble). I didn't have any magnetic snaps on hand, so I made a tab and wooden button closure instead.

Around Town Tote by Poppyprint
My favourite way to add some oomph: triplestitch topstitching

The Liberty tana lawn was purchased from Katy on destash ages ago. It looks amazing with Essex yarn dyed linen in black (what doesn't?!?). That linen came in a hefty 5 yard chunk from Marmalade Fabrics because I know I'll use it for many projects. For the lining, I chose Summersville weave and added a divided pocket for iphone and keys on a fob.

Around Town Tote by Poppyprint

It is kind of hard to tell, but this bag is a very generous size (I hardly had to suck in my gut for this picture)! 

Around Town Tote by Poppyprint

I'm definitely going to make more of these. It's rugby shirt stripes: the Liberty glam version!

Wednesday, August 1, 2012

Liberty Scrap Challenge the Jewelry Edition and WINNERS!


No one wants to throw away even the smallest scrap of Liberty tana lawn, do they? Here are a few ideas for you and your large coin-sized scraps: Covered button jewelry!

Liberty Scrap challenge - jewelry with covered buttons!


You'll need fabric scraps (mine are courtesy of Jo at The Organic Stitch Co., where you can get a scrumptious scrap bag for about $15!), lightweight fusible interfacing, a few inexpensive findings and some strong all-purpose adhesive for these projects.

Liberty Scrap challenge - jewelry with covered buttons!

I purchase my findings (buttons & blanks, bookmark giant paperclips, rings and earring posts) at great prices here . I love the fact that you can buy in small quantities, as well as in bulk. They also sell adhesive, but I find their brand is very strong-smelling and the smell lasts for over two weeks until the glue is absolutely cured. Instead, I use Aleene's Platinum Bond 7800. Make sure you source an adhesive that's good for metal surfaces and help it along by roughing your surfaces with a bit of sandpaper first.

Liberty Scrap challenge - jewelry with covered buttons!

These are great summer, no sew items to make. Here's what you need to do:

1. back Liberty tana lawn scraps with fusible lightweight interfacing (this is so the metal of the button doesn't show through when the fabric is stretched over the blank).

2. cut fabric to size needed for your buttons. I used 1/2"  (size 20) for earrings and 1 1/8" (size 45) for rings and bookmarks. If you make a template out of cardboard, you can simply hold it with your fabric and trim around - no need to mark on the fabric.

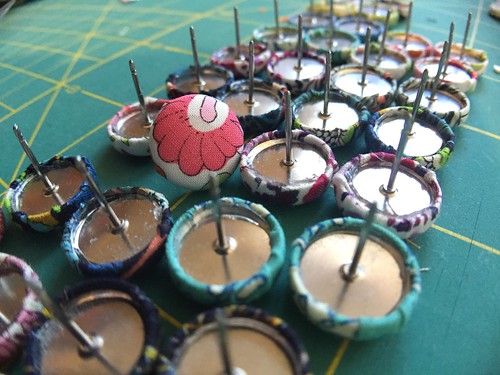
3. follow pictures below to cover your button. With the tiny 1/2" blanks, I use the eraser of a pencil to push the fabric & button into the rubber holder and again to stuff the excess fabric into the back of the button before pushing the blank onto the back.

covered button pictoral

4. Rough up the blank on the back of your buttons. In a well-ventilated area, apply adhesive to the blank as well as the surface you want to stick it to. For the earrings and tiny buttons, I used a toothpick to apply the glue. Wait 5 minutes, then stick 'em together!

Liberty Scrap challenge - jewelry with covered buttons!

All of these items are fun for gift-giving, craft sales or just wearing around all summer.  When I posted my first Liberty Scrap Challenge tutorial for the Liberty Lemonade tablecloth, I offered my leftover charms to anyone willing to take on the Challenge.  The winner needs to use those charms (added fabric is okay!) and come up with a fun project and tutorial to share.  Random number generator has chosen comment #22, so it looks like our next challenger will be Kirsty@Bonjour!


This is very exciting because Kirsty makes beautiful projects and it looks like she's already got something in mind for the scraps. Check out her gorgeous blog for fabulous tutorials and stunning photos of her life in Provence, France.

Now I also promised a "little Liberty something" to a commentor who wasn't up for the scrap challenge, and the first such comment to come up randomly is #49. Yippee, it's Duff, who eats breakfast food in any order she wants!


She liked that I used the word 'schematic' in my tutorial post. I love that she signs all her comments with a heart. So there.  Michele, go ahead and pick out an item you like in the photo above and it's yours! (well, except for the navy rose ring which our visiting cousin already claimed....).