Showing posts with label foundation piecing. Show all posts

Tuesday, March 31, 2015

A Stylish New Bath Mat!

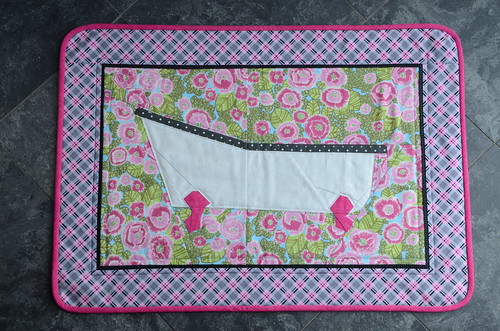
Welcome to my stop on the Paper Pieced Home blog tour! I can't wait to show you the project I made. Penny's excellent book is full of fabulous foundation patterns but the clawfoot bathtub is one of my favourites. It didn't take me long to claim the bath mat as my project for the tour.  We had a lovely old cast iron clawfoot tub in our first home. A bath in that thing got cold in about 5 minutes, but it was very romantic with it's vintage fixtures set on a hardwood floor in a tiny bathroom.  I am pretty sure the bathroom was built around the tub because I cannot see how it could have been moved through the door!

Clawfoot Bathmat by Poppyprint

One of the best technical things about Penny's book is that all of the foundation patterns are included on a CD so all you have to do is pop it into your computer, click on one button to open the book, then click on the project you want from the table of contents.   As long as your printing options are set to "print actual size" and NOT "shrink to fit" you're in business. A handy square printed on the first page of each pattern lets you measure and confirm you are printing at the proper scale.
Clawfoot Bathmat by Poppyprint

If you are going to create this bath mat, just be sure to click on the Clawfoot Bath Mat project on page 84, not the Clawfoot Tub block on page 75 (which is a slightly smaller tub complete with shower head and embroidered water detail) when you are ready to print your pattern pieces.
Clawfoot Bathmat by Poppyprint

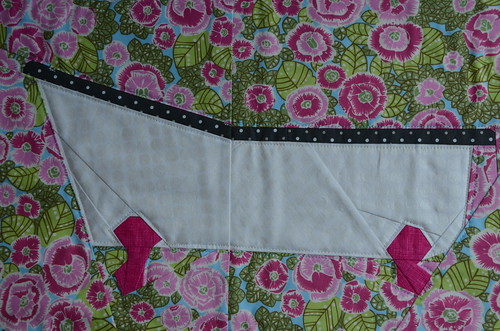
I made this entire project on retreat a couple of weeks ago and it went together beautifully! I taped all of my pattern pieces together, then cut them apart on the blue lines just as Penny instructs in the excellent "Basic Steps" section starting on page 11.  I am an experienced foundation paper-piecer, so I had no trouble making this block (and I must say, some of the giant pieces of tub and wallpaper background help to make you feel like a rockstar when your block sections are complete with only one or two seams!).  On the flipside, even the tiny pinky nail-sized pieces around the clawfoot were easy to piece.  Unfortunately I don't have any process photos as our retreat was over a very dark and rainy weekend.

Clawfoot Bathmat by Poppyprint

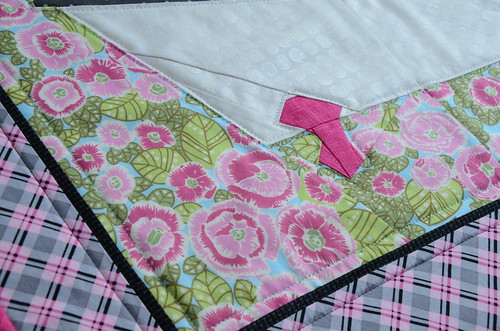
Choosing fabric for this project was really fun. I wanted to try and stick to Penny's cute sample in the book, so I pulled my only diagonal plaids (I have two) from my stash and set to work finding just the right coordinating "wallpaper" fabric. I really wanted to use the aqua floral from Farmdale as it looked amazing with the pink/grey plaid but alas, I didn't have nearly enough fabric [Foundation piecing always uses more fabric than you imagine when just looking at the pattern pieces. You have to account for the long pointy angles and include your 1/4" seam allowance outside the actual pattern piece.]  I think this old Amy Butler floral does the job, though.  Majority opinion on retreat voted for the black piping insert before the border to delineate the wallpaper from the plaid.  I adore the Mirror Ball Dots tub (although I'm a little worried about the mirror balls picking up dirt - I fully plan to put this mat to use in my daughter's bathroom).
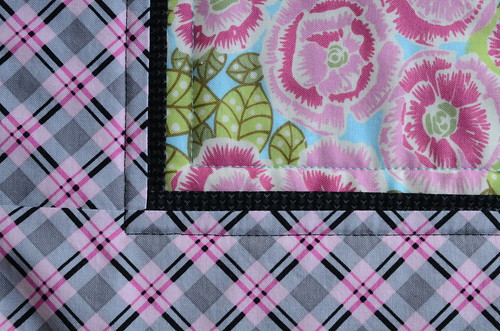
Clawfoot Bathmat by Poppyprint

As per Penny's instructions, the bath mat is quilted with a piece of white flannel inside with white terry cloth backing.  I know it will be washed repeatedly and I didn't like the idea of trying to hand-stitch through terry cloth, so I attached the binding by machine.

Clawfoot Bathmat by Poppyprint

How'd you like to receive an digital copy of Penny's book? There are such fun patterns that would make amazing house warming, wedding, baby or anniversary gifts, or blocks that could be combined into a special mid-century modern, gardening or baby quilt.  What has caught your eye?  Leave one comment below to enter and I'll draw a winner with the random number generator on Easter Sunday. COMMENTS ARE NOW CLOSED, thank you.


By Penny Layman
Interweave/F+W; $26.99 US

You can check out the rest of the tour and enter to win on the fun blogs listed below. Then on Monday, tune in to Pat Sloan Radio to hear Penny talk about her book!

The Paper-Pieced Home
Blog Tour Schedule

3/16       McCall’s Quilting / Sewing Machine Block
3/17       Love of Quilting / Review
3/17       Sandi Sawa Hazlewood  of Crafty Planner / Watering Can Block
3/18       Quilty Pleasure (Quiltmaker blog) / Review
3/18       Imagine Gnats / Rotary Phone Block
3/20       Verykerryberry / Lion Block
3/21       Artisania / Cast-Iron Skillet Block
3/23       Where the Orchids Grow / Lamp Block
3/24       Katie Blakesley of Swim Bike Quilt / Layer Cake Block
3/24       House on Hill Road / Oven Mitt Block
3/24       Lee Heinrich of Freshly Pieced / BBQ Grill Block
3/26       Pink Penguin / Allie-Gator Block
3/26       A Happy Stitch / Giraffe Block
3/27       Bijou Lovely / Jar Block
3/27       Two Little Banshees / Saucepan Block
3/27       Charise Creates / Espresso Mug Block
3/30       Karen Lewis Textiles / Couch Block
3/31       Poppyprint / Clawfoot Tub Block YOU ARE HERE!
3/31       One Shabby Chick / Stack of Books Block
3/31       During Quiet Time / Sleeveless Dress Block

4/06       Pat Sloan The Voice of Quilting / Author Podcast Interview

Tuesday, March 17, 2015

Paper Piece Your Home!

Just popping in to let you know that my friend Penny (who, after "knowing" her for over 5 years, I was finally able to meet in person at QuiltCon. Yay!) is celebrating the release of her gorgeous new book with a blog hop.  There are a whole whack of us bloggers all set up to make each of the incredible paper-pieced blocks from her book The Paper-Pieced Home. Something I already love about the book is that all of the foundation patterns come on an included DVD, so there's no destroying your book while you try to smush it flat on a photocopier/scanner!

I told Penny I don't foundation paper piece anything for just anyone! I'm going to try my had at the hilarious, yet sophisticated clawfoot tub, reminiscent of the one in the first house B and bought together.  Hilarious, because it is just about the last thing on earth I thought I'd ever paper-piece! It just goes to show you that a determined designer can make a pattern for anything (a frying egg in a cast iron pan! a sleeveless dress! a rotary phone!). You'll see just how talented Penny is if you follow along on this tour. Also, there are lots of books to be won so be sure to check out all the stops listed below.
Here's the schedule: 

3/16       McCall’s Quilting / Sewing Machine Block
3/17       Love of Quilting / Review
3/17       Sandi Sawa Hazlewood  of Crafty Planner / Watering Can Block
3/18       Quilty Pleasure (Quiltmaker blog) / Review
3/18       Imagine Gnats / Rotary Phone Block
3/20       Verykerryberry / Lion Block
3/21       Artisania / Cast-Iron Skillet Block
3/23       Where the Orchids Grow / Lamp Block
3/24       Katie Blakesley of Swim Bike Quilt / Layer Cake Block
3/24       House on Hill Road / Oven Mitt Block
3/24       Lee Heinrich of Freshly Pieced / BBQ Grill Block
3/26       Pink Penguin / Allie-Gator Block
3/26       A Happy Stitch / Giraffe Block
3/27       Bijou Lovely / Jar Block
3/27       Two Little Banshees / Saucepan Block
3/27       Charise Creates / Espresso Mug Block
3/30       Karen Lewis Textiles / Couch Block
3/31       Poppyprint / Clawfoot Tub Block
3/31       One Shabby Chick / Stack of Books Block
3/31       During Quiet Time / Sleeveless Dress Block

4/06       Pat Sloan The Voice of Quilting / Author Podcast Interview

Saturday, March 1, 2014

Selvage Colour Block Tutorial

I'm very pleased to say that Project Big Project is now complete for the time being and I am back at the sewing machine!! Thanks for hanging in there, I know Poppyprint has been rather quiet for a few months.

Although my UFO list is as long as my right arm (which is slightly longer than my left), I have jumped back into sewing with a brand new project. If you're an Instagram follower, you know that I've been working my way through the selvage drawer. It's about time, because I could hardly cram another strip of fabric into that drawer!  I've made a few small selvage projects over the years, which you can see here, here, here and here.  Recently my friend Diane posted her selvage string blocks on IG (where she is ylmommyx4) with the hashtag #selvageblockalong and I was immediately inspired to get busy.

Selvage Colourblock Tutorial by Poppyprint

If you google, or search Flickr for "selvage", "selvage strings" or "selvage quilts" you will find several different options. For a couple of years, I'd been thinking of sorting my selvages by colour and using them in a colour-blocked quilt somehow. I just like to be a little more organized in my scrappy efforts: sometimes completely random is too much like work for me!  

The blocks I'm making are 10 1/2" unfinished, so a complete colour block (above) will finish up at 20" square. I haven't decided if I'll use my blocks like this, so I'm not going to sew them together until I use up all my selvage strips and see where things sit at that point.  Ideally, I'd like a usable quilt about 80" square, but I don't think I have enough selvage to get there as that would require 16 huge blocks.

Here's a quickie tutorial for the blocks I'm making. 

Supplies for one 20 1/2" (unfinished) Selvage Colour Block

4 squares newsprint paper 10 1/2" x 10 1/2"
2 squares solid colour 5" x 5" cut once on the diagonal
a pile of selvage strips 10" to 40" long* matching your solid colour
disappearing fabric pen

*note that I generally cut my selvage with at least 1" of print above the white selvage strip. If the selvage is extra 'hairy' with a long fringe of threads, I carefully cut the fringe off without compromising the finished edge.

Selvage colour block by Poppyprint

1. Fold the paper once diagonally and crease to mark the diagonal OR draw a pencil line corner to corner. This is a guide to help you keep your strips running at 45 degrees.  Mark a 1/4" seam allowance on the long side of one solid triangle. Pin the solid triangle to one corner of the paper foundation, with the marked diagonal lines parallel to each other.

Selvage colour block by Poppyprint

2. Place the first selvage strip on the solid triangle, overlapping the finished selvage edge to the 1/4" marked line. Pin in place. I used my longest selvage (you need about 40") for the first strip on each of the 4 squares that will make up one colourblock. If I decide to piece my blocks like the one shown above, with a central solid diamond, having the same selvage print outline the solid will better define it and give it a more balanced appearance.

Selvage colour block by Poppyprint

3. Using a reduced stitch length for security and also to make it easier to remove the paper foundation later (I reduce to 2.0 from a 'normal' 2.5), topstitch the selvage strip with an 1/8" seam allowance.

Selvage colour block by Poppyprint

4. Repeat step 3, making sure each selvage strip is long enough to completely cover the paper and overlapping the previous strip by at least 1/4". I just eye-balled this and most of mine are probably overlapped by 3/8". Continue until the entire foundation is covered.

Selvage colour block by Poppyprint

Selvage colour block by Poppyprint

5. Press the completed foundation with a dry iron. Turn the piecing upside down and trim the square to 10 1/2" using the paper as a guide. Because all of the trimmed selvage edges of the square are on the bias, I plan to keep my paper foundations on until the squares will be sewn together.

Selvage colour block by Poppyprint


Selvage colour block by Poppyprint
MAKE 4

Just a couple of notes.....Seam allowances here are only 1/8" or so. The smaller stitch length will help keep these seams intact over time, but I will likely quilt this heavily for extra stability. Selvages have tiny permanent holes in them where the fabric was attached to the printing rollers.  There's a good chance that the batting will beard, or work it's way through these holes, over time.  I don't have any illusions of this becoming an heirloom quilt!  It's a fun project to use up interesting strips of fabric and to look at and remember favourite prints.  It's a quilter's Eye Spy! 

Selvage Colourblock Tutorial by Poppyprint
Here's the first blue one. There will be more as blue is my most abundant selvage pile!

If you make some blocks using this tutorial or any other selvage string ideas, please share on IG using #selvageblockalong !  You can also join and post photos in Diane's Selvage Block-Along Flickr group . 

No selvages in your stash? Start saving now. You won't believe how fast they accumulate! I typically don't cut off the selvage until I am going to use the fabric in a project, however if I want to see this quilt idea through to a finish, I may have to raid my stash for more strips. 

Hope you're having a lovely weekend. I look forward to hanging out with you here more often again!


Monday, December 16, 2013

A Christmas Greenhouse

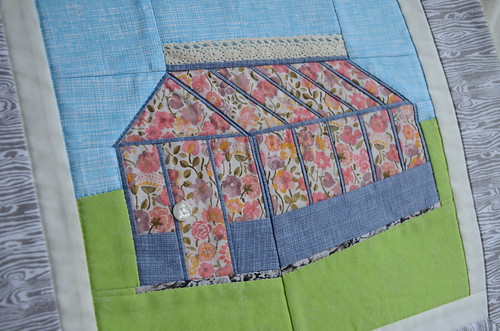
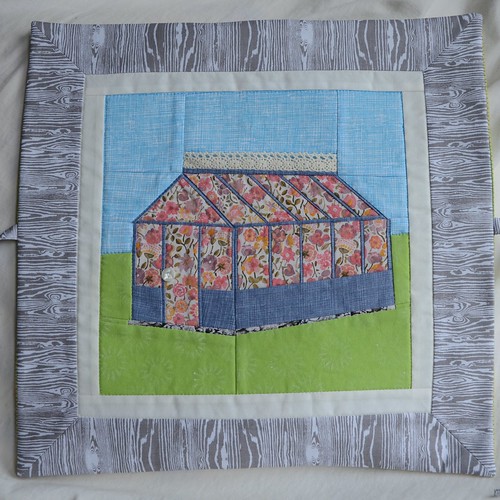
Making special gifts for family and dear friends is what Christmas is all about for me, and I know many of you, too.  The minute I saw Amy's Victorian Greenhouse pattern for foundation paper piecing, I knew that I would make it for my lovely friend. She recently inherited her mother's sweet greenhouse and after dismantling, transporting and setting it up in her own backyard, she spent last summer filling it with various seedlings, tomatoes, strawberries and a sweet garden chair.  I know it is very special to her, and that it will enrich her garden fully, not only with warm memories, but also vibrant, healthy plants.

Victorian Greenhouse by Poppyprint

We share a love of Liberty prints, so I had a look through the stack of tana lawn that I brought back from London last July to find just the right print to fill the greenhouse. I used my own poppy-printed fabric for the ground and Joel Dewberry's new woodgrain in grey for the border.  The foundation print is one of rocks that I've had for years and had never found a use for. It is perfect here.

Victorian Greenhouse by Poppyprint

The pattern, although featuring some super skinny strips, was very easy to sew on the foundation. I used a product called "Fundation" printable sheets  to print the pattern directly from my printer.

Victorian Greenhouse by Poppyprint

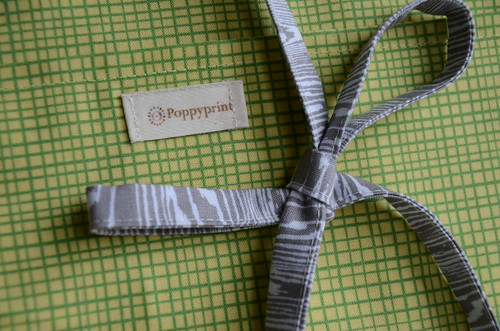
I sewed ties into the top and bottom seams (between the pillow front and back) to keep the back overlap from gaping. 

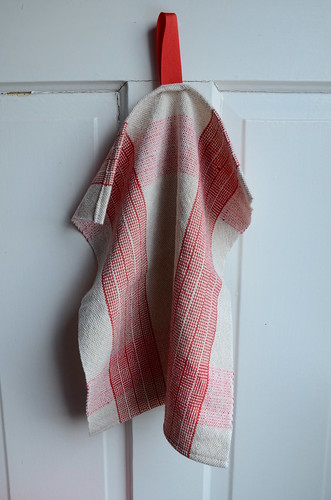
My friend visited with her family yesterday and we exchanged our heartfelt gifts. I was absolutely thrilled to receive the most beautiful hand-woven tea towel from the first cloth she has created on her table-top loom. You can see the blogpost about her newest obsession, and my treasured gift, here.  While Christmas is definitely a time of giving, I will freely admit to being a most appreciative receiver as well!

Victorian Greenhouse by Poppyprint

I hope you are enjoying spending some time sewing for special people in your life, too!


Saturday, October 20, 2012

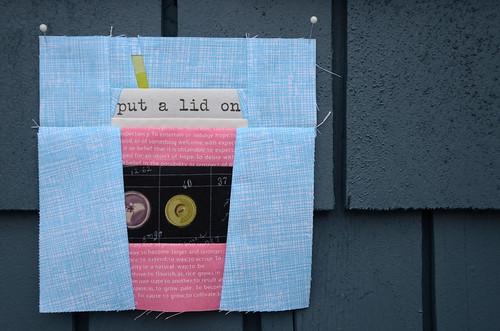
Put a Lid On!

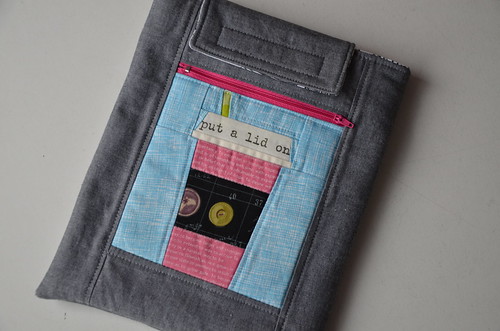
At the moment I'm fueling up for a day retreat that starts in an hour. A delicious latte by my side, I thought I'd write a quick post and show you the custom iPad cover I made for my mom while my parents were visiting.

Custom iPad case by Poppyprint

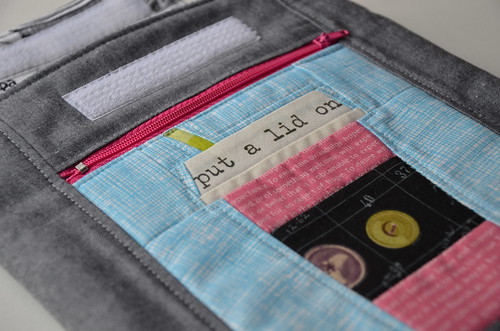
Using Penny and Kerry's sweet Latte to Go foundation/paper piecing pattern from Sew-Ichigo, I made the take out cup block a few weeks ago. I just love how perfect Berene's 'Say What?' text fabric is for the lid! You can find that fabric in her Spoonflower shop.  Berene cleverly spaced all of the fun sayings 1/2" apart so that they can be fussy cut and used for piecing into projects like this one without losing any of the text!

Custom iPad case by Poppyprint

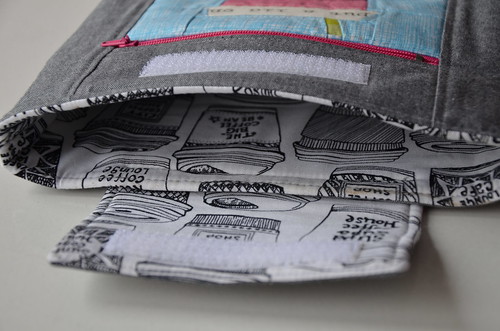
For the first time I tried a new "all-in-one" Velcro that has hooks and eyes all on one strip. Way less scratchy and it was much easier to sew on by machine.  The surrounding fabric is a lovely chambray that I'm also going to use in a new bag I'm assembling today.

Custom iPad case by Poppyprint

Mom loves her lattes and she's pretty smitten with her new iPad cover, too.  I had to make it larger than most tutorials as she's got a protective case that takes her iPad up to a full 8" x 10". You can find tutorials on Faith's and Amber's blogs...I just sort of adapted ideas they both had to suit my pre-made block and the size I needed. The outer fabric is interfaced with a fusible pellon poly batting.

Friday, September 21, 2012

This week's blocks

Preparations for Operation Grandma & Grandpa Visit are ticking along here, but I am procrastinating like crazy. Today I made gluten free lemon squares, then borscht and now I'm writing a blog post. Haven't actually done anything that would qualify as visit prep. Only three more sleeps until they arrive. As long as they have a bed to sleep in, that's all that matters, right?

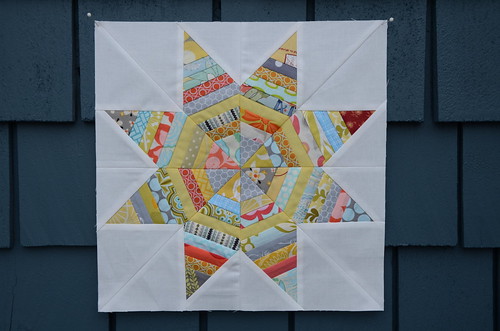
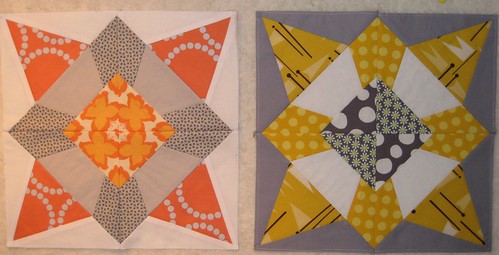
I'll share some of the re-organizing photos in my next post, but I thought it was high time to show you some sewing. First off, I am pleased to say I have completed my third foundation pieced star block in as many months for the Stash Trad bee. I was not anticipating all of this foundation piecing when I signed on for a traditional block bee, but it's been good to get back into practice (see next photo below). I haven't done much foundation piecing since I made all of these bee blocks about 18 months ago.

String Star block by Poppyprint

It really is a beautiful block and totally worth the effort. If you'd like to give it a try, Corey's tutorial is here. It helped that Felicity (and Berene) came over for an impromptu sewing day on Wednesday. Felicity and I support-grouped our way through it together. Yay for local sewing friends!

My mom got an iPad for her birthday in July and put in a request for an iPad sleeve. It's the least I can do in exchange for the 6 pairs of socks she knits every year as door prizes at my retreats. Her Sybil socks are definitely the coveted prize (so much so, that I have a rule you can only win one pair until every participant has their own!).

Latte to go!

We are still a bit pre-occupied with the above-mentioned Operation, so this block is as far as I've gotten with the iPad sleeve. Isn't it cute? It's Kerry and Penny's latest Sew-Ichigo foundation piecing pattern called Latte To Go. Perfect for my latte-lovin' mom.  That even more perfect text fabric on the lid? Designed by none other than Berene for Spoonflower (where, ahem, it won #8 in the Typewriter text contest a couple of weeks ago!). You should check it out. It's designed specially with a 1/4" of background above and below the lines of text so that they can be perfectly pieced into latte lids. Or anywhere else you need quirky idioms we English-speakers are famous for!

I think I'll vacuum now.

p.s. did you notice we got our house painted? That was one major element of the Operation that we (thankfully) contracted out. Our 93 year old blue cottage is looking rather refreshed!

Wednesday, October 12, 2011

5-Alarm block!

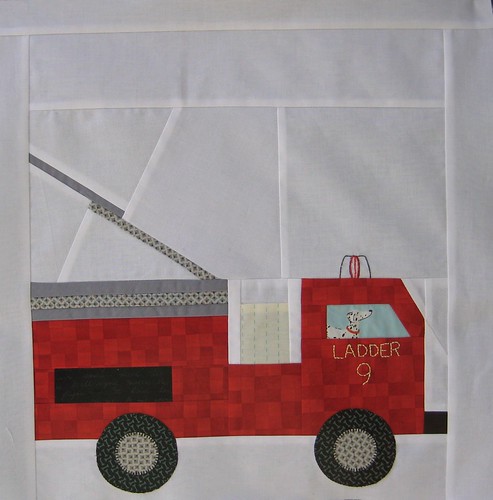
I made this yesterday for Melissa. September was her month in the VIBees, but sadly her fabric package has yet to emerge from the Canada Post Twilight Zone, and I fear it's lost forever. I went ahead and managed to find some red in my stash (uhhhh, not too difficult) because we're almost half way through October already!

Fire truck block by Poppyprint

Melissa is making a "Going Places" quilt for her son. Bee members are making blocks of transportation in the air, on land and at sea. I was on holidays when people chose their 'vehicles' and when I got back, the firetruck was mine!

Fire truck block by Poppyprint

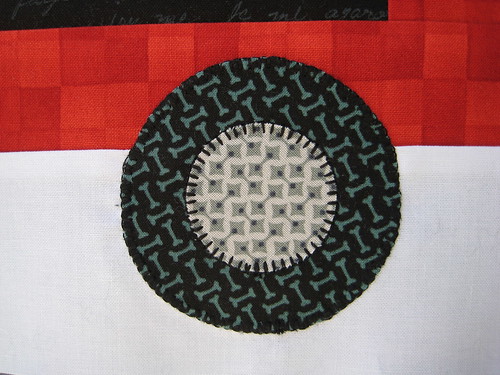
Since the blocks are massive at 16.5", I had to adapt a smaller 6" foundation pattern from a photograph posted in our flickr pool. Unfortunately, to maintain the proportions there ended up being a ton of white space, but hey, more room for creative quilting!

Fire truck block by Poppyprint

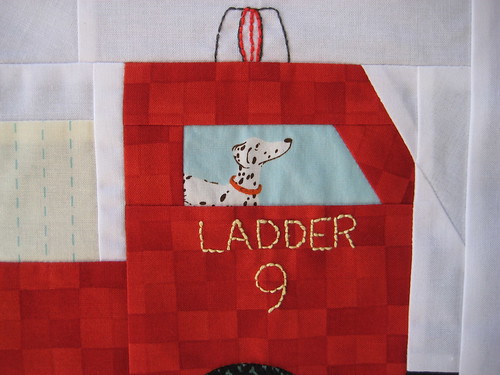
I'm pretty happy about the driver, and also the lined paper print that I used for the hose. I love it when you can find just the right piece of fabric in your stash to take a block up a notch. BAM! This quilt will be a lot of fun for her little guy.

Against my better judgement, I'm going to tell you about the most ridiculous giveaway. Alex has given Lynne a truckload of Aurifil thread to share. So much that it even comes in it's own suitcase! Quick - right after you leave a flattering comment on my adorable fire truck block, head over there and enter the giveaway in her super fun Christmas Gifts for Quilters series!

Wednesday, February 2, 2011

Back to the cutting mat

I was so proud of myself, finally seeing some progress on my Quilting Divas mini sampler bee blocks. In this bee (only the second one I've ever joined), there are 7 people in my group. Each of us will make 6 blocks that will finish 12" (7 if we make one for ourselves). Every block is the same design, but each participant has requested specific colours and one Kona solid for their background.

I scoured the Quilter's Cache for a pretty block. Since this is a sampler bee, I wanted to find a traditional, but not so common block to make. Plus, I wanted big enough pieces that would show off some pretty designer fabrics. The Snow Blossom block was the winner. After printing the foundation patterns, I double checked to make sure the 1" test square on the pattern had printed to scale (in other words, it was indeed 1" on all four sides). Check. I was ready to go.

Quilting Divas mini-Sampler bee blocks by Poppyprint

See how pretty this block is? Only these 2 are duds. Epic Fail, as my son would say. When all was said and done, they are EXACTLY 1/4" too small. ARRGHH! I carefully sewed on all of the printed foundation lines. I am Irrrr-i-tay-ted (I say this in my best remembered Afrikaans accent from working in South Africa. No one says 'irritated' in English like an Afrikaaner, complete with rolled 'r') . I actually lost sleep last night I was so disappointed.

I just love this block, so I'm back at it today. I'll make the long outside background pieces larger than the foundation, then trim them back with my 12.5" square ruler after the block is pieced. I hope it works. It will work, right? This time I'll make ONE block and check the results before forging ahead on block #2.

Every mistake is a lesson learned. And as my Flickr friends have already pointed out, now I have the beginnings of two lovely, coordinating pillows that just might look really fab on our red playroom couch!