Showing posts with label tutorial. Show all posts

Thursday, January 13, 2022

The Tote Tute

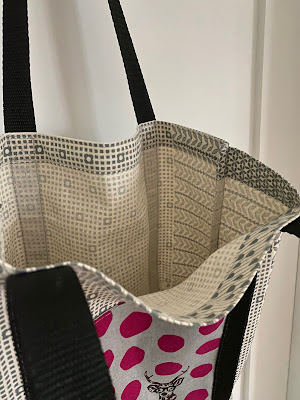
To help launch 2022 and what will (hopefully) be a return of my creative energy after a very long pandemic-induced hiatus, I'd like to share this free canvas tote tutorial with you! This also coincides with the City of Vancouver's long-awaited plastic shopping bag ban. If you can sew a straight line, you can make this simple pattern. The tote is unlined, but has French seams, a wrap around strap and no bottom seam for extra strength. Simple canvas totes are currently super popular with high school and university students; keep this in mind as a great gift for the student in your life, or their teachers!

If you would like to make totes from this pattern and sell them at a home crafter's (i.e. non-commercial) scale, please purchase the comprehensive Licensed The Tote Tute .pdf pattern from my Etsy shop for the awesome low price of $12 Cdn. 

If you purchase the crafter's license pattern, you will receive an invitation to join me in a 90-minute Tote Tute ZOOM sew-in from 10 a.m. to 11:30 a.m. on Sunday, February 27th! In addition, for a limited time, everyone is welcome to use the code POPPYPRINT for a 15% discount on lightweight 1˝ cotton webbing, Tula Pink webbing and zippers, charms and pulls at Zipper Valley! They will be bringing in 1˝ wide seatbelt webbing the first week of February if you'd like to wait for that. If purchasing strap materials from Zipper Valley, you'll need to buy 4 yards and put a note on your order that you need a continuous cut.


This tutorial is mostly photographic. It is not a difficult project and doesn't require that much in the way of fabric. In fact, you can make 2 totes from just one yard of canvas if your pocket is from the same fabric as the main body of the tote.

SUPPLY LIST

17" x 34" cotton canvas for main tote body
7" x 14" cotton canvas for pocket
120" continuous cut of nylon or cotton webbing 1" wide for strap
1" square cork label, scrap or 1" hemmed fabric scrap 

coordinating or contrasting 40 wt thread
90/14 topstitch needle
glue stick

NOTE: This tote is made from one long piece of canvas folded in ½ to avoid a bottom seam. If you have directional fabric, it will be upside down on one side of your tote. This is the same for the pocket, but you can place the upside down part on the inside of the pocket where it won't matter.


Prepare the Pocket

Fold the pocket piece right sides together, aligning the 7" raw edges. Sew the 7" top of the pocket with a ¼" seam allowance. Press open. Turn right side out and press the top seam and bottom fold.


Baste the sides closed and topstitch the top edge of the pocket by sewing up one side, across the top seam and down the other side with an ⅛ ˝ seam allowance.


Prepare the Tote

Hem the two 17˝ edges of the tote fabric. Turn under ½˝, press. Turn under another 1˝ and press again. Pin the folds in place. Topstitch both folds from the wrong side with an ⅛˝ seam allowance. I use a very skinny topstitch foot on my Juki for this task (you can see it in the photo below).


Now fold the tote in ½, bringing the hemmed edges together at the top. Press the bottom fold to leave a crease, so that you know where the centre of the bottom is when you create the gussets later.

Attach the Pocket

Pin the pocket to the centre front of the tote with the top of the pocket 4˝ down from the top hem of the tote (make sure you pin through just one layer of the tote!).  Attach the pocket to the tote by sewing down one side, across the bottom and up the other side with an ⅛˝ seam allowance, backstitching at the top edges of the pocket for extra strength.


Attach the Strap

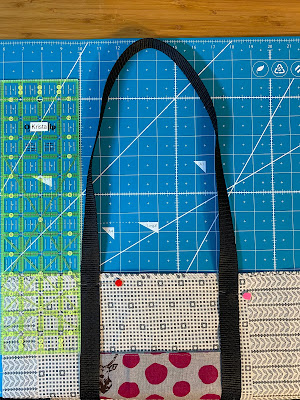
Pin the strap to the tote beginning about 1˝ below the right bottom corner of the pocket, overlapping the raw edges of the pocket by about ⅜˝. I use a 4˝ ruler to help keep the strap parallel to the edge of the tote. 


Leave a 12" handle at the top of the tote, taking care not to twist the strap as you bring it back onto the tote. I lay the tote on my cutting mat with the top edge on the 6˝ line and make sure the apex of the strap is at the 18˝ line.  Bring the strap back down the other side of the pocket and off the opposite hemmed edge, making the second handle. You are effectively making one giant loop of strap on the right side of the tote.


Trim the strap ends so that they butt together without overlapping. If using nylon, you may wish to run a lighter over the ends (in a well ventilated area) to burn the edges and prevent fraying.


Topstitch along both edges of the strap with a 1/16˝ seam allowance.When you reach the hemmed edges of the tote, sew a 1" square with an X in the middle for extra strength. You may have to double sew a line or two as you work your way around the square and X. Pivot with your needle down when changing direction at the corners. I don't mark anything. I just overstitch the hem seams as a guide for the square.


With a gluestick, affix a 1" scrap of cork or label over the strap ends and topstitch in place with a 1/16˝ seam allowance. I ordered my logo labels in Canada from Brickbubble.


French Seams

With the tote right side out, pin the sides and sew with a scant ¼˝ seam allowance. 


With a ruler and rotary cutter, trim any fraying threads from the seam allowance. Press the seam open.


Turn the tote inside out and press the side seams. Pin in place and sew the side seams, backstitching at the top, with ⅜˝ seam allowance. This will fully enclose and protect your previous seams.


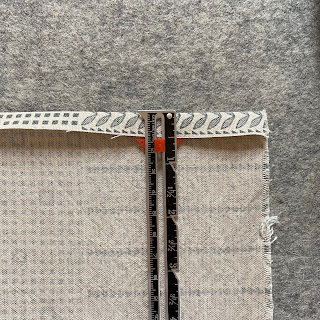
At the bottom corners of the tote, mark a 1 ½˝ square bordered by the side seam stitches (NOT THE SIDE OF THE TOTE) and the bottom fold (check the ruler lines in the photo below).


Cut out the square on the marked lines. Take a moment to reinforce the side seam where you cut the stitches with a few back and forth stitches.


Turn the tote right side out. At both bottom corners, bring the side seam and bottom crease together and pin, forming the gussets. Sew with a ¼˝ seam allowance.


Turn the tote inside out. Press the gusset seams, pin in place and sew with a ⅜˝ seam allowance, enclosing the previous seam. If your presser foot is struggling to sew over the bulk at the side seam, you may need to use a humpjumper. Please see my instagram highlights @poppyprint for a humpjumper how-to. Backstitch at the beginning, at the side seam stitches and at the end for extra strength.


Turn your tote right side out. YAY, YOU'RE DONE!


If you share your work on socials, let folks know that you used my tutorial and give me a tag so that I can stop by with a virtual high five! If you have questions, please email me directly using the email address in the upper left sidebar. I can no longer reply to blog comments.

HAPPY PLASTIC-FREE SHOPPING, FRIENDS!


Friday, September 11, 2015

Good Neighbors Pin Cushion Party plus a mini tutorial & giveaway!

It is a party! A pin cushion party! We're celebrating the release of Amanda Jean's sweet new fabric line from Connecting Threads called Good Neighbors. We've all made pin cushions to showcase the prints and there will be blogposts all month long.  You'll see at the end of this post an extensive list of bloggers supporting Amanda Jean - everyone is so excited for her and her first fabric line.  Although it was a really busy time, Amanda Jean and I did manage to meet each other at Spring Market and exchange a couple of hugs. I hope we will get to meet again one day and have more time to hang out and talk quilting!  I think that her contemplative, sincere style (and devotion to scraps) really come through in her fabric design.  Just look at these great colours and uncomplicated patterns:


Good Neighbors Charms

I especially love Leaves Array (bottom left) and cross stitch (fourth row, the red/blue/grey lattice prints on the right side).  The stripes on the bottom row are ideal binding fabrics!


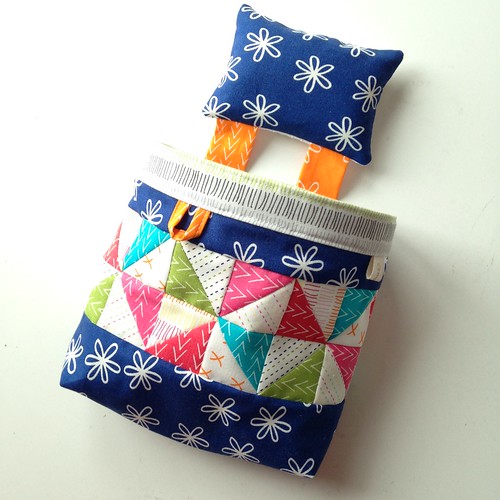
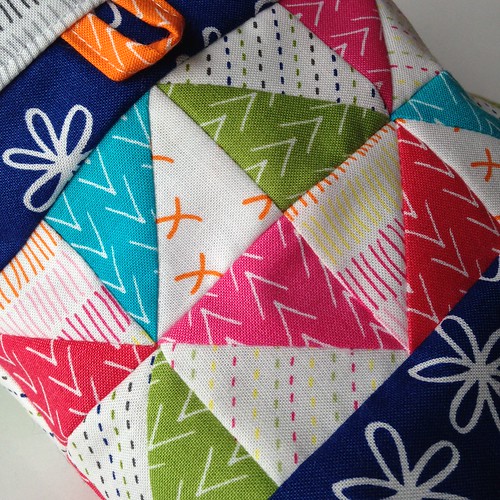
Big mouthed thread catcher from Make It, Take It with extra pinwheel piecing!

Good Neighbors is the perfect line of blending fabrics with all of the great colours and sweet little prints. I wanted to use as many of them as possible, so I added some tiny pinwheels to the Big Mouthed Threadcatcher pattern out of my book. I've been making these threadcatchers for so many years, in fact I know I've made well over 200. It's fun to change things up by adding some special piecing the thread bag.


Big mouthed thread catcher from Make It, Take It with extra pinwheel piecing!

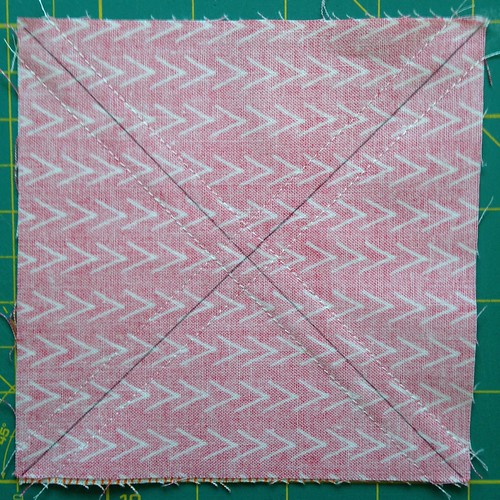
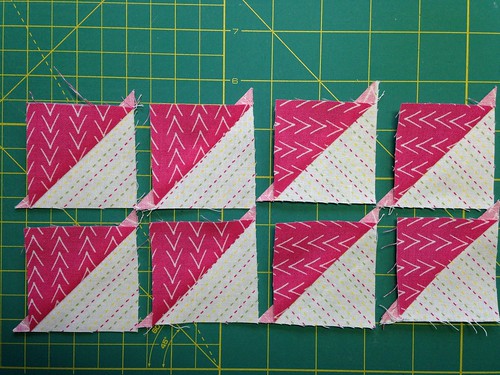
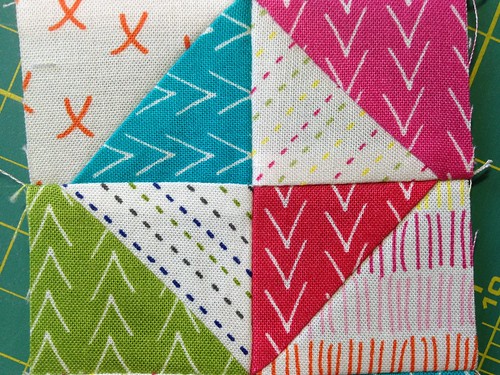
I remembered to use quick piecing and cutting technique that I'd learned somewhere along the way of my quilting career...I just can't remember where! Perhaps a magazine, or a long-ago workshop?  Here's how it works:  you start with two squares and end up with eight 1/2 square triangles! For my thread bag,  start with two 5" charm squares RST, draw both diagonal lines, corner to corner. Sew 1/4" on either side of the lines. Make 4 cuts: cut on the drawn lines and the horizontal and vertical middle. Presto: eight 1/2 squares!!  I trimmed mine to 2" before piecing them into pinwheels/broken dishes blocks.


8 half squares from two 5" charms. 

8 half squares from two 5" charms.

8 half squares from two 5" charms.

8 half squares from two 5" charms.

Connecting Threads would like to send a Canadian or US resident a charm pack of the Good Neighbors collection.  Just leave one comment here (your email must be linked OR written into your comment in order to win) and I will choose a random winner in a week's time. Good luck! {ETA: Comments are now closed, thank you for stopping by!}

9/1/2015 Amanda Jean – Crazy Mom Quilts
9/2/2015 Anna – Noodlehead 
9/3/2015 Mary – Mary on Lake Pulaski
9/4/2015 Svetlana – Sotak Handmade
9/5/2015 Debbie – Esch House Quilts
9/6/2015 Holly – Bijou Lovely
9/7/2015 Carla – Grace and Favour
9/8/2015 Faith – Fresh Lemons Quilts
9/9/2015 Vanessa –  V and Co.
9/10/2015 Anna –  Thimbleanna
9/11/2015 Krista –  Poppy Print Creates (you're here!)
9/12/2015 Erin –  Why Not Sew
9/13/2015 Lee –  May Chappell
9/14/2015 Alex –  Tea Ginny Designs
9/15/2015 Cheryl –  Nap Time Quilter
9/16/2015 Penny –  Sew Take a Hike
9/17/2015 Amy –  During Quilt Time
9/18/2015 Debbie –  A Quilter’s Table
9/19/2015 Anne –  Spring Leaf Studios
9/20/2015 Melissa Corry –  Happy Quilting
9/21/2015 Amber –  One Shabby Chick
9/22/2015 Nettie –  A Quilt is Nice
9/23/2015 Adrianne – Little Bluebell
9/24/2015 Cindy –  Live a Colorful Life
9/25/2015 Amy –  Diary of a Quilter
9/26/2015 Chase –  Quarter Inch Mark
9/27/2015 Rene –  Rene Creates
9/28/2015 Erin –  House on Hill Road
9/29/2015 Nicole –  Modern Handcraft
9/30/2015 Teri –  Connecting Threads

Saturday, October 25, 2014

Bloggers Quilt Festival - the ROYGBIV Selvage Edition

International Quilt Market is in full swing in Houston this weekend, so that can only mean one thing: I'm not there! Hehe, while that is true, what it really means is that it is time for the Fall Blogger's Quilt Festival hosted, as always, by Amy's Creative Side.

Last spring I discovered (on Instagram) that my friend Diane was using her selvage collection to make string blocks. She asked if anyone wanted to participate in a selvage block-along. I probably had a ton of other sewing to do, but I also had a selvage drawer full to bursting and it seemed like a good idea to just get busy and make something substantial with all of those pretty selvages.

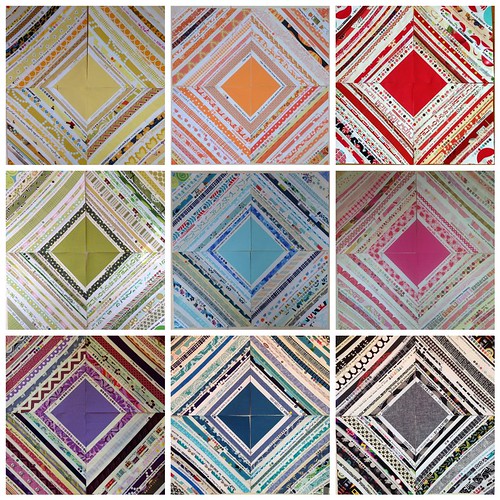
I know myself. I know that true 'random' doesn't work for me. I will always try to group colours or patterns, or match prints even if I'm not trying. So I decided to forego the random string idea right from the start and instead organized all of my selvages into piles of colour.  They almost completely covered my little sewing room floor!  Then I designed an easy 10 1/2" Selvage Colourblock (tutorial here) that would keep my inner organizer happy.

Selvage colour block by Poppyprint

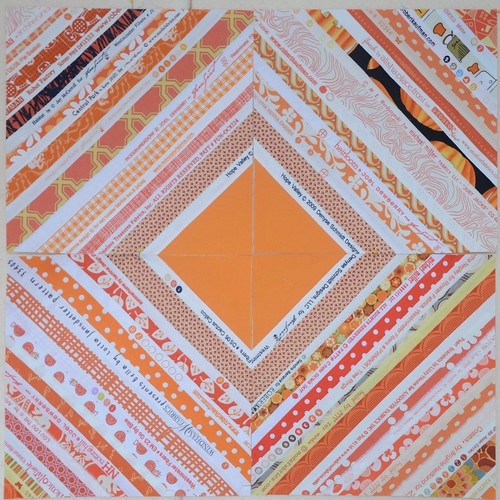
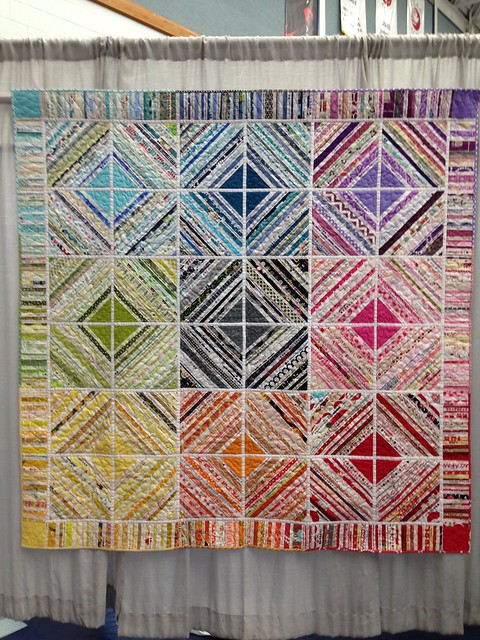
Four of these squares pieced together give you a lovely diamond of solid colour in the middle, surrounded by related selvages in a 20" block!  I chose my longest selvages for the very first strings next to the solid triangles so that they'd have a nice frame around them to start.  And then I went CRAZY RANDOM....within the same colour grouping, of course.

Selvage Colourblock Tutorial by Poppyprint

These blocks came together really, really fast. I had an absolute ball making them and I so enjoyed using the selvages that I'd been diligently saving for four years.  When this quilt top was complete, B said "Cool!......Wait, is that all from your own fabric?!".  I think you know my answer.  The only colour that I had to raid my stash to cut more selvage off was purple.

Little Black Dress selvage colourblock
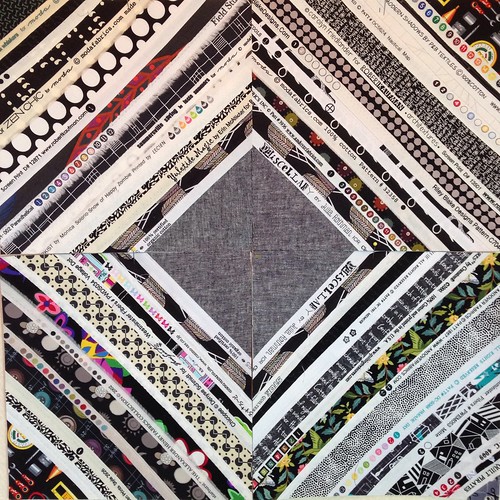
I used yard-dyed Essex for my black & white block centre and I love how it looks!  I wasn't sure how to fit black into the rainbow, so I ended up putting it smack in the middle of the quilt.

Once all of my 10 1/2" blocks were made I got kind of excited and pulled all of the newsprint foundations off. In retrospect, this wasn't such a great idea. All of those selvage edges cut at 45 degrees are the worst kind of stretchy! Now I was in a pickle. I had to figure out a way to stabilize the blocks and piece them together while keeping the quilt square. In the end, a skinny white sashing was my solution and I used the BigHugeLabs mosaic tool to help confirm my decision.

Selvage colourblock layout option 1
In the final layout, the 1" sashing borders every 10" block

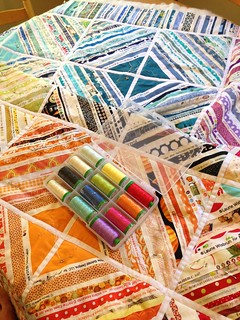
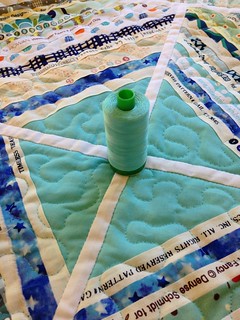
I was seriously loving this quilt (and there was still quite a bit of selvage on my floor), so I decided to keep going and add a border to enlarge it.  The border is colour-blocked, too! I pieced selvage strings into 4 1/2" wide strips of newsprint and planned the border colours to coincide with the outside blocks of the quilt top. The quilt ended up about 75" square. It's quilted with a wool batting (a first for me - I like the puffiness!). I stitched the ditch around each block to stabilize, then stippled with matching coloured thread over the selvages.  The border is quilted with a figure 8 pattern. This quilting may have required a rather extravagant custom Aurifil thread box purchase.  As you might expect by now, the binding was also pieced to match the colour-blocking.

Selvage colourblock by Poppyprint  Selvage colourblock by Poppyprint


I'm so happy that I saved my selvages so that I have this beautiful memory quilt of all my favourite fabrics. Once this quilt was done, I cleaned up my remaining selvage strings, stuffed them in a big plastic bag and gave them to a friend. I won't be making another selvage quilt and it isn't because this wasn't a ton of fun, it's just that I don't feel like saving and storing selvages anymore. I'm on to the next thing!  

Selvage colourblock by Poppyprint
Here's Selvage Colour Block hanging at my traditional guild's show last June. The entire summer and fall got away from me and I still have not succeeded in a proper outdoor photoshoot for this quilt!

Thanks for getting through this super long quilt story. If you've still got any tea left in your cup, go and check out the other festival entries here!

AmysCreativeSide.com


Sunday, July 27, 2014

Infinity

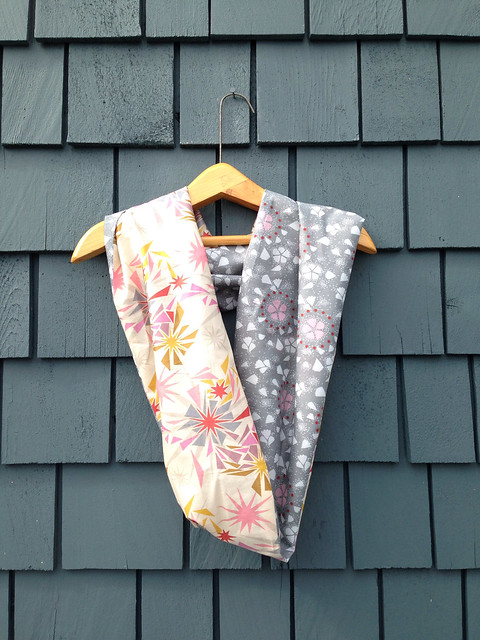
The adorable Mai was in town recently for work, so a bunch of us MQG peeps got together for a fun potluck dinner. It's so much fun to visit with IG friends when they come to town!  Mai had previously been a personal sherpa flying gifts between Oahu and Vancouver for me, so I wanted to make her a little thank you present.
It was a last minute plan that came together thanks to the great free tutorial at Pink Chalk Fabrics.  I have a small stash of AMH voiles on hand, so I was able to sew up this infinity scarf in no time!
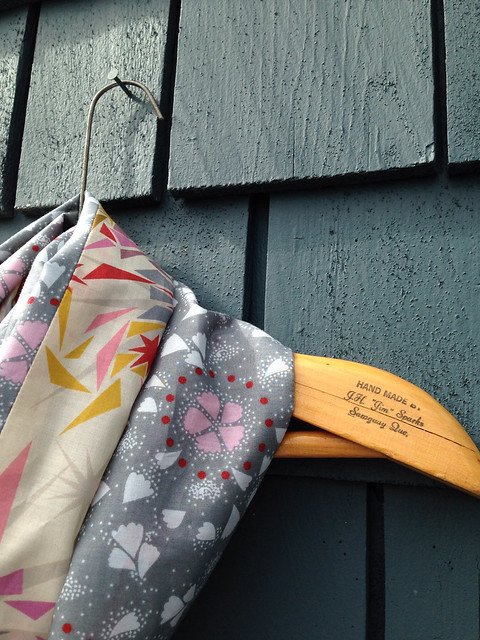
Pink Chalk Fabrics free infinity scarf pattern made up in AMH voile.

I mentioned on IG that the scarf is draped on one of my precious wooden hangers, handmade by my great-grandad Sparks. He lived in a little cottage beside my paternal grandparent's home in a small town outside Montreal  (Saraguay) that has since been incorporated into the city. He had a sunporch with a workbench at the back of the cottage where he planed wood and bent metal and glued up coat hangers. I don't know if he sold them, or just made them for family, but I am lucky enough to have a few.  Sadly, the family home and cottage are long gone now, replaced with a housing development years ago.  I have a few memories of the swing that hung between the house and the cottage, and my great-granddad's big hairy dog Buster that would sleep against the picket fence gate. Mostly I remember the smell of the sunporch, which was sawdust and toast....but I digress.

image

Back to the infinity scarf.  The pattern is super easy and there are only a few inches of hand-sewing required. I highly recommend it for a quick gift!


Saturday, March 1, 2014

Selvage Colour Block Tutorial

I'm very pleased to say that Project Big Project is now complete for the time being and I am back at the sewing machine!! Thanks for hanging in there, I know Poppyprint has been rather quiet for a few months.

Although my UFO list is as long as my right arm (which is slightly longer than my left), I have jumped back into sewing with a brand new project. If you're an Instagram follower, you know that I've been working my way through the selvage drawer. It's about time, because I could hardly cram another strip of fabric into that drawer!  I've made a few small selvage projects over the years, which you can see here, here, here and here.  Recently my friend Diane posted her selvage string blocks on IG (where she is ylmommyx4) with the hashtag #selvageblockalong and I was immediately inspired to get busy.

Selvage Colourblock Tutorial by Poppyprint

If you google, or search Flickr for "selvage", "selvage strings" or "selvage quilts" you will find several different options. For a couple of years, I'd been thinking of sorting my selvages by colour and using them in a colour-blocked quilt somehow. I just like to be a little more organized in my scrappy efforts: sometimes completely random is too much like work for me!  

The blocks I'm making are 10 1/2" unfinished, so a complete colour block (above) will finish up at 20" square. I haven't decided if I'll use my blocks like this, so I'm not going to sew them together until I use up all my selvage strips and see where things sit at that point.  Ideally, I'd like a usable quilt about 80" square, but I don't think I have enough selvage to get there as that would require 16 huge blocks.

Here's a quickie tutorial for the blocks I'm making. 

Supplies for one 20 1/2" (unfinished) Selvage Colour Block

4 squares newsprint paper 10 1/2" x 10 1/2"
2 squares solid colour 5" x 5" cut once on the diagonal
a pile of selvage strips 10" to 40" long* matching your solid colour
disappearing fabric pen

*note that I generally cut my selvage with at least 1" of print above the white selvage strip. If the selvage is extra 'hairy' with a long fringe of threads, I carefully cut the fringe off without compromising the finished edge.

Selvage colour block by Poppyprint

1. Fold the paper once diagonally and crease to mark the diagonal OR draw a pencil line corner to corner. This is a guide to help you keep your strips running at 45 degrees.  Mark a 1/4" seam allowance on the long side of one solid triangle. Pin the solid triangle to one corner of the paper foundation, with the marked diagonal lines parallel to each other.

Selvage colour block by Poppyprint

2. Place the first selvage strip on the solid triangle, overlapping the finished selvage edge to the 1/4" marked line. Pin in place. I used my longest selvage (you need about 40") for the first strip on each of the 4 squares that will make up one colourblock. If I decide to piece my blocks like the one shown above, with a central solid diamond, having the same selvage print outline the solid will better define it and give it a more balanced appearance.

Selvage colour block by Poppyprint

3. Using a reduced stitch length for security and also to make it easier to remove the paper foundation later (I reduce to 2.0 from a 'normal' 2.5), topstitch the selvage strip with an 1/8" seam allowance.

Selvage colour block by Poppyprint

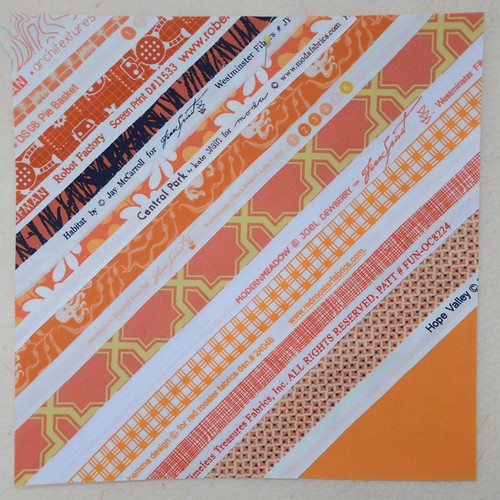
4. Repeat step 3, making sure each selvage strip is long enough to completely cover the paper and overlapping the previous strip by at least 1/4". I just eye-balled this and most of mine are probably overlapped by 3/8". Continue until the entire foundation is covered.

Selvage colour block by Poppyprint

Selvage colour block by Poppyprint

5. Press the completed foundation with a dry iron. Turn the piecing upside down and trim the square to 10 1/2" using the paper as a guide. Because all of the trimmed selvage edges of the square are on the bias, I plan to keep my paper foundations on until the squares will be sewn together.

Selvage colour block by Poppyprint


Selvage colour block by Poppyprint
MAKE 4

Just a couple of notes.....Seam allowances here are only 1/8" or so. The smaller stitch length will help keep these seams intact over time, but I will likely quilt this heavily for extra stability. Selvages have tiny permanent holes in them where the fabric was attached to the printing rollers.  There's a good chance that the batting will beard, or work it's way through these holes, over time.  I don't have any illusions of this becoming an heirloom quilt!  It's a fun project to use up interesting strips of fabric and to look at and remember favourite prints.  It's a quilter's Eye Spy! 

Selvage Colourblock Tutorial by Poppyprint
Here's the first blue one. There will be more as blue is my most abundant selvage pile!

If you make some blocks using this tutorial or any other selvage string ideas, please share on IG using #selvageblockalong !  You can also join and post photos in Diane's Selvage Block-Along Flickr group . 

No selvages in your stash? Start saving now. You won't believe how fast they accumulate! I typically don't cut off the selvage until I am going to use the fabric in a project, however if I want to see this quilt idea through to a finish, I may have to raid my stash for more strips. 

Hope you're having a lovely weekend. I look forward to hanging out with you here more often again!