Showing posts with label sewing. Show all posts

Thursday, January 13, 2022

The Tote Tute

To help launch 2022 and what will (hopefully) be a return of my creative energy after a very long pandemic-induced hiatus, I'd like to share this free canvas tote tutorial with you! This also coincides with the City of Vancouver's long-awaited plastic shopping bag ban. If you can sew a straight line, you can make this simple pattern. The tote is unlined, but has French seams, a wrap around strap and no bottom seam for extra strength. Simple canvas totes are currently super popular with high school and university students; keep this in mind as a great gift for the student in your life, or their teachers!

If you would like to make totes from this pattern and sell them at a home crafter's (i.e. non-commercial) scale, please purchase the comprehensive Licensed The Tote Tute .pdf pattern from my Etsy shop for the awesome low price of $12 Cdn. 

If you purchase the crafter's license pattern, you will receive an invitation to join me in a 90-minute Tote Tute ZOOM sew-in from 10 a.m. to 11:30 a.m. on Sunday, February 27th! In addition, for a limited time, everyone is welcome to use the code POPPYPRINT for a 15% discount on lightweight 1˝ cotton webbing, Tula Pink webbing and zippers, charms and pulls at Zipper Valley! They will be bringing in 1˝ wide seatbelt webbing the first week of February if you'd like to wait for that. If purchasing strap materials from Zipper Valley, you'll need to buy 4 yards and put a note on your order that you need a continuous cut.


This tutorial is mostly photographic. It is not a difficult project and doesn't require that much in the way of fabric. In fact, you can make 2 totes from just one yard of canvas if your pocket is from the same fabric as the main body of the tote.

SUPPLY LIST

17" x 34" cotton canvas for main tote body
7" x 14" cotton canvas for pocket
120" continuous cut of nylon or cotton webbing 1" wide for strap
1" square cork label, scrap or 1" hemmed fabric scrap 

coordinating or contrasting 40 wt thread
90/14 topstitch needle
glue stick

NOTE: This tote is made from one long piece of canvas folded in ½ to avoid a bottom seam. If you have directional fabric, it will be upside down on one side of your tote. This is the same for the pocket, but you can place the upside down part on the inside of the pocket where it won't matter.


Prepare the Pocket

Fold the pocket piece right sides together, aligning the 7" raw edges. Sew the 7" top of the pocket with a ¼" seam allowance. Press open. Turn right side out and press the top seam and bottom fold.


Baste the sides closed and topstitch the top edge of the pocket by sewing up one side, across the top seam and down the other side with an ⅛ ˝ seam allowance.


Prepare the Tote

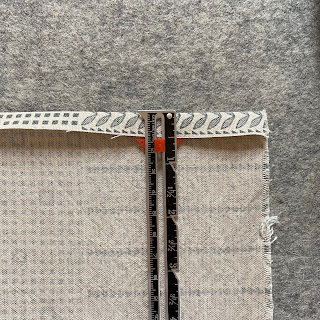
Hem the two 17˝ edges of the tote fabric. Turn under ½˝, press. Turn under another 1˝ and press again. Pin the folds in place. Topstitch both folds from the wrong side with an ⅛˝ seam allowance. I use a very skinny topstitch foot on my Juki for this task (you can see it in the photo below).


Now fold the tote in ½, bringing the hemmed edges together at the top. Press the bottom fold to leave a crease, so that you know where the centre of the bottom is when you create the gussets later.

Attach the Pocket

Pin the pocket to the centre front of the tote with the top of the pocket 4˝ down from the top hem of the tote (make sure you pin through just one layer of the tote!).  Attach the pocket to the tote by sewing down one side, across the bottom and up the other side with an ⅛˝ seam allowance, backstitching at the top edges of the pocket for extra strength.


Attach the Strap

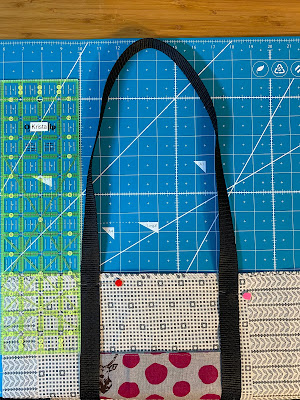
Pin the strap to the tote beginning about 1˝ below the right bottom corner of the pocket, overlapping the raw edges of the pocket by about ⅜˝. I use a 4˝ ruler to help keep the strap parallel to the edge of the tote. 


Leave a 12" handle at the top of the tote, taking care not to twist the strap as you bring it back onto the tote. I lay the tote on my cutting mat with the top edge on the 6˝ line and make sure the apex of the strap is at the 18˝ line.  Bring the strap back down the other side of the pocket and off the opposite hemmed edge, making the second handle. You are effectively making one giant loop of strap on the right side of the tote.


Trim the strap ends so that they butt together without overlapping. If using nylon, you may wish to run a lighter over the ends (in a well ventilated area) to burn the edges and prevent fraying.


Topstitch along both edges of the strap with a 1/16˝ seam allowance.When you reach the hemmed edges of the tote, sew a 1" square with an X in the middle for extra strength. You may have to double sew a line or two as you work your way around the square and X. Pivot with your needle down when changing direction at the corners. I don't mark anything. I just overstitch the hem seams as a guide for the square.


With a gluestick, affix a 1" scrap of cork or label over the strap ends and topstitch in place with a 1/16˝ seam allowance. I ordered my logo labels in Canada from Brickbubble.


French Seams

With the tote right side out, pin the sides and sew with a scant ¼˝ seam allowance. 


With a ruler and rotary cutter, trim any fraying threads from the seam allowance. Press the seam open.


Turn the tote inside out and press the side seams. Pin in place and sew the side seams, backstitching at the top, with ⅜˝ seam allowance. This will fully enclose and protect your previous seams.


At the bottom corners of the tote, mark a 1 ½˝ square bordered by the side seam stitches (NOT THE SIDE OF THE TOTE) and the bottom fold (check the ruler lines in the photo below).


Cut out the square on the marked lines. Take a moment to reinforce the side seam where you cut the stitches with a few back and forth stitches.


Turn the tote right side out. At both bottom corners, bring the side seam and bottom crease together and pin, forming the gussets. Sew with a ¼˝ seam allowance.


Turn the tote inside out. Press the gusset seams, pin in place and sew with a ⅜˝ seam allowance, enclosing the previous seam. If your presser foot is struggling to sew over the bulk at the side seam, you may need to use a humpjumper. Please see my instagram highlights @poppyprint for a humpjumper how-to. Backstitch at the beginning, at the side seam stitches and at the end for extra strength.


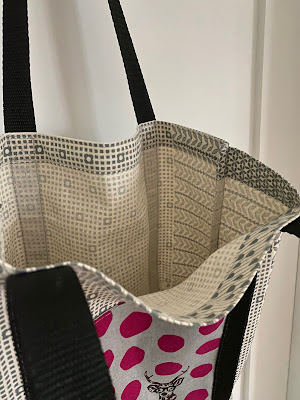
Turn your tote right side out. YAY, YOU'RE DONE!


If you share your work on socials, let folks know that you used my tutorial and give me a tag so that I can stop by with a virtual high five! If you have questions, please email me directly using the email address in the upper left sidebar. I can no longer reply to blog comments.

HAPPY PLASTIC-FREE SHOPPING, FRIENDS!


Monday, October 16, 2017

Level Two Tote - A Pattern Release!
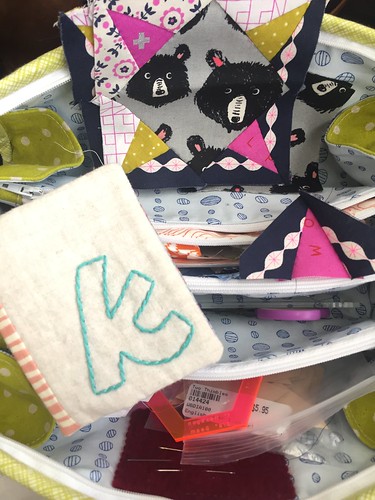
Hi all! Exciting news today. I've finished up an new pattern and it is now live in my Craftsy shop right here.  I've always been a bag lady and have made umpteen bags from many fabulous patterns available out there, but I put my favourite simple requirements together and came up with my own design.

You've seen a few of these totes I've made over the last 18 months. Initially, I designed one for myself as a simple last-minute bag to take with me on a trip. Since then, I've made a few others as gifts for friends, each time refining the design.  Finally, an Instagram follower commented "Please tell me you are making a pattern for this! I want to make one!"

Well, my friends. Ask and you shall receive. That IG follower even offered to pattern test for me and she made a beautiful tote! Here's my latest version that appears on the pattern cover. I made it with the gorgeous Rifle Paper for Cotton and Steel Alice in Wonderland linen blend and the most perfect shade of fuschia cork fabric that I was able to purchase at my LQS. In the pattern, I list various sources for materials you'll need to make this tote.

Finished size: 16" wide across the top x 13" high x 5.5" deep at base

There are fully illustrated and thoughtfully explained instructions for creating a zipper window like you see here. You'll also learn how to install a magnetic snap if you haven't tried that yet! This LEVEL TWO TOTE is so named because there are a few potentially new skills to learn, but also for that bottom level fabric that is chosen for durability and wash-ability. I've suggested waxed canvas, cork, vinyl or lightweight hide. My next one will be made with leather!


I've been using my original tote as my everyday purse and it is perfect for me. I wanted an uncomplicated bag that didn't have too much structure or fancy hardware detailing. This tote has plenty of room to accommodate a few extra things picked up during the day (like, for instance a yard of fabric, 5 FQ's or a couple of skeins of yarn.....ahem).


There is no central bottom seam and the leather handles are securely riveted on; both details that really increase the strength and durability of this bag. I regularly carry a full water bottle, heavy wallet, sunglasses, chequebook, iphone, car keys and a few pens around in mine. There's an internal slip pocket with two pen slots and the external zip pocket is large enough for your cell phone.

I hope you'll try one for yourself (and then make lots more as gifts!). It's an afternoon or evening project that only requires 6 rectangles of fabric! For real! 

Special thanks to Jackie and Eileen for testing this pattern so thoroughly for me!

Wednesday, April 12, 2017

Making it Down Under

If you follow along on Instagram, you know that I was recently in Australia for a vacation with my husband, B. The purpose of the trip was mainly to see our daughter play rugby with her high school team (they toured the north island of New Zealand before heading to Newcastle, NSW to play a 15's game and 7's tournament). We caught up with them in Newcastle to see some great games, but unfortunately their 7's tourney near Sydney was cancelled due to all of the rain and flash-flooding.

I have many photos to edit and cull through before doing any tourist-type posts, but I thought I would start with a few photos of creative stuff I was able to accomplish on this trip (staying with a kind and generous quilty friend certainly helps to get your creative on when vacationing!).

Sewing in Oz 2017

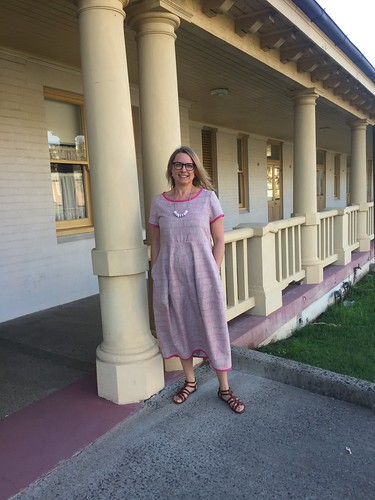
I admired Lorena's linen dresses, of which she has several, made from fun fabrics. She'd used the Eva Dress pattern from Sydney design and fabric store Tessuti.  We made a trip to the shop, where I ogled the Liberty tana lawns on display (but restrained myself from buying). They have sewn samples of all their in-house patterns that you can try on! This is absolutely the best thing ever for someone like me who has major garment-sewing challenges. Most of the patterns are for light, lineny, flowy dresses and tunics. I purchased paper copies of their Eva Dress and Ola Tunic. The size medium Eva dress fits me and the size small (crazy!) Ola Tunic fits me. Here's the Eva dress that I made on Lorena's serger and Bernina, using MakerMaker linen purchased in Berry, NSW at the adorable Berry Quilt & Co.

Sewing in Oz 2017

I'm looking forward to making a second version next week without sleeves! I've got a gorgeous red and black crossweave linen/rayon blend that I think will be super comfy. The linen above needs a few good wearings and washings as I find the linen/cotton is a bit stiff.

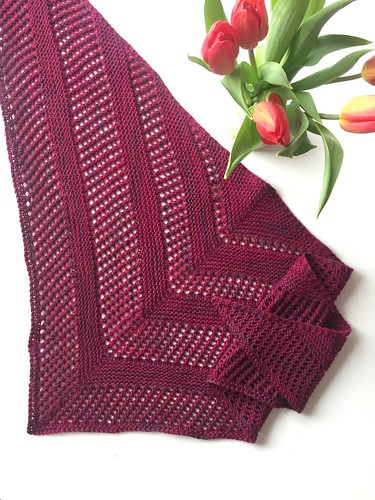
While on this trip I did a bit of knitting (both on airplanes and on the couch in the evenings) and was able to finish a smallish Reyna shall that's more of a scarf. It's been blocked but I still need to darn in the ends before sending it to a friend as a thank you gift. I love the colour!

Sewing in Oz 2017

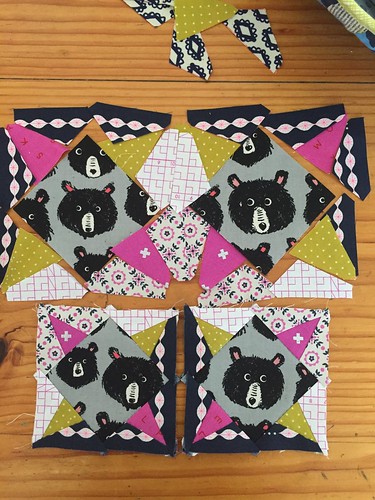
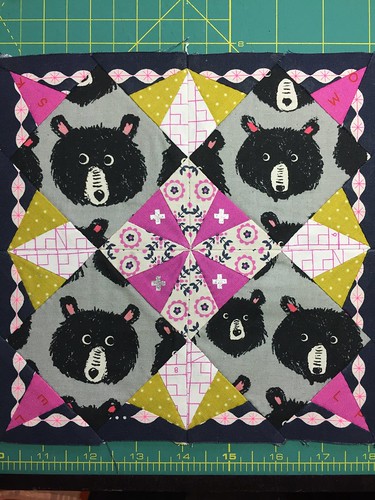
Before leaving, I gave some thought to the Vancouver MQG - Ottawa MQG mini-mini quilt swap that would be due shortly after I got home. I brought along a few EPP papers, thinking that I'd make something hexagon-related, but plans changed! Lorena had just returned home from QuiltCon with some of Victoria Findlay-Wolfe's new "snack sets" which are tiny acrylic templates for small piecing. I hand-pieced this little 8" quilt on the dining table, as well as on trains and planes. I've just got a little bit more hand-quilting to do on it.  

Sewing in Oz 2017

Sewing in Oz 2017

Sewing in Oz 2017

And finally, I had the opportunity to teach a workshop!! It was such a fun day and a total pleasure to see Cath and Danielle (two lovely Aussie quilters I'd met in Austin at Quiltcon2015), both of whom travelled a long way to attend.  Everyone was so kind and I think they really enjoyed their Speed Date with Improv!  Class was held in a renovated WWI hospital that now serves as a seniors activity center (you can see the wrap-around veranda where I'm standing in the dress pic above).

Sewing in Oz 2017
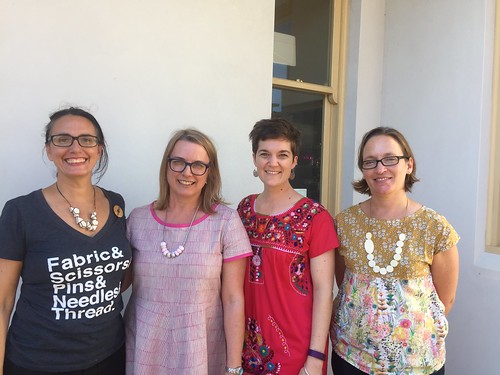
Here I am with Lorena (lorena_in_syd), Cath (cathmosely) and Danielle (petitselefants)

Sewing in Oz 2017
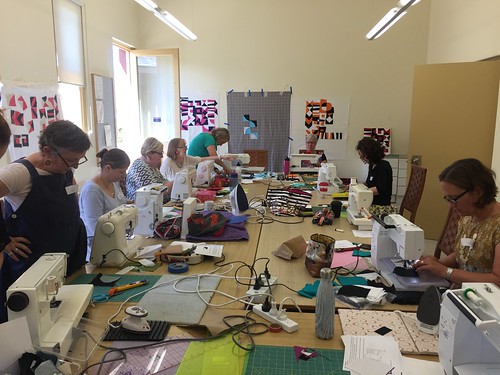
Our beautifully-lit classroom

Sewing in Oz 2017
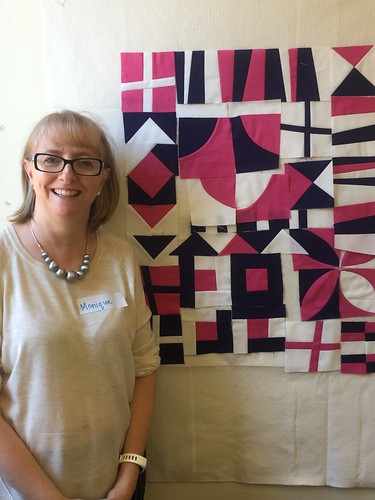
Here's Monique (sharingthegoodstuff) with her fab improv elements. It was her first time trying improv work!!

Sewing in Oz 2017
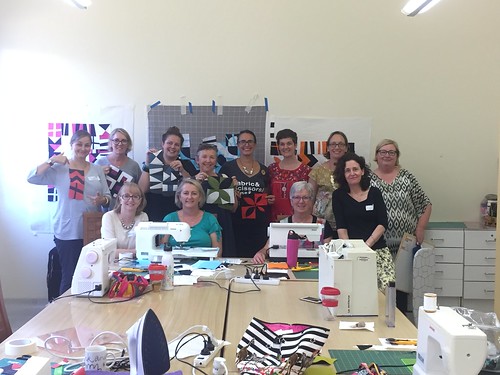
All of the gorgeous women who sewed with me! What a fun day (fueled by delicious snacks prepared by Lorena - she really spoiled us on this trip with her generosity).

I am busily preparing for a 3 week teaching tour coming up quickly, so no promises, but I will attempt to get some proper Nikon-taken touristy photos up here for you at some point soon.  Lots of mad sewing going on. If it ever stops raining in Vancouver, I just might be able to take some pictures to share with you!

Saturday, April 30, 2016

#May is for Makers

Here's something cool. Lindsey over at LR Stitched has launched a wonderful initiative for May. She's written a great little post (and designed this awesome button) that explains her thinking and her hope for the month right here.  Have a read.

May Is For Makers | LRstitched.com

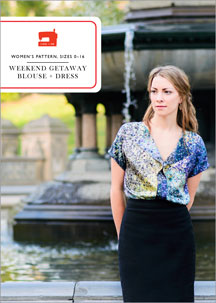
We've all shared patterns with friends. We've all balked at prices. We've all asked "where can I get that for free". In reality, most sewing and quilting patterns are around $10. In Canada, we pay up to $20 for quilting magazines - I have stacks of them, yet I can count on one hand the number of projects I've actually made from a magazine. They are great inspiration, but it is the individual patterns in my collection that I return to over and over, either to make or to dream of making. Patterns like Anna's 2-4-1 Tote (in fact, any of Anna's bag patterns!), or the Liesl's Weekend Getaway Blouse or Kirsty's The Plus Side Quilt

  digital weekend getaway blouse + dress sewing pattern  Image of Quilt Pattern PDF - The Plus Side

Guess what?  I've even bought patterns from blogging friends and others I don't really know, just to say "thank you" and acknowledge the inspiration and great content they provide for free in between their pattern releases.  I know, my halo shines.  My "pattern downloads" folder on the laptop overflows. Doesn't mean I will ever getting around to making every pattern I've purchased, but it's easy to drop $10 to show someone the love. Around these parts, that's a lot less than a meter of fabric or a couple of lattes!  I'm acutely aware of the time and energy it takes to come up with an idea, sketch it, test it, write it up, make it, edit it, produce it and finally, get it ready to market and sell. I cringe every time I see someone comment on a blog "will you create a tutorial for this? I'd love to make one!" Yes, but how much would you love to make one? Would you reward the designer for two, three or four days' work by spending $5 on a pattern? Would you? I hope so.

Here's another great post by Mandy with some food for thought on supporting indie.

I'm ahead of the game. I've already bought my first indy pattern for the month. It's one that EVERYONE but me has made already and it's high time I put my extensive zipper stash to use. Can you guess which pattern it is? Tune in Monday for the first day of #MayisforMakers!

Support creative people. 
The end.

Sunday, August 11, 2013

FQR - The Good Stuff

After a big trip, it takes me some time to decompress, reflect, and organize my thoughts, images, souvenirs and laundry.  The London week was so full and exciting it still fills my mind on a daily basis as I recall things I saw, people I met and places I visited. Not really knowing how to break it all down for sharing, I thought I would begin by showing you all of the incredible handmades that came home with me, and segue into the incredible people I met.

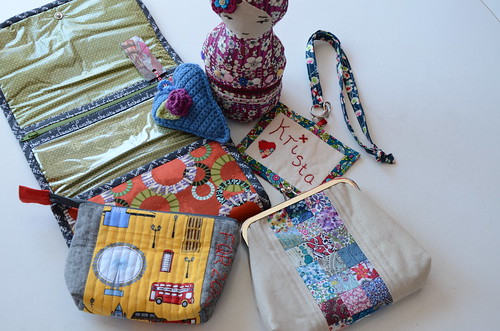
Here's an all-in-one shot of my loot:

Fat Quarterly Retreat handmades

Everything is so fab that each one deserves it's own picture, though. First I'll start off with items from the "Sample Swap". This was cleverly arranged by Trash via the retreat Flickr group. People signed up and said what they would like to make and Trash organized all of us into secret groups of 4 or 5 swappers, careful to make sure there were a variety of items being made amongst the members of each group.  We posted photos in the Flickr pool prior to retreat so that everyone could get excited and hope for their favorite items.  I think I may have squealed with joy when I heard Jo's name called in my group. I was in love with her beautiful Liberty Matryoshka dolls and was so happy that one would come home with me!

Liberty Matryoshka doll by Jo 

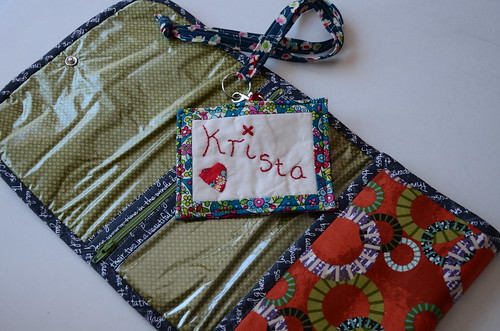
I know from Flickr that Di makes lovely things, so when her name was called for our group, I couldn't wait to see what she'd brought. This plastic window pouch/roll up will be super handy. I just can't decide if I will fill it with sewing notions, or perhaps use it as a travel case for toiletries.  Also appearing in the photo below is the gorgeous nametag I received in the separate nametag swap! This was made by Anna and features prints from the Liberty quilting cotton collection. Swoon.

Window pouch and nametag from FQR 2013

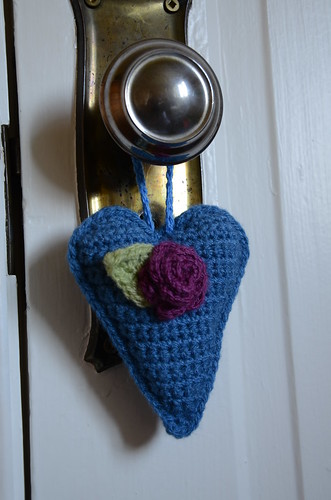
One of the sweetest new friends I made at FQR was Sonia. Look at the adorable heart hanger she swapped with us! I haven't the foggiest idea how to crochet and didn't manage to make it into Laura Jane's class at the retreat to learn how, so I really appreciate this tiny perfect flower on the heart. I've got it hanging on the doorknob of my bedroom closet right beside my bed so I see it first thing when I wake up!

Crochet heart by Emily

photo
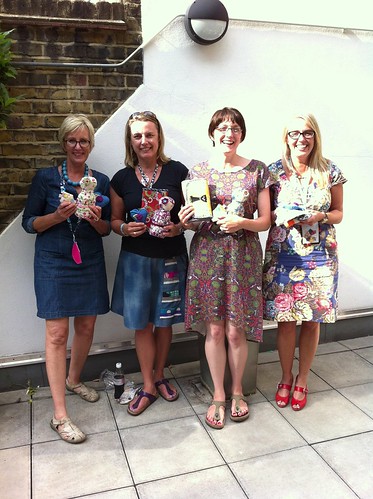
The happy swappers! Di, me, Sonia and Jo

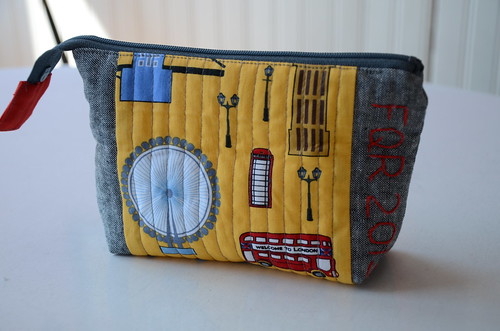
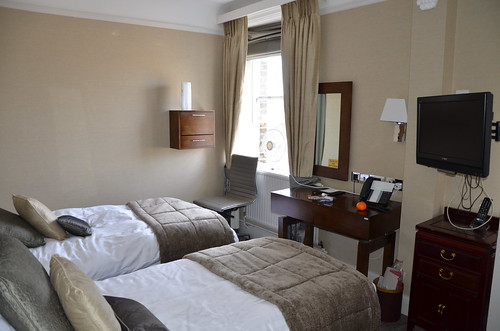
Fellow Canadian and Best Roommate Ever (we had no choice but to get very personal in our tiny, sweltering 5th floor hotel room....one cannot wear a whole lot to bed when it's 30 degrees C in the room!) Susan gifted me with this welcome to London quilted zip pouch complete with her perfect embroidery. I brought her a thread catcher made of Munki Munki roller skates filled with Canadian candy that she's been missing while living in the UK for years.

FQR 2013 zippy by Susan

DSC_7089
Tiny hotel room with mostly ineffective fan!

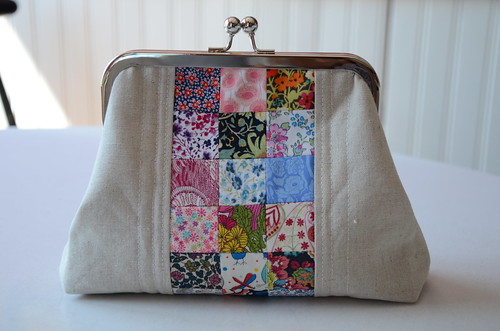
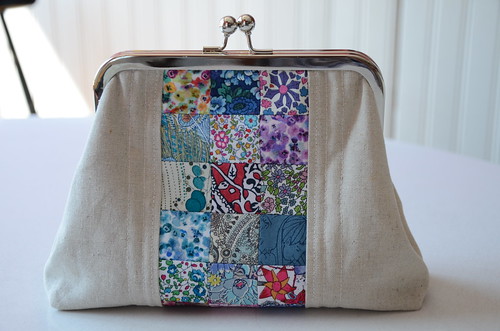
For over a year, Hadley and I had been bantering back and forth about doing a swap together. This was the perfect opportunity to save on postage and get 'er done!  She asked me for a threadcatcher, which is easy peasy for me since I make about a hundred a year. Outdoing herself, Hadley made me the most exquisite clutch purse of Liberty tana lawn + linen. I am seriously considering having a plexiglass box made so I can permanently display it in the middle of our living room coffee table. I mean, look at this thing! It's perfection in tiny squares! I was rather speechless and feeling a tad guilty for emerging from this swap a clear winner. Methinks Hadley deserves a bit of a top up from my end.

Clutch purse made by Hadley
side A, I die.

Clutch purse by Hadley
side B, I die a little more.

I'll continue on here with a few more pics from the actual retreat. I didn't take my DSLR out much as I was busy talking (shocker!), sewing and generally doing everything but thinking of taking pics.  The people were the draw for me. I went to meet longtime online friends in person and having so many in one place was perfect, but also a little challenging. I'm sure anyone who has attended Sewing Summit, Quilt Market or QuiltCon would agree: there truly wasn't enough time to sit down and really connect for very long. I think everyone tried to make the best of it, though.

DSC_7010
I finally got to meet John. How cute is he coordinating with the FQ banner? Poor guy, basically got off an overnight flight and two hours later was greeting retreat guests at the welcome table. Despite very little sleep all weekend, John maintained his friendly, cheerful demeanor at all times. Total honey.

Siblings Together Quilt from VMQG
This is Delma from Siblings Together with the quilt I donated made by members of VMQG

DSC_7015
The delightfully charming, hilarious AND talented Lucie Summers teaching her Portholes class. It was a real treat to meet her, learn her great technique, hear about The Turkey Shed and return home with an autographed copy of her book Quilt Improv. It's written entirely in her voice (now I can even hear her accent when I read it!) and is a visual treat for any quilter.

Portholes class with Lu Summers
The results of my Portholes class

photo
Need I say anything? Mr. Aurifil himself.

photo
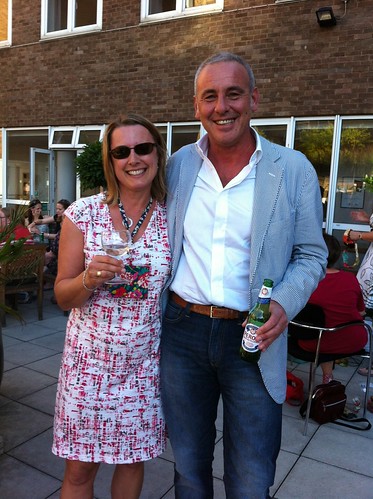
The delightful Mandy  (from whom I learned needle turn applique) and Kerry (who taught me how to make perfect PJ pants) sandwiching a very tired looking me on the final morning of retreat.

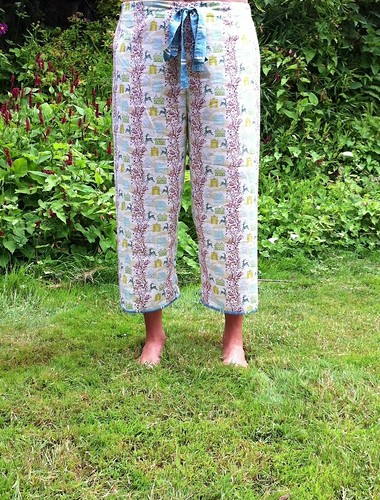
PJ capris by Poppyprint
The results of my PJ's class = lovely voile capris. Just don't call them "pants", people. I love the comfy waistband that is 1/2 elastic, 1/2 ties.

photo
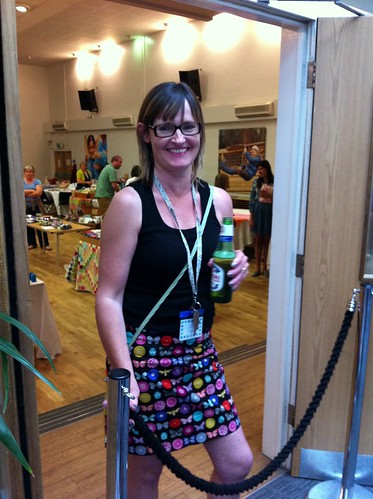
Lovely Lynne taking her job as velvet rope doorwoman for Market Night very seriously indeed

photo

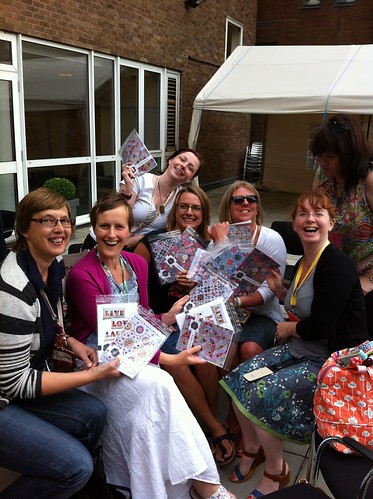
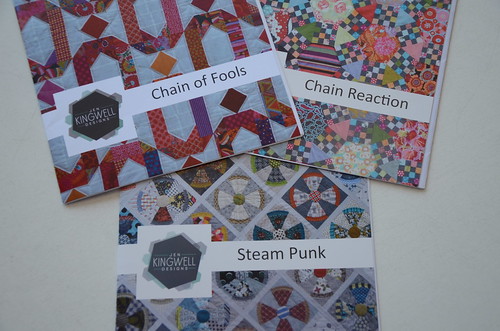
On Saturday night after classes a Pub Quiz was held on the terrace for groups of 7. It was all very impromptu and sudden, but I found myself in a stellar group creatively named The Team and look at us! We emerged victorious and each walked away with 3 gorgeous Jen Kingwell patterns after successfully answering questions about fabric, designers, bloggers and quilts. Yay team!

Pub Quiz prizes!

Phew, I think that just about wraps it up for FQR 2013 people and makes. I've got lots of London photos to wade through and share as well. More coming soon, promise. Our summer travel is all done so I will attempt a return to more regular blogging. I hope everyone is enjoying their fine summer!!