Showing posts with label buttons. Show all posts

Tuesday, February 3, 2015

Getting Closer to Making and Taking!

The 10th cannot come soon enough. That's the day that cases of my book will leave the Martingale warehouse and start their journey to Amazon, sewing wholesalers, me and YOU!  There's a lot of activity on the interwebs now, with contributors starting to show sneak peeks of their projects after receiving their digital copies last week and a lovely primer post on the Stitch This! blog today. Check it out!  In the comments, you can let them know which new title you're most looking forward to this month, nudge-nudge, wink-wink.

In other exciting promo news, I picked up my Retreats Rule! buttons yesterday. They're so fun and I can't wait to give one to everyone who buys a book from me at trunk shows or signings this year, or takes one of my workshops, or bumps into me at QuiltCon, or practices beside me at yoga, or packs my groceries, or......

My buttons are here!


Wednesday, August 1, 2012

Liberty Scrap Challenge the Jewelry Edition and WINNERS!


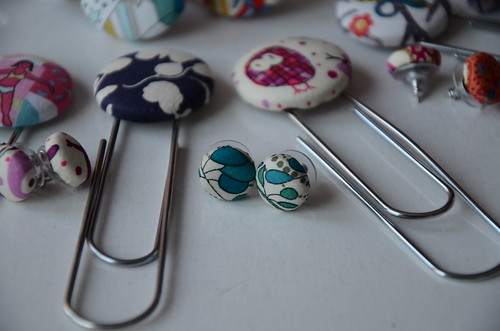
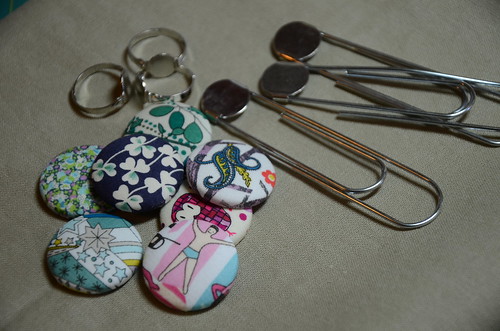
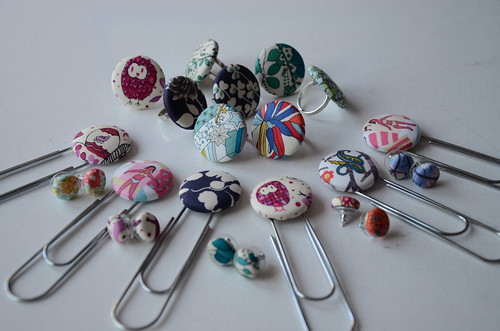
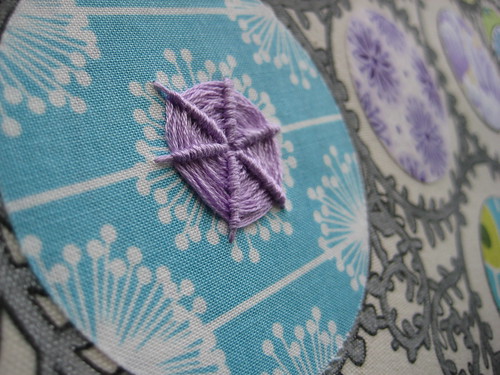
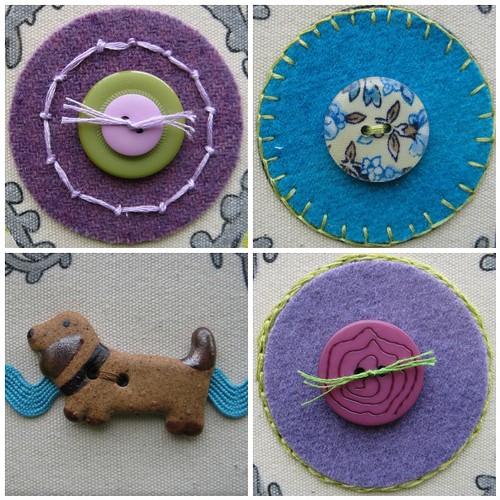
No one wants to throw away even the smallest scrap of Liberty tana lawn, do they? Here are a few ideas for you and your large coin-sized scraps: Covered button jewelry!

Liberty Scrap challenge - jewelry with covered buttons!


You'll need fabric scraps (mine are courtesy of Jo at The Organic Stitch Co., where you can get a scrumptious scrap bag for about $15!), lightweight fusible interfacing, a few inexpensive findings and some strong all-purpose adhesive for these projects.

Liberty Scrap challenge - jewelry with covered buttons!

I purchase my findings (buttons & blanks, bookmark giant paperclips, rings and earring posts) at great prices 
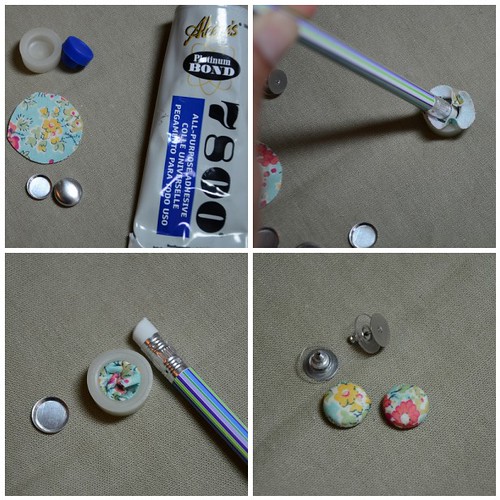
here . I love the fact that you can buy in small quantities, as well as in bulk. They also sell adhesive, but I find their brand is very strong-smelling and the smell lasts for over two weeks until the glue is absolutely cured. Instead, I use Aleene's Platinum Bond 7800. Make sure you source an adhesive that's good for metal surfaces and help it along by roughing your surfaces with a bit of sandpaper first.

Liberty Scrap challenge - jewelry with covered buttons!

These are great summer, no sew items to make. Here's what you need to do:

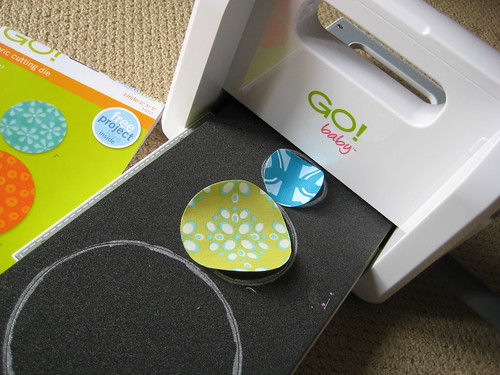
1. back Liberty tana lawn scraps with fusible lightweight interfacing (this is so the metal of the button doesn't show through when the fabric is stretched over the blank).

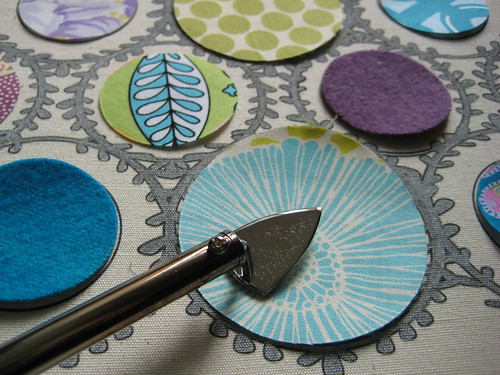
2. cut fabric to size needed for your buttons. I used 1/2"  (size 20) for earrings and 1 1/8" (size 45) for rings and bookmarks. If you make a template out of cardboard, you can simply hold it with your fabric and trim around - no need to mark on the fabric.

3. follow pictures below to cover your button. With the tiny 1/2" blanks, I use the eraser of a pencil to push the fabric & button into the rubber holder and again to stuff the excess fabric into the back of the button before pushing the blank onto the back.

covered button pictoral

4. Rough up the blank on the back of your buttons. In a well-ventilated area, apply adhesive to the blank as well as the surface you want to stick it to. For the earrings and tiny buttons, I used a toothpick to apply the glue. Wait 5 minutes, then stick 'em together!

Liberty Scrap challenge - jewelry with covered buttons!

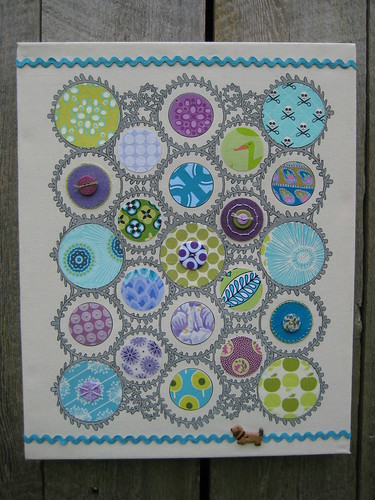
All of these items are fun for gift-giving, craft sales or just wearing around all summer.  When I posted my first Liberty Scrap Challenge tutorial for the Liberty Lemonade tablecloth, I offered my leftover charms to anyone willing to take on the Challenge.  The winner needs to use those charms (added fabric is okay!) and come up with a fun project and tutorial to share.  Random number generator has chosen comment #22, so it looks like our next challenger will be Kirsty@Bonjour!


This is very exciting because Kirsty makes beautiful projects and it looks like she's already got something in mind for the scraps. Check out her gorgeous blog for fabulous tutorials and stunning photos of her life in Provence, France.

Now I also promised a "little Liberty something" to a commentor who wasn't up for the scrap challenge, and the first such comment to come up randomly is #49. Yippee, it's Duff, who eats breakfast food in any order she wants!


She liked that I used the word 'schematic' in my tutorial post. I love that she signs all her comments with a heart. So there.  Michele, go ahead and pick out an item you like in the photo above and it's yours! (well, except for the navy rose ring which our visiting cousin already claimed....).

Thursday, October 20, 2011

Fav Fabrics - Sampler Tutorial & Giveaway!

Fabric and scrapbook design company Basic Grey created a groovy concept for a sampler display canvas. You've likely seen them on other blogs recently - Fat Quarterly had a bunch made up as designer challenges and Amy has done several stunning examples, too. It's cool to see how different people run with the idea of displaying their fav fabrics, notions, trims and even scrapbook paper!

My original plan took a bit of a U-turn. Initially I thought about painting the vines gold and using Christmas fabrics in the circles...sort of a Christmas bauble idea. I considered silk ribbon for embroidering hangers on a few of them, or criss-crossing it over the middle of a few circles as if they were wrapped gifts. The Sharpie Gold Paint pen was a disaster on the canvas. I tested it on the back and it sunk into the canvas with no sheen at all. It was just a dull brown stain. Euw.

Basic Grey Sampler by Poppyprint

So, plan B was Sharpie Silver which looked better (still not what I envisioned, but oh well). Unfortunately, I don't have enough holiday-looking fabric to coordinate with silver so I re-programmed and went with a fav fabrics display for my daughter. She wants us to repaint her bedroom in lime green, purple and turquoise. Hmmm. If I can keep this a secret, it will be a Christmas gift for her. If you'd like to try out a Basic Grey sampler and want some ideas, here's how I did mine:

Basic Grey Sampler by Poppyprint

After the colouring was all done, I scoured my scrap bin for suitable fabrics. Then I cut 3.5" squares of Steam-a-Seam II and stuck it on the back of each scrap, leaving the backing paper ON. Using my GO! Baby and the circle die (thanks Di!), I cut out 2" and 3" circles from the Steam-a-Seam-backed scraps. I also tossed in a few hand dyed wool pieces for a hit of saturated colour. I hadn't considered cutting wool with the GO!, but Paulette recently did a whole bunch and it worked perfectly!

Basic Grey Sampler by Poppyprint

Then I laid everything out with a few buttons and took a photo for reference. All the backing papers were peeled off and, as is typical of me, I chucked the photo and rearranged most of the pieces in a different way. To hold them in place temporarily, I used a Clover mini-iron, just heating the very centre of each circle. This little iron would have crushed the felted wool, so Roxanne's Glue did the job on those ones (honestly, I hadn't intended for this post to become such a product placement....I really have all this stuff and I really use it!).

Basic Grey Sampler by Poppyprint

Now with everything secured, I turned the canvas frame over so I could press firmly from the back to adhere each circle permanently.

Basic Grey Sampler by Poppyprint

I found the whole display rather flat at this point, so it was time for some buttons and embroidery to add texture.

Basic Grey Sampler details
I know the pottery puppy button seems like a complete non sequitur, but if you know D, you know there is nothing she loves more than dogs. I've had these South African-made buttons for ages and this seemed like a place to use one!

Still not completely satisfied, I decided that some ricrac would help frame the whole she-bang so I staple-gunned it around the edges to the back of the frame. A few dabs of hot glue secured it to the canvas. And here you have it:

Basic Grey Sampler by Poppyprint

Now that you see how easy and fun it is to create a display of your fav fabrics, do you want to try one? Have you got a horde of cherished scraps, or bits of baby clothes, or grandma's button collection to display? Basic Grey will send one lucky reader a canvas sampler of their choosing (there are three different styles). If you'd like to leave ONE comment below I will use the random number generator to pick a winner on Saturday morning, Oct.22. The samplers are available to purchase online here.

PLEASE: Your email must be linked to your comment, or written in your comment to win. Use "name(at)network(dot)com" format if you like.

Edited: Comments are now closed, thanks for visiting!