
My original plan took a bit of a U-turn. Initially I thought about painting the vines gold and using Christmas fabrics in the circles...sort of a Christmas bauble idea. I considered silk ribbon for embroidering hangers on a few of them, or criss-crossing it over the middle of a few circles as if they were wrapped gifts. The Sharpie Gold Paint pen was a disaster on the canvas. I tested it on the back and it sunk into the canvas with no sheen at all. It was just a dull brown stain. Euw.
So, plan B was Sharpie Silver which looked better (still not what I envisioned, but oh well). Unfortunately, I don't have enough holiday-looking fabric to coordinate with silver so I re-programmed and went with a fav fabrics display for my daughter. She wants us to repaint her bedroom in lime green, purple and turquoise. Hmmm. If I can keep this a secret, it will be a Christmas gift for her. If you'd like to try out a Basic Grey sampler and want some ideas, here's how I did mine:
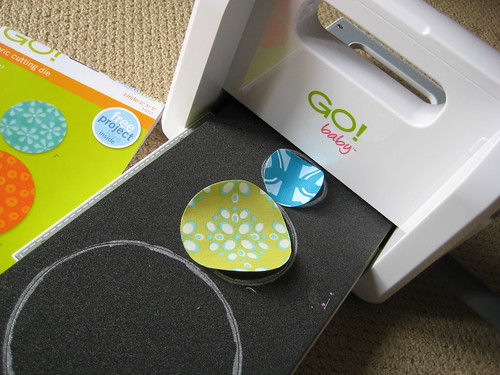
After the colouring was all done, I scoured my scrap bin for suitable fabrics. Then I cut 3.5" squares of Steam-a-Seam II and stuck it on the back of each scrap, leaving the backing paper ON. Using my GO! Baby and the circle die (thanks Di!), I cut out 2" and 3" circles from the Steam-a-Seam-backed scraps. I also tossed in a few hand dyed wool pieces for a hit of saturated colour. I hadn't considered cutting wool with the GO!, but Paulette recently did a whole bunch and it worked perfectly!

Then I laid everything out with a few buttons and took a photo for reference. All the backing papers were peeled off and, as is typical of me, I chucked the photo and rearranged most of the pieces in a different way. To hold them in place temporarily, I used a Clover mini-iron, just heating the very centre of each circle. This little iron would have crushed the felted wool, so Roxanne's Glue did the job on those ones (honestly, I hadn't intended for this post to become such a product placement....I really have all this stuff and I really use it!).
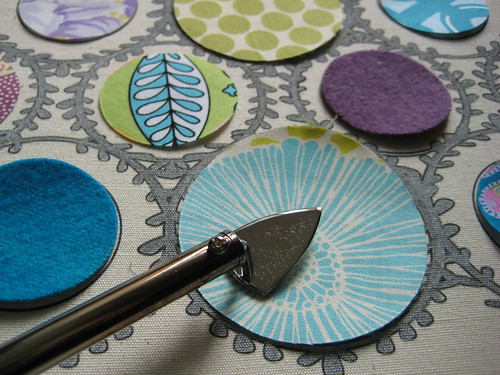
Now with everything secured, I turned the canvas frame over so I could press firmly from the back to adhere each circle permanently.

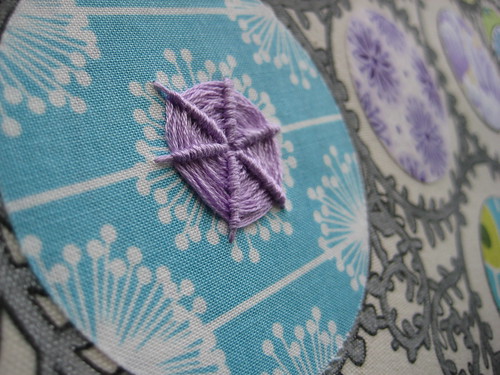
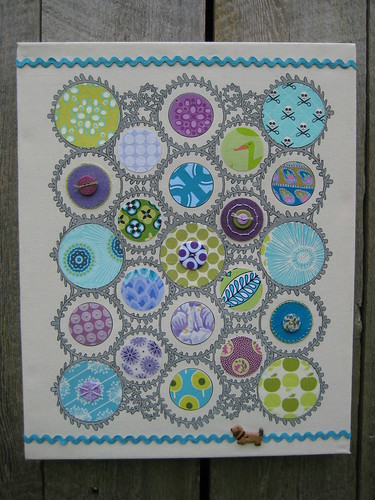
I found the whole display rather flat at this point, so it was time for some buttons and embroidery to add texture.
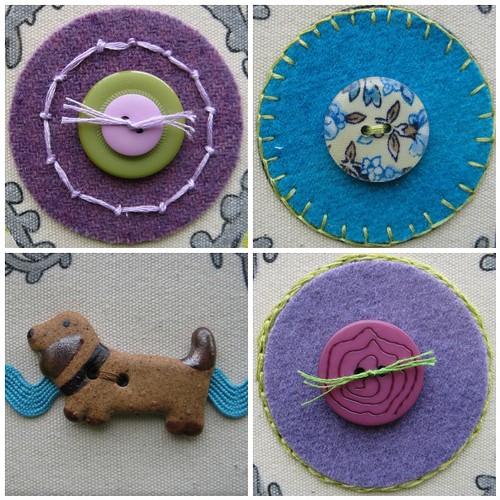
I know the pottery puppy button seems like a complete non sequitur, but if you know D, you know there is nothing she loves more than dogs. I've had these South African-made buttons for ages and this seemed like a place to use one!
Still not completely satisfied, I decided that some ricrac would help frame the whole she-bang so I staple-gunned it around the edges to the back of the frame. A few dabs of hot glue secured it to the canvas. And here you have it:
Now that you see how easy and fun it is to create a display of your fav fabrics, do you want to try one? Have you got a horde of cherished scraps, or bits of baby clothes, or grandma's button collection to display? Basic Grey will send one lucky reader a canvas sampler of their choosing (there are three different styles). If you'd like to leave ONE comment below I will use the random number generator to pick a winner on Saturday morning, Oct.22. The samplers are available to purchase online here.
PLEASE: Your email must be linked to your comment, or written in your comment to win. Use "name(at)network(dot)com" format if you like.
Edited: Comments are now closed, thanks for visiting!