Many years ago I took a Quadrille Twister class from former CQA (Canadian Quilters' Association) Teacher of the Year Dianne Stevenson. In that workshop, I learned what I believe is the BEST technique for sewing blocks or quilts of like-sized squares together. Dianne learned the technique from someone else and was very happy to share it and now I'm passing it along to you. There's a good chance someone else has done a tutorial on this already, but I've never seen one. Pluse, posted a very brief Instagram photo tute the other night and some of my friends asked for more details.
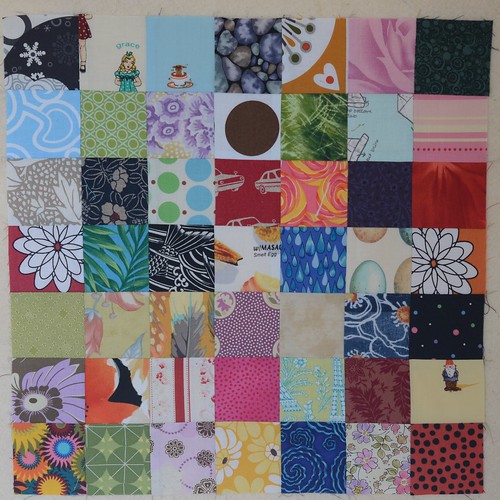
In my last post, I told you about the thousands of 2.5" squares that I cut from my unwanted, older, not-intended-for-any-other-projects fabric. I am very happily using all of these squares to build a Scrap Vomit quilt. At 49 patches per block, there is ample opportunity for the voodoo to creep in (not that it really matters with scraps). Piecing this could be a tedious bore.
Enter: The Anti-Voodoo Block Piecing Tutorial.
I'm going to show you how to do this with little 2.5" squares, but it can also be done with an entire quilt of 10" blocks, or even a whole charm pack of 5" squares that you want to whip up into a baby quilt.
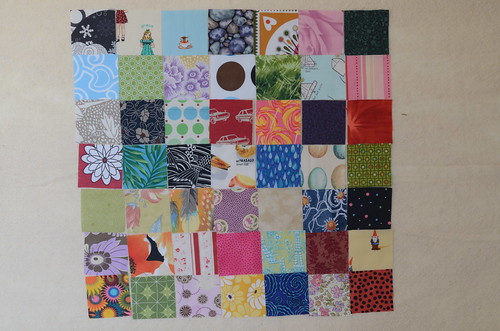
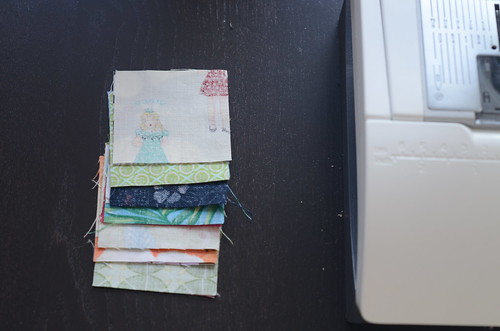
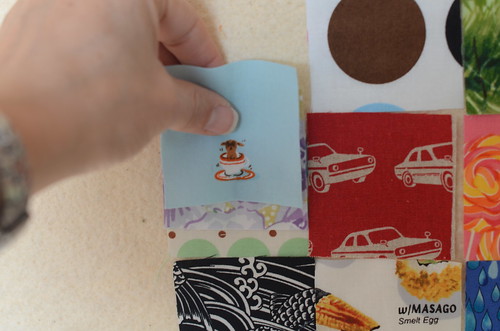
1. Arrange your squares on a design wall (or if small, beside your machine on your table).
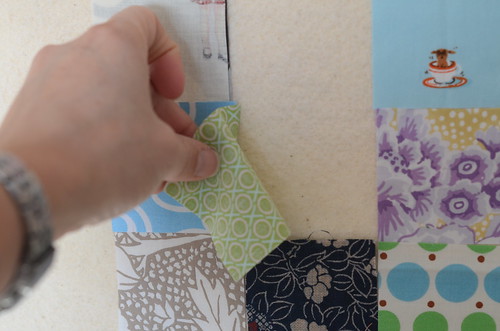
2. Turn column 2 squares over to the left so that they are RST with their column 1 neighbour.
3. Now all column 1 squares are covered by their column 2 neighbours.
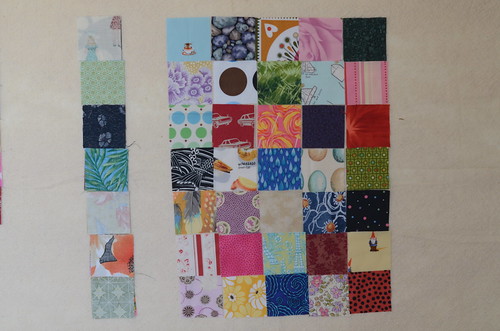
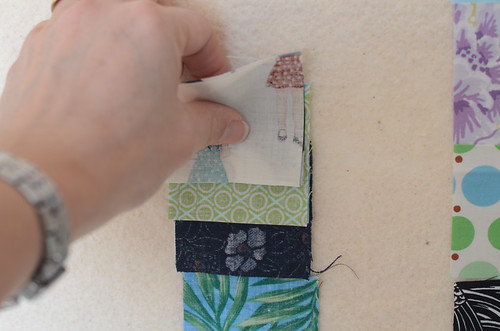
4. Pick up the first set and keeping it on top, gather the sets below it in order from top to bottom.
5. Now lay the sets beside your machine, ready to sew in order from top to bottom.
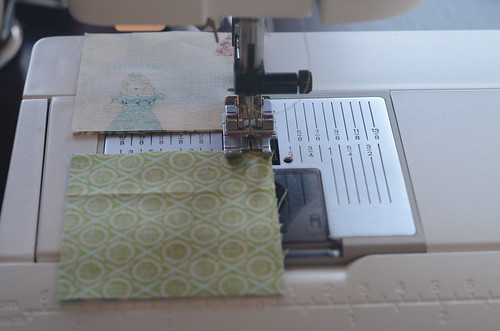
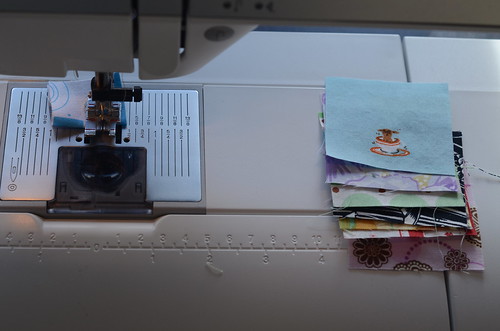
6. Sew the first set of squares together. At the end of the seam sew a few stitches 'in the air' before feeding the second set in (chain piecing). We are not cutting any threads until we reach the end of the sets!
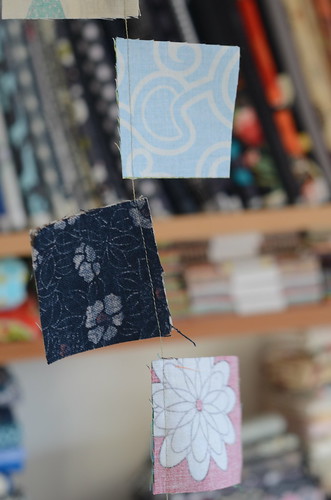
7. At the end of the sets, remove from the machine. You've got a chain of 2-patches!
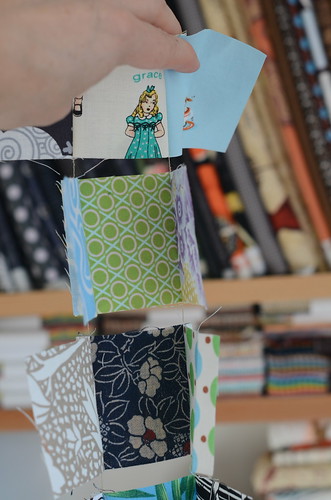
8. Now stack your 3rd column squares, keeping first square right side up on top, and the rest of the column in order from top to bottom.
9. Take them to your machine and piece them in order to their 2nd column neighbours. I like to sit them on my machine bed, to the right of the needle so they are easy to grab.
10. Now you've got a string of 3-patches that are starting to look like rows.
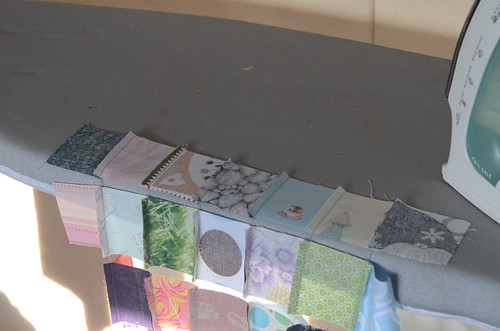
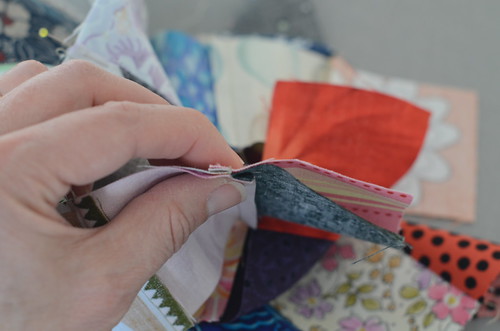
11. Continue until you've added all of the columns and you've got your entire block's worth of rows all joined together by their piecing strings. Take your rows to the ironing board and with the wrong side up, lay the top row on the board with the other rows hanging off the front of the board.
12. Press all seams in one direction, then pull the second row up onto the board and press all seams in the opposite direction. Continue until all rows have been pressed in alternate directions. I like to hold on to the last patch of the row to give a little tension as I'm pressing, making sure that each patch is fully pressed out from the seams.
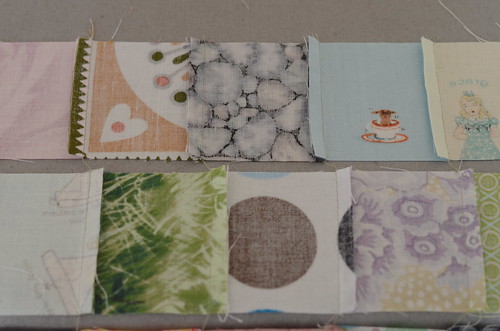
13. Now you're ready to sew the rows together. Nestle the opposing seams together (I like to pin before the seams, just to hold the seam allowances down as they approach the presser foot). I pull my pins out just before sewing over them. Don't worry about those 3 or 4 stitches that you sewed in the air; there is no need to clip the thread, unless of course you want to.
14. Once all of your rows are sewn together, press the seams in the direction that makes sense for your project. In other words, so that the seams of neighbouring blocks will be opposite, allowing you to once again nestle seams and get nice, tight intersections between patches/blocks.
There you have it! Now I am sure some of you will have questions about pressing seams open and I really don't want to get into a huge debate (that's a dead horse that's been flogged many times before on various blogs!). I am a side presser. Always. Except when making wallhangings, or very complicated foundation pieced blocks, or blocks with a crazy number of intersecting seams that would leave a massive lump if you tried to cram them all over to one side.
Let me put it this way: if you want to sleep under your quilt, throw it in the washer and dryer, drag it on picnics, built forts with it, take it to the beach, let your cat knead it into a suitable bed and snuggle underneath it on the couch, then why would you want to expose your piecing threads between each patch? I like my thread nicely protected under a seam allowance, thereby giving my quilt a fighting chance at longevity. Not to mention that every time you have two open seams meeting at right angles, there is a teeny, tiny hole in your quilt top! I'm not saying pressing open is wrong. I just think pressing to the side is going to help my quilts last longer.
Plus, those Old Ladies that Know Stuff told me to do it that way.

42 comments:
I was on IG asking for this tuto and NOW I GET IT!!! Yay!!! Thanks Krista! This is fabulous: my life just got easier!!
Love this idea!!
Beautiful tute. Thanks Krista!
In Hawaii, it's always those menehune that do it!
THE BEST piecing method, hands down.
This makes so much sense. I will use this all the time from now on. Thanks so much for sharing this!
Great method - too bad I just finished my 49 block scrap vomit quilt! I'll try this out on my next one.
Do you know about the fabric swap for the SV quilt?
http://www.swap-bot.com/swap/show/136658
Sign up closes tomorrow (Friday), so move quickly.
I have read about this method before but now I totally get it, thank you.
Untill now I always used a large cutting mat with the lay-out of all the pieces of a block next to my sewing machine, which worked really well for me, but I love to try your tutorial, Krista!
I’m with you on the pressing seams to the side!
Thank you for pictures! I can totally understand this now and will give it a try on my first Scrap vomit!
It really is a brilliant way to do things. I might have gone crazy many times if I didn't do it this way. But just in case something wacky happens to my piecing order from layout to machine, I usually snap a quick pic on my phone for reference, especially since I've accidentally flipped my chained sets end to end on more than one occasion...
That is such a good method. I actually blogged about the method last July. Di x
That's exactly how I pieced my scrap vomit quilt. Great tutorial :)
Bonnie Hunter (the same one whose tutorial is being used for the Scrappy Trip Around the World craze) uses this method to piece together her blocks - she calls it "webbing the top". You can find her tutorial at http://quiltville.blogspot.ca/2005/06/webbing-top-or-how-to-chain-stitch.html. I used this to put together my first queen size quilt last year, and won't do it any other way now!
That's a clever way to do it! A lot of vodoo happened here before... Thanks for sharing, that's really helpful.
Ha, were you spying on my sewing room last Saturday night as I turned the air blue?!
Alas, I already worked out to do that, but one my HSTs turned round at the ironing board without me realising (unfortunately the HSTs changed orientation several times in each row) and I managed to sew 2 rows together along the wrong edge. I don't think there's much you can do to fix that kind of sutpidity ;o) I will definitely pin this for some charm square simple ones I have coming up though!
What a great idea. Thanks!
Side Pressers unite! Shazam!
& I finally "get" voodoo piecing, I had seen it before, but promptly forgot how it worked...
Thank you! I've got lots of those tiny squares and didn't know quite how I was going to put them together. I'm a side presser too ~ tho I did do one quilt pressed open and I've been worrying about it since. Won't let the kitties on it ~ much to their indignation.
Thanks for sharing your piecing technique. A friend of mine does it this way & she's told be about it several times, but I could never "see it" until now. And I agree completely with pressing seams to the side. I'm slowly learning to FMQ, but I still want the option of stitching in the ditch.
Well aren't you the smartie pants!! LOVE this idea!!
P
That is a great tip I have never thought of! I'll never get that mysterious voodoo from now on! Thank you for sharing.
You = AWESOME!
This is a great tutorial, Krista. Okay, so maybe you will change my mind on side pressing. I side pressed for years, and then pressed the seams open for flatness. But you make a very good point. I just might revert back to side pressing.
I'm with you on pressing, it kind of depends on the project. If it's going to be loved a lot, then I think side pressing is the best option, but if i'm going for looks over function, then i'll do open seams if it gives the right look to the piece. It always depends on the project. Also, love piecing things this way. Anything that makes life simpler is always in favor with me!
I'm still chuckling at point 1. Short people shouldn't bother trying to use a design wall!
This "old lady who knows stuff" (who ever thought I would be happy to be referred to in that way??)puts a tiny safety pin in the first piece of the first row so I don't get the end for end of things mixed up. This is a GREAT tutorial Krista.
I am with you on the side pressing. The "Old Ladies Who Know Stuff" taught me that way back when I was a young whippersnapper and the only time I didn't do that I ended up mending holes within a few months on a much loved well washed quilt.
Felicity taught me this technique! Your explanation is very helpful. I think it's these simple but effective tips that we online-taught quikters miss out on!!
And the pressing discussion has been exhausted, but I haven't heard it explained in quite this way. It makes a lot of sense to me!
Hoo rah for side pressing and wanting to make quilts to be used!
Yes, I get blocks arse about face all the time! Thank you for sharing your method. I always side press. It's what I was taught we do in quilting. Open seams is for garment sewing!
Wonderful tutorial! I'm a side presser for the last 35 years. Yep, that makes me an old lady...not sure if I really know my "stuff" tho. =P
hugZ,
annie
I am so happy you passed this on! I have been doing many patchwork blocks and was trying to figure out a method for non-voodoo :)
I love you! Really! Thank you SOOO much for this tute - I am now ready to start my triple-Irish-Chain king size quilt!
One more suggestion. when chain sewing two squares together, the garland of chain pieced blocks tends to get twisted and you can lose track of which square was originally on top. To remedy this situation just use a different color thread for the bobbin.
That's pretty much how I piece. And why I love chain piecing so much! Slick!
I have been learning to quilt for just over a year now. Working my way through Harriet and Carrie Hargraves series Quilters Academy. They teach this method in volume one of the series, so thats how i learned to do it.
Vicki
Hurray for side pressing! Enjoy your stitching today ; )
Such a great way to do this! Thanks for the tute! I side press too :)
Bless your heart for writing this! Since I seem to be the slowest person in the whole world at sewing, and since I'm self-taught, this is like a light bulb went off in my head! Thanks for throwing the switch!!!
GEE NEE USSS
Fabulous! Great explanation. I really need to keep voodoo at bay when I'm stitching my rows/blocks together. I can't wait to try it so I might pull out my scrap vomit blocks and make another one tonight..even though I have other things I'm supposed to be working on!
This will be a huge time saver… and no more frustration over which way to press seams (I get it wrong no matter how much careful planning happens. Thx for sharing Krista!
Post a Comment