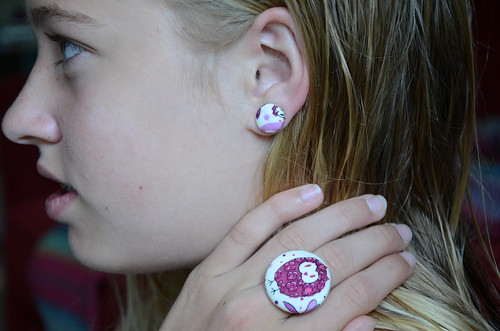
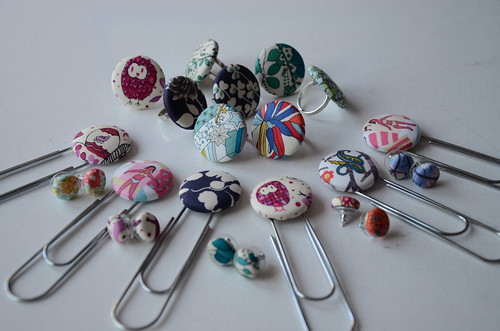
No one wants to throw away even the smallest scrap of Liberty tana lawn, do they? Here are a few ideas for you and your large coin-sized scraps: Covered button jewelry!
You'll need fabric scraps (mine are courtesy of Jo at The Organic Stitch Co., where you can get a scrumptious scrap bag for about $15!), lightweight fusible interfacing, a few inexpensive findings and some strong all-purpose adhesive for these projects.
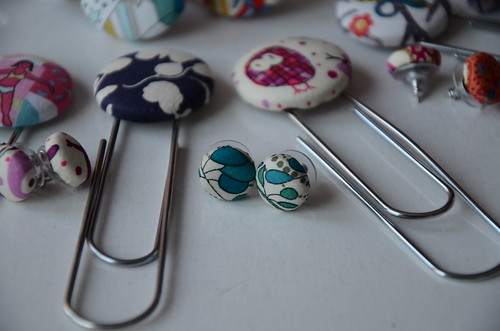
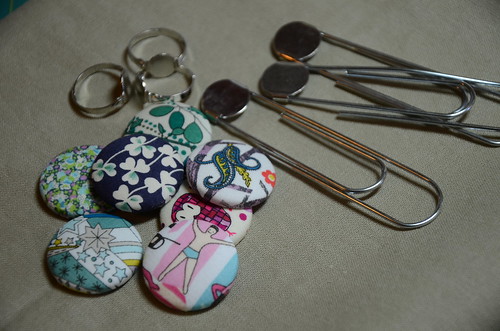
I purchase my findings (buttons & blanks, bookmark giant paperclips, rings and earring posts) at great prices here . I love the fact that you can buy in small quantities, as well as in bulk. They also sell adhesive, but I find their brand is very strong-smelling and the smell lasts for over two weeks until the glue is absolutely cured. Instead, I use Aleene's Platinum Bond 7800. Make sure you source an adhesive that's good for metal surfaces and help it along by roughing your surfaces with a bit of sandpaper first.
These are great summer, no sew items to make. Here's what you need to do:
1. back Liberty tana lawn scraps with fusible lightweight interfacing (this is so the metal of the button doesn't show through when the fabric is stretched over the blank).
2. cut fabric to size needed for your buttons. I used 1/2" (size 20) for earrings and 1 1/8" (size 45) for rings and bookmarks. If you make a template out of cardboard, you can simply hold it with your fabric and trim around - no need to mark on the fabric.
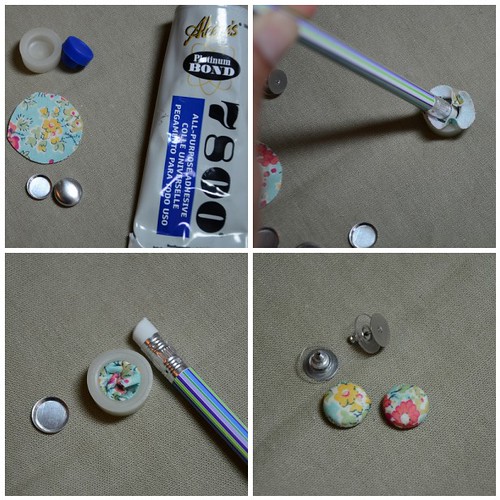
3. follow pictures below to cover your button. With the tiny 1/2" blanks, I use the eraser of a pencil to push the fabric & button into the rubber holder and again to stuff the excess fabric into the back of the button before pushing the blank onto the back.
4. Rough up the blank on the back of your buttons. In a well-ventilated area, apply adhesive to the blank as well as the surface you want to stick it to. For the earrings and tiny buttons, I used a toothpick to apply the glue. Wait 5 minutes, then stick 'em together!
All of these items are fun for gift-giving, craft sales or just wearing around all summer. When I posted my first Liberty Scrap Challenge tutorial for the Liberty Lemonade tablecloth, I offered my leftover charms to anyone willing to take on the Challenge. The winner needs to use those charms (added fabric is okay!) and come up with a fun project and tutorial to share. Random number generator has chosen comment #22, so it looks like our next challenger will be Kirsty@Bonjour!
This is very exciting because Kirsty makes beautiful projects and it looks like she's already got something in mind for the scraps. Check out her gorgeous blog for fabulous tutorials and stunning photos of her life in Provence, France.
Now I also promised a "little Liberty something" to a commentor who wasn't up for the scrap challenge, and the first such comment to come up randomly is #49. Yippee, it's Duff, who eats breakfast food in any order she wants!
She liked that I used the word 'schematic' in my tutorial post. I love that she signs all her comments with a heart. So there. Michele, go ahead and pick out an item you like in the photo above and it's yours! (well, except for the navy rose ring which our visiting cousin already claimed....).




16 comments:
Very cute makes, and I always wondered how those button earrings worked!
Looking forward to seeing what Kirsty comes up with :o)
These are so cute!!! I just love them!! I could see my daughter and I doing a project like this together.
OH man! I adore it when good things happen to crazy people--it restores balance in the world!
I would love to see the turquoisey starburst ring grace my hand. MIneral blue is my favorite color so I have lots to go with this beauty!
That is a cute project, I love covered buttons. And congratulations to your winners.
Wheeeeee! Happy dance!
I only hope mine can compare with these adorable little clips/earrings you have made. Yay for Liberty!
Cute x
What fun , thy look great.
Tricia
So cute - and very well modellled!
Great ideas...and I am glad to know the name of that glue! I am looking for something that will do the trick and you solved it!
Congratulations to the winners, I can't wait to see the projects.
I really like to make fabric covered buttons. They are great as magnets too.
I seriously need to get myself some button kits. These are just SO pretty Krista! Love them, all of them.
Love!!!
Welcome to the Challenge Kirsty! Yay!
Cute model!! :0)
Great tutorial for your lovely jewellery as well.
beautiful things.
regards
Gitta
What perfect projects! Thanks for the source link, too!
Liberties just feel so great just wanted to thank you for the tip about daiso i had a blast there. Deb
Post a Comment