
You won't need much:

- 5" square of fabric with some cute motifs that are about 3/4" square (charm packs are a great for this).
- two pieces of lightweight fusible interfacing 4 1/2" square
- a 1"x6" clear ruler
- marking pen of your choice
- sewing machine with decorative stitch or buttonhole stitch
- white thread

Step 1: Layer and fuse the two pieces of interfacing to the wrong side of your fabric. I found that using one piece of heavyweight interfacing (like Timtex) was too difficult to cut tiny curves out between the stitching. Two pieces of lightweight were perfect.
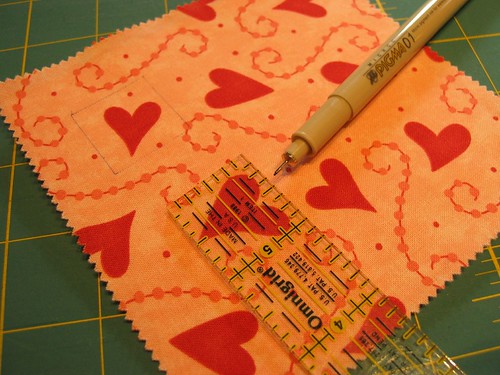
Step 2: Place your ruler over the motif that you want in your stamp. Trace a 1" square around the motif. If you can trace several on one piece of fabric, go for it (just remember to leave room for your stitching between your stamps).
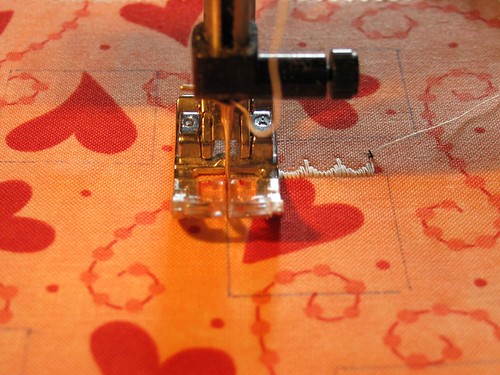
Step 3: Choose a decorative stitch (my Pfaff just happens to have this one that is perfect for the edge of a perforated stamp...use a tight zigzag or buttonhole stitch if you don't have a decorative option). I did play around reducing the stitch length and width to make the decorative stitch smaller & more compact.
Stitch around the drawn line, pivoting with your needle down in the corners. Make sure to cover your marked line with the stitches. In my case, the design is all stitched to the left of the needle centre line, so I just lined up my marked line with the centre of my presser foot.
Step 4: Using a fine point permanent marking pen, add any text you would like now, before cutting.
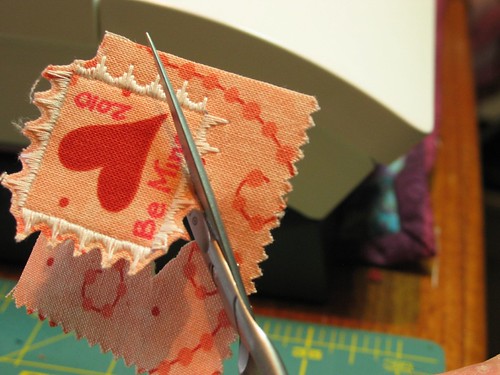
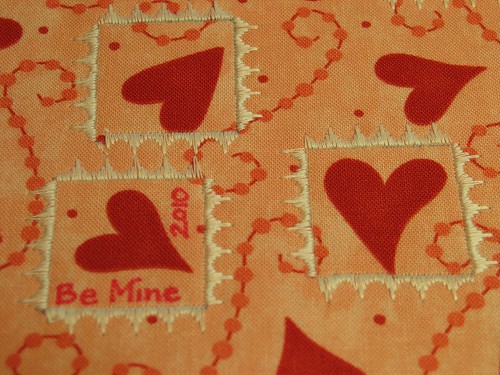
Step 5: Using sharp embroidery scissors, cut out each stamp, curving into and out of the space between the stitches carefully (you will have more control of this near the hinge of your scissors).
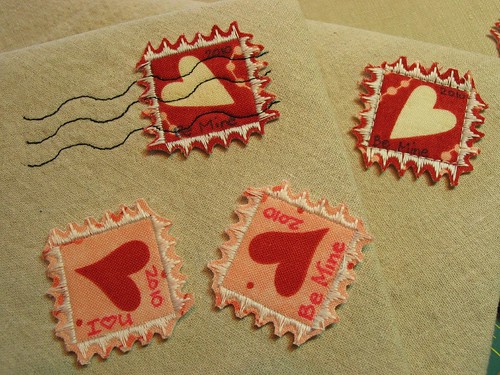
Step 6: Attach your stamps to a fabric envelope or postcard using a wavy machine stitch to resemble a postmark, or simple straight stitch along the inside square of your decorative stitching (both methods shown in the photo).
Happy Valentines Day!!
20 comments:
Is it just me?! The pictures aren't showing up...
Disregard previous post!
Yes! It WAS me, matter of fact. =-)
Krista, these are SO CUTE! Thanks for the tute!
How cute are these?? You mean you have to give them away??....Love them!!
Paulette
Isn't that as cute as it can be! love them. I'll be traveling this next week, and don't have time to make them this year. I'm making myself a note to come back to this tutorial next year!
They are just way too cute!! I love them, you are so creative.
You are so clever.
I love it!! Such a great idea....thanks for sharing!!
great idea & tuto, thanks !
I love the heart stamps! Very nice work!
Potholder Pass 2 sign ups have begun. I know you wanted to join this time. Come sign up!
OMG, these are so precious! I love how you made them and what a great tute! Thanks so much, Krista!
Very clever and cute! Thanks for the tutorial, I need step by step instructions!
Thanks so much for the great tutorial! They are quick and fun and I will be able to get them done before Valentines :-)
Marian
I love your stamps!
A W E S O M E !
LOVING THIS!!!!
SO so so cute!
Adorable! Thanks for sharing ... I've posted a link.
Oh I love this! I don't have a fancy sewing machine, but I'll figure out some type of zig zag stitch to make it work. Your generosity is greatly appreciated.
Brenda C.
Texas
The stitching for the cancellation mark is such a fabulous detail!
I just found your blog. These are too cute! Thank you!
oh these are terrific! Thanks for sharing with me on Ig! I'll let me QAL folks know...
Post a Comment