Showing posts with label facing. Show all posts

Wednesday, April 8, 2020

Varietals - A Monochromatic Improv Study

Here's a recent finish, the second in what I hope will be a series of three quilts all based on improvisational (free cut) hourglass units. This mini-obsession started with the
"Try a Triad" design challenge (still open!) issued by the Canadian Quilter's Association to make a modern mini quilt using only red, blue and yellow fabric. I really loved the resulting design and composition of my challenge quilt but the colours are not at all 'me'.   I decided to hit my Oakshott fabric stash and try a monochromatic version.


Varietals 25" x 25"

Oakshott fabrics are shot cottons, which means they are woven with two different colours of thread. One colour for warp, the other for weft. In the photo above, it may appear that there are more than 3 colours of fabric used. Had I been incredibly diligent about piecing the fabric with the threads always in the same vertical and horizontal orientation, the quilt would appear more uniform, but it wouldn't be as interesting, in my opinion. That is just one more delightful aspect of Oakshott fabric; it gives quilts added visual interest and depth because as you change your viewing angle on the flat, two dimensional artwork, the colours subtly change as the different threads some into view and the fabrics absolutely glow. 
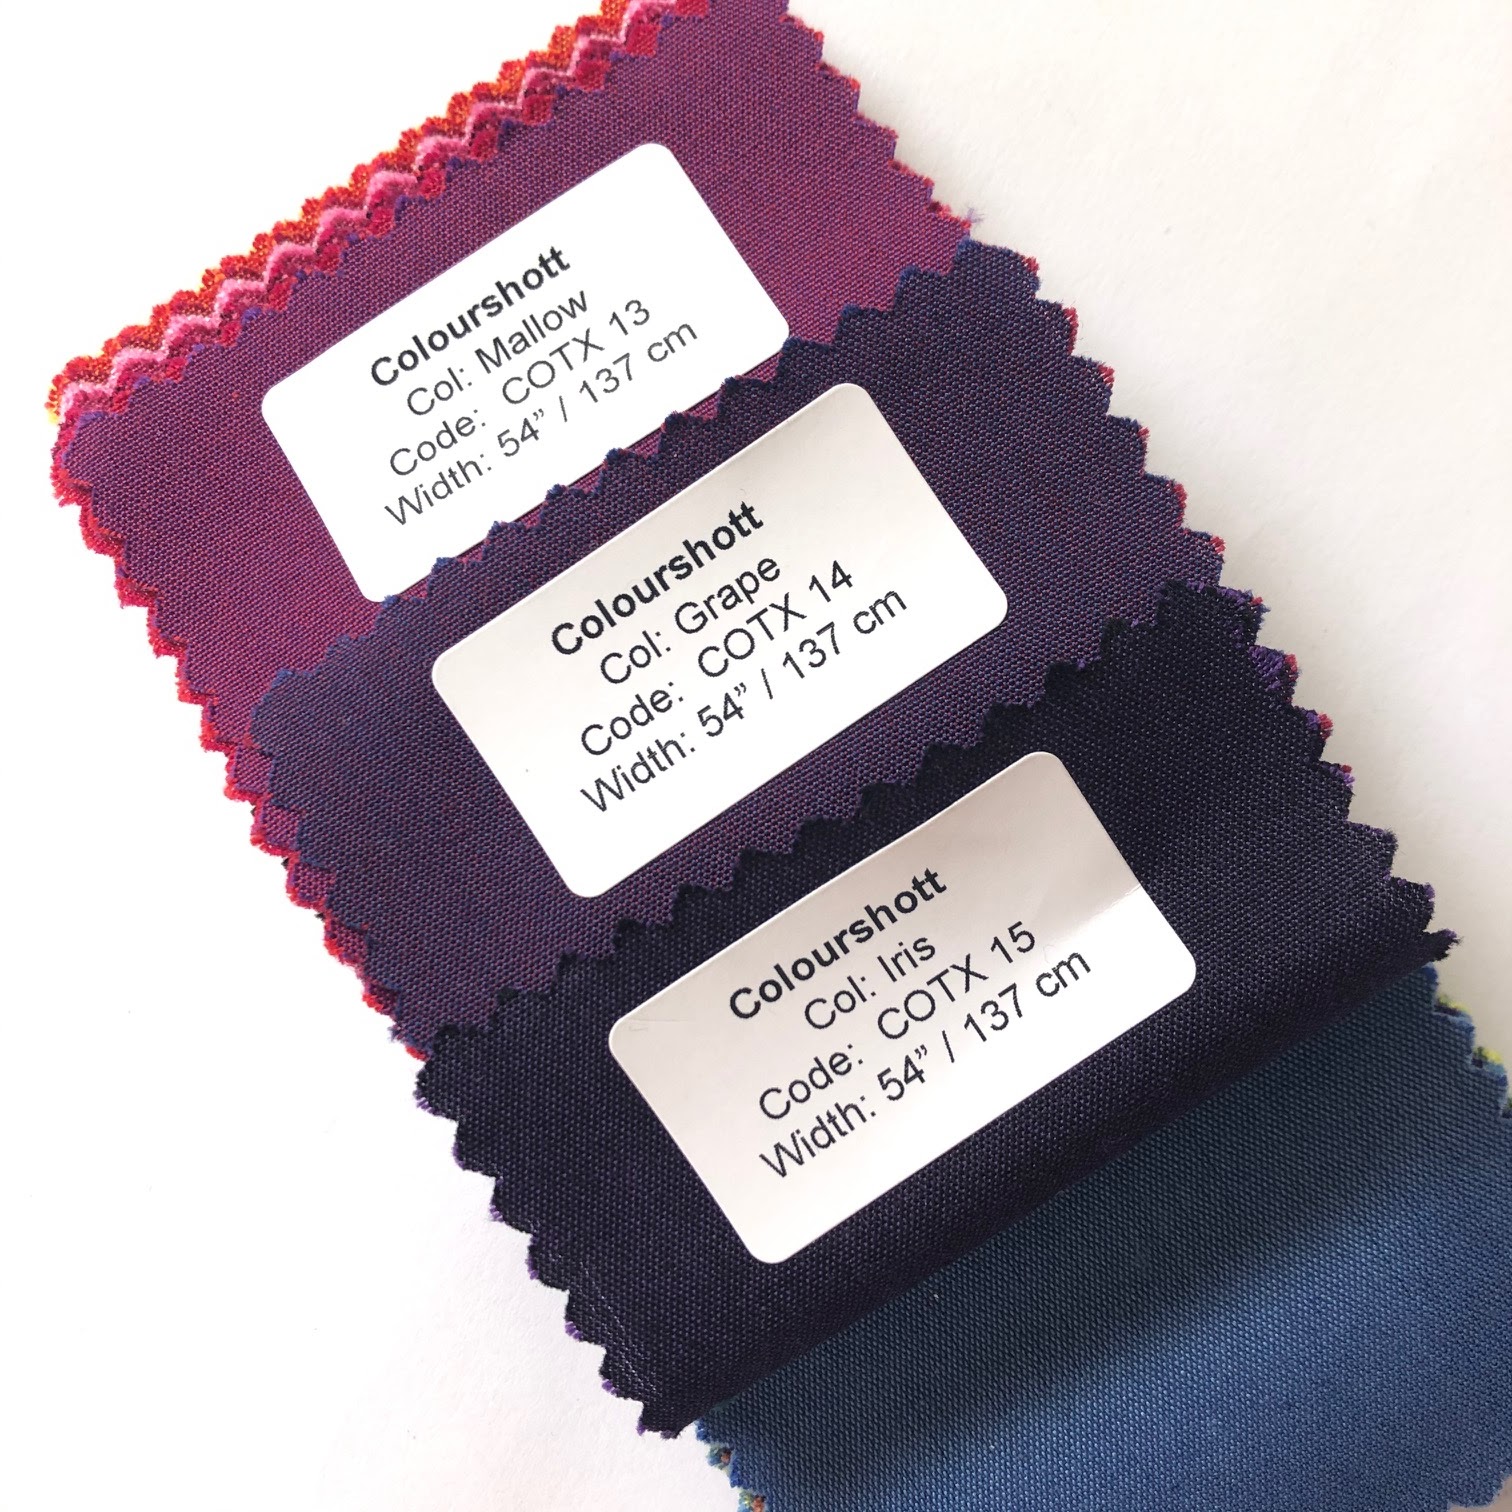
These are the 3 colours I used to make Varietals. Iris is black + purple thread, Grape is red + navy thread and Mallow is red + purple thread.

The tricky aspect to all of this fabric awesomeness is photography. Everyone who loves working with Oakshott will tell you the same thing: it is really difficult to adequately capture the depth in photos. Every time I share one of my quilts in a show or lecture, I hear the same thing, "wow, that quilt is even more incredible in real life!". The best way to describe the sheen and depth is to compare it to Dupioni silk, another fabric you may be familiar with. In the case of Varietals, I could have made this quilt with regular quilting cottons, but with only 3 shades of one colour and no real value difference, the quilt would probably have a flat, less interesting appearance. 


In terms of construction, I first cut sets of squares in a few different sizes from each fabric. The squares were stacked and then free-cut on both diagonals using a rotary cutter but no ruler. Swapping triangles out, I then pieced a lot of improv hourglass units. For me, the challenge of quilts like this is the puzzle-piecing of all the units into a pleasing composition. These are techniques I teach in my Speed Date with Improv workshop. Here, my desire was to portion the quilt into three colour sections that blend toward the center. Keeping like-sized units in groups prevents the quilt from having a completely chaotic appearance. 


As an Aurifil Artisan, I am very lucky to have access to the 270 colours available for my projects. To add more dimension to the piece, I purposely didn't try to exactly match the fabrics, but chose thread colours that I thought would shine on the fabric. I've been using Aurifil thread for about 17 years now and have settled on 40 wt as my go-to quilting weight. I used to stick with 30 wt for quilting (and still do sometimes when I'm not quilting so densely), but I've come to love the look of 40 wt on closely-spaced straight line walking foot quilting. These lines are eyeballed using the edge of my walking foot as a rough guide, about 1/4" to 3/8" apart. I don't try to keep the lines perfectly straight, or perfectly spaced. After all, this is an improv quilt! The lines run at different angles for each colour section. My stitch length is set around 3.0 on my Juki. I've had quilt judges say that my stitch length is too long, but for a wallhanging that isn't going to get any wear and tear, I think this looks much prettier than tiny stitches where I really notice the holes more than the thread.
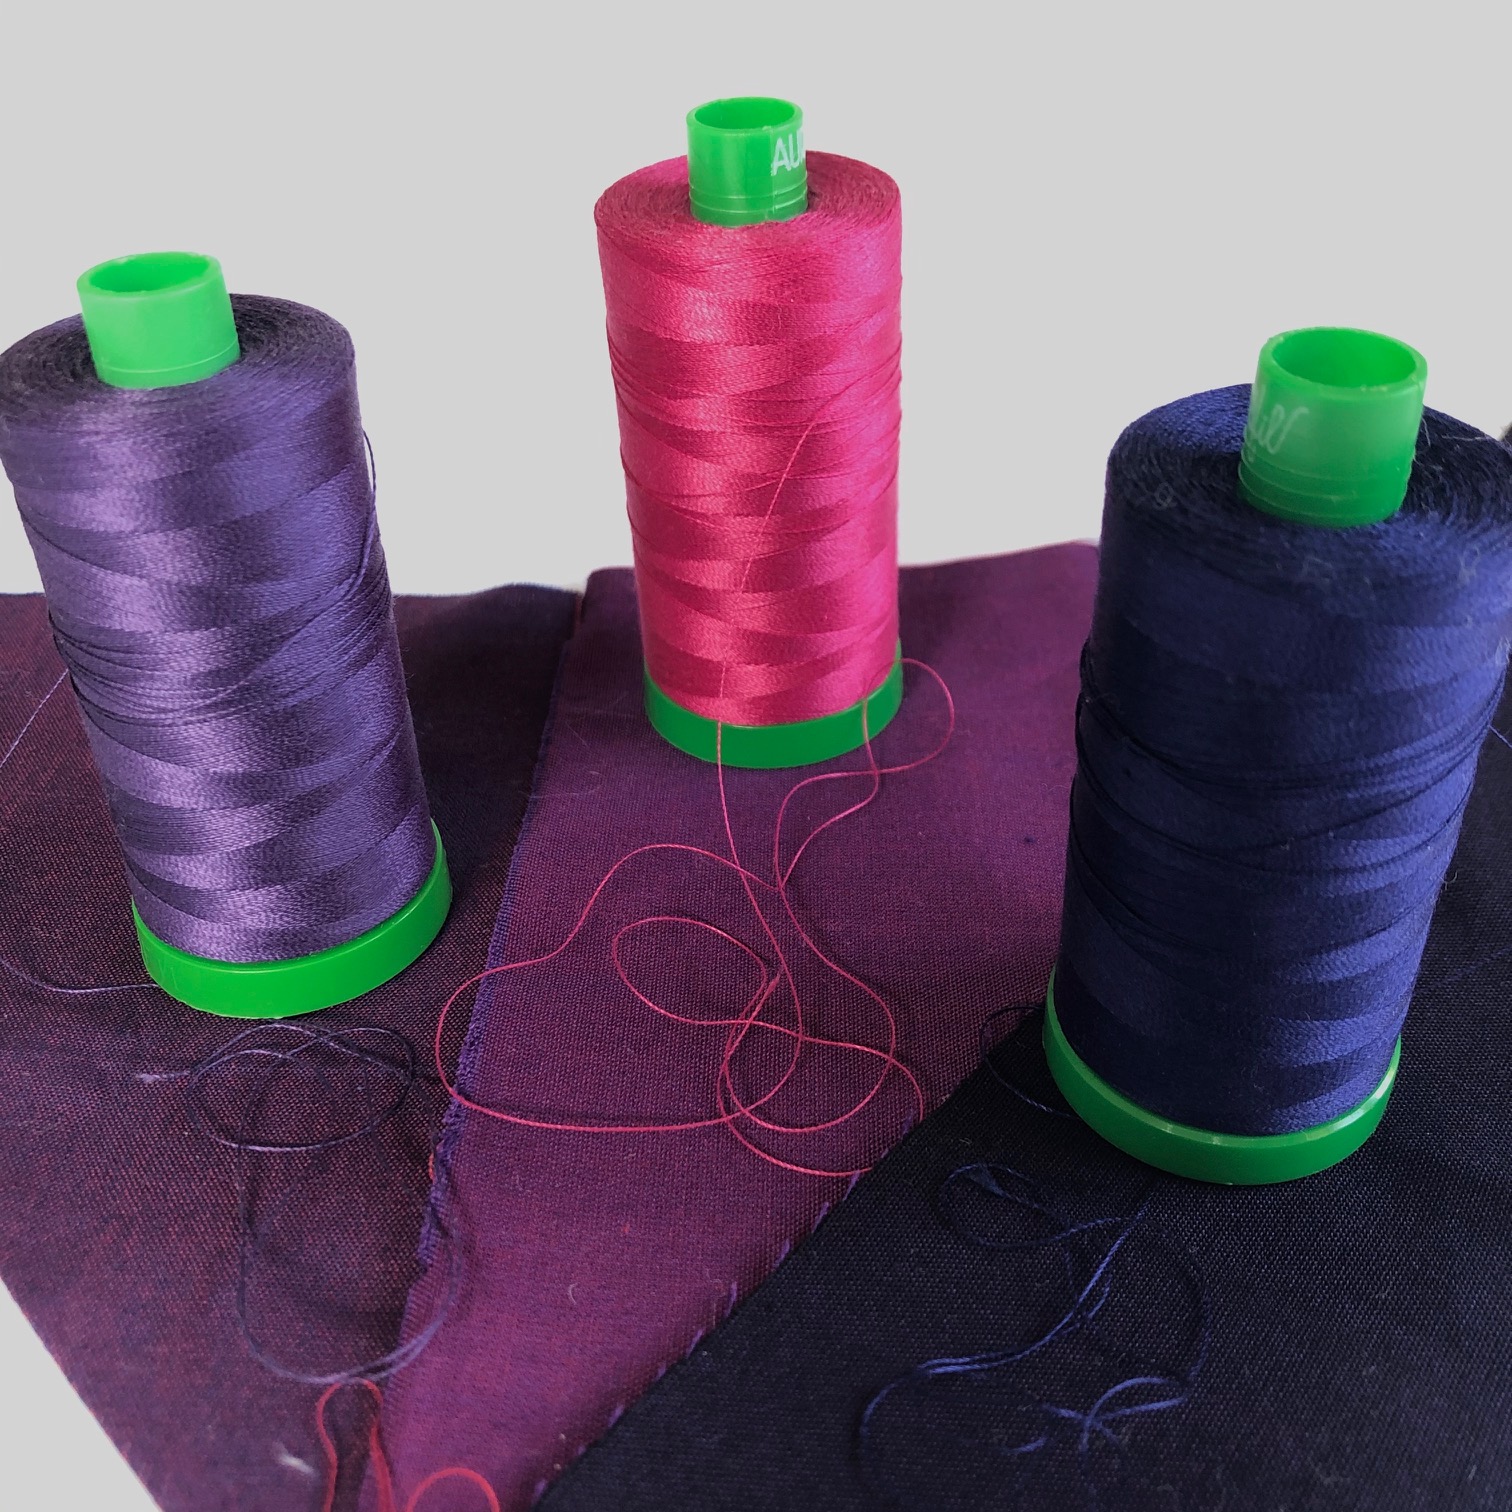
Aurifil colours from L-R: 2581 Dark Dusty Grape (on Grape), 1100 Red Plum (on Mallow)
 and 2745 Midnight (on Iris)

I used almost every scrap of the supersized Oakshott FQ's that I had for each colour (Oakshott is milled at 55" wide and cut by the meter, so you actually get a luscious piece of shot cotton that is 19.5" x 27"!). That meant a binding was out of the question, so this quilt is faced using most elements of this great tutorial on my friend Terry's blog.

I got the name from my visit to Naramata, B.C. at harvest time last fall. I'd never been when the vines were laden with grapes and it was a gorgeous sight to see!

Any day now, I'm going to find the focus required to start my third version, which I plan to make a bit larger and using 3 different Oakshott reds. I hope it will turn out as beautifully as this one!

Thank you to my friends at Oakshott Fabrics and Aurifil for the fine materials they share with me so that my projects can look their absolute best.

Sunday, December 3, 2017

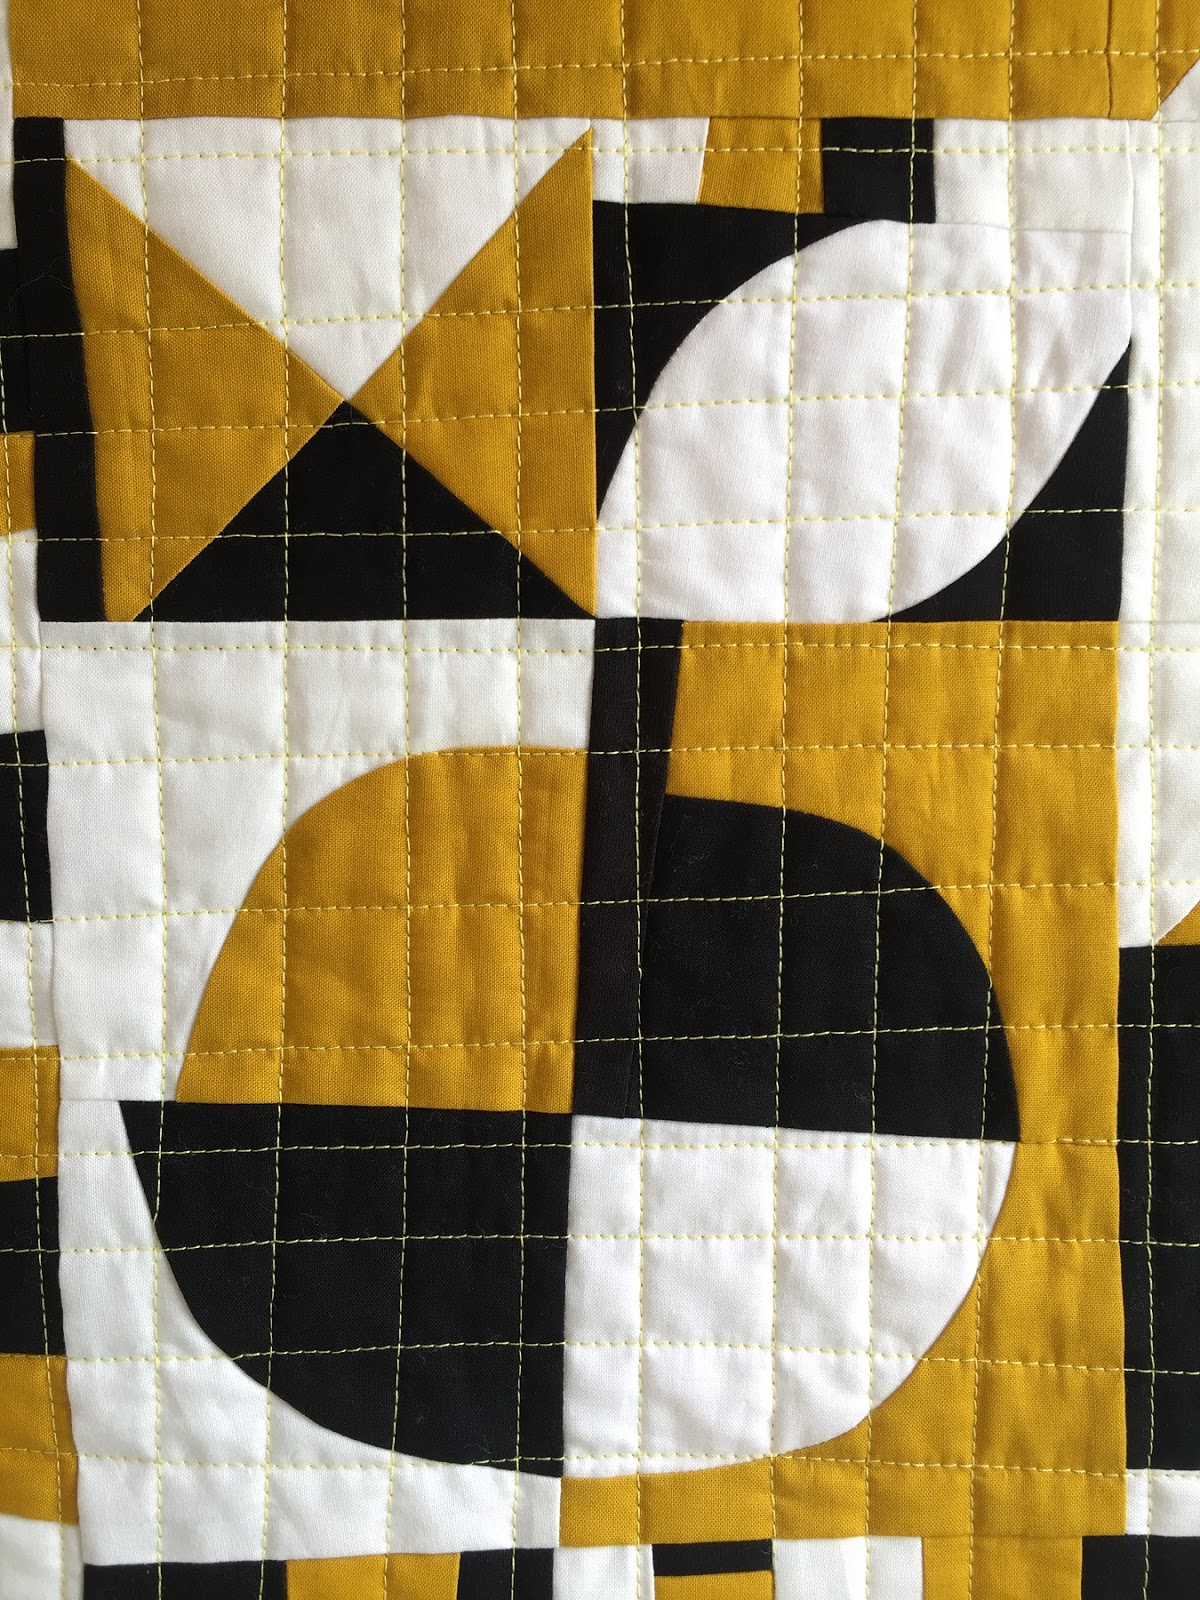
What Apple?

Here's my latest Speed Date with Improv class sample. When I teach the workshop (which as been very popular with traditional and modern guilds alike, yay!), I demo each technique for students. When I travel, I use student fabric (no one minds because it gives them a little head start on each "date"), but at local classes I use my own machine and fabrics.  The result is lots of improv units on my home design wall.

I was recently interviewed by CBC radio for a local weekend program called North by Northwest. A producer came to interview me working in my studio, so I decide to piece this together because it was a fairly small, manageable project.  I'll write more about that fun afternoon once I get the word on the day the interview will air (it might be mid-December).

So, here is What Apple?  A fun mini-quilt improv sampler that finished up at 24" x 28".


There are a few more units making up this quilt than in my previous Speed Date samples because I used the same mustard fabric for demos in two workshops, so I had extras to play with. I also had some more chunks of mustard leftover, so decided to insert that strip on the right side and balance it with black on the bottom and white on the top to extend the piece. These chunkier strips coupled with the 1/4 circle curves at each corner give the piece boundaries, but jaggedy, imperfect boundaries where like colours meet. I prefer this on an improv quilt as opposed to a straight and defined traditional border.


I chose to quilt in the "wonky waffle" with my walking foot again. This is random straight-ish vertical and horizontal lines that I really like on top of this busy quilt. I score a few lines with a long ruler and Hera marker, then fill in by eye at random intervals in between.

Like the two that came before, Mojito and Night and Day, this one has faced edges.

This workshop continues to take me places...in the new year, I'll be teaching on Vancouver Island, in Scotland, England, Alberta and for a couple of outlying modern guilds in BC as well. I can't tell you how happy that makes me!!  I've had several students create completely new improv work informed by what they learned in this class; that's incredibly exciting for me because that is the exact intent of teaching these techniques as a sampler. Bring on 2018! 

Tuesday, November 1, 2016

28 days of rain and other things...

Fact: it rained 28 days in Vancouver during the month of October. Know what that means for sewing bloggers? Lots of sewing time surrounded by Very Little Chance for Decent Photography. So, in order to stay in touch with you here, I'm going to break a personal rule and publish some sketchy iphone photos. I try to only use good quality, well-lit photos taken with my Nikon on the blog.  It pains me to do otherwise, but I have been making and teaching and doing fun things that I want to share, so here goes.

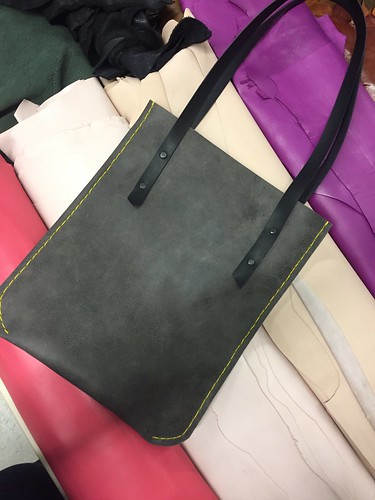
First up, last weekend I made this super cool leather tote at a workshop with Riley at Lonsdale Leather in Vancouver. It was a 3-hour evening workshop with 7 students and everyone had a completed bag in well under 3 hours. We were able to choose pretty much whatever leather we wanted from the warehouse, so I went with this distressed grey that is rather unique. I love the neon waxed poly thread for the hand-stitching! Patterns were provided by Riley. We learned how to cut out with an x-acto knife, glue our seams, mark our stitch lines and holes with a perforating roller, punch the holes, stitch the seams and rivet the handles on. I love my new tote!

Untitled

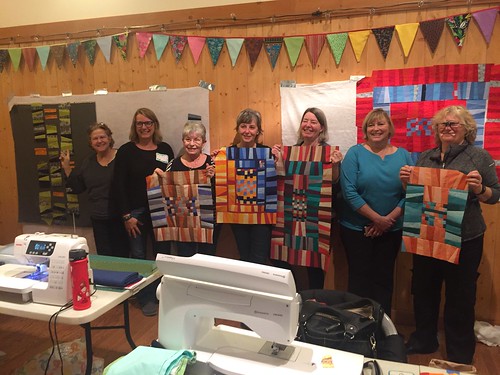
The weekend before, I was very fortunate to be a teacher at the Denman Island Creative Threads Conspiracy. I re-connected with several women I hadn't seen in a long time, several of whom I had no idea would even be there! How fun. We did my Structural Improv workshop with gorgeous results. I always enjoy introducing traditional quilters to the concept of improv and designing-as-you-go with pieced units. 

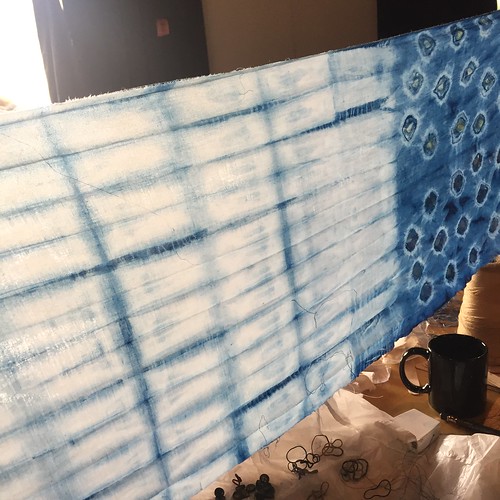
There were about 5 or 6 concurrent workshops all running in the community hall within "classroom" spaces created with hanging quilts as walls. I wasn't sure how all that was going to work out, but it was super inspiring and fun to see what everyone else was teaching and making. I was especially thrilled to see two older gentlemen in the beginning sewing class, sitting together in the back, consulting their machine manuals.  A couple of my friends took a 2-day indigo dying & shibori workshop with gorgeous results (see one of Rossie's pieces below)!

I thoroughly enjoyed my 4 days on this small island, surrounded by a caring, creative community. I was well-fed with local organic produce and hosted in a super cosy island home by the Conspiracy co-ordinator and her ceramic artist partner. We were treated to a presentation by the Llama Lady one night and learned all about her herd of Llamas and Alpacas and the gorgeous fibre they produce. 

Untitled
Here are the fantastic women from my class with their works in progress!

My friend Rossie's indigo dying results from a workshop at the Denman Island Creative Threads Conspiracy, October 2016

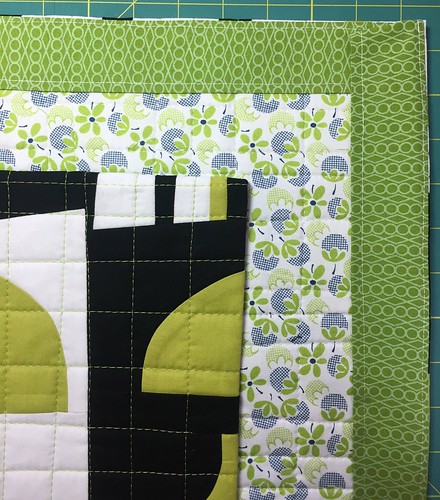
I managed to complete a second class sample for my new Speed Date with Improv workshop coming to several modern guilds this winter/spring. This one is called Mojito; for now you just get a glimpse of one corner and the facing. A full frontal pic will have to wait for some natural light.

Untitled

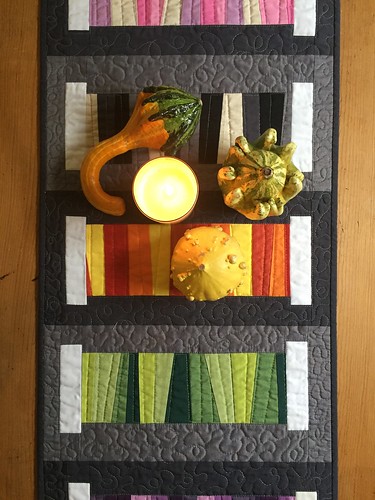
I also finished up this special table runner for days that my stitch group, the Gathered Threads, come over! I used the same pattern as my Variegated Threads quilt (available in my Craftsy shop here) except that I sewed 7 spools side by side. I love it on my rustic pine dining table; the Oakshott fabrics are so vibrant. I'll be teaching this as a workshop this coming weekend for the Blue Mountain Quilter's Guild and I can't wait to see how the students like working with their custom Oakshott kits!

Variegated Threads Table runner. Pattern available in my Craftsy shop, search for "Poppyprint" on the Craftsy homepage.

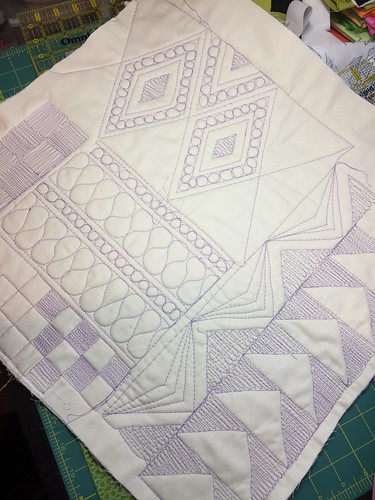
Kathleen Riggins was in town recently and did a trunk show of beautiful quilts and longarm quilting at the Vancouver Modern Quilt Guild. The next morning, I took a 1/2 day "marking for free-motion quilting" class with her at Stitch and Bobbin, my LQS. I learned a couple of cool infill and grid marking ideas that may or may not make it onto a quilt at some point. I enjoy practising on small sandwiches, but am a little intimidated to try ideas like this out on a big quilt. 

Untitled

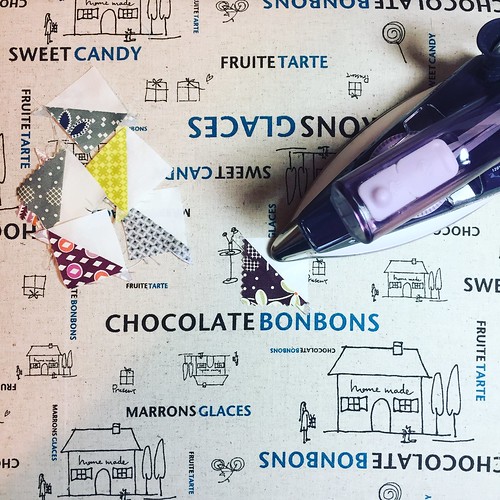
This afternoon I covered a wooden TV table tray to make a portable ironing surface for retreat. I might not have given my choice of cover enough consideration...the not-to-subliminal messaging could prove hazardous to my bottom line! I think the word CHOCOLATE is visible no fewer than 8 times!

Untitled

My final tidbit of news is that I'm knitting!! I just finished a Boneyard Shall  and I absolutely love it knit up in Malabrigo yarn that I purchased on sale at Knotty by Nature in Victoria last spring. I know that I will make more of these because it was super enjoyable to do and very fast, too. Photo if the sun ever comes out again....

Friday, August 12, 2016

Round Peg, Square Hole - a New Quilt!

You've seen this design from me before - I made a 4-patch version and called it Quarter Round last year for the Vancouver Modern Quilt Guild's Modern Mini Showcase exhibit. It also proudly hung in the Small Quilts category at QuiltCon 2016. I did a digital mock up of the design in Touchdraw and I got so excited about all of the design possibilities available just by colour-blocking certain strips and making more blocks to repeat the pattern.

When I sent a picture of the 4-patch to my creative genius friend Berene looking for name suggestions (Quarter Round was her idea), she also thought I should try making it with an ombre effect. I held that thought.

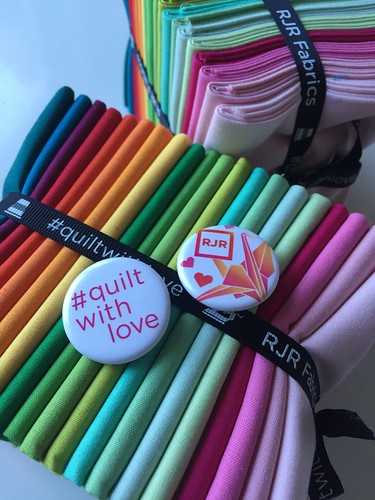
Recently, RJR Fabrics asked if I'd like to participate in their What Shade Are You? feature on their Quilt With Love blog. The blog hop showcases their Supreme Cotton Solids. This was my chance to choose as many colours as I wanted to make any project my little heart desired. "Yes please" was my reply!  Of course, actually choosing the fabrics took me f.o.r.e.v.e.r.

Cotton Supreme Solids from RJR for my Round Peg, Square Hole quilt.

The last couple of years I've been enjoying working with the contrast of warm and cool colours in my improv work, so I thought I'd do the same with this quilt. Here are the colours I finally chose from the Supreme Cotton Solids colour card.  They are listed in ombre order from lightest to darkest in their colour groups.

Shell Pink 175T
Candyland 86T
Hot Pink 217
Rhododendron 181T
Ruby Slippers 286

Glow in the Dark 204
Peridot 342
Wimbledon 205
Clover 128T
Kelly Green 127T

Goldenrod 92T
Carrot 131T
Tangerine Dream 276
Mandarine 159T
Chili Pepper 49T

Seafoam 301
Nile Green 90T
Toy Boat 366 C&S
Horizon 354
Twilight 353

and finally, Kerchief 364 C&S as a warm white background.

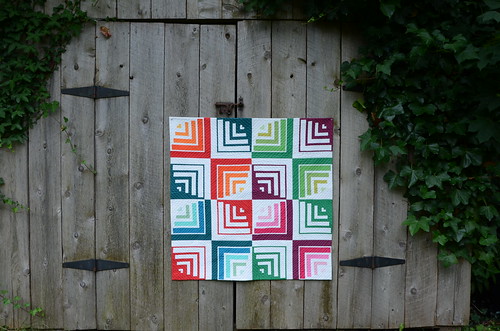
Round Peg, Square Hole by Poppyprint

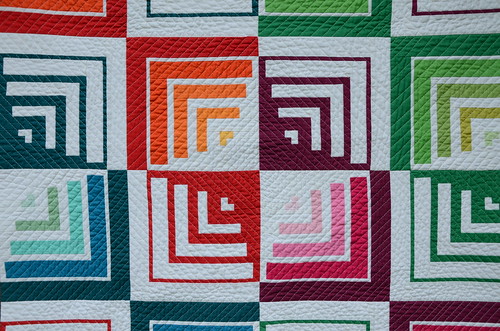
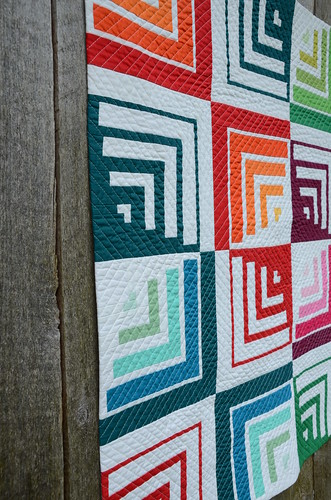
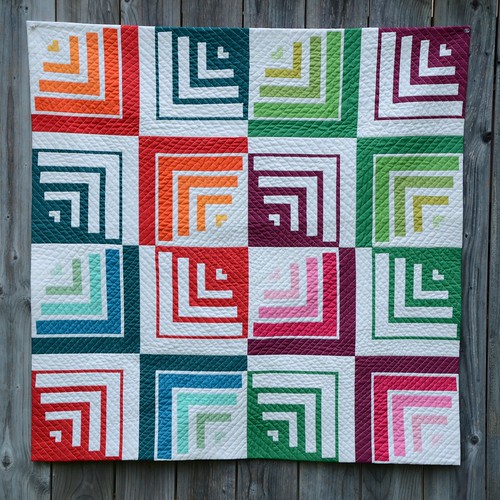
And here it is! All 38" square. Because I can't stop myself, there's a lot of straight line quilting 1/2" apart in concentric squares and it's all on the bias grain of the fabric. There was definitely some distortion of this little quilt (even with ditch-stitching the edges of the blocks to stabilize them first).  A full wash and blocking was in order, so I did that prior to finishing the edge (see below). I can honestly report that these fabrics are 100% colourfast in cold water. No running, no fading. I used a mild, unscented powder detergent in a front loading machine and the colour catcher came out completely white. 

Round Peg, Square Hole by Poppyprint

The quilting is all done with Aurifil thread #2026 in 40 wt (with white Aurifil 50 wt in the bobbin). 

I love this positive/negative star that happens when the 4-patch blocks meet in the middle! Every one of the sixteen 10" blocks in this quilt are built with the same pieces. The resulting illusion of round edges within the square block are all about the colour placement and which strips are designated "background", or in this case white.

Round Peg, Square Hole by Poppyprint

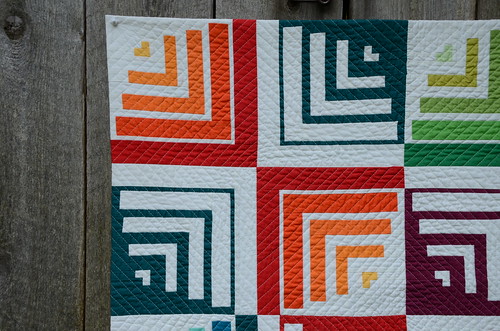
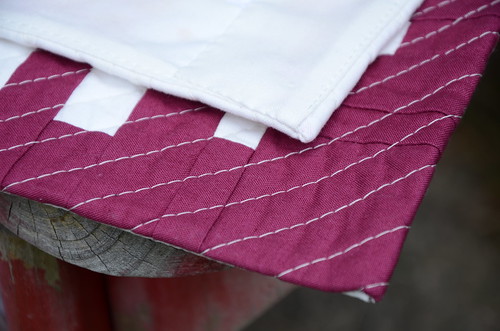
I just couldn't bear to border the blocks in with a binding, so I chose to face the quilt. I've done this before using different techniques and always been very pleased with the results. This time, I followed a tutorial by fellow VMQG member Terry Aske. You get such nice, sharp corners! (I used the method of cutting out a 1/2" triangle of batting in each corner of the quilt).


Round Peg, Square Hole by Poppyprint

Round Peg, Square Hole by Poppyprint

Here you can see both a front corner and what it looks like on the back where the facings overlap.

I'd like to thank RJR for the opportunity to work with their lovely solids. I'm excited about issuing a pattern for the Quarter Round block with some layout suggestions and colouring pages so that you can try it, too! I've got a couple of pattern testers raring to go, so hopefully I can finalize the pattern early in the fall.

Round Peg, Square Hole by Poppyprint