Showing posts with label scraps. Show all posts

Wednesday, November 8, 2017

What to do with 300' of clothesline?

And a mountain of fabric strips in your scrap bin?

Make a rug!

NOTE: This project was fully inspired (as in I never would've thought to do this myself) by my hilarious friend Jodie who blogs at RicRac. You can see her gorgeous rug and a tutorial to make your own here. The only thing I did differently is that instead of a regular zigzag stitch, I used an 8.5mm wide triple stitch (that is three stitches in every zig and zag). I thought this might be more durable in the long run with my chair rolling over the carpet.  I also didn't join ends with tape, I just wrapped the fabric around a few times flat to splint the ends together.


100' (or one skein of Dritz cotton clothesline) made a 21" diameter rug....


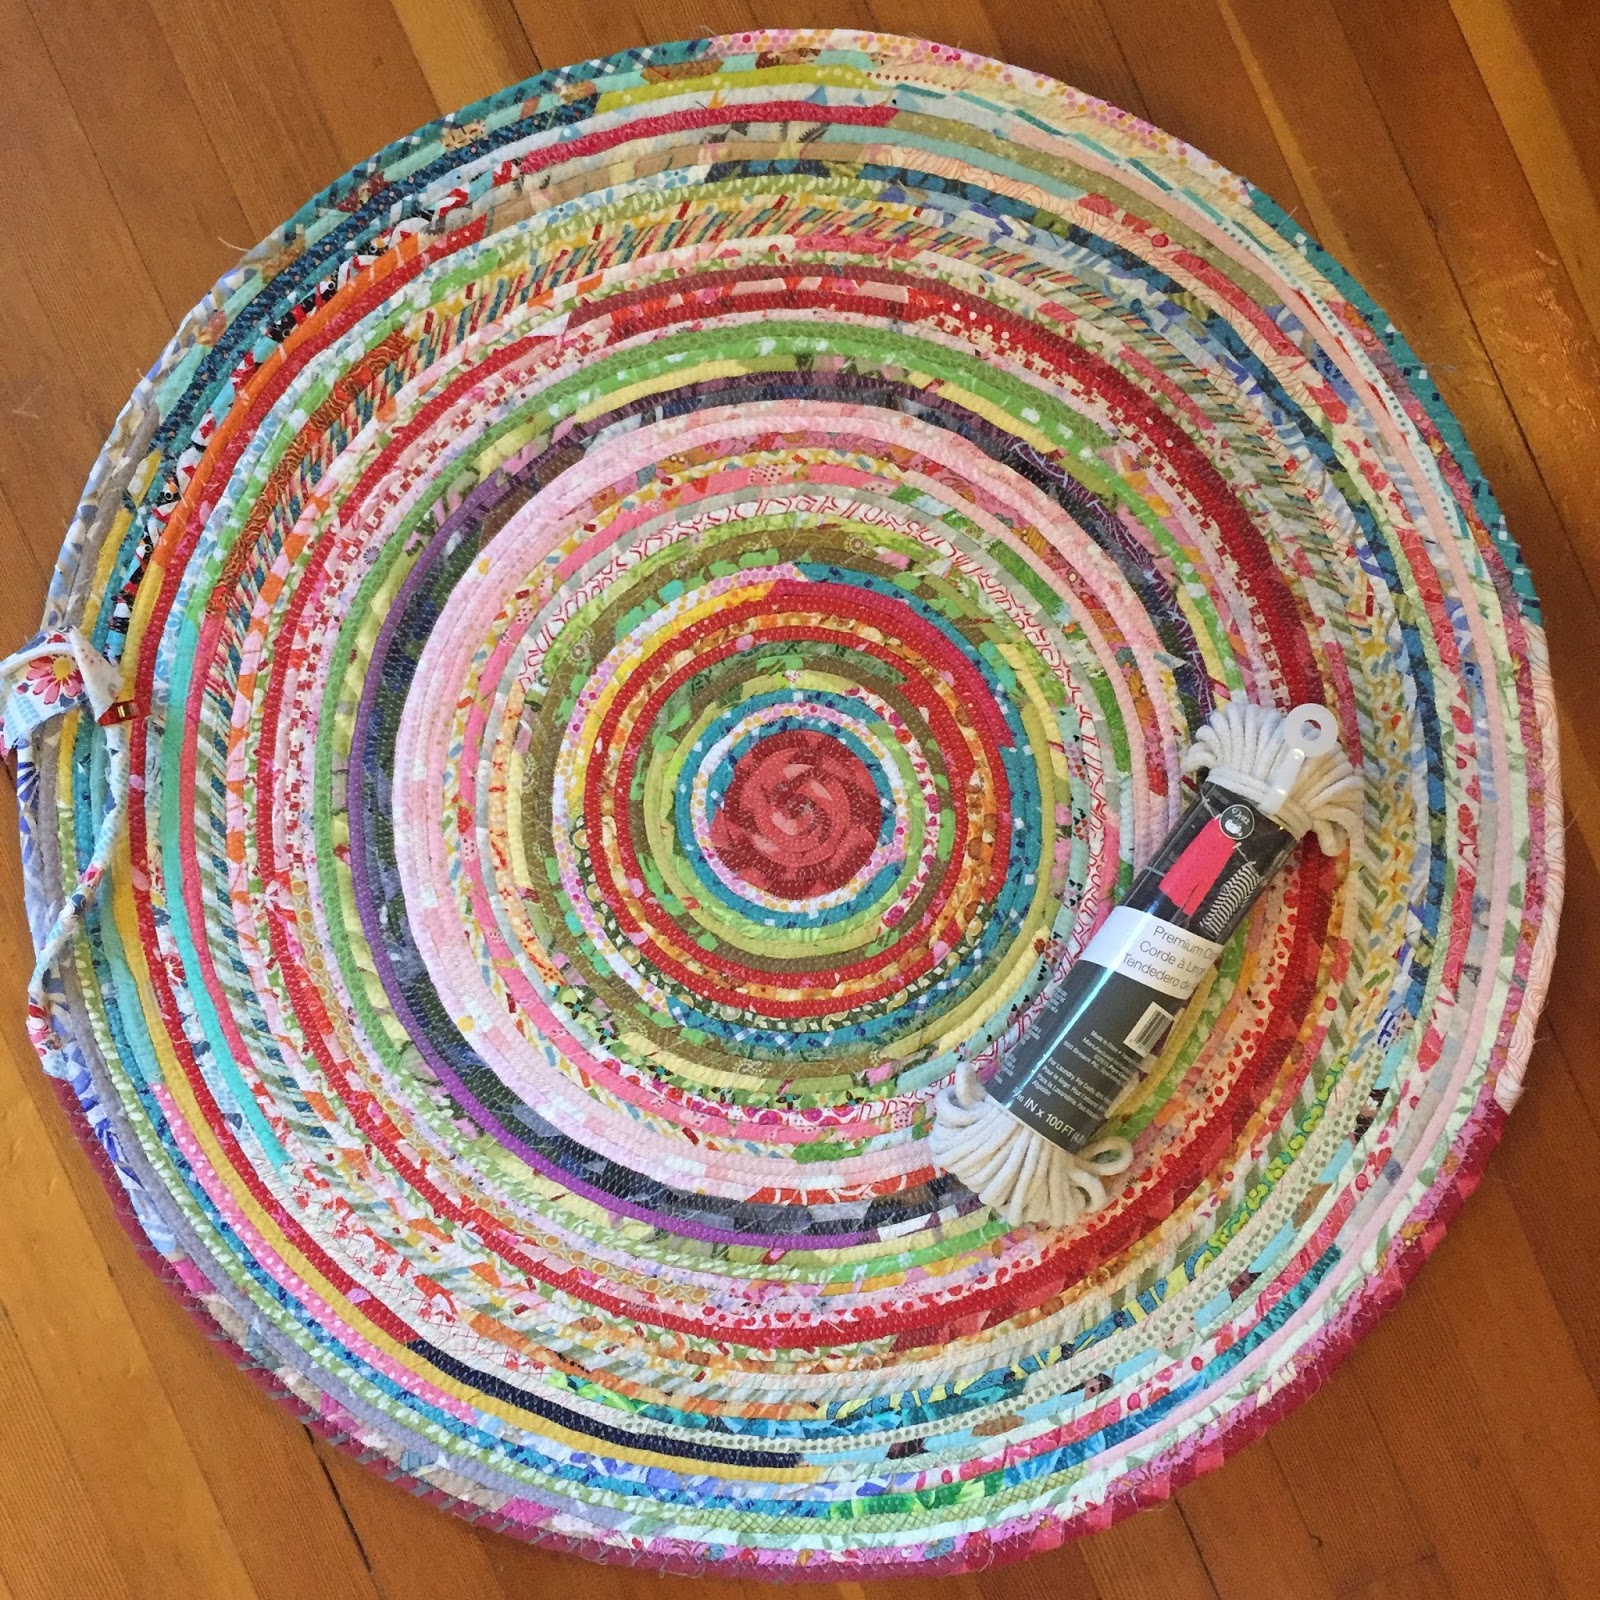
200' (two skeins like the one shown) yielded a 31.5" diameter rug. At this point, I'd broken two Topstitch 90 needles, which isn't bad considering the weight of this thing and the fact that the feed dogs haven't got a chance. You have to feed the rug into the machine with your own effort. My left shoulder started complaining right about here.


I posted on IG throughout making this rug. After I started in on the third skein, things started to get a bit warpy. I began to wonder if I was making a giant nest. The rug was much bigger than the plexiglass extension table for my Pfaff and even though it seemed like I was feeding it into the machine totally flat, obviously there was tension from the weight of the rug causing pulling and warping.  I felt a bit panicky, to be honest. Opinions on blocking varied. I decided to call it quits after 300' of clothesline was wrapped and sewn and the rug had reached 40" diameter.   I really wanted a 5' diameter rug for my sewing room, but I just didn't have it in me (or my shoulders) to keep going.  Like Jodie says, the KEY to success is having a totally flat surface. If you've got a table with a hole in it for your machine, you are all set! I ended up using various boxes and an ironing board on my left side to help support the rug.

I dipped the rug into a bathtub filled with cool water, then rolled it in a beach towel to remove as much water as I could. Then I laid it on a big terry blanket on top of our playroom carpet. I put our round kitchen table upside down directly on the rug and pinned all around the outside coil of the rug to hold it flat against the carpet. I weighted the table with about 30 pounds of stuff (exercise weights, ski boots, a box of office supplies and a karaoke machine - basically whatever was lying around within reach!); then I waited.

Miracle! It's flat!


FAQs based on people at my retreat and on IG:

How are you going to clean it? (really?) Well, it is going to live in my sewing room under my chair. It will get dusty and thread-covered, but not really dirty because like most Canadians, we don't wear shoes in the house. I'll likely vacuum it once in a while and maybe take it outside for a beating now and then.

How long did it take?  I'm not a huge tracker of information like this. I make stuff because I love to make stuff. Tracking hours doesn't always make me feel good about how long things take and I'd rather just enjoy the process....however if I had to guess I think I'll say about 18 hours

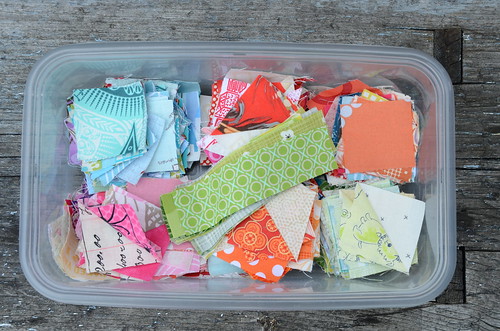
How much of your scraps did you use? I have no idea. Hardly made a dent. You know how it is. I can tell you that I used about 1500km of polyester thread, though (that is easy to measure! One 1000m spool and have of a second one.

Would I do it again? Maybe one day. It is more likely I'll return to rope bowls.

Are you going to give it a go?


Friday, September 16, 2016

Cutting Garden Weekend Workshop

There's been a lot of prep work going on this week from the Sunshine Coast to Vancouver to Whistler. Scrap bin diving, pressing, cutting. And more cutting, cutting, cutting.  This is Cutting Garden Weekend for myself and 19 friends! We're all coming together to spend two days working on this gorgeous, scrappy quilt and learn a few new piecing techniques.  I'm looking forward to sharing some of my most special scraps and swapping 2" squares with everyone. This quilt really is a joy to lie under and seek out those precious fussy cuts and coveted prints.

Cutting Garden by Poppyprint

I've got some exciting news for all of you, too! I finally opened a pattern shop on Craftsy! Now you can purchase .pdf downloadable patterns for 5 of my designs including Cutting Garden. The best part of this pattern is that I'll be donating a portion of profits to the BC Cancer Agency twice yearly in memory of my friend Deanna and Tracey's friend Chelsa. 

Once we arrive at our great venue Saturday morning and grab a cup of coffee or tea the fun will start. We'll all be able to take a rest from the rotary/ruler routine and cut in bulk with two super cute Sizzix Fabi cutting systems. I've got all of the necessary dies required for our 2" squares, 2" strips, half triangle squares and circles.  Many thanks to the Sizzix company for generously providing us with the equipment we need! One lucky quilter is going to win their own Sizzix Fabi to take home this weekend! 

I'm grateful to the following sponsors for providing some fantastic loot for our goodie bags that are all packed and ready to go.  Everyone will leave with some great new patterns, notions and kits, all provided by my generous industry friends.


Soft & Stable  


I'll share some workshop photos next week. I hope you  have some fun sewing plans this weekend, too!

Wednesday, September 14, 2016

Blowing My Hair Back I


Just popping in with a little finish that you saw here before I added the big-stitch hand quilting. The name is explained in the original post, as is the source of inspiration for this 22" mini that I have grown to love despite the in-yer-face colour scheme.

Blowing My Hair Back I by Poppyprint

I was lucky to have the opportunity to take and review Gwen Marston's Abstract Quilts in Solids class available on iquilt.com . They often have sales and specials on the site, so when they do, grab your chance to learn from the lovely Gwen. Her gently encouraging teaching style is my fav. This quilt is exactly modelled on one of her "string block" class sample quilts.

Blowing My Hair Back I by Poppyprint
I love the fun details and shapes that emerge when they angled lines of the quilting meet!

I decided to quilt this in a large running stitch using 8wt. white perle cotton. Gwen often does free form zigzag quilting on her abstract work and it's super effective, so I thought I'd give it a try. I marked the lines with a 1" x 6" ruler and a Clover white wax pen so that they would be straight, but unmeasured. I'll definitely do this again as I love the effect. I quilted this whole piece over the course of our summer vacation on Hornby Island...mostly waiting for, and riding on, the ferries (it takes 3 boats to get there!).

I've made a start on a second abstract quilt based on other lessons in the class, but I think I'd like to grow it in a medallion-style like Gwen so often does. I may refer to her excellent book Liberated Medallion Quilts that is in my home library for some additional ideas. I have enough scraps of these fabrics, that's for sure!

Blowing My Hair Back I by Poppyprint

I'm really enjoying working with solids and a limited palette at the moment. I've got another fun improv quilt to share next week that is a sample for an exciting new workshop I'll be teaching in the coming year.  Check back Monday for that one as part of the Blogger's Quilt Festival!

Wednesday, July 15, 2015

Cutting Garden featured in Homespun - and a giveaway!

If you've never had the pleasure of reading Homespun Magazine from Australia, I hope perhaps my latest quilt pattern will encourage you to order a copy! This has always been one of my fav sewing publications due to the varied projects (quilting, embroidery, sewing, collaging), gorgeous photography, matte paper, designer biographies and glimpses of quilting life DownUnder.  I wish it were easier to find in Canada. If you search online there are a few retailers in North America from which you can order copies.

 
Here's the adorable cover and a little detail of my quilt on the contents page!

The story of Cutting Garden is kind of a long one. You may recall that last year I worked with many neighbourhood friends (as well as others from my local quilting community) to make a Scrappy Sprouts quilt for our friend who was diagnosed with cancer.  The quilt we made was inspired by a quilt my friend Tracey made with sewing buddies the year before for her friend with cancer.  We both feel that the block is sweet and hopeful and I know that both quilts brought so much joy to their recipients. 

Cutting Garden by Poppyprint
The location photos in the magazine are just stunning and make me so proud to have a project included!

Well, the editors at Homespun saw a photo of my quilt online and approached me to create a similar one, but they wanted a design with more flowers and a darker "ground".  I first asked Tracey if she wanted the gig, after all, it all started with her block design and quilt.  The timing wasn't right for her, but she graciously allowed me to go ahead with a quilt using a smaller version of her block.  Because of Tracey's generosity and the origins of this quilt, I've donated my modest design commission to cancer research - that just felt right.

Cutting Garden by Poppyprint

The scale of a dresden plate flower didn't work with these smaller sprout blocks, so I designed some folk-art inspired flowers that are made up of two pieced quarter circles, some bias tape applique stems and machine appliqued circles.  I love how they look on top of those pretty rainbow sprout stalks.  It is really difficult to showcase the scrappy low-volume background fabrics in photographs, but trust me, there are tons of prints in there!

Cutting Garden by Poppyprint
One of my fav things about the quilt are the two Heather Ross bumble bees on the flowers (Briar Rose fabric line).

Cutting Garden (detail) by Poppyprint

This quilt is a fabulous scrap-buster. There is a lot of piecing, so it takes a while, but the results are so pretty. I cut the squares from pressed scraps using my Accuquilt GO!Baby cutter, which saved lots of time.  I have a little stash of leftover HST's, squares and stems that I saved for one lucky follower along with a copy of the magazine if you'd like to make this quilt yourself.  

Scrappy Sprouts leftovers

Please leave one comment below for a chance to win. Your email MUST be linked to your comment, or appear in the comment itself, in order for you to win.  I'll choose a random winner next week on my birthday: July 22nd. Good luck everyone!

ETA: comments are now closed. Congratulations to comment #74 chosen by the random number generator! The Rx Quilter, you've won!! I'll email you for details on how to get your prize to you.


Wednesday, November 26, 2014

Horoscope Pillow

Here's a project that's been under wraps for months that I can now share with you!  You'll find this fun pillow cover (or mini quilt pattern - attention all Schnitzel & Boo IG swappers!) in issue 5 of Quilt Now, Katy's gorgeous mag out of the UK.  This issue is all about scraps, and I've used some gems in this project!

Horoscope Pillow

Bricks of low volume with jewel-toned corners? Yes please!

Horoscope Pillow

Horoscope Pillow

I love the oblong 6-pointed star that results when the bricks are offset like this. I called it the Horoscope pillow because of these stars. It is a pretty easy pattern to put together and BONUS - if you double seam your  little corner squares and save your "two-fers" you can use them for a teeny tiny piecing project, like this!

There are 22 scrap projects in this issue of Quilt Now and an article on scrap organization by fellow quilting Canadian Cheryl Arkison. Order your print or electronic copy today (only 90 print copies remaining!).  

I hope that you'll share your version of Horoscope with me when you make it!

Horoscope Pillow
The pillow cover is bound just like a quilt and there's a hidden zip in the back!

Wednesday, October 15, 2014

It is October, right?

Travelling over a change in month can be so disorienting. How is it mid-October already? Since returning from Italy, we have celebrated B's birthday and Thanksgiving. Next up is Hallowe'en!

The Vancouver Modern Quilt Guild often holds a block raffle at our meetings (one completed block = one raffle ticket to win a set of blocks). Every year I make tons of Hallowe'en blocks to enter, because I really want to make a Hallowe'en quilt! Alas, I've never one the Hallowe'en lotto. This will be my 4th attempt, so wish me luck.

I spent some time over the long weekend playing with scraps. Here's one of the blocks I made using some Oakshott Colourshott scraps from my Chess on the Steps quilt (speaking of which, go look at the incredibly playful All the Colours Quilt Leanne made using my pattern!).

Hexy pumpkin 6 1/2" block made with Oakshott Colourshotts for the VancouverMQG Halloween block exchange.

I used a 1/2" hexy to start and pieced 3/4" strips log-cabin style in rounds. So fun!  Our blocks have to be in size multiples of 6" finished, so this one is actually 6 1/2" square, but I've zoomed in on the pumpkin for the photo.

Scrappy candy corn pieced then cut with my GoBaby Accuquilt tumbler die.
apologies for pretty awful night time phone pics - it's dark and stormy here today!

For this 6 1/2" x 12 1/2" block, I first pieced some strips together and then cut out tumblers using my Accuquilt Go!Baby for some scrappy candy corn. I liked this so much, I made three more similar blocks. The meeting is next Monday night and I will let you know what happens.

I'm slowly making my way through holiday photos, editing, labelling and uploading. I'll be able to post some soon!

Friday, May 16, 2014

A Very Special Delivery - Blogger's Quilt Festival

Welcome to my Bloggers Quilt Festival post!  Some of you may recognize this quilt I've chosen to share in the ROYGBIV category because a very similar one made by Tracey and her friends was featured in the festival last year! I sent Tracey a block for her quilt and it became my inspiration - not only the design, but also the sentiment - for this quilt.

I had the great pleasure of delivering this beautiful quilt to a very special person earlier this week.

Scrappy Sprouts for Deanna

This is what I've been busy with over the past 5 weeks, with regular updates on Instagram. A mom in our school community received the worst possible news while on vacation with her family in March. She has a long road ahead to regain her health and she needs to know that we are with her all the way.  There was a sense of urgency to get a quilt around her brave shoulders, so I put out a call to my retreat customers and fellow members of the VMQG to help.  They responded as quilters do: with generosity and grace.

I also organized several sewing days around my dining table for mothers and friends in our community so that they could learn how to piece a scrappy sprouts block and put their love and strength into this gift as well. Several women had never sewn before and others hadn't touched a machine in years, but they patiently laid out their blocks and carefully sewed the patches together for their dear friend.  I had pre-cut squares and pre-pieced half square triangles from my stash ready for them to select.

Scrappy Sprouts for Deanna

In the end I was overwhelmed with the number of sprouts blocks that came in. I couldn't bear not to use every single one, so there's a lovely stalk of them holding up the back. Piecing 74 blocks made by over 30 different people has it's challenges but I was determined to let this project come together peacefully. This isn't perfection of technique, but it is absolutely perfect.  In the final layout, a vertical sashing between the columns and a slight offset of each stalk of sprouts keeps things interesting and hides the subtle size differences in the blocks.

image
A sweet purple Dresden just for Deanna - the four full stalks of sprouts represent her incredibly supportive husband and their three amazing boys.

The VMQG retreat over the first weekend in May was my opportunity to assemble the top and backing, sandwich this 78" x 82" quilt and complete the quilting.  It's quilted with an all-over swirly and looping meander using a gorgeous variegated Aurifil 28 wt in pale yellow/cream/lilac. The backing fabric is a Michael Miller print called Old Script with lilac-coloured cursive text.  It's bound with a V & Co. Color Me Happy green bead stripe cut on the bias, plus a little strip of purple Lizzy House pearl bracelets around the lower left corner. I used 3 strands of coordinating lilac embroidery floss to blanket-stitch the label on.

DSC_8310

There's just something extra-special about this sweet sprout block that makes it the perfect choice for a group-effort comfort quilt.  I send a heartfelt hug and thanks to Tracey for allowing me to share her mini-tute for the sprouts block, and the same to every woman who had a hand in the making of this quilt. 

This quilt is so cheerful and full of hope; it is made with love and just plain feel-good vibes.    I know it's already working wonders.

Visit the festival at Amy's Creative Side and have a look through the festival links to see hundreds of amazing quilts made all over the world! Amy does an incredible amount of work organizing sponsors, categories and voting twice a year - it truly is the biggest quilt show online! Thank you Amy!

Spring '14 Blogger's Quilt Festival - AmysCreativeSide.com

Sunday, January 13, 2013

New Digs

Back in the fall I shared this post about a fairly significant room swap in our home. The entire thing was prompted by an extended grandparent visit (which was truly lovely and yielded some beautiful items from my mom, who parked herself on the couch beside a very happy miniature dachshund and knit and knit and knit!).  After my parents returned home to Ontario, it was a slow process establishing D in her new bedroom (my former sewing room) and transferring all of my stuff two floors up to her former bedroom.  There was a lot of 'transition' time with dismantled IKEA furniture stacked against hallway walls, boxes of folded fabric stacked in corners, 4 days of drywall repair and painting and let's not forget Christmas.

Fortunately, B was able to take a full two week holiday - this was our chance to get 'er done!  Posts have been sparse here at Poppyprint because I made a commitment to myself that I would not start sewing again until I was properly set up. I feared that once I got started into projects, all unpacking would grind to a halt and I'd be living in a disaster zone for months.  I can tell you that sorting and refolding 12 years of fabric accumulation brought on some very powerful emotions:  fond memories of past projects I loved making, buyers remorse at some seriously questionable fabric acquisitions, satisfaction at seeing my beautiful stash re-established in colour order all neat and tidy.  As the dust settled and I felt more and more content in my tiny new room however, the most powerful realization I had was that I am truly happy. And fortunate. And free to create as I please.

DSC_3106

It's far from complete. There is a ton of stuff that just doesn't fit that I'm still pondering. I have to decorate the walls with my mini-quilt collection and figure out a window covering (this room faces south and the low winter sun is rare, but blinding!). 

DSC_3111

Feeling 75% settled, I hatched a master plan to deal with all of the unloved fabric I still have that just doesn't seem 'me' anymore.  I admit, some of it is downright ugly, but most is perfectly acceptable and it's all good, quilt-store quality. I already gave tons of fabric away at my last day retreat, however the Big Relocation made me realize that I have so much invested in quilting.  I bought all of this fabric for a reason, albeit misguided at times. I want to use it. 

DSC_3104
This is just a tiny, infinitesimal portion of my 'not me anymore' fabric

If you follow me on Instagram (I'm Poppyprint) you know that my scrap quilt is well and truly underway. A 3-day cutting marathon with my friend Dianne's Accuquilt Go! 2.5" die has yielded thousands of squares of happiness (I have a Go! Baby but Accuquilt doesn't make a 2.5" die despite my begging - jeez, do they not listen to me?).  I cannot tell you how happy this project is making me! I swear every little 2.5" square has a memory for me. This may turn out to be one of my most favourite projects. It feels really indulgent, actually. It is just for me.

I'll be back soon with a post all about my Scrap Vomit progress.

Tuesday, July 10, 2012

Liberty Lemonade Tablecloth Tutorial & Giveaway


liberty scrap challenge banner1 Liberty Scrap Challenge   June Edition

Life gave me unexpected Liberty. So I made this reversible table cloth and called it Liberty Lemonade.

Liberty Lemonade reversible table cloth

Actually 'life' didn't really give me the gorgeous 5" charms of Liberty Tana Lawn. In reality, they came from none other than Jo at  The Organic Stitch Co, via the lovely Nova, who invited me to participate in the monthly Liberty Scrap Challenge. Nova and other design bloggers have been busy creating all sorts of beautiful things using precious Liberty charms and scraps. You can check out the full list of amazing tutorials here. If you make any of the projects, please share photos in the flickr pool!

While I patiently awaited the arrival of what I thought would be one of Jo's incredible scrap bags, I came up with a few ideas for very small things that I could make with my Liberty fabric (tutorial coming later this month for Little Liberty Somethings). When an envelope arrived containing TWO charm packs, I was so surprised, but immediately inspired to make a light, summery tablecloth for our little kitchen table.

Liberty Lemonade reversible table cloth
Our pretty napkins were sent to me by berlinquilter on flickr in the Table Top Swap!

I chose the floral, summery charms and paired them with Michael Miller's Old Script for a blendy look. I first tried using a solid ivory as the alternate block, but the effect was so flat. I think the swirly lines of hand-writing mirror the sketchy outlines of the Liberty floral prints so nicely; I really love the way they look together.

Liberty lemonade sneak peek

Our kitchen table is only 35" in diameter. The four of us eat meals together here, so I wanted a smallish table cloth that would not hang down too far and get caught on people's laps as they sat down. I thought it would be fun to piece the cloth on point and retain the pointy edges instead of trimming it round. My cloth finished up approximately 45" square (measured point to point across the horizontal). In this schematic I drew on our iPad using Touchdraw (look at me go, Lynne!), you can see and read how to do it.

Liberty Lemonade table cloth tutorial
click through to flickr so you can view in full size to read the text

You'll need 45 - 5" Liberty charms and 36 - 5" alternate charms, plus a 46" square of backing fabric.  The basic instructions are all there in the diagram, but I've made a flickr set as a basic photo tutorial showing some details of making the table cloth. It is a beginner sewing project and as long as you can maintain a consistent seam allowance, you can make this! I used a quilting seam allowance of 1/4", but the edge of a standard presser foot would work just fine, too. There is no batting, but the two layers of fabric are secured with a narrow zigzag topstitch along every seam. I used a light blue Aurifil 40wt thread for this.

Liberty Lemonade reversible table cloth

Would you like to be a Liberty Scrap Challenge designer? Would you would like to play with my leftover Tana Lawn charms (mostly in grey/charcoal/blue colours)? The winner would have to design a project, make it using the Liberty fabric (other fabrics can be added) and then publish a tutorial on their blog. If you're up for this extra challengey-challenge, let me know in the comments and I'll include your name in a draw for the charms.  ALL OTHER comments will be up for a surprise Little Liberty Something that I'll send to one lucky person chosen by Mr. Random. I must have a way to contact you from your comment, either a linked blog or email address. Please leave only one comment.

Right then, I'm off to enjoy a little cup of tea over my sweet new table cloth. Thanks Jo and Nova!

Monday, December 6, 2010

Scrappy Greetings

Confession: I used to chuck my scraps.

Then I discovered quilting blogs and about a gazillion ideas for projects I could use my scraps for. I have done several small scrap projects, including fabric baskets, coffee cozies, zippy pouches, mug rugs and a very funky wrist cuff. Nothing that really makes much of a dent in the scrap pile, though.

The strippy scraps from my two tree skirt projects were just too pretty to throw away, so I turned them into scrappy Christmas cards. Easy!

Scrappy Greetings by Poppyprint

For all the moaning I've done over issues with thread tension on my 'new' machine, I must say, it sews through cardstock like a hot dam! After trimming my strippy scraps into tree shapes that fit onto the blank cards, I sprayed the wrong side of the fabric with 505 temporary adhesive (probably overkill, 404 or 202 would do the job, but I didn't have any). The fabric adhered very well to the paper and allowed me to sew a line around each shape, no problem.

Now I have a set of pretty holiday cards to send to my crafty friends!

Thursday, May 20, 2010

Zakka Zippies

You're back! Hi there and thanks for stopping by. I am very excited to have so many new friends lingering from the Sew Mama Sew Giveaway Day. My butt is numb from all the computer time this week trying to make it to all the blogs participating in giveaway day. Honestly, after all that surfing, reading, posting, oohing and aaahing, wouldn't it be nice to win just one teensie giveaway? Fingers crossed! I can't wait to call upon the RN generator later tonight and find out who wins my mini selvage quilt (oh! are you here looking for the giveaway post? Keep scrolling, it's a few down there and you have until 9 pm Pacific time to enter).

So..... Zakka Zippies. Yes, this is what I made from the leftovers after finishing this on retreat. I love making zippy pouches, actually. These are going to be for sale in the members boutique at my guild quilt show in early June.

Japanese linen zippy pouches

To make these, I free cut my scraps with scissors into random pieces, sewed them together into a fabric 'sheet', sliced the sheet and inserted some longer strips, then cut rectangular sections the same length as the zippers I wanted to use (umm, was that clear?). Most of the Japanese linen sections were bordered with a natural organic cotton/linen blend.

Japanese linen Zippy pouches

In some cases, I felt like adding a little more zip to the zippy, so using my machine's triple straight stitch and a light blue Aurofil 30 wt thread I topstitched a 1/4" from the seams. I like the weight of this stitch and by extending the stitch length to 3.5, you get a Sashiko-y sort of machine stitch. Nice.

Japanese linen zippy pouch

That's not all folks! More retreat finishes coming. In the meantime, tune in tomorrow to see who wins the selvage mini and what the heck is on the back!!

Friday, April 23, 2010

Chinese Coin Swap - Success!

Another successful swap! Mary received the one I made for her (rather quickly, I might add. She lives in the Portland area, so our mini's didn't have too far to travel....just a quick jaunt up and down the I-5).

Here is the selvage mini I sent south:

April MiniQT coin quilt

It is all selvage strips that have been topstitched onto a 3" strip of muslin. I sew a line through the white edge of the selvage, which catches the coloured part of the overlapped selvage and attaches both to the muslin foundation. I purposely cut generous strips of selvage when I take them off my FQ's and yardage. I want to retain some of the fabric print so that any selvage projects are not merely white strips of words, but also a fun record of the prints I've been using. For these coins, I tried to include as many colour dot sections as well as some fun words....like "Wild Thyme". The blue sashing and binding is a Kaffe Fassett shot cotton and I simply quilted it with running stitches in a hand-dyed perle cotton.

April MiniQT detail1

It was so much fun and really quick to put together (after all, it's only 13" by 9") that I made myself one, too! You only need a 3 1/2" long piece of selvage, so they go a long way.

And now, here's the mini that Mary sent to me. The coins are only 1/2" high!

Chinese coin made for me by 13insanepenguins

I love that it's so scrappy. It's beautifully pieced and she attached the binding to the front with a machine blanket stitch. She also sent along some really fun scraps (including some selvages!!) Thank you so much for this sweet swap, Mary!

Quilting retreat tomorrow, so I must get into the kitchen and prepare. I hope you find time to do something you love this weekend, too.