
One day down the road, someone in your family is going to want to know who made the quilt that gives them comfort in bed, or that they admire on the wall. So, here's a simple way to make and attach a quilt label. It is a similar technique that I used for my Crop Circle Table Runner circle appliques. This is how I do all my labels.
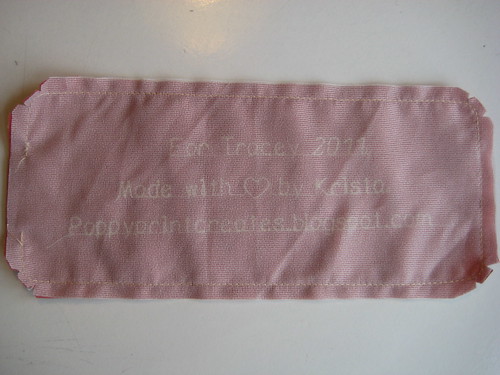
First, prepare your label. You can write on a piece of muslin with a permanent Ident-i-pen, or Micron pen, you could embroider the words with floss and a backstitch, or if your machine has the capability, you could sew out the information like I did for the very FIRST time yesterday!! [Never mind that I've had this machine for 2 years. Sometimes I take a while to try new things.] Another popular label technique is to format it on your computer, maybe even incorporate a photo, then print it through your home inkjet on specially treated fabric sheets.
Ok, your label is ready to go, now what? You need some lightweight FUSIBLE webbing. In North America this is often sold as "Sewer's Dream". It is polyester, almost weightless, sheer and fusible on one side. In fact, I fuse it to the back of all my embroidery projects (before I begin stitching) because, although it is sheer, it hides all of the threads carried across the back!
Step 1: cut webbing the same size as your prepared label. Place the two layers RST (quilt label facing up, gluey/bumpy side of webbing facing down towards label). Pin.
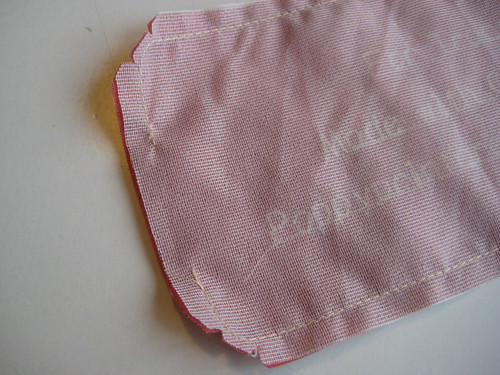
Step 2: With a 1/4" seam allowance, begin at one end, sew the 2 layers together. Gently round each corner and leave 1" open at the end. Backstitch at the beginning and end to prevent your stitches unraveling when you turn the label. Snip the curves.
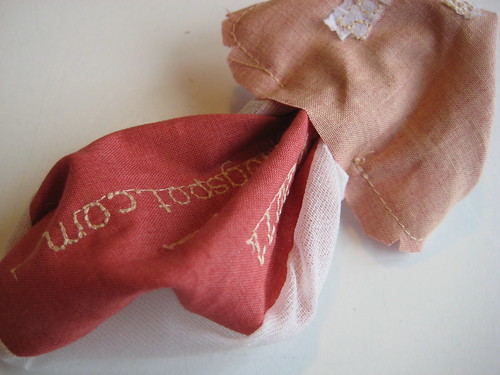
Step 3: turn! Carefully poke out the rounded corners. Don't use anything too pointy (I just use my finger) because the webbing will tear easily.
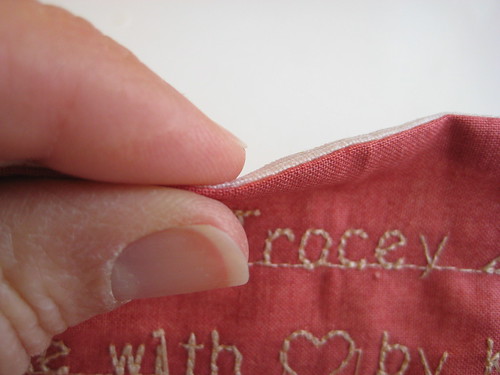
Step 4: Your label is now effectively a heat-activated sticker. This means you cannot press the turned edges with an iron. Using your thumb and index finger, roll the seams out and finger-press the webbing to the back.
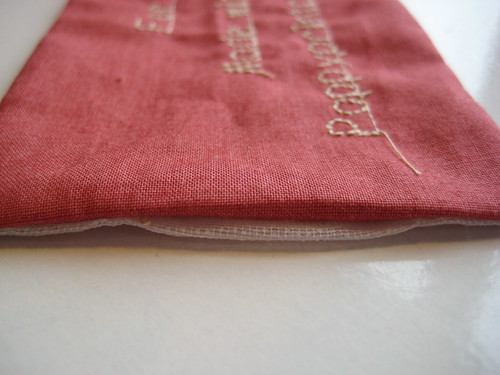
No need to stitch the opening closed. The webbing seam allowance that is turned inside will 'glue' the opening shut once you press the label to the quilt.
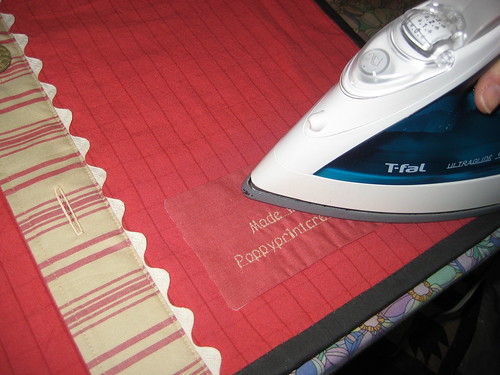
Step 5: Place the label where you want it on the backing of your quilt (or in this case, my pillow). Press in place with a hot steamy iron. NOTE: If you've embroidered your label and would rather not flatten your floss, then place a terry towel over your label and press/steam through it. Your label is now secured in place and there won't be any pointy pins to poke you while you hand sew the edges down!
Finally: Load a needle with matching thread and hand applique your label in place with tiny stitches that just go into the quilt back & batting. If there is a sliver of webbing peeking out from behind the label, just tuck it under with a sweep of your needle before you sew across that spot.
Alternatively, you could machine sew your label to the quilt back PRIOR to sandwiching your quilt. Some quilt experts recommend this for heirloom or traveling quilts, so that some quilting stitches will go through the label, thereby making it difficult to remove. I never seem to remember to do this, though!
Let me know if you have any questions. I hope that this will encourage you to label your work, if you haven't up 'till now.
18 comments:
I'm definitely going to try this. Thanks!
I do the same thing, but instead of leaving an opening, I sew all the way around, then cut an "X" in the center of the interfacing ONLY! Turn it right sides out and once it's fused you'll never know the "X" was there. Makes for a nice neat edge.
Love your label!
This is great! Thanks for sharing!
Jennifer :)
This is so useful Krista, and I like Kathy P's little X-tra suggestion. I'm learning, yay! Thanks so much!
That is a great way of doing labels! Thanks Krista. Do you know what the 'specially treated fabric sheets' are called that you can use with your printer? Or where you get them from?
It's a really good point and gosh you break it down to be so doable! Thanks for the reminder and how to!
Awesome! Hey did you know that the connecting threads between the letters are meant to be snipped out? (I read that in my manual). I didn't know that until recently. I tried it and it works! The letters stand alone without undoing. ; )
Nice label....like I should expect anything less from you??? I think not! No surprise that your labels are as wonderful as your quilts!!! Don't look at the back of my quilts. I just scribble something right on the back with a Micro pen. Ugh! Bad me!!!
That's a neat tutorial, and thanks!
Micki
Very clever idea! I want to start making labels for quilts.
What a great label tutorial, Krista! Thanks for sharing it!
Hi again Krista,
"Tips on Tuesdays" is doing the topic of Labels by request this week, so I put a link to this post. Just thought I would let you know!
: )
Happy Family Day!
~Monika
I came from My Sweet Prairie Tips on Tuesday and this is great! I need to find some of that webbing!
This is genius, I need to find some of that webbing-stuff
So true! we need to label our quilts and i am guilty of this. i have two labels that i made that i don't know how to attach to an already finished quilt so i will be trying this method this weekend! thanks again. you are rocking my world!!!
Great idea! I love this and am going to do this exactly! (although in your step #4 you may want to 'edit' the part that says, 'press' to 'finger-press' webbing ) Just a thought. Thanks!
Awesome! Thank you for the great suggestion and directions! It is one thing I don't do because I am so unsure of how to make it look good! I just may have to watch for more great ideas on your blog!!
Thank you! I just finished my first quilt and wanted to make a personalized label. Now I have the technique. Thank you!
Post a Comment