
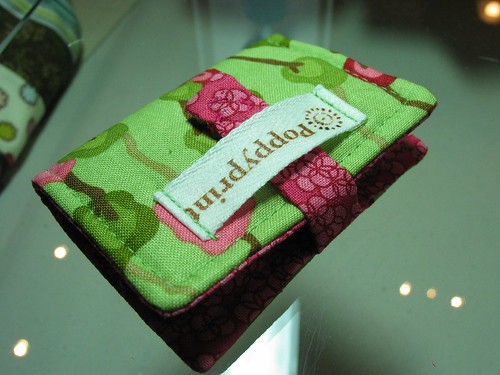
As mentioned yesterday, here is a simple project to make good use of your very own labels, or a snip of favourite 1/2" ribbon or trim. My labels were made with a great tutorial written by my friend Laurraine at PatchworkPottery. I made myself a Mini Label Needle Book while away on retreat last weekend because I was rather mortified when, in public, I pulled out my embroidery needle collection from my needlework kit....various needles were stored in a scrap of fabric (albeit lovely Kaffe Fassett shot cotton). Situation analysis: dangerous and embarrassing. Not to mention tacky.
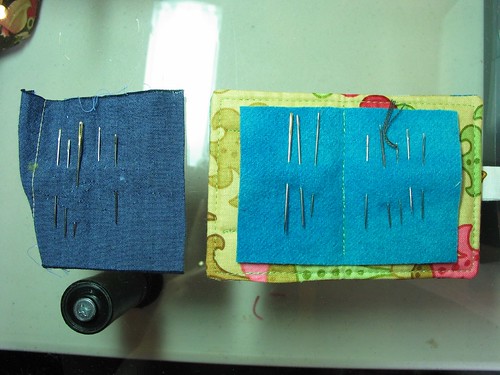
Needle storage: Before and After
With all of the cute needle books I've made and gifted over the years, seems I hadn't kept one for myself! So, off I went making something that wasn't on my retreat 'to do' list. Then I had so much fun, I made another for my friend Uschi who had just gifted me a gorgeous aqua piece of her hand-dyed wool. As often happens, I forgot to sew in one of my labels during the piecing process...and therein lies the afterthought-inspiration for the label 'beltloop' on the front of the needle book! On with the tutorial.
Here's What You Need:
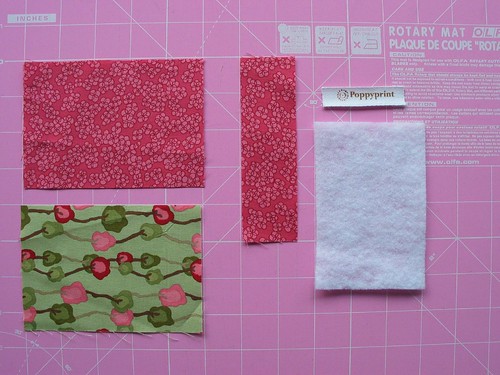
2 pieces of fabric 3.5 " X 5" for book body(or trim down two charm squares)
1 piece of fabric 1.5" X 5" for closing tab (use the trimmed edge of your charm square)
1 piece woolfelt 3.5" X 2.5 " (not shown above)
1 piece cotton or thin poly batting 3" X 4.5 "
1 small sew-in snap
1 fabric label or 2" length of ribbon, trim or twill tape
sewing machine
Coordinating thread
Here's How You Do It:
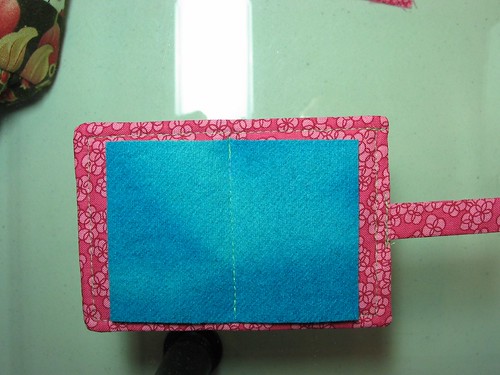
1. Place the two 3.5" X 5" pieces of fabric Right Sides Together (RST). Center the piece of batting on top of these. Pin through all 3 layers. Stitch all around the outside edge of the piece of batting, barely catching the edge of the batting in your seam. Leave 1" open for turning in the middle of one short side (this is where you'll insert your closing tab later).

2. Clip corners, turn work Right Side Out (RSO), press.
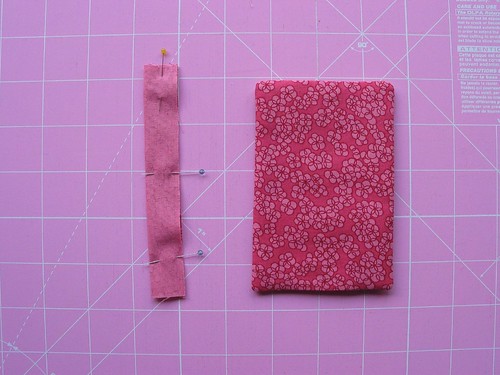
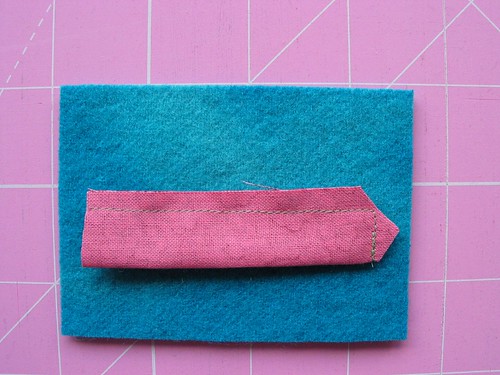
3. Fold the 1.5" X 5" piece of fabric in half, RST, lengthwise (in photo above). Stitch one end closed, pivot at corner and stitch one long edge, all with a 1/4" seam allowance. Clip corners and turn through the open end. For hints on turning long skinny things, see Melly's great idea
here. Press. This is your closing tab.
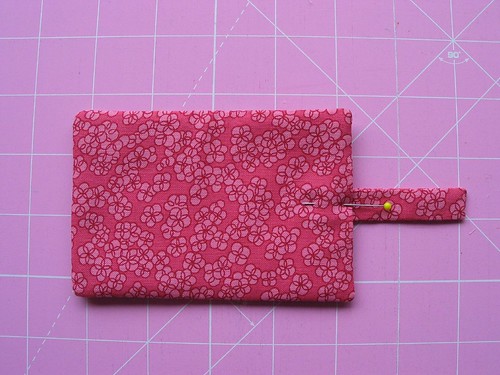
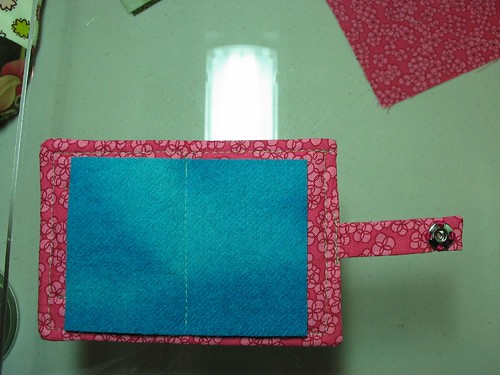
4. Trim the closing tab to 3" length. CAREFUL: cut the raw end off as waste, not your nice turned end! Insert the closing tab, raw end first, about an inch into the opening on the side of your needle book. Pin in place.
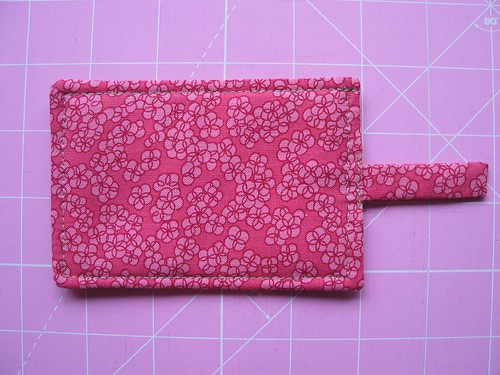
5. Topstitch all around the edge of your needle book with an 1/8" seam allowance, securing the closing tab with this stitching. I did an extra line of stitching across the closing tab for extra oomph.
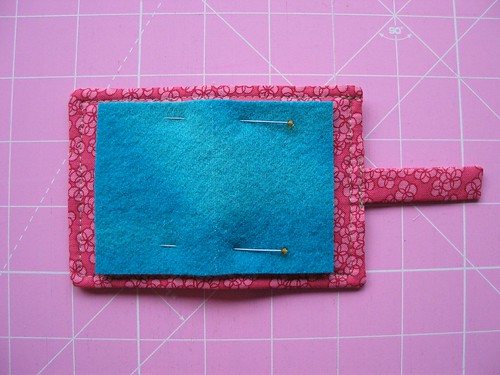
6. Mark a vertical line that divides the 3.5" length of woolfelt in half. Center the piece of woolfelt on the inside of your needle book [the closing tab is the right side]. Pin in place.
7. Sew a vertical seam through all layers, down the middle of the felt, backstitching at either end to secure.
8. Fold the raw edges of your label under 1/8". Open your needle book with the outside fabric on top, woolfelt facing down and closing tab sticking out the left-hand side. Pin your label vertically onto the outside of your needle book about 1/8" inside the topstitching on the right-hand side of the book. Making sure the woolfelt is folded out of the way, stitch & backstitch across both ends of your label. CAREFUL: do not stitch all the way around your label, as it will function as a little beltloop for your closing tab.
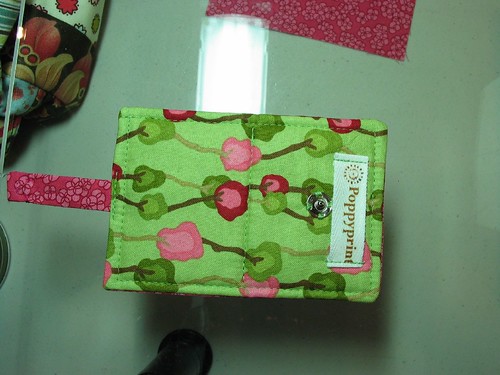
9. Sew male part of snap to outside front of needle book (above). Sew female part of snap on the underside of the closing tab (below).
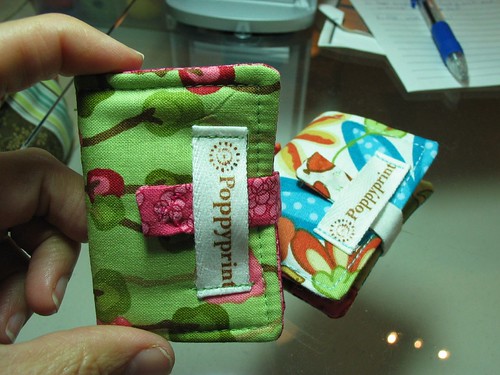
10. Enjoy your new Mini Label Needle Book! These are so quick to do up, consider making one for all of your stitching pals so they, too, can avoid tacky-needle-storage-embarrassment while stitching at large!
15 comments:
very cute! I can see a few of these in my future! Thanks for the tute!
Yippee skippee! I love a good needlebook! Thanks for showing us how to make a super cute one!
Thanks for the idea Krista! I have made a couple with a minor adjustments and they are very cute!
I love you thread holder -ypour fabric is simply adorable.
Hello Krista
I found this tut by way of Tip Nut. The first thing that caught my eye is your beautiful banner. I then wondered if it was one I could use if I opened a shop in Etsy. Are you on Etsy? I have been an artist and crafter for over 45 years but quilting is the one thing I haven't tried yet. Well, maybe once a long time ago but I'd rather not talk about it :). Anyhow, I love your site and your work. If I can use your pic, please let me know, If not, I understand.
Sincerely, Betty Basche
ps I have several needles not in packs. Is there any way to tell what size they are? I see some writing on them but can't read it even with magnifing glass. Thanks Betty
i made one from this tutorial. quite impressed with myself
Adorei!!! Muito bem explicado! Sigo você com prazer!
meu blog:http://mariagirassolcraft.blogspot.com/
Awesome little gems! Thanks forth tute. I will definitely make a few of these.
Smiles-
Melissa
what a gorgeous needle book. Best I've seen!! I'm quite new and if you could see my needles you'd be horrified as they sit loosely in a plastic container. Think I know what I'll be doing next.
Nice tutorial - I just made myself a needle book but wish I'd seen your guide before. Mine isn't quite as neat!
that's super cute! going to have to make one soon! TFS!
I finished making one yesterday afternoon. The result can be see here:
http://itsaprogrammerslife.blogspot.com/2011/07/sewing-on-go.html
Cute tutorial! I'd like to feature this on SewCanShe.com. Please drop me a line at caroline@sewcanshe.com and let me know if that's okay. Thanks!
Very nice-I will make one today.!!
Post a Comment