Showing posts with label scrap. Show all posts

Friday, April 17, 2015

Quilt Lovely - An Interview with Jen Kingwell

You all know Jen Kingwell's patterns: The Circle Game, Steampunk, Chain Reaction, Gypsy Wife and more. Her work is very recognizable for her inspired use of multitude prints and detailed piecing. Although I own several patterns, having won them at the Fat Quarterly Retreat in 2013, I have yet to tackle any. The closest I've come is borrowing a set of templates for Steam Punk!


When given the opportunity to take a peek at Jen's first ever book, I jumped at the chance. She's a quilter I greatly admire.  Imagine my delight when I found out I could interview Jen for this blogpost - yay! I did a little research online and learned a bit more about Jen's style and technique by watching these great videos filmed recently by the Fat Quarter Shop at QuiltCon. I follow Jen on Instagram so I knew that she'd recently returned home to Australia, and her quilt shop Amitie Textiles, after living in the Middle East for a couple of years.  The Nosy Parker in me really just wanted to know how she managed to stay creative while isolated from her shop, her people and her home!

Mrs. Bannister's Stars, from Quilt Lovely by Jen Kingwell

Krista: Congratulations on your gorgeous fabric line Gardenvale and inspiring book Quilt Lovely, Jen! Both are firsts for you and seemed to have happened around the same time. Did your design work require a lot of discipline and planning to keep on schedule? Did you start out knowing you'd spend your time in the Middle East working on the book?

Jen: Thank you Krista. I'm really happy with both. I had no idea the path I was going down. Sometimes ignorance is bliss! I had to be very disciplined( not my greatest strength). After I had decided what I was doing I did set a schedule and I worked to that. I think for me that was the hardest thing. I'm an organic designer and quite often things start with a very loose idea and just grow. I frequently fall out of love with things as I go along and they have a rest in a drawer or the bottom of the cupboard but with the book I didn't have time to change my mind. Maybe that was a good thing but it hadn't stuck as I've just sidelined something I'm not happy with this week!

Krista: You've owned Amitie quilt shop for 15 years and been immersed in quilting through teaching, selling fabric, designing patterns and running the business. How did the past 2 years living in the UAE affect your quilting?

Jen: I would never have embarked on the book and fabric range if I was in Australia. Always so busy with "things". I had the luxury of time in Al Ain. The first year we were there we lived in a hotel. I didn't even make the bed! So spoilt. I stitched from day light to dark. It's always inspiring to be surrounded by new things. I think the colours of the desert will be popping up in a few projects in the future.

Flea Market Dash from Quilt Lovely by Jen Kingwell


Krista: Much of my own quilting experience and joy is shared with others through participation in my guilds and retreats. I've seen stunning examples of hand work shared online by Middle Eastern women. Did you work alone while in the UAE, or were you able to connect at all with other like-minded expats or local women?

Jen: I worked alone. We lived in an area where there were not a lot of expat women. Most who were there worked. It was a very "local" city and ladies in the UAE to my knowledge are not so interested in handcraft as in other parts of the Middle East. I did join the Abu Dhabi quilt guild and there were a few local ladies in the guild. The highlight of my week was to drive to Abu Dhabi to stitch with my little group, a mixed bunch! All from the UK and Scotland. These women were my lifesavers. They had all lived there for quite a while and advised me on all things UAE! More laughing and eating was done than stitching. It was so worth the 3 hour round trip.

Krista: I really enjoyed listening to you and learning from your experience while watching the Fat Quarter Shop videos you filmed recently at QuiltCon. Now that you are home in Australia, will you be teaching regularly? Is teaching a passion of yours?

Jen: I had such a great day with the Fat Quarter shop team. I will be teaching quite a bit this year both here in Australia and overseas. I really enjoy meeting so many great people as I travel and I always seem to learn as much from them as them from me I think.

For the Boys from Quilt Lovely by Jen Kingwell


Krista: There is a certain vibrant, scrappy aesthetic in the work of many Aussie quiltmakers that I recognize and have always admired. What do you think is the main influence for this common approach in Australian quilt design?

Jen: Our quilting community is small here in Australia. Our quilting stores are smaller also and many years ago before online stores you could only purchase what your quilt stores carried. Store owners didn't have the luxury of space to stock whole ranges so you "chose" your collection. A mixed bag of fabrics and I think many of us have grown up and developed this as our style.

Krista: The online quilting world moves quickly and there is often a feeling of urgency to make quilts and move on to the next thing. The beautiful quilts in your book are a wonderful reminder that patience pays off in the form of heirloom quilts - you even hand quilted your work instead of having everything longarmed in a hurry. What advice can you give to people in the 'just get it done' mindset about the value of slowing down?

Jen: I love this question. When I sit down to hand stitch it's like an enormous exhale for me. I swear I can feel my blood pressure lowering. I started to hand stitch many years ago when my girls were small. I'm a midwife by trade and worked, so in the evenings I wanted to sit with the family and share the days news.....the sewing machine was never appreciated! So hand stitching it was and I just loved it. It's easy, very cost effective as you need little equipment and it's very sociable.

I also love the " quiet" of hand stitching. A comfy chair, your favourite music and a window, needle, thread and fabric. That's all you need. It's hard to put into words the joy I get from hand stitching in particular hand quilting. It's like " meditation".

Thank you for kindly answering all of my questions, Jen!

Jen's fabric line Gardenvale is available now as precuts and I think shops are receiving yardage as soon as next week.  It is truly a scrap quilter's dream fabric range and I look forward to adding some to my stash as a way to expand into more floral and blender fabrics. I love that the line is named for the location of Jen's shop in Melbourne - how perfect!


Hocus Pocus Fat Quarter Bundle Deb Grogan for RJR Fabrics

When I receive a new book, I immediately skip all the pre-amble and head straight to the project photos. I love the matte finish paper in Quilt Lovely and the gorgeous photos of the quilts out in the real world.  I did take the time to read Jen's Appendices to learn more about her thoughts on value, colour and scale. She's got great advice at the back of this book.  There are several pillow and quilt patterns that are immediately do-able for the intermediate (or confident beginner) quilter. However, with rather a lot of travelling in my future, I am contemplating a slow hand-piecing project instead. I don't do "quiet sitting" very well (my elementary school report cards will back me up here), but if I'm trapped on an airplane I might as well be productive. Sometimes it is a good idea to bust out and try a challenge. I will keep you posted!


Friday, August 29, 2014

Uhm, You Missed a Spot

A couple of weeks ago I had the pleasure of visiting Thormanby Island again. My generous friend A invited our little gang of island-hopping quilters that usually descend on Mayne Island every February for a retreat. As you can imagine, our February weekends are almost always spent indoors, enjoying the cozy sewing room while buckets of cold winter rain fall outside.  Let me just say that our August weekend together had 90% more sunshine and about 20 degrees of Celcius more to enjoy (as an August weekend should!).

image
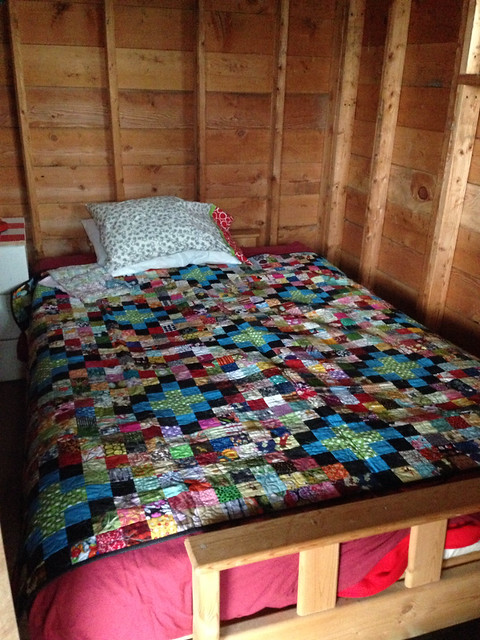
The perfect cabin quilt!

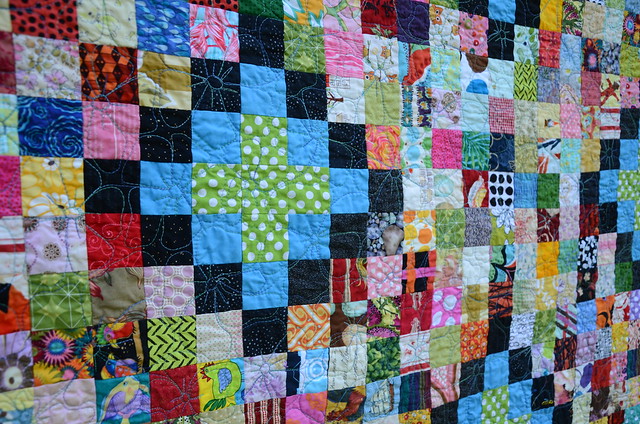
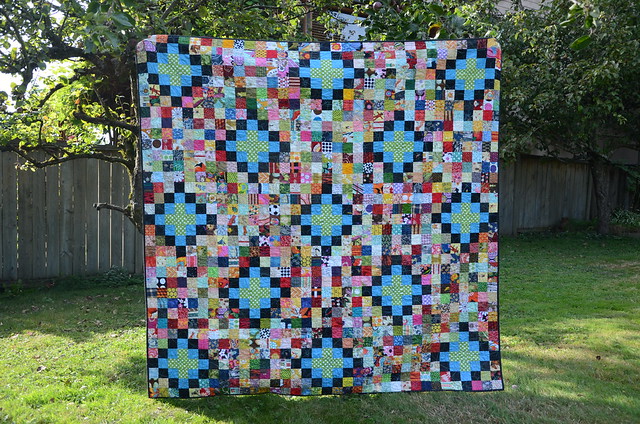
It stood to reason that I should bring along my almost finished scrap vomit quilt - which, by the way, I will now refer to as the Scrapalicious quilt. This quilt has been over a year and a half in the making (actually I've pieced two of these tops and have enough squares cut to make a few more!).

  • Katy's fab tutorial for the quilt is here
  • See my Anti-Voodoo piecing tutorial for making sure your squares make it from the design wall to the machine in the right order using a method I learned years ago from a favourite quilting teacher. This works for efficiently piecing blocks into a quilt top as well.
  • A post including a pic of the second top I've pieced with different coloured "B" blocks is here 
Back in February I'd finished the quilting and attached the binding while on Mayne.  As I do with all large quilt bindings, I pressed the binding to the back and temporarily secured it with tiny dots of Roxanne's Glue-Baste-It.  Hand-sewing the binding has been a hit and miss 'whenever I feel like it' activity for months and it needed to just. get. done. I figured if I brought the quilt along to sleep under, I could finish off the binding in the daylight hours while sitting on the sunny deck. Which I did. Wearing a bikini. OMG. That's all I'm saying about that.

Scrapalicious by Poppyprint

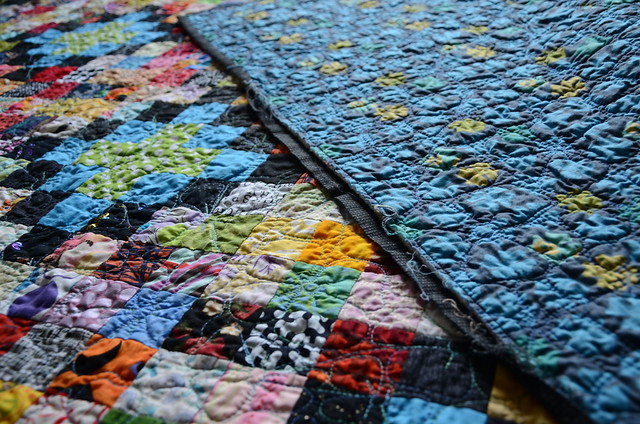
And then I came home and washed the quilt. When I pulled it from the washer and saw batting and frayed thread, I had a momentary coronary event thinking that something had ripped the quilt, until my brain registered that, in fact, I had missed sewing down about 20" of binding!!! So, yeah, I missed a spot. Oops.

Scrapalicious by Poppyprint
Scrapalicious: the Full Frontal

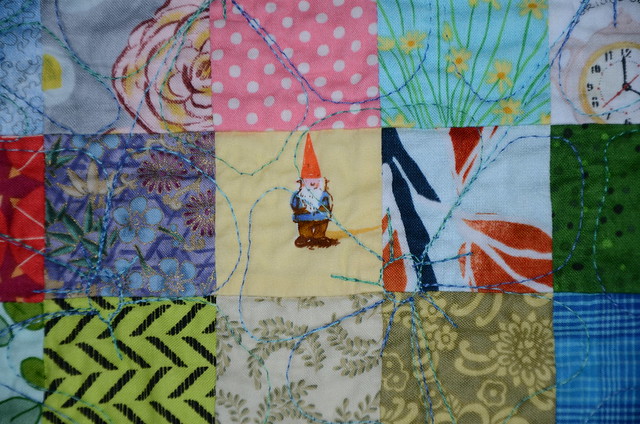
So, although you've seen several iterations of this quilt from blocks, to top, to quilted top, now it is finally complete, washed and folded on the back of our family room couch for everyone to enjoy.  Even this little gnomey.

Scrapalicious by Poppyprint

I free-motion quilted it in an all-over interlocking flower pattern that I learned last year in a FMQ class with local teacher Lynne Fanthorpe.  I had so much difficulty with the Sulky 40wt thread I was using - it was breaking constantly and driving me mental with stopping/starting and burying threads. I finally had to abandon it from frustration but when I resumed quilting at Mayne my friends helped me discover that the variegated spool I was using was simply 'bad thread'. It broke with a gentle tug! I had pulled my hair out and came very close to tears thinking that my machine, the tension, the batting, the many needles I tried, or my skills were to blame. I've never experienced bad thread before. Luckily, I had a second spool of the exact same brand and colour variegation that I purchased on the same day as the offensive spool. The second one worked PERFECTLY FINE. Bizarre. 

Next time I'm sticking with Aurifil thread and less involved quilting. I'll also do a more careful check of the binding before my quilt gets its first wash!

Scrapalicious by Poppyprint

Thursday, January 17, 2013

The Anti-Voodoo Block Piecing Tutorial

Have you ever experienced that mysterious voodoo that occurs between your design wall and your machine such that a perfect layout becomes totally mixed up and wacky once all your blocks have been carried to your machine and sewn together?  I don't know what happens, but time and time again, I swear I'm sewing the correct block to a row, or the right row to the bottom of the quilt but it'll end up bass ackwards or upside down or in some other crazy, unintended orientation.

Many years ago I took a Quadrille Twister class from former CQA (Canadian Quilters' Association) Teacher of the Year Dianne Stevenson. In that workshop, I learned what I believe is the BEST technique for sewing blocks or quilts of like-sized squares together.  Dianne learned the technique from someone else and was very happy to share it and now I'm passing it along to you.  There's a good chance someone else has done a tutorial on this already, but I've never seen one. Pluse, posted a very brief Instagram photo tute the other night and some of my friends asked for more details.

In my last post, I told you about the thousands of 2.5" squares that I cut from my unwanted, older, not-intended-for-any-other-projects fabric. I am very happily using all of these squares to build a Scrap Vomit quilt. At 49 patches per block, there is ample opportunity for the voodoo to creep in (not that it really matters with scraps).  Piecing this could be a tedious bore.

Enter: The Anti-Voodoo Block Piecing Tutorial.

I'm going to show you how to do this with little 2.5" squares, but it can also be done with an entire quilt of 10" blocks, or even a whole charm pack of 5" squares that you want to whip up into a baby quilt.

1. Arrange your squares on a design wall (or if small, beside your machine on your table).

Efficiency Piecing Tutorial

2. Turn column 2 squares over to the left so that they are RST with their column 1 neighbour.

Efficiency Piecing Tutorial

3. Now all column 1 squares are covered by their column 2 neighbours.

Efficiency Piecing Tutorial

4. Pick up the first set and keeping it on top, gather the sets below it in order from top to bottom.

Efficiency Piecing Tutorial

5. Now lay the sets beside your machine, ready to sew in order from top to bottom.

Efficiency Piecing Tutorial

6. Sew the first set of squares together. At the end of the seam sew a few stitches 'in the air' before feeding the second set in (chain piecing). We are not cutting any threads until we reach the end of the sets!

Efficiency Piecing Tutorial

7. At the end of the sets, remove from the machine. You've got a chain of 2-patches!

Efficiency Piecing Tutorial 

8. Now stack your 3rd column squares, keeping first square right side up on top, and the rest of the column in order from top to bottom.

Efficiency Piecing Tutorial

9. Take them to your machine and piece them in order to their 2nd column neighbours. I like to sit them on my machine bed, to the right of the needle so they are easy to grab.

Efficiency Piecing Tutorial

10. Now you've got a string of 3-patches that are starting to look like rows.

Efficiency Piecing Tutorial

11. Continue until you've added all of the columns and you've got your entire block's worth of rows all joined together by their piecing strings. Take your rows to the ironing board and with the wrong side up, lay the top row on the board with the other rows hanging off the front of the board.

Efficiency Piecing Tutorial

12. Press all seams in one direction, then pull the second row up onto the board and press all seams in the opposite direction. Continue until all rows have been pressed in alternate directions. I like to hold on to the last patch of the row to give a little tension as I'm pressing, making sure that each patch is fully pressed out from the seams.

Efficiency Piecing Tutorial

13. Now you're ready to sew the rows together. Nestle the opposing seams together (I like to pin before the seams, just to hold the seam allowances down as they approach the presser foot). I pull my pins out just before sewing over them. Don't worry about those 3 or 4 stitches that you sewed in the air; there is no need to clip the thread, unless of course you want to.

Efficiency Piecing Tutorial

14. Once all of your rows are sewn together, press the seams in the direction that makes sense for your project. In other words, so that the seams of neighbouring blocks will be opposite, allowing you to once again nestle seams and get nice, tight intersections between patches/blocks.

Efficiency Piecing Tutorial

There you have it! Now I am sure some of you will have questions about pressing seams open and I really don't want to get into a huge debate (that's a dead horse that's been flogged many times before on various blogs!). I am a side presser. Always. Except when making wallhangings, or very complicated foundation pieced blocks, or blocks with a crazy number of intersecting seams that would leave a massive lump if you tried to cram them all over to one side.

Let me put it this way: if you want to sleep under your quilt, throw it in the washer and dryer, drag it on picnics, built forts with it, take it to the beach, let your cat knead it into a suitable bed and snuggle underneath it on the couch, then why would you want to expose your piecing threads between each patch? I like my thread nicely protected under a seam allowance, thereby giving my quilt a fighting chance at longevity. Not to mention that every time you have two open seams meeting at right angles, there is a teeny, tiny hole in your quilt top!  I'm not saying pressing open is wrong. I just think pressing to the side is going to help my quilts last longer. 

Plus, those Old Ladies that Know Stuff told me to do it that way.