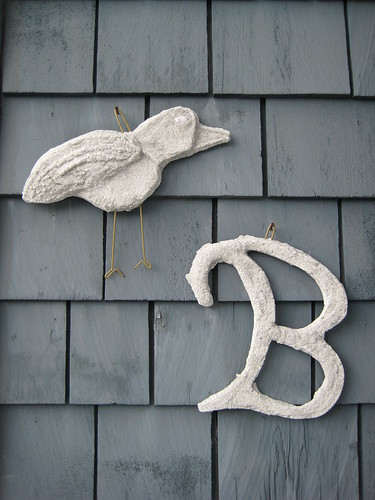
You need Plaster of Paris, fresh water, a bucket and stir stick/spoon, wire coat hanger and wire-cutters and shells or pebbles for decorations if you like. The key to success is compacted beach sand (the stuff just below the high tide mark...not saturated, but not dry, either). With our massive summer tides, we had no shortage of perfect sand!
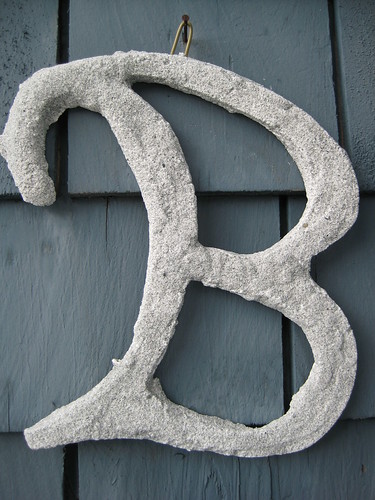
Simply dig out a mould (you want at least 2" depth...we made our "B" a little too thin and it took much care to get it home in one piece!). A popular shape with kids is a starfish. Cut a section of coat hanger and bend it into a loop. Push the bend into the sand 1/2 way down the edge of your mould at the top of your shape. You want the two 'arms' of the loop to be imbedded in the plaster of paris. My husband also lays bits of wire into the plaster if a shape is particularly delicate, like our letter "B", to give it extra strength - just imagine crafty re-bar.
Give them at least an hour to dry in the sun (and guard them against frisbee players and kite flyers from running into them!). With a shovel, dig under the sculptures and gently free them from the sand. As the sandy side dries, most of the sand will brush off, leaving a only a thin layer.
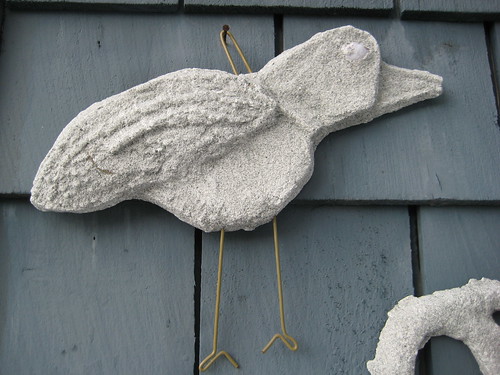
You can experiment with digging different levels to give your sculpture more dimension, like with bird's wing and beak. Don't you just love the long skinny birdie legs?
I'm sorry I don't have any process photos. I intended to take some, but was busy swimming, embroidering and magazine reading while B did this craft with the kids.
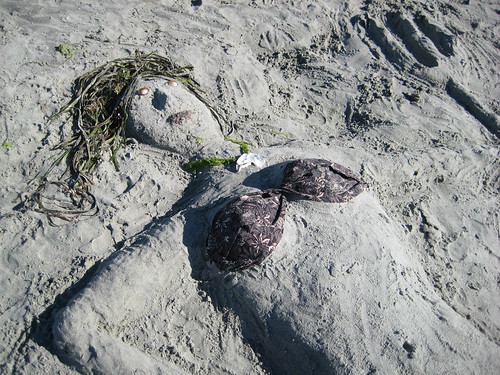
If you're without plaster of paris, never fear. You can always make a mermaid with decorations at hand. This beauty was sculpted by D and her Aunt (usually referred to here as my SIL). These two massive guys (below) were built on the same beach a couple of years ago by B and his friend, with the help of about 10 kids.
So, my holiday posting has come to an end. The kids start school in two more sleeps (I'll try to keep my cheering quiet). We've had a wonderful summer together, but everyone is ready to get back to the routine, friends and activities. And Mom has a stack of UFO's to work on, two exciting courses and two retreats coming right up!


11 comments:
I did a version of this with my Gr. Ones with plaster of paris, seashells and styrofoam hamburger containers that you use to get MacDonalds. Put wet sand into the bottom, lay the good side of your shells down and then pour the plaster over this...add a paper clip to the back...Presto instant seashell wall plaque...a memento of our beach trip. The kids loved this craft and so did I...so easy!
LOVE your bird...and never thought to actually do it down at the beach!! Your kids will always remember this craft!!
Take care!
P
Sweet summer craft Krista!!! Love the other sculptures too! Looking forward to doing this with my grandbabies - yes that is plural - yippeee for IVF!!!!
that is so cool! I've not seen or heard of this before, but it sure makes me want to head to the beach to give it a try. Love Ms Mermaid, and the other sand sculptures are incredible - what a talented family you have!
That is so cool! We'll have to try it out next summer. I am not familiar with Plaster of Paris, can you use other kinds of plaster?
those sculptures are beautiful! why is kids' art so great?i wish I could pull that certain child-like quality off (i know they're not small kids but still...). the layer of sand really adds to their natural beauty too!
Always something new with you! I guess I'm too old to know about all this new, neat stuff! Bravo! Love your sculptures!
Wow, that's a blast from the past! It reminds me of elementary school. We used to go to art class and there was a sand table. We would make indentations in the sand and fill it with plaster of paris...good ole elementary school! Thanks for the memories Krista!!
so cool! How fun! :)
Look at you and your crafty family...
I hope you got a model's fee for the mermaid! xx
Sounds like you had a lot of fun at the beach, I love the sculptures!
Love those sand sculptures. That turtle and croc are so cool too.
Post a Comment