Showing posts with label bags. Show all posts

Monday, October 16, 2017

Level Two Tote - A Pattern Release!

Hi all! Exciting news today. I've finished up an new pattern and it is now live in my Craftsy shop right here.  I've always been a bag lady and have made umpteen bags from many fabulous patterns available out there, but I put my favourite simple requirements together and came up with my own design.

You've seen a few of these totes I've made over the last 18 months. Initially, I designed one for myself as a simple last-minute bag to take with me on a trip. Since then, I've made a few others as gifts for friends, each time refining the design.  Finally, an Instagram follower commented "Please tell me you are making a pattern for this! I want to make one!"

Well, my friends. Ask and you shall receive. That IG follower even offered to pattern test for me and she made a beautiful tote! Here's my latest version that appears on the pattern cover. I made it with the gorgeous Rifle Paper for Cotton and Steel Alice in Wonderland linen blend and the most perfect shade of fuschia cork fabric that I was able to purchase at my LQS. In the pattern, I list various sources for materials you'll need to make this tote.

Finished size: 16" wide across the top x 13" high x 5.5" deep at base

There are fully illustrated and thoughtfully explained instructions for creating a zipper window like you see here. You'll also learn how to install a magnetic snap if you haven't tried that yet! This LEVEL TWO TOTE is so named because there are a few potentially new skills to learn, but also for that bottom level fabric that is chosen for durability and wash-ability. I've suggested waxed canvas, cork, vinyl or lightweight hide. My next one will be made with leather!


I've been using my original tote as my everyday purse and it is perfect for me. I wanted an uncomplicated bag that didn't have too much structure or fancy hardware detailing. This tote has plenty of room to accommodate a few extra things picked up during the day (like, for instance a yard of fabric, 5 FQ's or a couple of skeins of yarn.....ahem).


There is no central bottom seam and the leather handles are securely riveted on; both details that really increase the strength and durability of this bag. I regularly carry a full water bottle, heavy wallet, sunglasses, chequebook, iphone, car keys and a few pens around in mine. There's an internal slip pocket with two pen slots and the external zip pocket is large enough for your cell phone.

I hope you'll try one for yourself (and then make lots more as gifts!). It's an afternoon or evening project that only requires 6 rectangles of fabric! For real! 

Special thanks to Jackie and Eileen for testing this pattern so thoroughly for me!

Thursday, May 12, 2016

Sew Together Bag for #MayisforMakers

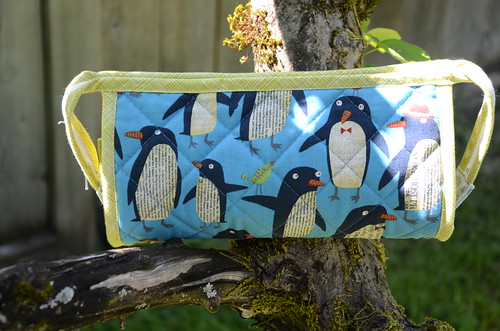
What a satisfying project!! I can't believe it has taken me so long to jump on the bandwagon and make this super cool and useful Sew Together bag.  I'm sure one day I will make more, but for now this one is for me and I just love the clever design of it.

DSC_1174

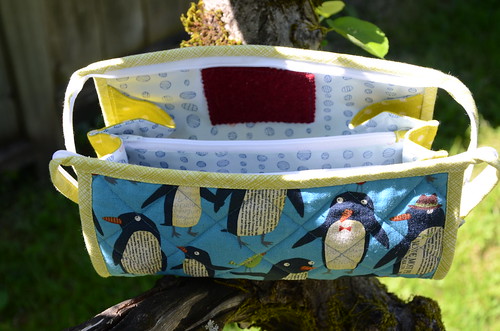
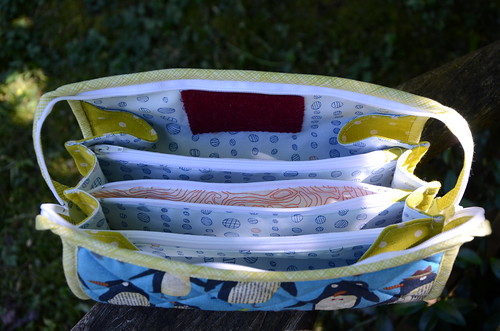
The penguin linen blend was a long ago purchase from SewMeASong that's been curing in my stash awaiting the perfect project. Seriously, these guys are so cute!  I used linen mochi dots in lime for the side panels and two Carolyn Friedlander prints on the inside and pocket linings. The binding is a favourite of mine: Heath in green from Alexander Henry. I quilted the outside panel to byAnnie's Soft and Stable to give the bag body and prevent it from collapsing when it was loaded with stuff and unzipped.

DSC_1175

DSC_1177

When I posted a progress shot on retreat, a friend shared her brilliant tip of hammering the side seams of the linen prior to attaching the binding (really! With a hammer!). This was a lifesaver to achieve a relatively even binding application, because all of those linen layers are really thick! I sewed this project on my Juki (if you have one, then you know how small the stitchplate hole is) and in the final inch of stitching the zipper ends to the bottom edge, I bent one topstitch gold-eye needle and broke a second. Yikes.  Not bad, though, considering all of those layers that easily divert a lesser quality needle on it's way through.  Ironically, the "thick fabric" stitch plate that I've had on back order since last November was in the mail pile awaiting my return home from retreat.

I found the photos in the posts from this sewalong very helpful when putting the pockets together.

I'm still searching for my week 2 indie pattern purchase for #mayisformakers...what are your favourite indie patterns?

Saturday, January 23, 2016

Your Maker's Tote

Yes, this could be YOURS!

Noodlehead Maker's Tote by Poppyprint

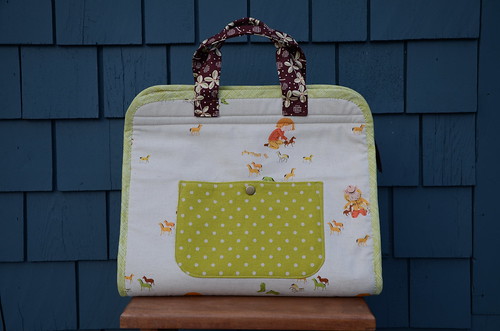
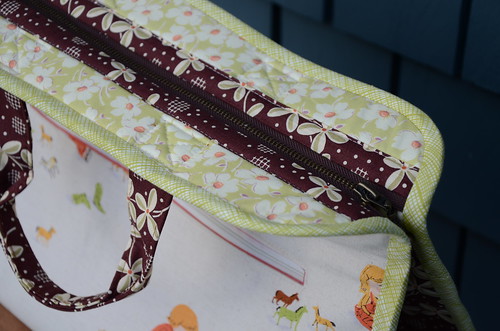
I've just completed this adorable Maker's Tote, designed by Anna Graham of Noodlehead. It is a wonderful pattern that is really pretty straight forward and easy. There's no turning, no squashing of batting/interfacing/outer bag and long handles through tiny lining openings. The trickiest part is sewing the bias binding on the bottom corners, but slow and steady (and Clover Wonder Clips) win the race!

Noodlehead Maker's Tote by Poppyprint

There's a slick zipper installation (optional magnetic snap instructions for those folks nervous of sewing straight lines that will show on the outside of the tote).  You use an opening zipper for a true wide-mouth bag that you could probably stuff a baby quilt into. It's size large for sure!

Noodlehead Maker's Tote by Poppyprint
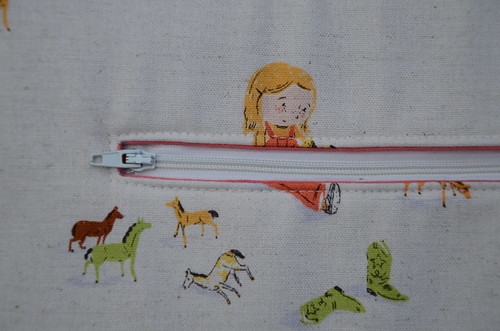
There's another zip pocket on the back side of the tote!

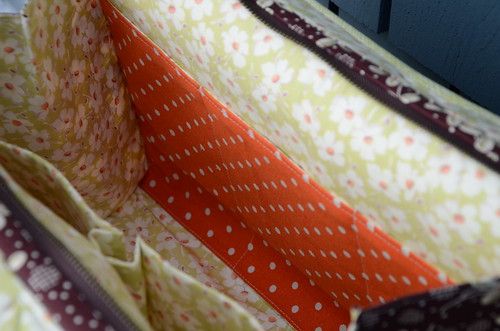
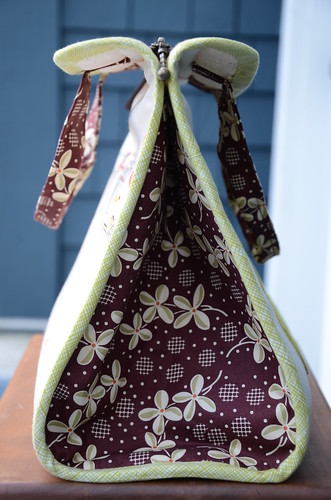
I used the adorable Heather Ross print in linen for the outside. After all, what crafty maker can't relate to the creativity of little girls playing with their horses? A Denyse Schmidt  print for the side panels and handles, a Mochi linen dot for the inside slip pocket and an older, sweet Amy Butler print for the lining. The body of the bag is supported ByAnnie Soft and Stable. I chose special fabrics that I love because I'm sharing this bag with one Lucky Maker!

Noodlehead Maker's Tote by Poppyprint

Noodlehead Maker's Tote by Poppyprint

I hope to get around to making another for myself, but first I'm going to stuff this one with about $200 worth of gorgeous modern fabrics from my generous blog partners and a bunch of gifts from me. This will be the prize for my epic 5K follower giveaway on Instagram! If you're not on IG, I'm sorry that you won't be able to win, however there will be another fun giveaway right here around Valentines Day just for blog followers. Everybody gets a chance, just as soon as the prizes arrive and I can photograph everything in it's epicness. 


Wednesday, March 12, 2014

Cargo Duffle Cameras

Along with five of my fun quilty peeps, we're heading off to our annual long weekend sewing retreat on Mayne Island in a couple of days. This calls for a new travel bag, n'est-ce pas?  Who am I kidding, I rarely need an excuse to try a new bag pattern!  Plus I love everything Anna designs and knew I'd make her Cargo Duffle as soon as I saw her first one posted. The best part? This pattern is 100% FREE! Thanks Anna.

I was recently in Seattle and had a lovely visit with Keli at my favourite little fabric shop, Drygood Designs. I was thrilled that she had new Echino cameras in stock, so I purchased a yard to use for my duffle. In addition to sewing, photography is another passion of mine, so I just love this print.

Noodlehead's Cargo Duffle by Poppyprint
(just cause photography is a passion doesn't mean I'm an expert...pardon the sunspot!)

All of the panels of this bag are quilted. I decided this was the perfect project to try ByAnnie's Soft & Stable for the first time. I'd heard good things about it and it didn't disappoint!  It's 3/8" thick foam batting/interfacing that has some sort of fabric-y surface. It's not fusible, but the surface took 505 spray baste very well.   It cost about $18 for enough to make this bag, so it's more than triple what cotton batting would cost, but I think well worth it for the structure it adds to this bag. It was no harder to sew through than batting and it has almost no weight.

Noodlehead's Cargo Duffle by Poppyprint

I quilted the Echino panels with a cream Aurifil 28 wt cotton thread and a 4.5 stitch length. I pieced the bag using polyester Gutermann thread for strength.  Although I followed the pattern and covered the seam allowance (on the inside of the bag) where the bottom and zipper gussets meet with a single fold binding, I decided not to tackle covering the main seams with the binding.  I just wasn't confident I could do a nice job of it.

Noodlehead's Cargo Duffle by Poppyprint

Instead, I followed this tutorial and lined the bag with a quilting cotton. In lieu of pinning the lining along the zipper tape (as recommended in the tute), I first held the lining in place with Clover Wonder Clips, then glue-basted it prior to topstitching all along both sides of the zipper.

Noodlehead's Cargo Duffle by Poppyprint

Finally, the only other change I made was to add in a fabric pull-tab at each end of the zipper.  I love this duffle and will definitely make more in the future. I think that I'll add 3" or more to the width next time to make it a larger bag (and that will necessitate slightly longer straps, as they'll sit further apart).

Noodlehead's Cargo Duffle by Poppyprint

Fabrics used:
Echino cameras
"Deer Valley" by Joel Dewberry (handles and pocket lining)
Essex yard dyed linen in black (handles, panels)
"County Fair" by Denyse Schmidt in home-dec (weight outer pockets).
"Giverny" by Marianne Elizabeth for Bernatex (main lining)

Monday, January 6, 2014

The Bag Lady

A Christmas gift from the resident poet laureate, my husband B. He totally gets me.

Bag Lady

Sitting on the counter, busy through the night
Is a little white iPhone, buzzing with delight.
The ‘likes’ are streaming in, from coast to coast to coast
All because of a bag on an Instagram post.

What’s caused this double tapping, from people overseas?
What’s piqued their curiosity, what’s made them weak in knees?
Why it’s a simple sack, so it appears at a glance
Just wait a couple seconds, there’s another like from France.

I just observe this process, I don’t post any stills
I don’t sew any fabric, I don’t possess the skills.
Let us take a moment, and subject to further inspection
The features of the tote, that others call perfection.

There are several carry-ons, which Krista makes for fun
The most popular it seems is the famous 2 4 1.
It’s got pockets on the ends, and a wee one on the side
And a big one in the middle, that’s made to open wide.

Sometimes the fabric’s cool, while other times it’s snazzy
Top stitching’s often tripled, and Krista likes her lining jazzy.
With cotton webbing strapping, each bag’s a perfect gem.
To quote Krista from her blog, “I can’t stop making them!”

With everything she makes, Krista says it’s just a snap
Follow the directions, perhaps add an extra flap.
But I think it’s not so simple, they would all be making one
The difference is K’s ethic, she just gets sh*t done.


 I guess he's onto something...although I have made my fair share of Rae's Buttercup Bag, too! Here's a small sampling of bags over the past few years. I honestly think I could have made an 8 x 8 mosaic.


Referring to the last line of the poem, that is exactly what I'm busy with these next 7 weeks. I have some serious stuff to get done, so don't worry if I'm scarce. I hope you've all had a wonderful start to 2014. All I can say so far is Brrrrrrr!

Wednesday, October 30, 2013

Yet Another....

Last Sunday I taught Anna's 241 Tote pattern for the VMQG. There were 14 guild members in the class and everyone was excited to make their totes (for some it was their very first attempt at making a bag!).  I always forget to take photos during my workshops, so I don't have any from the class - hopefully some will show up in the VMQG flickr group.  The modern guild students are very keen. Many had done online research before  class and wanted to widen their bags and customize their pockets.  I can't wait to see them all finished at our November meeting!

241 Bag VW style by Poppyprint

Whenever I teach, I like to do demonstrations of certain construction elements in patterns, so I come to class prepared with all of the fabric pieces ready to make my own bag.  This time I made one using an adorable Heather Ross Spoonflower print of VW Camper Vans on linen blend. I've already got more 241 Totes than I could ever need, so this will be a gift for a friend desperately seeking her very own real-life camper. Hopefully this will tide her over until she can find just the right vehicle!

241 Bag VW style by Poppyprint

The side panels and strap are Essex Yarn Dyed Linen in black from Marmalade Fabrics, the lining is a Denyse Schmidt print for JoAnn Fabric and the pocket linings are a fun retro flower print from Patty Young's Flora & Fauna line.  I like to put several rows of top-stitching on my bag straps for stability and strength.  I use a topstitch needle, size 90/14 and in this case, a Guterman polyester thread. I have had cotton thread stitches pop on straps before, so if I have an decent matching or contrasting poly thread on my thread rack, I'll use it.

241 Bag VW style by Poppyprint

Once in a while very funny things happen in workshops, mostly due to people concentrating on their work with one ear and the conversation with their other ear. Here's one from Sunday:

Student to me: Do you actually use those little side pockets?
Me: Yes, just for a pack of gum
Another Student (using one ear): YOU PACK A GUN?!?!?!
Me: Yup, that's right, I pack heat in my little side pocket.

Hope you're having a great Wednesday. I'm off to watch D's high school field hockey team in their first play-off game. Go Eagles!!


Sunday, September 8, 2013

Craft Book Month

Craft Book Month

Lindsey and Mary over at Craft Buds are hosting their 3rd annual Craft Book Month through September. They've got a blog tour all month featuring book projects as well as a link up for people to share projects made in 2013 from craft books (including great prizes!). This is interesting for me. I have a LOT of sewing/stitching/quilting books. I love reading through them, checking out different construction techniques, fabric combinations, inspiring photography and stories. Do I make stuff out of my craft books? Rarely. I can't really say why. Perhaps it is because I often have my own ideas that need sewing, or I use specific one-off patterns that I purchase from blogging friends.


One book that has inspired me in the past several months is Alexia Abegg's Liberty Love. In this case, it is entirely due to the gorgeous Liberty tana lawn fabrics and  Alexia's designs that show them off to their full potential. Of course, any favourite fabric could be used for projects in the book - one need not fork out the big bucks for Liberty - but if you've got a treasured stash, this is likely the book that will get you cutting into it.

Around Town Tote by Poppyprint

I originally blogged about this gorgeous Around Town Tote here.  I want to make one for myself soon because I just love the aesthetic of this uncomplicated bag. I still have enough of the leaf print, but I might be tempted to choose one of the more colourful florals that I brought home from London instead.

My next project from Liberty Love will be the Spool Quilt. I fear it will have to wait until November retreat, but that's okay. It is the perfect project to easily piece while laughing with friends and I know everyone will be excited to see all of the tana lawn prints. Liberty is rare here. 

Once I make the Spool Quilt, that will be two projects out of one book. A definite record for me. What crafting book have you made the most projects from? 


Saturday, August 31, 2013

I Just Can't Stop!

I think this must be my 9th or 10th one. Just popping in with this latest 241 bag for a friend who previously commissioned me to make one for her friend's birthday. When it was complete, she said "I need one, too!"

She shopped my stash. I was very brave and only said "sorry, you can't have that", to one fabric she chose (it was Echino cameras in blue folks. Those babies are mine). Here's her chosen fabric combo.

241 bag by Poppyprint
An unknown Japanese dragonfly print, Stamped triangles for side pockets, Essex yarn dyed linen everywhere else.

241 bag by Poppyprint
One zip pocket in front with an Echino dot lining

241 bag by Poppyprint
It's a Summersville party on the inside.

241 bag by Poppyprint
Adjustable strap for cross-body wear. I prepare a 55" long strap and cut off 4" from one end to use for the ring tab.

I'm working my way through a manageable list of obligated sewing before I dig into my long-awaited Liberty Spool Quilt project. My background Kaufman Cambridge ivory lawn is now here and I'm itching to begin! School starts next week and it's back to routine around here.  I've always loved September and will forever feel like it is the true beginning of the year. 

Happy New School Year! Have a safe weekend, friends.

Monday, June 10, 2013

Super Duper

My first retreat project was to sew up two Super Totes using Anna's newest bag pattern. My mom has a birthday and I have a trip coming up in July so I thought I'd make two at once. Mom's a full-time knitter and I know this will be a perfect bag for her projects. I love the size and shape for myself to use as a shopping tote - this will accompany me to the FQ Retreat in London where I hope to fill it with Liberty lovelies.

I took all of the pattern pieces pre-cut to retreat so that I could start sewing right away (I really don't like to do lots of cutting/prep work while on retreat because I will often make mistakes while chatting!). Turns out I wasn't paying enough attention at home either, I forgot to cut the lining side pieces of both bags so the very final assembly had to wait until I returned home! Since the .pdf pattern was loaded onto my iPad bookshelf, I only had to print the actual pattern pages. I followed all of the assembly instructions on the iPad.

Super Tote - Poppyprint
This one is my Mom's and B was able to personally deliver it thanks to a last minute business trip (which is why I finished it at midnight and took Ott-light photos before his crack of dawn departure to Toronto).

Super Tote - Poppyprint

The pattern calls for piping across the top of the large outer pocket. Due to my long recovery from the Weekender piping fiasco, I opted out of this cute design feature. I still wanted an accent there, so I cut my lining an extra 1/2" longer than the pocket piece. The seam allowance is 1/2" on this bag, so after sewing the lining to the outer pocket piece RST, I pressed the seam allowance in half to 1/4", then folded the lining to the wrong side, wrapping it around the 4-layer seam allowance. Then I used my stitch in the ditch foot to topstitch right in the seam along the front (which you can't actually see in this picture, above!). Presto: cheater piping.

Super Tote - Poppyprint

This one is for me. I love the bright red flower centres of this print.

Super Tote - Poppyprint
I only had FQ's of the AMH flower print, so I used the linen on the 'back' of the bag. I just had enough print to cut the top strip so there would be consistency around the top of the bag.

Super Tote - Poppyprint
Lining of my tote showing the non-elastic pockets. I read several pattern reviews that mentioned they would probably not make elasticated pockets on both sides if they made the bag again, so I took the hint and did a straight/lined pocket on one side.

Super Tote - Poppyprint
Mom's lining showing the elastic pockets (as per the pattern) and the key fob I added. The fob is at one end of the zipper and  slips in and out without having to unzip the bag.

Super Tote - Poppyprint
A last-step option is to satin stitch across the end of the pleat to secure the seam and attach the lining to the outer bag. I like this detail very much!

As with all of Anna's patterns, the instructions are clear and easy and the results fabulous. My friends tease me that I have way too many bags, but I absolutely love making them and never tire of trying new designs. This is a seriously Super Tote and not difficult to make. The zipper closure is not only clever, it's a breeze (if Zipperphobes aren't convinced, it's completely optional - Anna explains how to make your tote without one as well).  

Are you going to give it a try? 

Wednesday, March 13, 2013

Loving Liberty

Last month I visited the sewing wholesaler to gather prizes and giveaway goodies for my retreat when I spied a copy of Liberty Love by Alexia Abegg on the manager's desk. Playing the innocent, I said "oh, I didn't realize that book was for sale yet!". Of course it wasn't for sale yet, but a businessman isn't going to pass up a sales opportunity, is he? Out I walked with a smile on my face and an advance copy of Liberty Love in my lovely Happysewlucky-made fabric shopping bag!

Having read the book cover to cover, I can hardly think of anything else beyond my trip to London in July and fondling Liberty Tana Lawn in person, IN THE LIBERTY FLAGSHIP STORE!  I've previously declared my love of sweet spool quilts and even made a few selvage ones, so it's a no-brainer to put this one on my Future Quilts list. Liberty charm square acquisition is in full swing!

photo

Instagram is loaded with amazing photos of people making the Marcelle Medallion quilt. It is exciting to see how different the central medallion looks in different colours and prints (check the flickr group for pix). I love medallion quilts, so I'm sure there will be one of these in my future, although I don't think I am keen to piece flying geese with tana lawn, so I will probably use my cotton scraps.

To kick off my own personal Liberty Love fest here, I went with a quick but satisfying project: the Around Town Tote. Alexia taught a class at Keli's amazing Drygoods Make.Do.Mend workshop last weekend and after seeing photos of the bag that K2 made there, I realized this would be the perfect gift for a friend's 50th birthday. 

Around Town Tote by Poppyprint

I know my friend is an over-the-shoulder bag carrier, so I made the straps longer. The pattern calls for upcycling a leather belt, but I've got a buttery soft deer hide that's been waiting over 20 years for the perfect project, so I cut strips from that. Due to it's stretchy nature, I decided to stitch two strips together, rough side in, for stability. A 100/16 topstitch needle did the trick...I just went slowly with presser foot pressure turned right down and a teflon foot. I don't have an awl, so I used the same needle without thread to pre-pierce marked holes for the hand-stitched X's (sewn with doubled polyester thread, a leather needle and thimble). I didn't have any magnetic snaps on hand, so I made a tab and wooden button closure instead.

Around Town Tote by Poppyprint
My favourite way to add some oomph: triplestitch topstitching

The Liberty tana lawn was purchased from Katy on destash ages ago. It looks amazing with Essex yarn dyed linen in black (what doesn't?!?). That linen came in a hefty 5 yard chunk from Marmalade Fabrics because I know I'll use it for many projects. For the lining, I chose Summersville weave and added a divided pocket for iphone and keys on a fob.

Around Town Tote by Poppyprint

It is kind of hard to tell, but this bag is a very generous size (I hardly had to suck in my gut for this picture)! 

Around Town Tote by Poppyprint

I'm definitely going to make more of these. It's rugby shirt stripes: the Liberty glam version!

Thursday, March 7, 2013

One Weekend, Three Weekenders

Sigh. Another Mayne Island Retreat has come and gone. Last weekend I spent four days with five lovely women in the comfort of Rebecca's gorgeous home (and sunlit sewing room). Before retreat there was a flurry of emailing, pattern prepping, cookie & lasagne baking and just a little bit of running around gathering supplies for the Weekender Bag.

At first I resisted. My plan was always to make one for my trip to the Fat Quarterly Retreat in London in July. I mean, that's months away! I've got heaps of time! Fat quarters of Denyse Schmidt homedec-weight fabric had been purchased on de-stash long ago and sat piled for this project. Eventually I caved and started THE CUTTING.  You know that I narrowly survived making Amy's Blossom Bag a couple of years ago....you may also recall I said it was unlikely I'd ever make one of her bag patterns again. I'm glad I sucked it up and gave it a whirl. It is a stunning piece of luggage. Yes, I made luggage! Bonus: it's ready four months in advance of my trip!


Weekender Bag by Poppyprint
Side 1

Weekender Bag by Poppyprint
Side 2

Because it was made from fat quarters, there are different prints all over the place and a few unexpected seams (in top and bottom panels), but I really like the combination of prints. The lining is a voile I picked up super cheap at JoAnn Fabrics and an interior zip pocket is lined with Aviary II woodgrain in yellow.  I was so thankful for Diana's recent Pink Chalk Fabric post that showed straps made with hardware. It solved my problem of finding enough length in a fat quarter to make all of the strap required without 10 seams! 

Weekender Bag by Poppyprint

Much has been written about this bag and between the 3 of us that made it, we'd read many blog posts and gathered great advice. Like using 6 bag feet to protect the bottom.

Weekender Bag by Poppyprint

Many people on Instagram asked me if this "was worth it". Absolutely, of course it is! Any gorgeous project takes lots of time and effort. I may not ever make another Weekender (that piping was a major effort), but I am very happy with this one.  As you can see by my label on the inside, it's no "quickie"...

Weekender Bag by Poppyprint
My lining is a bit floppy - I still have to do some handstitching to secure the corners

Here are our fabulous bags together!

3 Weekenders in a Row
Dianne's gorgeous poppies in the middle, Jo Ann's on the right (check her fussy cutting!)

Lest you think we were chained to the machines all weekend, here's a look at some of my favourite  tree bark in the whole wide world, taken from an oceanview train near the house.

Beautiful Mayne Arbutus
Arbutus

In addition to the bag, I also had plenty of time to work on some more scrap blocks for my second "Scrap Vomit" quilt (the first one is a top awaiting basting). All in all, an amazing weekend retreat of friends, food and sewing!

Friday, February 8, 2013

Ninja Pocket

Hopefully you are not too tired of seeing 241 Bags here. I just can't stop making them! Last weekend I taught a workshop for my traditional guild. I prepared all of the pattern pieces so that I was set for demonstrating various stages in the bag construction.

photo

This time I decided to go all out and purchase some of Melody Miller's typewriter fabric. I already had the perfect lining with Lu Summer's 'Summersville' alphabet print in aqua! The side panels are a Japanese linen blend graphic print by Ellen Luckett Baker for Kokka called 'Stamped'. The side pockets are lined with Lizzy House pearl bracelets in swiss chard - a delicious bright green.

Typewriter 241 Bag by Poppyprint

I decided to combine both versions of Anna's pattern and include side pockets, plus one zipper pocket (many of the workshop participants did the same). Check out my ninja pocket placement: 

Typewriter 241 Bag by Poppyprint

Typewriter 241 Bag by Poppyprint
I like a jazzy pocket lining!

I like to use my Pfaff's triple stitch for topstitching whenever possible (great for pouches). It results in a great stand-out stitch - I used it along the top edge of the side pockets. It's tricky when going around curves or over bulky seam allowances, so this is the only spot I used it on this bag. On the photo below you can see the difference when comparing the single stitch around the top edge of the bag and center panel.

Typewriter 241 Bag by Poppyprint

Typewriter 241 Bag by Poppyprint

That's a bit of photo overload, but these fabrics are so fun to shoot and I am enjoying using the new macro lens that B gave me for Christmas!  For that, I'm linking up with Friday's Felicities!