Showing posts with label 'bloggers quilt festival'. Show all posts

Monday, September 19, 2016

Night & Day Improv Sampler

Here's my second entry for the Blogger's Fall Quilt Festival!  Thanks to Amy for hosting what has become a welcome tradition for quilt bloggers every fall and spring.

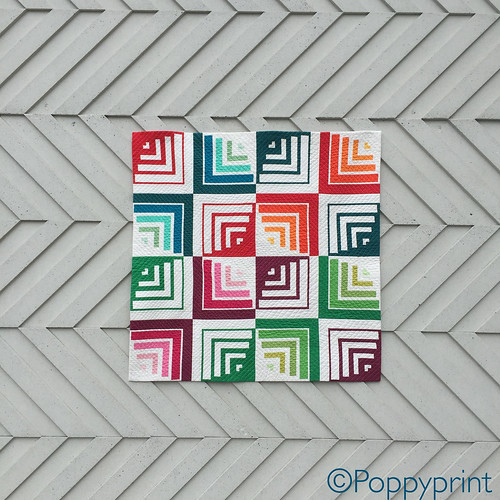
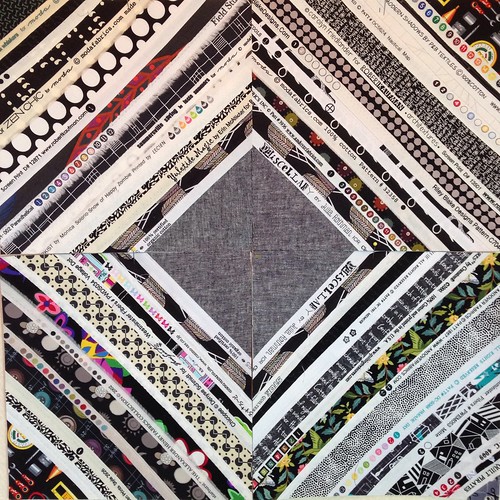
This is a small quilt made as a sample for a new workshop I'll be teaching across Canada in the coming year. I'm really excited about the workshop - it's going to be a lot of fun. I've entered this quilt in in the Modern Quilt Category for the festival.

Night & Day by Poppyprint
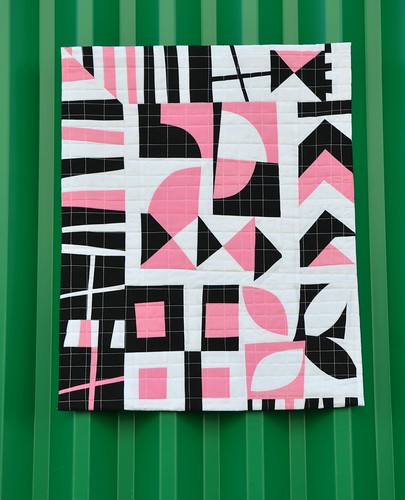
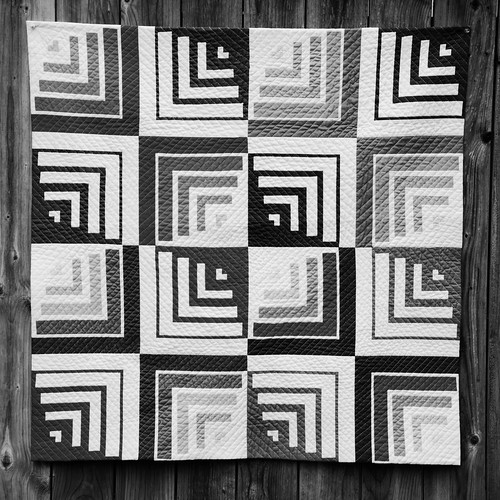
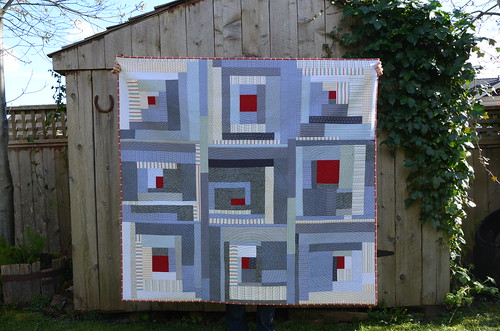
Night and Day, 18 1/2" x 23"
Made entirely from Oakshott Colourshott shot cottons.

I call the quilt Night & Day for a couple of reasons: first, the obvious black and white monochromatic colour scheme. Secondly, the fact that improv construction is so different from traditional piecing. Also, the format of this class is going to be very different from most workshops I teach.  However, similar to Temperature Check and Structural Improv, every student will come out of the class with their own unique quilt design.

Night & Day by Poppyprint

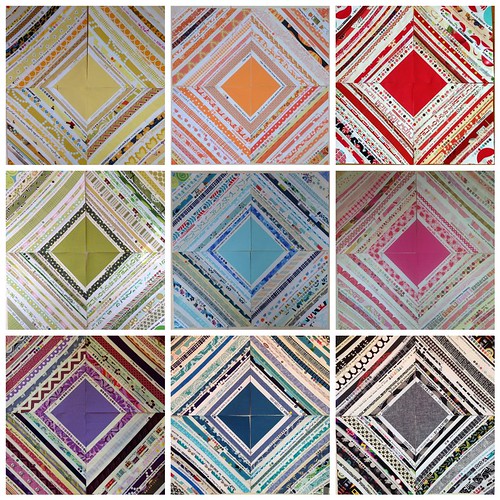
The workshop is called Speed Date with Improv. It will be a face-paced one day workshop for the improv-curious quilter who's ready to let go and work without stressing, obsessing or second guessing!  There won't be time for worrying about perfection as students make their way through "dates" with several different improv piecing techniques. Later, we'll play on the design wall, jigsawing our pieces together into a fun abstract compositions.  The goal is not to create a masterpiece, but rather have fun exploring line, shape and creative expression. The resulting quilt functions as a sampler of the techniques learned and could inform larger work in the future.

Night & Day by Poppyprint

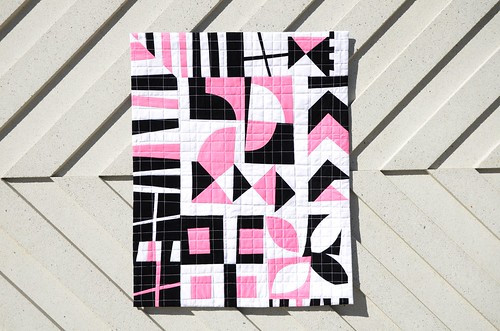
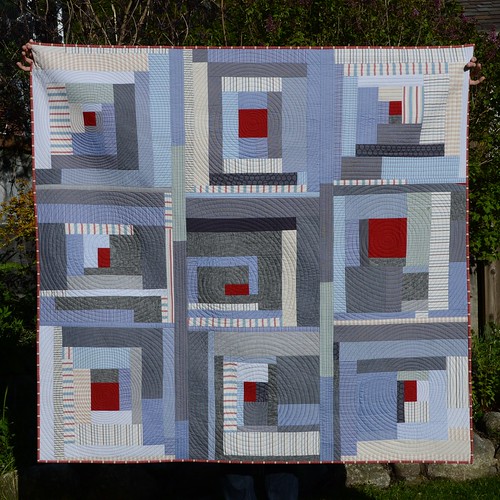
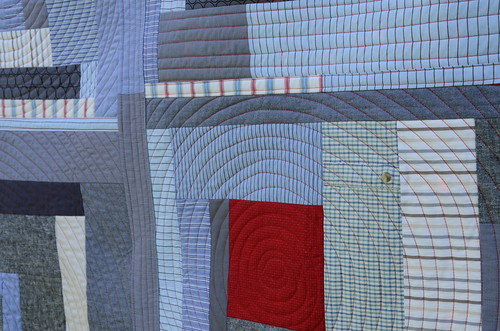
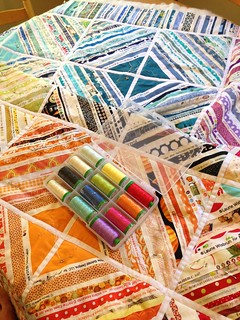
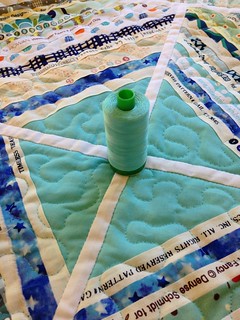
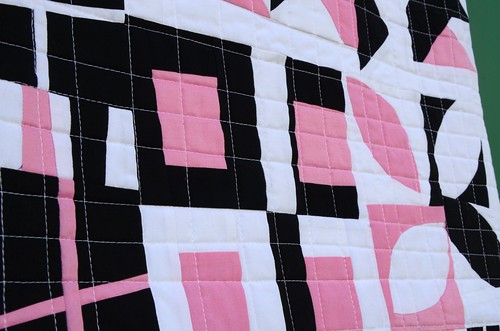
To keep things very simple, I quilted irregular lines both horizontally and vertically in something I like to think of as "wonky waffle quilting".  I marked the lines with a ruler and hera marker so that while they are not parallel, they are pretty straight. I enjoy the look of open shapes at the edges, so I faced this little quilt instead of framing everything in with a binding. Plus, I love the fun tool print with the polkadot facing on the back!


Night and Day facing by Poppyprint
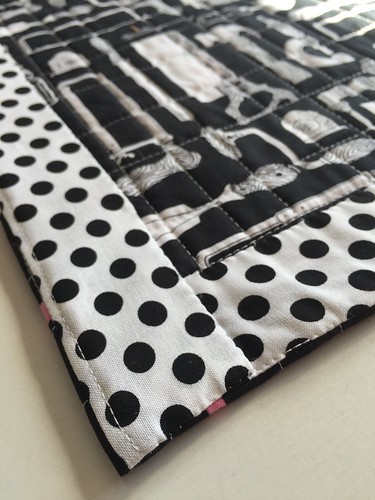
For a great facing tutorial, check out my friend Terry's blog.

The first workshop kicks off right here at home with the Vancouver Modern Quilt Guild in November. I will be sure to share results here on Poppyprint!  

Have a look around the rest of the Blogger's Quilt Festival. Other categories include Original Design, Modern, Traditional, Art, Hand-quilted, small, medium & large, ROYGBIV, Scrappy, Applique, and Home machine quilted. Voting for your favourites starts next week.


AmysCreativeSide

Blogger's Quilt Festival Fall 2016

Here's the first of my two entries to the latest Blogger's Quilt Festival. This one I'm proudly entering in the Original Design category. You can read more about this quilt, Round Peg, Square Hole in this previously published, detailed blogpost.

Round Peg, Square Hole by Poppyprint, August 2016. 38" square. RJR Supreme Cotton Solids.
Made with 100% RJR Supreme Cotton Solids: 38" square

Round Peg, Square Hole hung recently in the VMQG Showcase and is now on it's way to RJR headquarters for display in their booth at Fall Quilt Market. I really wish I could accompany my quilts on their exciting trips!

I've had three generous friends pour over this pattern and test it out by making their own fantastic versions of Quarter Round (a 4-block mini quilt).  After incorporating their great suggestions, I have taken the plunge and opened a pattern shop on Craftsy! YES! You can now purchase a .pdf pattern that includes instructions for Quarter Round AND Round Peg, Square Hole.  I'm so excited because there are a gazillion possibilities for secondary patterning and fun colour play with this block and I'll never in my lifetime be able to make them all myself. I need all of you to try out it and show me what you can do with this pattern!

Find this (and four of my other patterns) for instant purchase and download here.

Round Peg, Square Hole by Poppyprint
Quilted in spiral squares set on point with 40 wt. Aurifil thread

Round Peg, Square Hole by Poppyprint
I love this effect: contrast cranked up and converted to grey scale!

Thanks for clicking through if you've come from the Festival linky. If you haven't, then check out the festival by clicking on the button below! It never fails to disappoint and it's a really fun way to discover new friends and enjoy quilts made in different styles and different countries all around the world. Perhaps you've got a quilt that you would like to share? Everyone is welcome to participate and win prizes, as long as you've got a blog. All of the information is on Amy's site. 

AmysCreativeSide

Friday, May 15, 2015

Bloggers Quilt Festival Spring 2015 - Power Nap

Hello and welcome to another edition of the fabulous Blogger's Quilt Festival: the only quilt festival best enjoyed in PJ's and bare feet! I've been participating off and on in Amy's great festival for years and I always enjoy meeting new quilt bloggers and enjoying the work of old friends alike. 

This time I'm sharing my first ever QAYG (Quilt-As-You-Go) quilt, made with upcycled, worn out work shirts of my husband's along with some chambray, linen and a few yardage scraps. I'm entering it in the Scrappy Category. This quilt was gifted to a friend of ours on the occasion of his 50th birthday last month.


Power Nap by Poppyprint

Power Nap by Poppyprint

Most of the blocks were spiral quilted individually, then joined together into rows with narrow joining strips. The rows were then joined with wider sashing strips stuffed with a strip of batting and quilted with straight lines. Initially, I liked the idea of the red "power tie" in the centre of each improv pieced block, surrounded by shirt fabrics, so the quilt was going to be called Power Tie. Then I found out that our friend likes to take a brief nap every afternoon in his downtown office, so I renamed it Power Nap (plus, he's not a tie kinda guy anyway).

Power Nap by Poppyprint
There's even a sleeve placket with button and a chest pocket left on and quilted over. 

 The quilt was started in a class with Marianne Haak at the Vancouver Modern Quilt Guild last fall. Before the class, I precut all of the laundered shirts into strips of various widths. Each block began with a red square-ish shape in the middle area and was built out improvisationally. At one point, I made a very traditional style log cabin with light fabrics on one corner and darker fabrics on the other. When laying out all of the blocks, that one really stuck out, so I decided to make three more and put them in the corners. I like the resulting big blue circle effect!  Check out Marianne's blog for excellent tutorials if you would like to try this technique. It is a great way to create a big quilt, fully quilted, on a small domestic machine.

Power Nap by Poppyprint

Thanks for stopping by. Be sure to check out the rest of the festival. You can really make someone's day by nominating a quilt for Viewers Choice sometime in the next week, then vote for your category favs when voting opens on May 22!

AmysCreativeSide.com

Thursday, November 6, 2014

Stuff You Need to Know!

This is one of those public service announcement blog posts, just so that I know, that you know, what's going on this week on the internets!

First up, voting is almost over (ending tomorrow) in the annual Fall Blogger's Quilt Festival. You still have time to check out the stunning collection of quilts nominated for the Viewer's Choice Award as well as all of the other festival categories.  My Selvage Colourblock quilt was nominated for Viewer's Choice, which I must say was a huge thrill for me in itself. I don't want to get too sappy, but you can't deny the Sally Field reaction when you learn that your peers appreciate something you designed and made yourself.  I'm very thankful!

Coming soon is a fun event for Canadian Bloggers sponsored by the lovely ladies at Sew Sisters. This event is an opportunity for us to share our stories and introduce themselves to a wider audience. If you want to know who is making what in Canada, then check out the Blogathon!


Starting November 17 right here on the west coast, provincial hosts will introduce themselves and provide a list of links to other bloggers in their province. British Columbia's hosts are both incredibly talented members of the Vancouver Modern Quilt Guild: Stacey is a designing genius with original ideas and energy to spare.  e Jessica is exploring the beautiful Japanese art of Indigo and Shibori dying and regularly shares her knowledge with fellow guild members.  There are prizes! Every day the hosting sites have sponsored gifts to giveaway to visitors, so be sure to stop in.


All Canadian bloggers are invited to submit their blog addresses to Sew Sisters for inclusion on the provincial lists. Share your address and invite the world to visit YOU! Email the shop at connect@sew-sisters.com

Here are all of the provincial hosts for you:


Monday, November 17BCStaceyStacey in Stitches
Monday, November 17BCJessicaMomiji Studio
Tuesday, November 18MaritimesLindaScrapmaster
Tuesday, November 18MaritimesLindaStitch Lines
Wednesday, November 19ABKelseyEveryday Fray
Wednesday, November 19ABLeanneShe Can Quilt
Thursday, November 20SKHeatherPeace.Love.Quilt
Thursday, November 20MBLoriNight Owl Quilting
Friday, November 21QCJoséeThe Charming Needle
Friday, November 21TerritoriesJanetCaribou Crossing Chronicles
Saturday, November 22ONLorna Sew Fresh Quilts
Saturday, November 22ONSandyUpstairs Hobby Room

Saturday, October 25, 2014

Bloggers Quilt Festival - the ROYGBIV Selvage Edition

International Quilt Market is in full swing in Houston this weekend, so that can only mean one thing: I'm not there! Hehe, while that is true, what it really means is that it is time for the Fall Blogger's Quilt Festival hosted, as always, by Amy's Creative Side.

Last spring I discovered (on Instagram) that my friend Diane was using her selvage collection to make string blocks. She asked if anyone wanted to participate in a selvage block-along. I probably had a ton of other sewing to do, but I also had a selvage drawer full to bursting and it seemed like a good idea to just get busy and make something substantial with all of those pretty selvages.

I know myself. I know that true 'random' doesn't work for me. I will always try to group colours or patterns, or match prints even if I'm not trying. So I decided to forego the random string idea right from the start and instead organized all of my selvages into piles of colour.  They almost completely covered my little sewing room floor!  Then I designed an easy 10 1/2" Selvage Colourblock (tutorial here) that would keep my inner organizer happy.

Selvage colour block by Poppyprint

Four of these squares pieced together give you a lovely diamond of solid colour in the middle, surrounded by related selvages in a 20" block!  I chose my longest selvages for the very first strings next to the solid triangles so that they'd have a nice frame around them to start.  And then I went CRAZY RANDOM....within the same colour grouping, of course.

Selvage Colourblock Tutorial by Poppyprint

These blocks came together really, really fast. I had an absolute ball making them and I so enjoyed using the selvages that I'd been diligently saving for four years.  When this quilt top was complete, B said "Cool!......Wait, is that all from your own fabric?!".  I think you know my answer.  The only colour that I had to raid my stash to cut more selvage off was purple.

Little Black Dress selvage colourblock
I used yard-dyed Essex for my black & white block centre and I love how it looks!  I wasn't sure how to fit black into the rainbow, so I ended up putting it smack in the middle of the quilt.

Once all of my 10 1/2" blocks were made I got kind of excited and pulled all of the newsprint foundations off. In retrospect, this wasn't such a great idea. All of those selvage edges cut at 45 degrees are the worst kind of stretchy! Now I was in a pickle. I had to figure out a way to stabilize the blocks and piece them together while keeping the quilt square. In the end, a skinny white sashing was my solution and I used the BigHugeLabs mosaic tool to help confirm my decision.

Selvage colourblock layout option 1
In the final layout, the 1" sashing borders every 10" block

I was seriously loving this quilt (and there was still quite a bit of selvage on my floor), so I decided to keep going and add a border to enlarge it.  The border is colour-blocked, too! I pieced selvage strings into 4 1/2" wide strips of newsprint and planned the border colours to coincide with the outside blocks of the quilt top. The quilt ended up about 75" square. It's quilted with a wool batting (a first for me - I like the puffiness!). I stitched the ditch around each block to stabilize, then stippled with matching coloured thread over the selvages.  The border is quilted with a figure 8 pattern. This quilting may have required a rather extravagant custom Aurifil thread box purchase.  As you might expect by now, the binding was also pieced to match the colour-blocking.

Selvage colourblock by Poppyprint  Selvage colourblock by Poppyprint


I'm so happy that I saved my selvages so that I have this beautiful memory quilt of all my favourite fabrics. Once this quilt was done, I cleaned up my remaining selvage strings, stuffed them in a big plastic bag and gave them to a friend. I won't be making another selvage quilt and it isn't because this wasn't a ton of fun, it's just that I don't feel like saving and storing selvages anymore. I'm on to the next thing!  

Selvage colourblock by Poppyprint
Here's Selvage Colour Block hanging at my traditional guild's show last June. The entire summer and fall got away from me and I still have not succeeded in a proper outdoor photoshoot for this quilt!

Thanks for getting through this super long quilt story. If you've still got any tea left in your cup, go and check out the other festival entries here!

AmysCreativeSide.com