The VMQG guild executive recently asked me to give a presentation on accuracy. Whether you tend to make measured, traditional style blocks or you prefer improv quilting, maintaining a scant 1/4" seam allowance will lead to neater work, more resilient seams, less bulk to quilt through, blocks that fit together and the satisfaction of pointy points where you want them.
Both beginners and experienced quilters alike can benefit from a seam allowance tune-up. You'd be surprised how many people have struggled for ages, wondering why their measured blocks don't end up the planned size. The test doesn't take long and once your seam allowance is established, you'll enjoy the satisfaction of blocks that fit together as your patterns intend, without distortion from stretching short edges or puckers from gathering generous ones. Refresh your accuracy by performing the simple test below and remember that you'll need to repeat this on ALL of your machines (because, ahem, a few of us sew on more than one machine). If you are sewing a project using bulkier fabric such as Essex linen, or fine fabric such as lawn, it would be a good idea to repeat this test with the actual fabric being used for the project!
Both beginners and experienced quilters alike can benefit from a seam allowance tune-up. You'd be surprised how many people have struggled for ages, wondering why their measured blocks don't end up the planned size. The test doesn't take long and once your seam allowance is established, you'll enjoy the satisfaction of blocks that fit together as your patterns intend, without distortion from stretching short edges or puckers from gathering generous ones. Refresh your accuracy by performing the simple test below and remember that you'll need to repeat this on ALL of your machines (because, ahem, a few of us sew on more than one machine). If you are sewing a project using bulkier fabric such as Essex linen, or fine fabric such as lawn, it would be a good idea to repeat this test with the actual fabric being used for the project!
BUT WHY "SCANT"? Quilt blocks are measured to the 1/4" based on side-pressing of seams within the block. A scant 1/4" seam is necessary because we need to allow room in the pressed-over fold for the piecing thread as well as the one or two threads of fabric on the edge of the fold. A fine, 50 wt piecing thread takes up very little room in seams, which is one of the reasons the Aurifil brand is so popular with quilters.
5 STEPS TO A PERFECT
SCANT ¼” SEAM ALLOWANCE
1. Accurately cut five 2 1/2" squares of pressed, quilting weight cotton. Measure with your quilting rulers, not the cutting mat. Remember that accurate piecing begins with accurate cutting. Know your rulers!
1. Accurately cut five 2 1/2" squares of pressed, quilting weight cotton. Measure with your quilting rulers, not the cutting mat. Remember that accurate piecing begins with accurate cutting. Know your rulers!
2. Using your normal piecing thread, sew the squares together along side seams, creating one long strip unit.
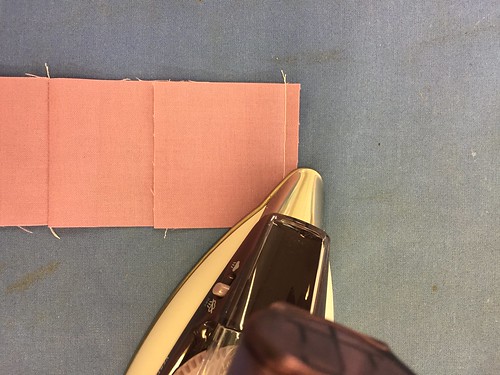
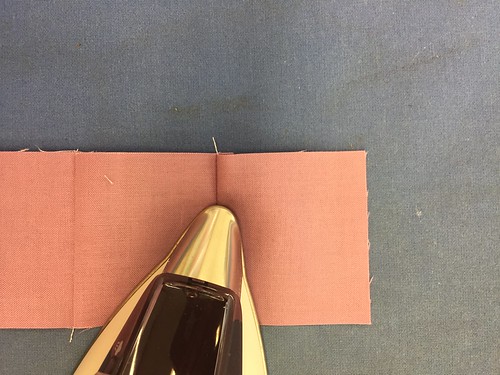
3. Press seams flat to set stitches, then press seams all to one side in the same direction.


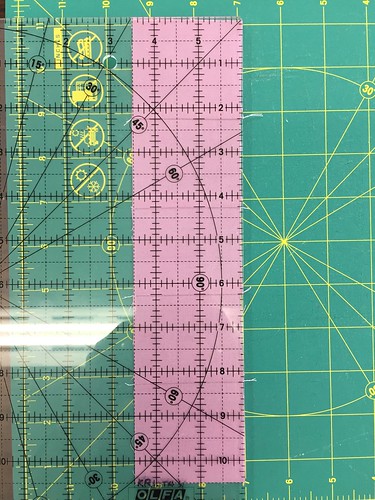
4. Measure the unit by placing your quilting ruler on top of the strip. It should measure 10 1/2".

5. If your strip is less than 10 1/2" long, then your seam allowance is larger than a scant 1/4". If your strip is greater than 10 1/2" long, then your 1/4" is too scant.
TROUBLE-SHOOTING
My strip is larger than 10 1/2" long
- confirm pieces accurately measure 2 1/2" square
- confirm seams are all pressed to one side in the same direction (NOT OPEN).
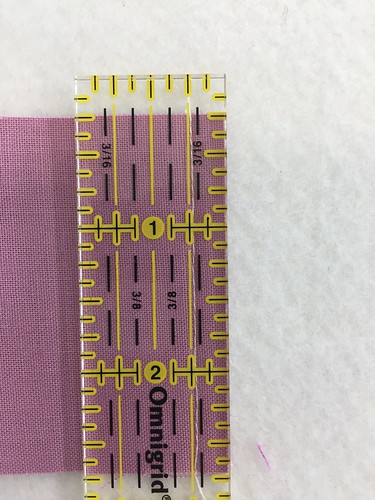
- fold over the last square and re-press the seam flat. Place your ruler on top of the right edge, aligning the edge of the ruler with the edge of the fabric. Your stitches should be visible just to the right (or inside) of the 1/4" ruler line. If you can see fabric between the 1/4" line and your line of stitches, then your seam is too scant.

This seam is just a hair too scant because you can see fabric between the 1/4" line on the ruler and the line of stitches.
My strip is smaller than 10 1/2" long
- confirm pieces accurately measure 2 1/2" square
- confirm from the right side that the fabric of each square is fully pressed out over the seam
- fold over the last square and re-press the seam flat. Place your ruler on top of the right edge, aligning the edge of the ruler with the edge of the fabric. Your stitches should be visible just to the right (or inside) of the 1/4" ruler line.If your stitches are under the 1/4" line, then you've sewn an exact 1/4" seam, not a scant one; you need to decrease your seam allowance by about 2 thread widths. If your stitches are fully to the outside, or left of the 1/4" line, then your seam allowance is too generous (big) and adjustments to decrease it need to be made (move needle one notch to the right or adjust your seam guide closer to the presser foot).
In general, as I've had students perform this test in workshops, it appears that many manufacturer's 1/4" patchwork feet with fence guide attached on the right side of the foot are actually a bit generous. If you have one of these feet, hold it up to the light. Can you see daylight between the edge of the foot and the fence? If so, chances are that the edge of the foot is actually the scant 1/4" and the fence it a true 1/4".
Good luck! Let me know how you make out in the comments and leave any questions you may have there as well. I'll try to answer questions in subsequent comments, so check back.

8 comments:
Thank you so much for this Krista!!
you're right, I do need a tune-up! how do you find the quarter inch foot on the Juki? I think mine is generous. I do better with my Featherweight using a screw in guide or the quarter inch foot or both.
This such good and useable info...always a good reminder! Although, when I have to adjust, it is the blue tape on my "table" that gets adjusted, lol! Oh to have adjustable needle positions and seam guides!
Thanks. I pulled the "fence" off my 1/4" foot a while back, as it was inaccurate.
Hi Krista
Thanks, I am sewing together many strips. 4 strips should equal 7.5 inches but my is measuring 7 inches 7/16 inches. just a thread or two to much taken up! I was lazy and set my 1/4 inch seam up after sewing just 2 x 1.5 in strips together. worked great but 5 strips or squares makes a lot of sense. back to testing before I proceed
Barbara
My piecing has gotten a lot more accurate since I started using Aurifil 50 wt. thread. I find that it is a lot less linty also. I had been using mostly thread from Connecting Threads but a lot of lint accumulated in my machines. Not so much now. I invested in a large cone of light grey for piecing on most fabrics but I use white when using a white background. I love piecing on my 1936 Singer Featherweight, named Kay in honor of the lady my husband bought her from. RIP Kay Anderson I have a 1/4" foot for her and between the Aurifil thread and the foot my piecing has gotten much more accurate. My blocks always used to run too small.
Thank you. Have bookmarked
Hi, thank you for the information, what is the difference between pressing seams i one direction versus pressing seams open? I assume that there will be a slight difference in length between the two different pressing techniques?
Post a Comment