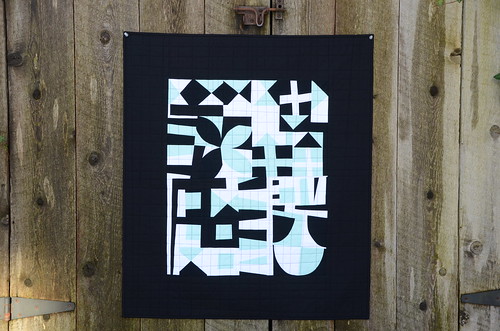
Improv Untitled, 31" x 36"
One of my students, VMQG member Jaydeen, pieced her improv collage, then surrounded it with a lot of negative space to make it into a gorgeous lap quilt for a friend. After seeing her quilt, I thought about playing with borders for these pieces, so that the improv elements could float in a background of white, black, or the 'free colour'.
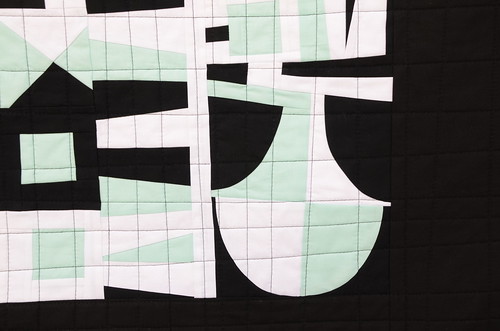
I'm excited about the possibilities this brings up for the viewer. When I posted photos in instagram, one person commented that if she turned the composition, she saw a locomotive. Another person saw the shape in the lower right as a pendulum that had knocked all of the other pieces askew. That's so cool. It is exciting to think that every person seeing the quilt can interpret it in their own way. The expansive background gives the improv shapes more room, opening them up to imaginative possibilities. The magic of negative space.

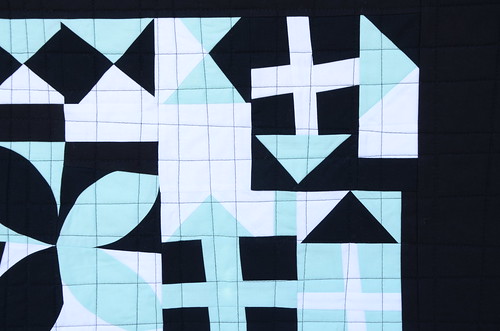
See the pendulum? A wrecking ball? Chemistry lab glassware? A little black house or a blue arrow?
I'm teaching this class in Nanaimo in late February, in PEI and NS in May and in Ottawa in September. I know that every time I teach it I will learn more from my fellow quilters and each composition will tell a new story. When creating my first quilt with these techniques, jigsawing the improv elements together, I thought about the wooden blocks my son and daughter used to play with - you know the standard ones that have squares, rectangles, half circles, cylinders and little "bridges"(rectangles with the 1/2 circle arc cut out). I'm sure many of you have seen these blocks, or even built towns with them yourselves!

Arrows!
All of this improv play has really ignited my creativity but unfortunately, I'm sort of overwhelmed with ideas at the moment. I'm making sketches so that I don't lose any of the sparks. I just have to focus and start on something. My teaching/travel schedule is packed for the coming months (so exciting!), so there won't be tons of time for big projects. Manageable improv to the rescue!

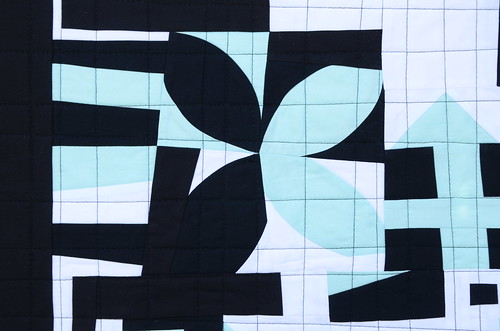
One permission I've given myself is to not obsess over quilting these compositions. I think that the 'wonky waffle' improv grid really works well without overwhelming the piecing. I mark the lines with a hera marker and then quilt them with my walking foot and a 4.0 stitch length. The quilting goes quickly and the piece is done. Result. My previous two were faced, but I bound this one with black.
You can tell with these photos that balancing colour in our winter light is a challenge for me. This minty blue proved difficult!

Wonderful work! Great color choices and the border really changes things up. And, yes, I've played with those blocks with my children. What a great way to think of this kind of improv!
ReplyDeleteMay I ask where, or with what guild, in PEI you will be teaching in May? Maybe a guild or two in NB would be able to host your workshop as well. When in the Martimes, right?!
ReplyDeleteThanks!
Love this improv a lot. I have a hard time doing it, my brain wants everything to be ordered. I keep trying it every once in a while tho. Oh, love the quilting too!
ReplyDeleteHoping to register for your Square peg Round hole class but no word yet? Is the class full?
ReplyDeleteVivian
I'm intrigued by theee quilts and the process to create them. I wish I could take one of your classes.
ReplyDeleteThis is a fabulous piece Krista! I love how each person sees something different. Your decisions to "border" with negative space and use wonky grid lines for quilting are great ones. Lucky students who get to learn from your teaching schedule! Enjoy!
ReplyDeleteThe grid quilting is my new favourite. I tried it before but the recent class with Terry Aske solidified how much I love grid machine quilting patterns.
ReplyDeleteThanks for this wonderful post and hoping to post more of this!
ReplyDeleteWeb hosting in Tanzania
QuickBooks Tanzania
I SO need to take this class. I'm quite improv phobic and this looks like a great project to get me started.
ReplyDeleteI'm late to comment on this post but very excited to join you in May for this class with MMQG. I love what adding the negative space does and will probably end up doing something like that with mine. See you in May!
ReplyDelete